
We understand how overwhelming it is to become a new parent. However, as a new parent, you must make all the necessary decisions and provide the best products to your baby. This is when the baby registry will come in handy.
First, do understand the list of items you need to receive for your baby. The available list will help you keep track of things that you already have and need to get. By considering the same, Amazon also comes forward with the Amazon Baby Registry. This practical tool will make your parent’s journey more seamless.
It is one of the best and most comprehensive solutions that simplifies getting all the essential items for your new family. However, some parents are not aware of how they will be able to create an Amazon Baby Registry. If you are also stuck in the same situation, don’t worry because, in the article, we will discuss the steps in detail and help you know how to do it efficiently.
Step-By-Step Guide for Creating the Amazon Baby Registry
Step 1: Create an Amazon Baby Registry
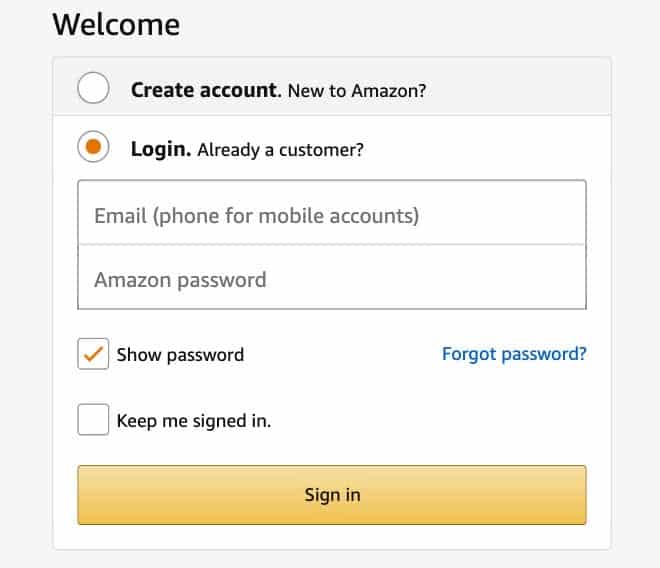
When starting as a new parent, you need to initiate the process by creating a baby registry on the Amazon website. Perform the login into your Amazon account. If you are someone who has never used Amazon before, don’t worry because there is an option available through which you can create your new account. Either you need it to mention the credentials available, or you can simply click on a new account and complete the process.
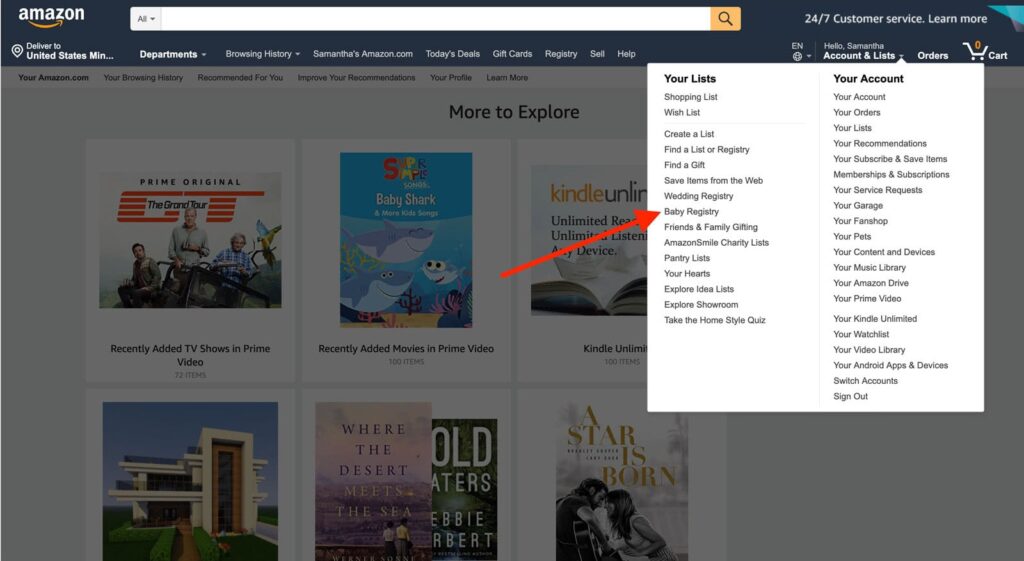
Step 2: Locate the Baby Registry Option
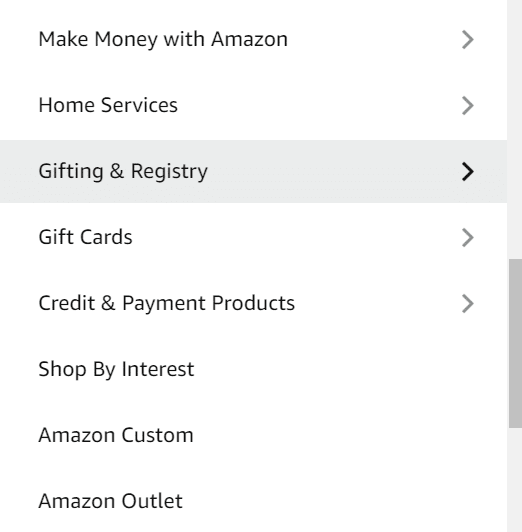
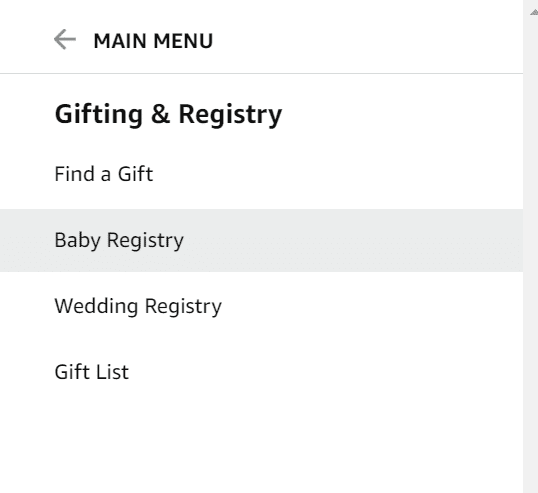
On the main page, you will see that a menu icon is available. Click on it and move to the “gifting and registry” option. When you click on the option, you will find a “baby registry” option inside the tab and click on it. Now click on Create a Baby registry option.
Step 3: Fill out The Information
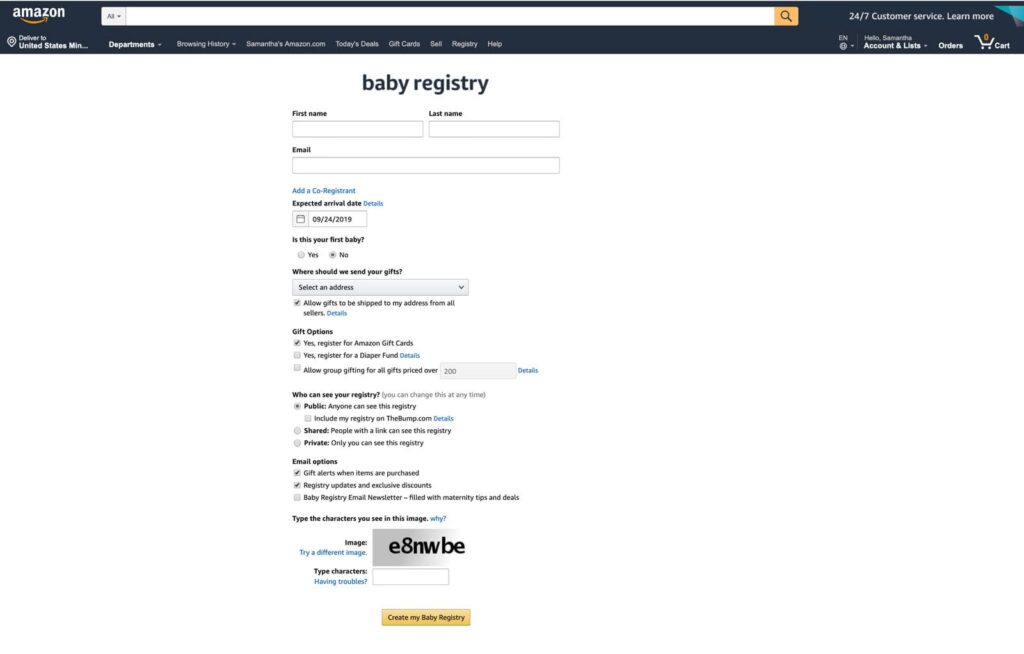
You will reach a page where it will ask you to fill in the details, including first name, last name, expected arrival detail, and other basic details that you need to mention. After matching all these details, you need to hit the “Create my baby registry” option, which will create the baby registry. You need to note that you are mentioning the shipping address carefully because if you have mentioned the wrong address, there is a possibility you may miss the parcel. Whether you want to select your home address or office address is totally on you.
Important Note: Whether you want to share your registry with the public is totally on you. You can set up the privacy on the same page and then excess the details. After fulfilling all the details, you can add the products to the registry. A private link will be available to you that you can share with your family and friends if they want to check out the registry. You will also receive email updates regarding the baby registry updates and discounts you can get from Amazon.
Step 4: Add the Products to The Registry
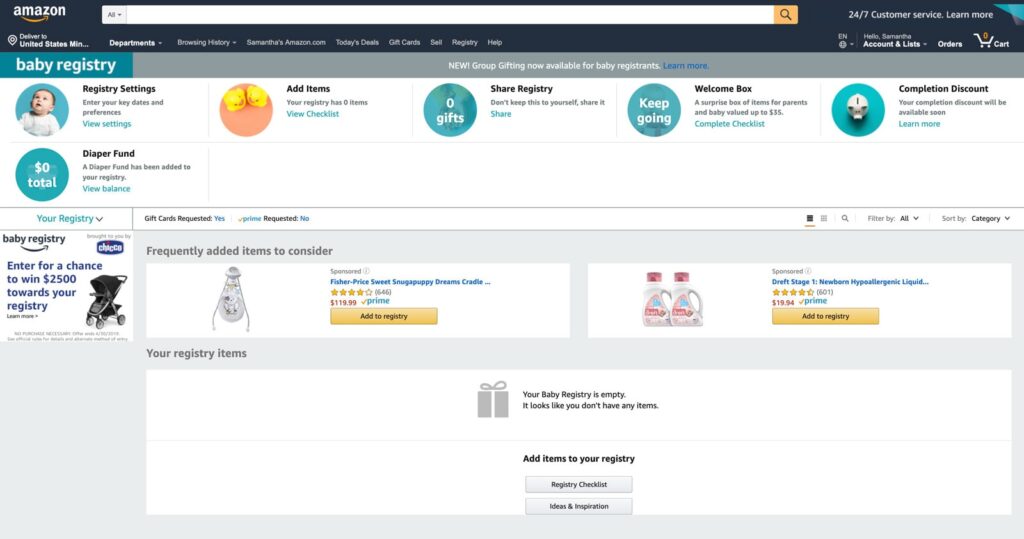
When you are all set up with the setting preferences and other details, it is time for you to add on the products. You will be redirected to a page where you can add the items to the list. Initially, the page will appear empty, but don’t worry. When you start adding the stuff to your registry, you will see all the products in it.
Also, you need to keep the registry settings in consideration. If you wish to return to the registry settings like privacy or any other details, then you must only move to the main page. Don’t worry.
The registry is completely secured, and there will be no need for you to worry about privacy. If you are facing any difficulty utilizing it, you can connect with the customer executive directly, who will help you. You will also receive an email from Amazon regarding the tips you can follow when you are a new baby registry user.
For adding on the items, there are three ways that you can follow:
1. Utilise Checklist
First of all, you can use the checklist available in the registry. Amazon specially prepares this list to help parents to start with the essentials. If you are unsure about the products you require, a category is available that includes all the best-selling products under each category. You can check that out and at the products to your registry.
2. Add from The Product Page
If you know that this is a particular product you need, then directly add it from the product page of Amazon. When you have done creating the baby registry, there will be a button available on the right-hand side of the page that will help you add the product to the registry.
3. Start Browsing
If you do not know what to do, you can simply start and go through the available products. You can set up the age and other details filters and add the items to the registry.
Step 5: Share Your Baby Registry with Friends and Family
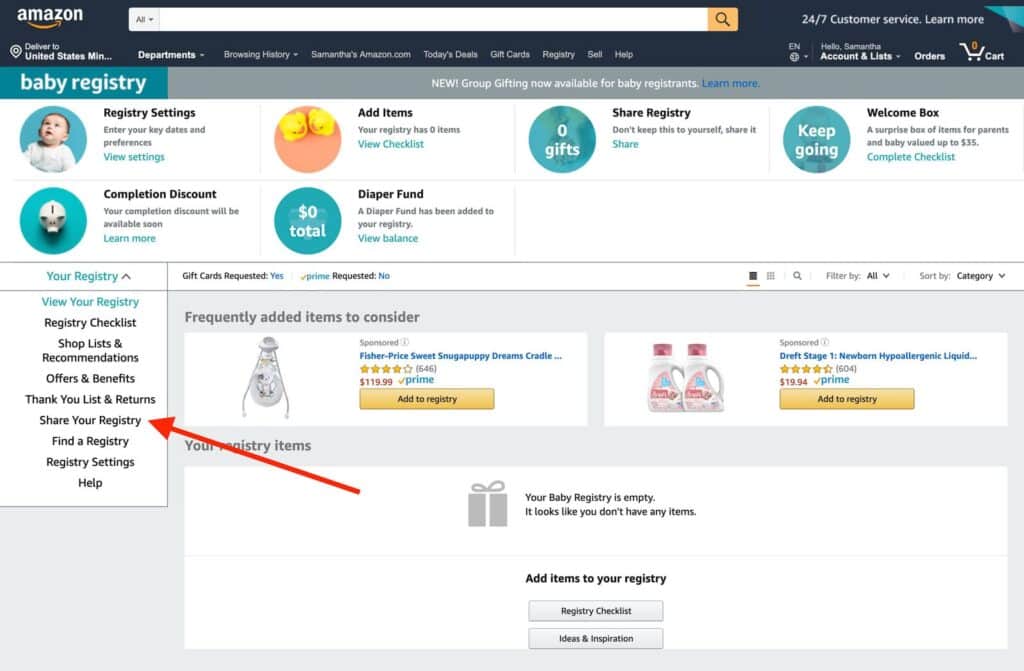
Now that you have a baby registry with all the required products, you can share it with your family and friends. It is not mandatory to share it with your friends and family. If you don’t want anyone to contribute to it, you can purchase the products independently.
But if you have decided to share it with others, then there are simple steps you need to follow. To initiate the sharing process, you need to click on the “Share Your Registry” section, and a URL will be available that you can send to anyone, and they will be able to check out the registry.
Step 6: Keep Track of What Has Been Purchased and What Not
Last but not least, it doesn’t matter whether you have shared it with your friends, but if you have started purchasing products for your baby, keep track of the products you have purchased and have not. This will help you to reduce the duplicity of products, and you will be able to invest in quality products only. Make sure you update the registry regularly so that you will not miss out on the latest offers and products you may require for your baby.
Important Note: If you are quite specific about the products and have seen that people are not taking them seriously, you can discuss it with them. If you want to discontinue their registry access, you can do that as well. You can set up the privacy settings and get it done. People are not restricted when they want to choose the best for their baby.
Tips to Follow While Creating an Amazon Baby Registry
When creating the Amazon baby register, there are several tips that you need to keep in mind, and these are as follows:
1. Start Early
It is advisable to start preparing for your loved one in advance. We are not saying you to start from the first trimester, but make sure to take steps in the second or third trimester. This will help you to plan and shop for the things that are required. Do not invest in those products that are not required in the initial days after the birth of your baby.
2. Diverse Item Selection
You need to widen your horizons and select from the different items that are available online. You need to add the products in your registry from must-have Essentials. You also need to look for the products you may require in their second or third month. Keep everything in mind when finalizing things for your baby.
3. Prioritize Essentials
How can we forget that essential place and integral role? The first few months of the baby are very crucial, and you need to be sure about all the basics that are a must. The things that you must include in your basics list are baby clothing, feeding supplies, diapers, wipes, and a safe sleep environment.
4. Research Reviews
Before adding any product to your registry, review the reviews and ratings from other parents. This will help you analyze whether you are investing in a quality product. Check out the safety and functionality of the product as well to make a wise decision.
5. Add Different Price Points
We are not saying you are tight on budget, but to fulfill all the requirements, you need to plan your budget properly. When adding things to the registry, add them from different price points. This will help you efficiently manage your budget and other expenses.
6. Consider Long-Term Needs
Always invest in those products that you can use for a few months. Do not invest in those products you can use for only a few days. The products that you can consider for long-term needs include car seats, high chairs, and toys that are helpful in different development and stages.
7. Stay Organized
Amazon’s registry management tools are also there, helping you at every step. These will help you to keep track of what’s been purchased and what’s still needed and even allow you to prioritize items. Regularly update your list to avoid duplicates.
8. Express Your Preferences
Amazon has an option that will allow you to specify your preferences, such as color choices, preferred brands, and styles. By communicating your preferences, you guide your friends and family toward selecting items that align with your taste and values.
Conclusion
In conclusion, when you are looking forward to creating an Amazon Baby Registry, you are preparing yourself for the baby’s arrival and getting everything required to equip for this special Journey. When you have taken the step and started early, you will be able to select among the diverse items, and you can finalize all the essentials.
As a result, this will help you stay organized, and you can ensure that all the products you purchase are practical and suitable to your family’s needs. There is a possibility that you may require something urgent in that condition as well.
You can check out the registry and place the order. Ensure you are not compromising with Essentials because it will let you face difficulties when the actual time comes to utilize the products!