Dragons capture the hearts of people across every culture and generation. From ancient legends to modern movies, these magnificent creatures spark imagination like nothing else.
Many artists dream of drawing these mythical beasts but struggle with making them look real and believable. Getting the proportions right, adding realistic scales, and creating that perfect balance between power and grace can feel overwhelming.
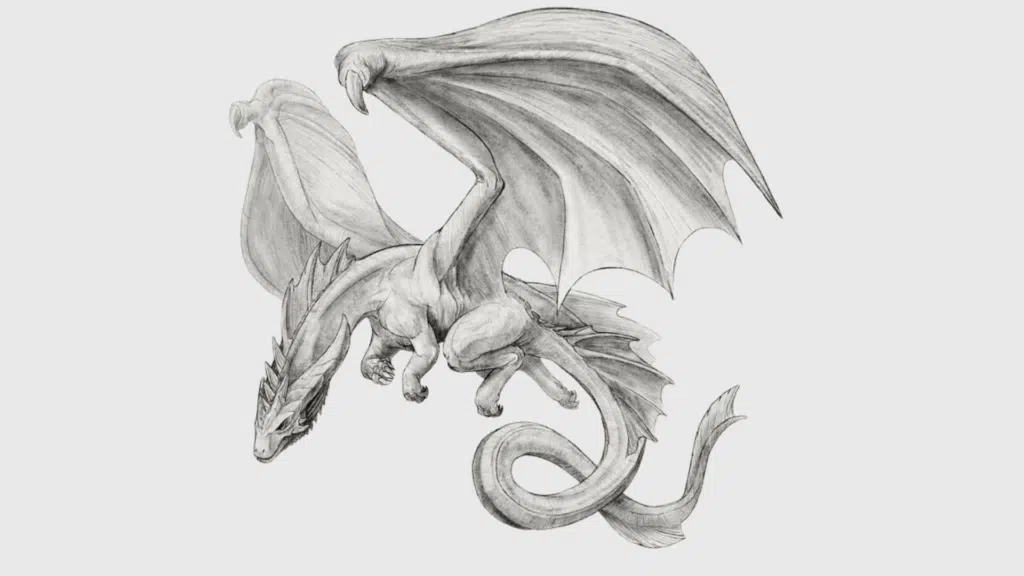
Most tutorials focus on cartoon dragons or skip essential details that bring dragons to life on paper. These steps break down how to draw a realistic dragon full body.
Readers will learn professional techniques for creating lifelike proportions, adding convincing textures, and bringing their dragon to life with confidence.
Artist’s Key Tips Before You Begin
Before you dive into how to draw a realistic dragon full body, taking your time with structure helps bring out lifelike balance and detail.
- Start with soft pencil strokes. Go darker once your lines feel right.
- Use shapes to structure. Ovals, rectangles, and arcs help build believable forms.
- Keep symmetry in check, especially for horns, limbs, and wings.
- Vary your line weight. It adds depth and focus.
- Draw from reference. Examine the anatomy of various animals, including deer, cats, birds, bats, and dinosaurs.
Building the Dragon from Head to Tail
Learn how to draw a realistic dragon’s whole body by connecting each part with purpose and flow. This section breaks down the anatomy from horns to tail in a simple, structured way.
Step 1: Gather Materials Required

Start with an HB or softer pencil for smooth, controlled sketching. Use an eraser to clean up lines and refine your shapes as you go.
Have a sketchpad or plain paper ready, and optionally add an inking pen for outlines and a drawing glove to prevent smudges.
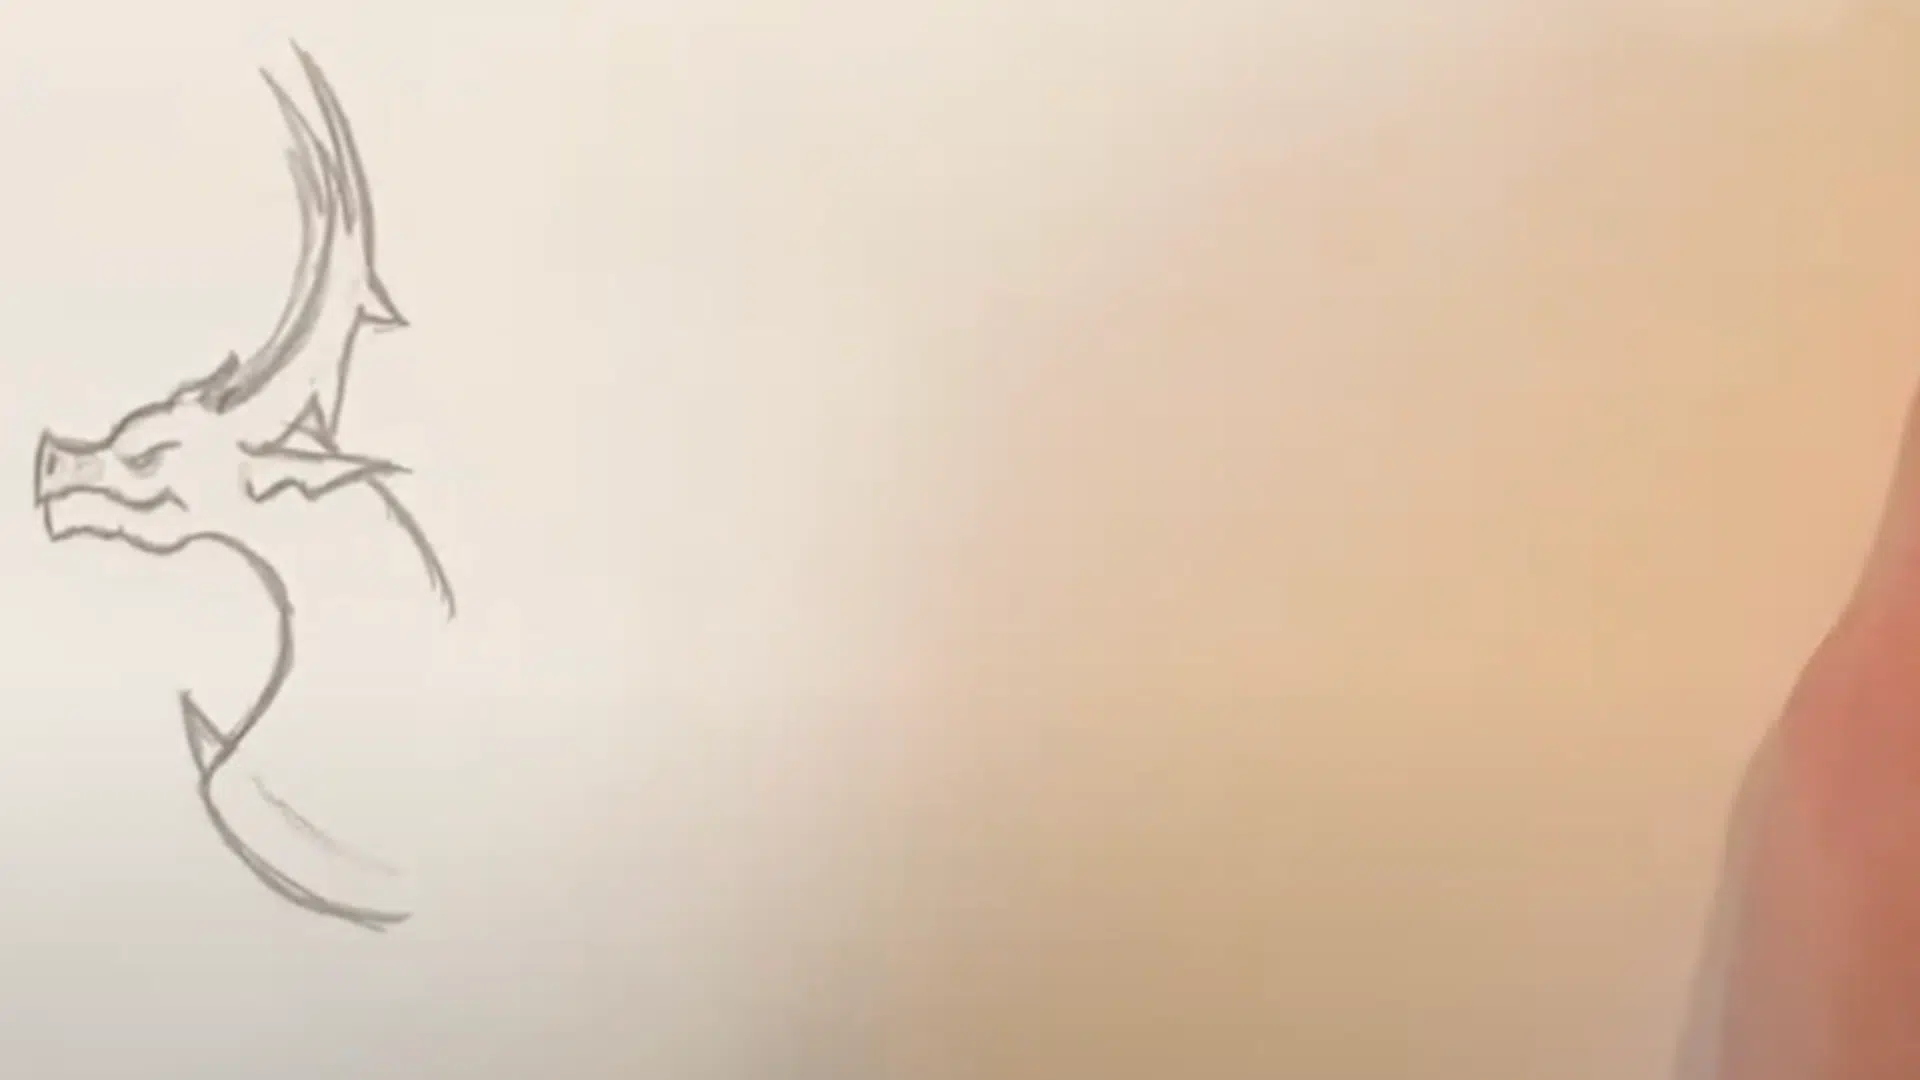
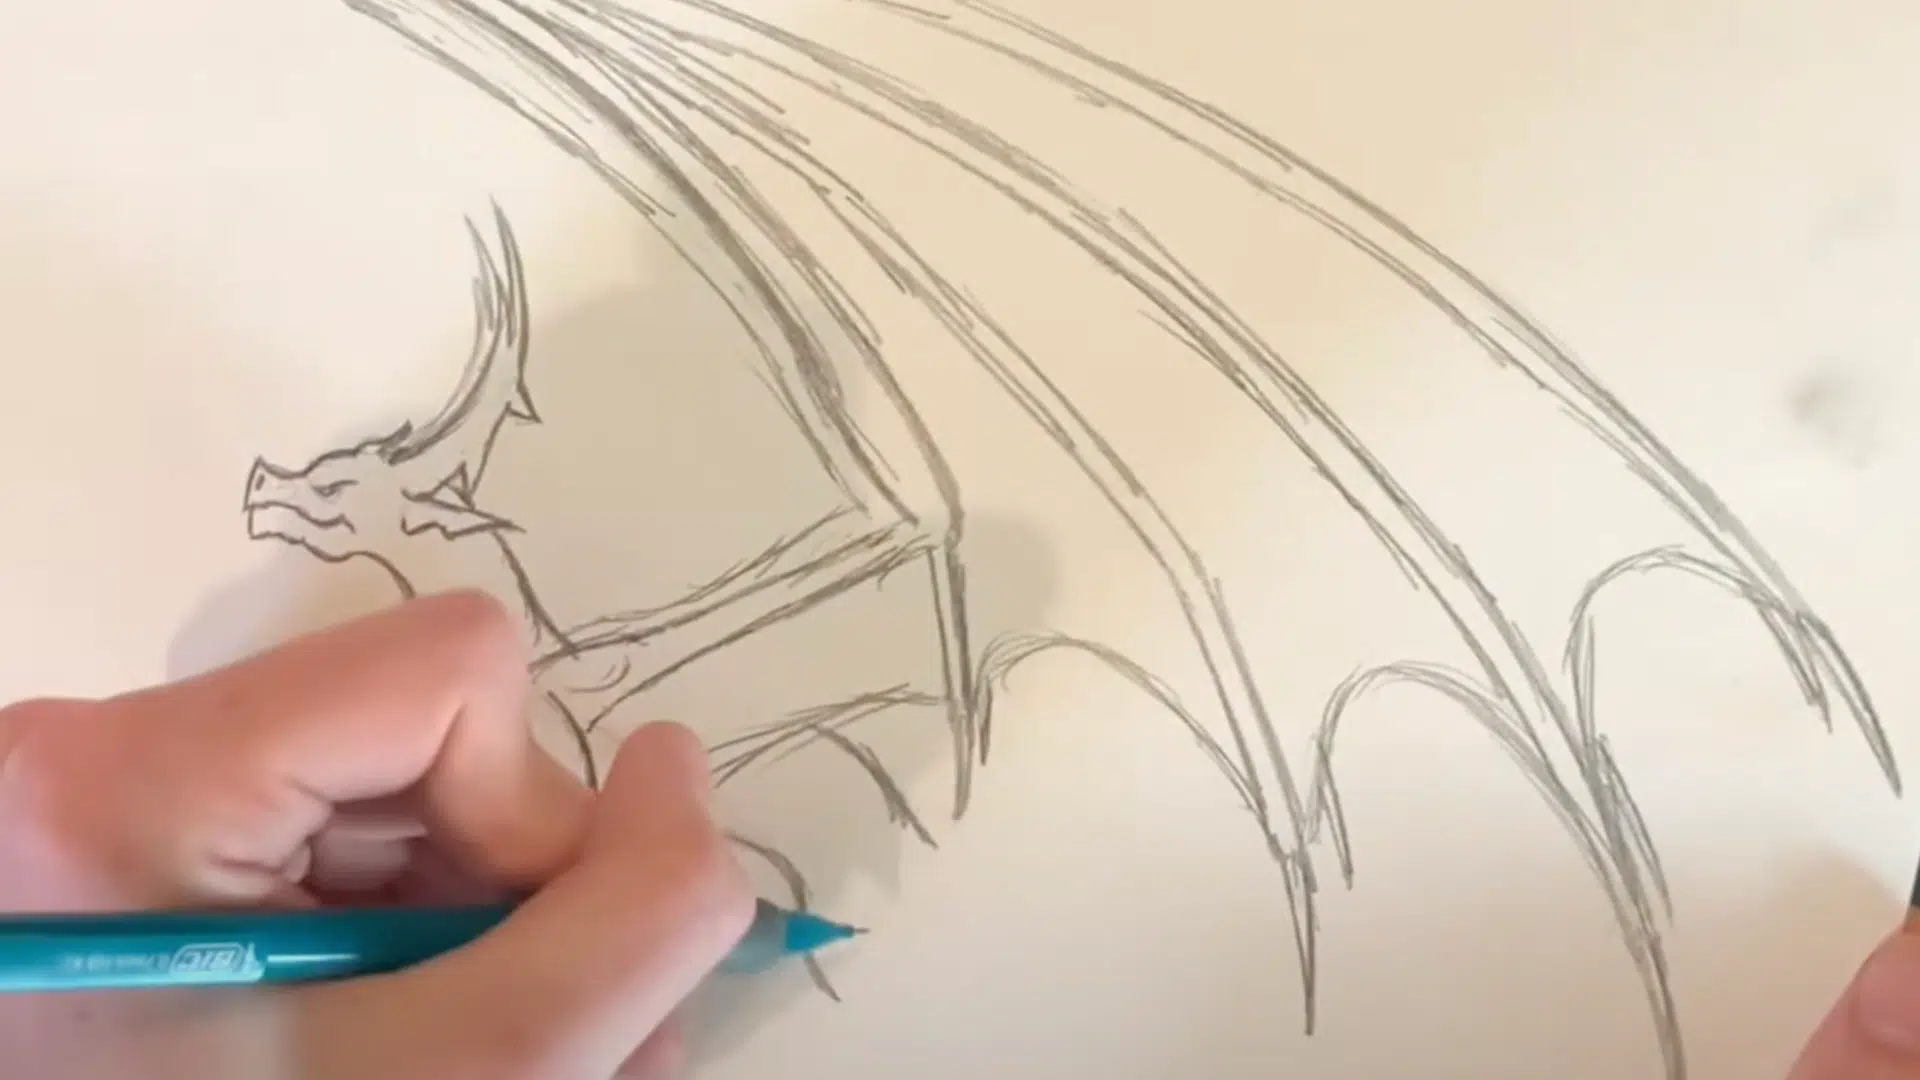
Step 2: Sculpting the Horns
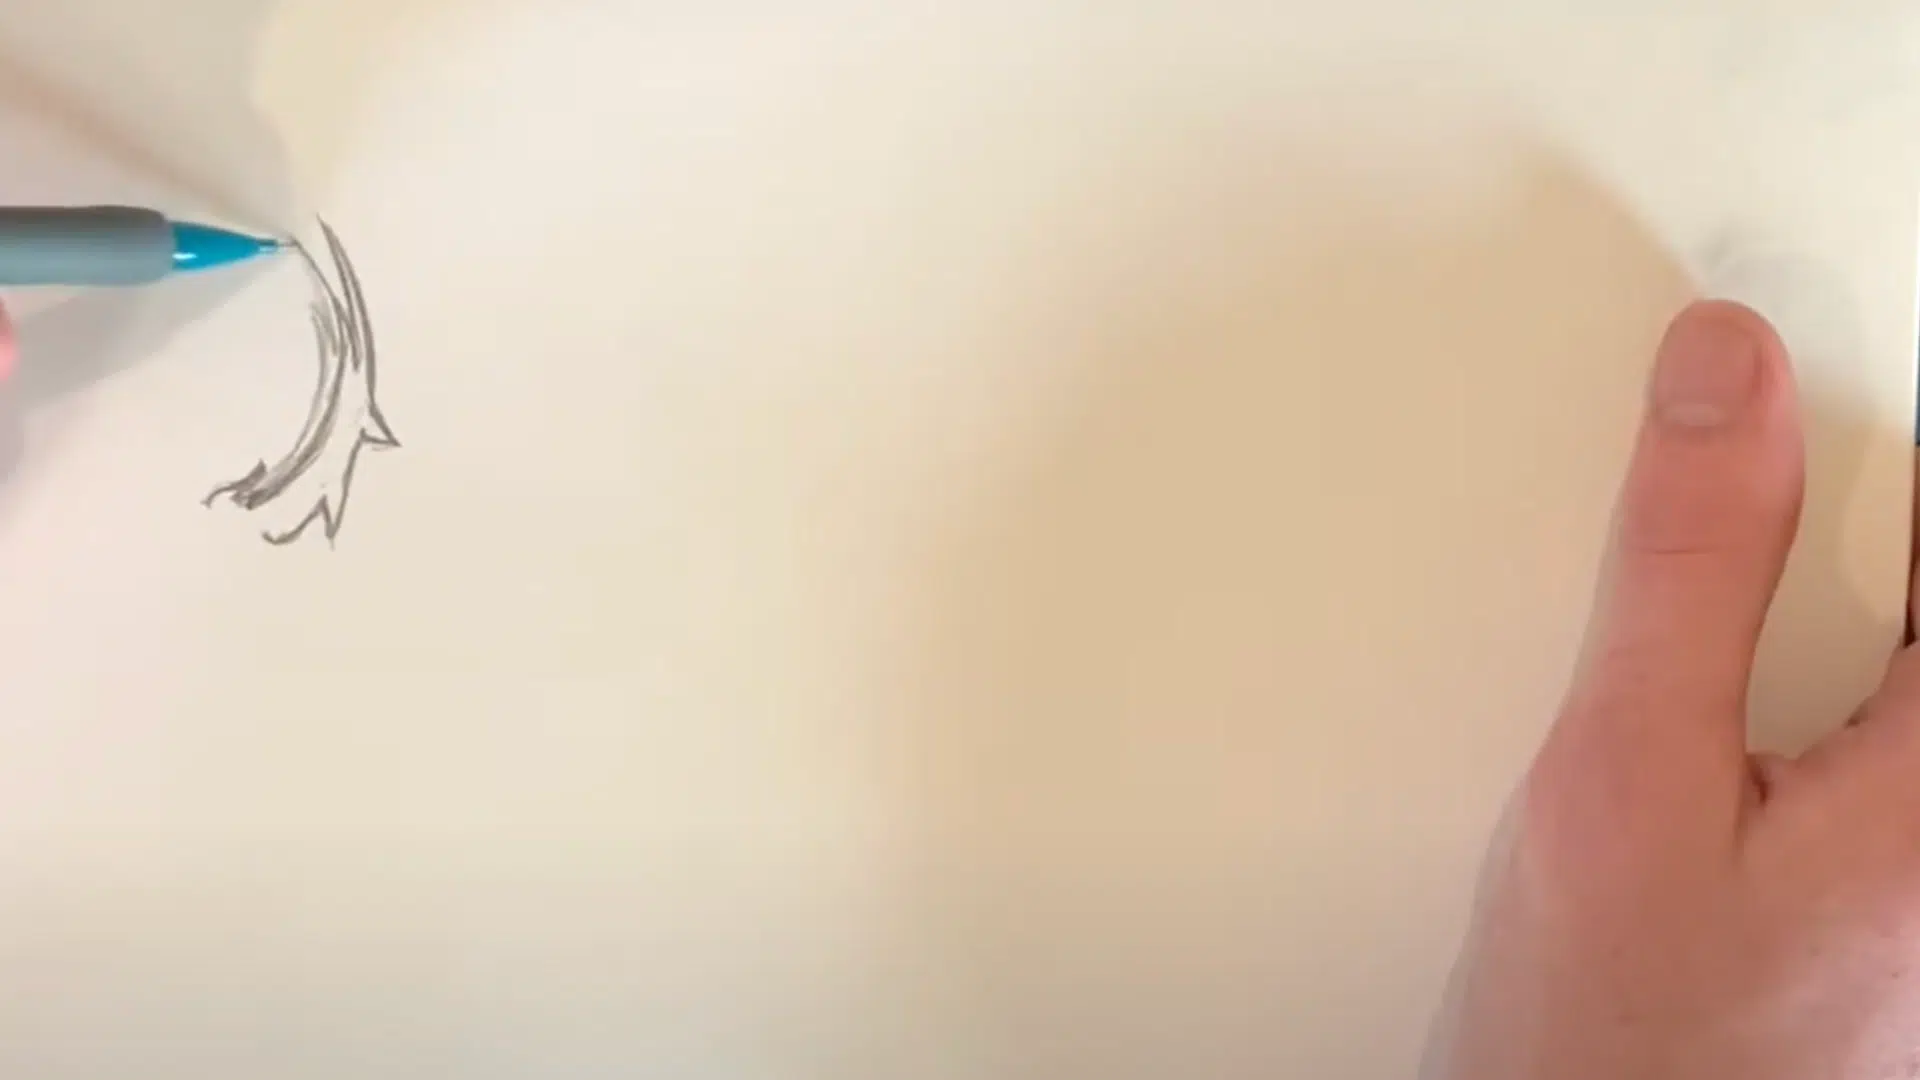
Begin your creature with majestic, deer-style antlers that arch upward in flowing curves. Let each horn branch into smaller spikes or tines, giving them a layered, organic appearance, similar to twisted wood or bone.
To add depth and spatial perspective, make the second horn lighter and slightly smaller, as though it’s turned away. Nestle smaller inner horns or bony protrusions between the two main ones.
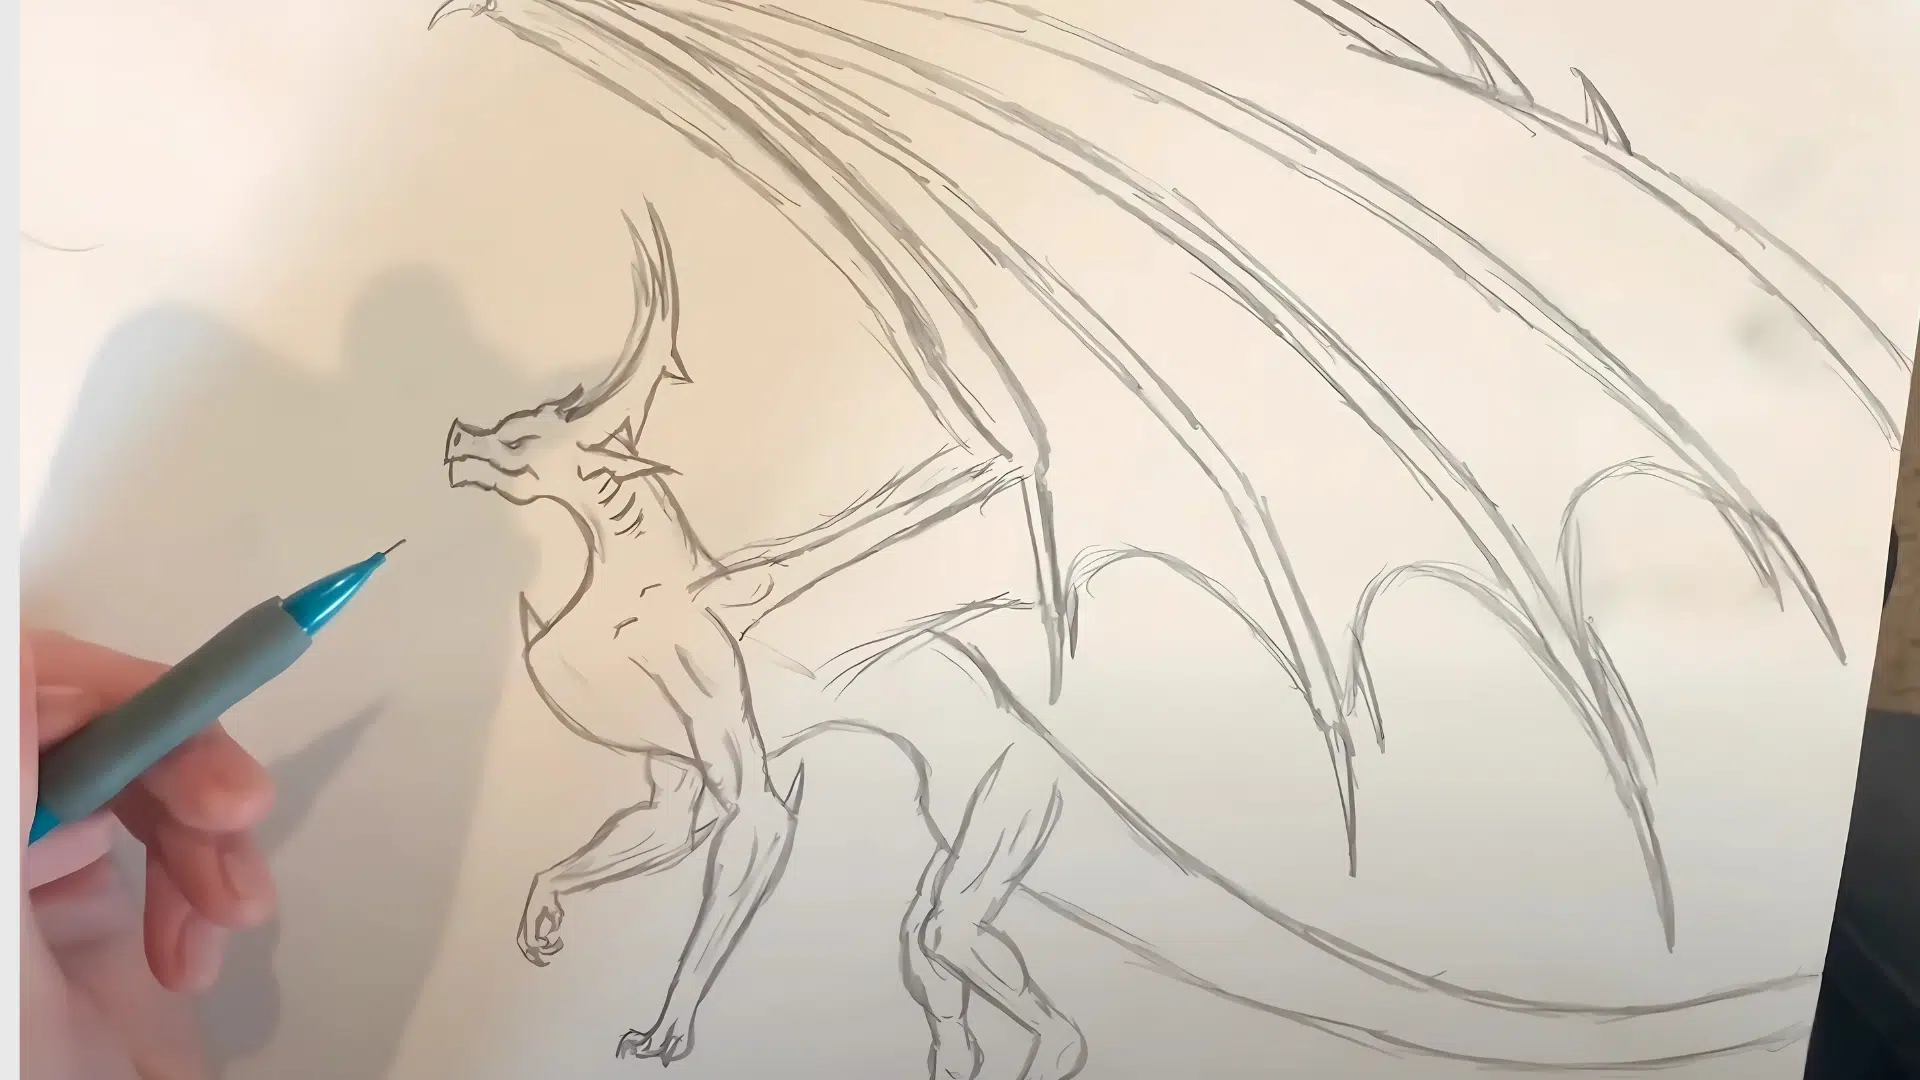
Step 3: Designing the Face
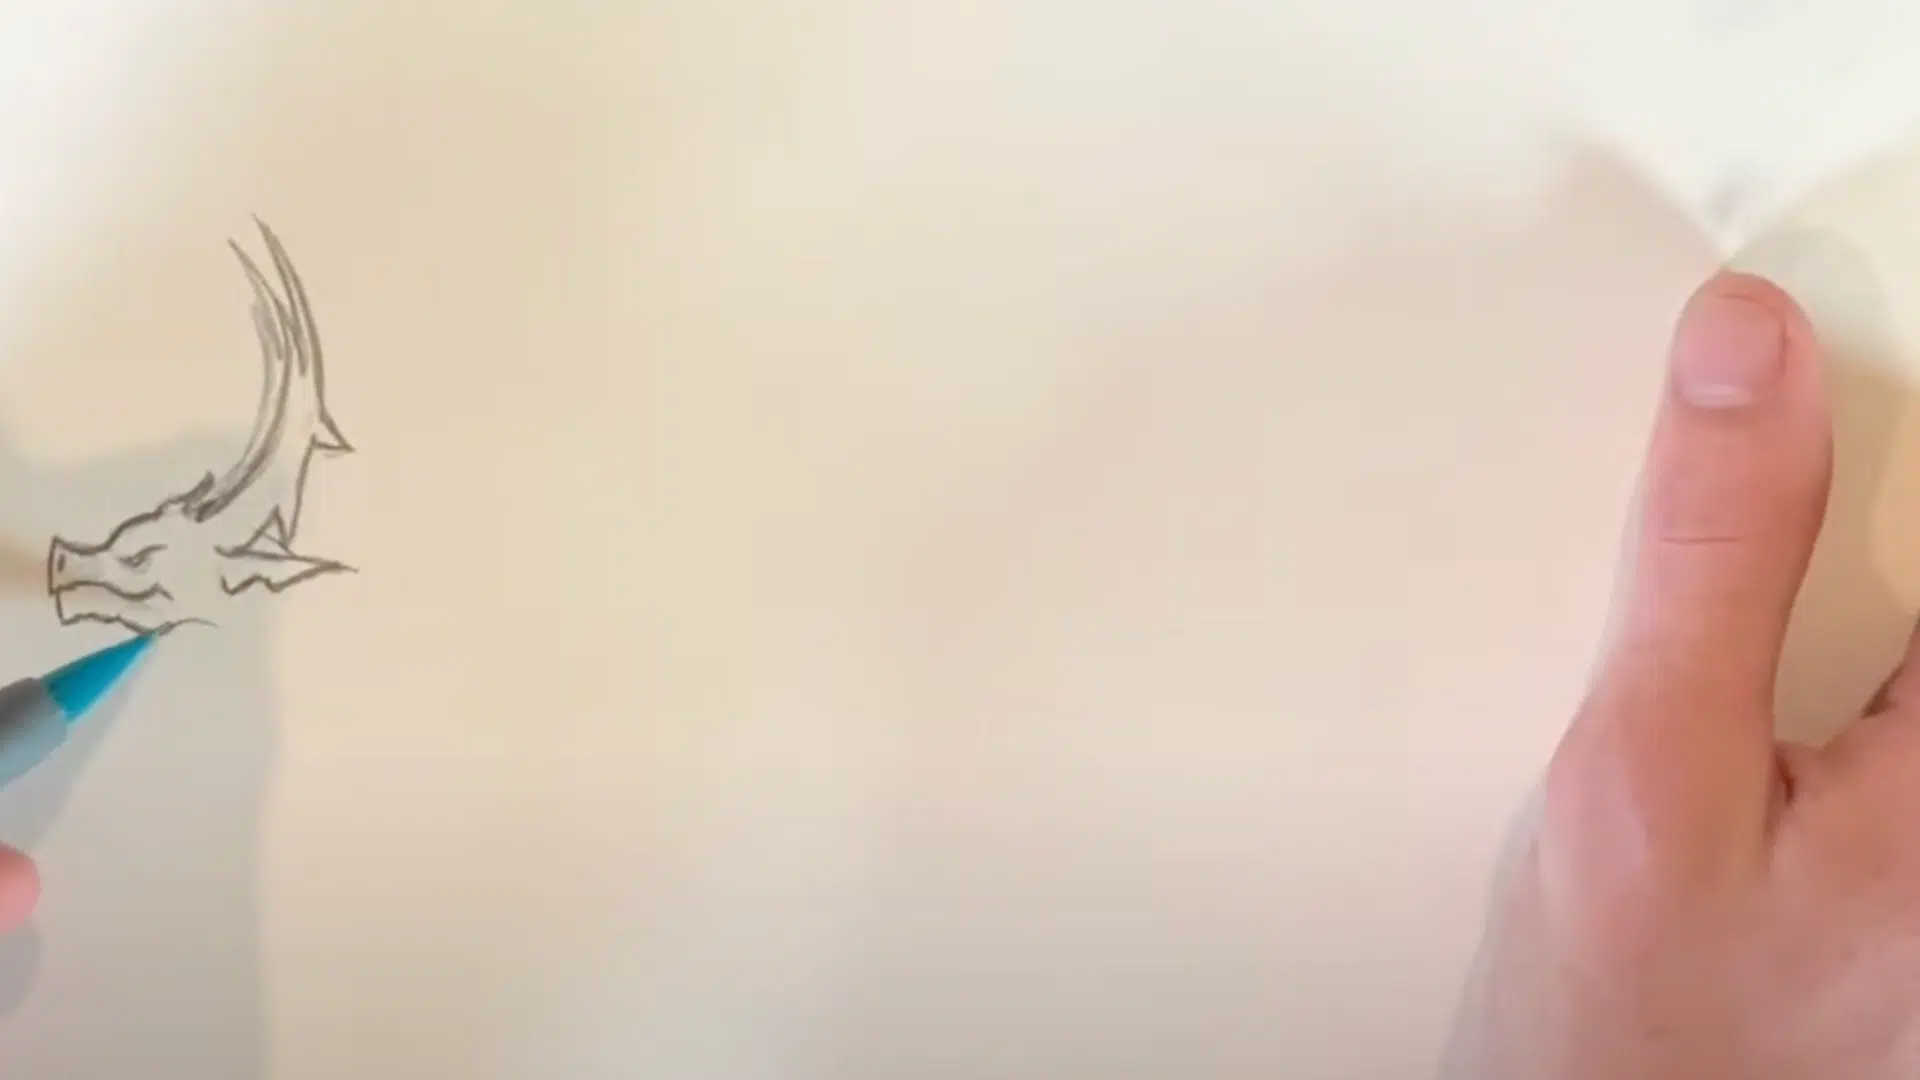
From the face, starting with a short, upward-tilted snout that suggests a proud posture. Add a curved brow line above the eye to convey a subtle emotion, such as serenity, intelligence, or calm focus.
Place a single gentle eye slightly forward on the face, with a slight crease for the eyelid. Add a minor nostril near the snout’s tip and sketch a soft, closed smile for personality.
A squared jaw strengthens the structure. For realism, add faint bone dents near the cheek or temple. These hints of skull beneath skin lend originality.
Step 4: Forming the Neck and Chest
Connect the head to the body with a long, graceful S-shaped neck. This shape implies elegance and fluid movement. As the neck descends, broaden it at the base where it meets the chest.
Use a keel-like line to define the chest’s center, showing where strong muscles attach. A few faint curves along the neck or under the jaw can suggest tendons or veins, and a soft shadow can hint at the neck’s cylindrical form.
Step 5: Sketching the Front Limbs
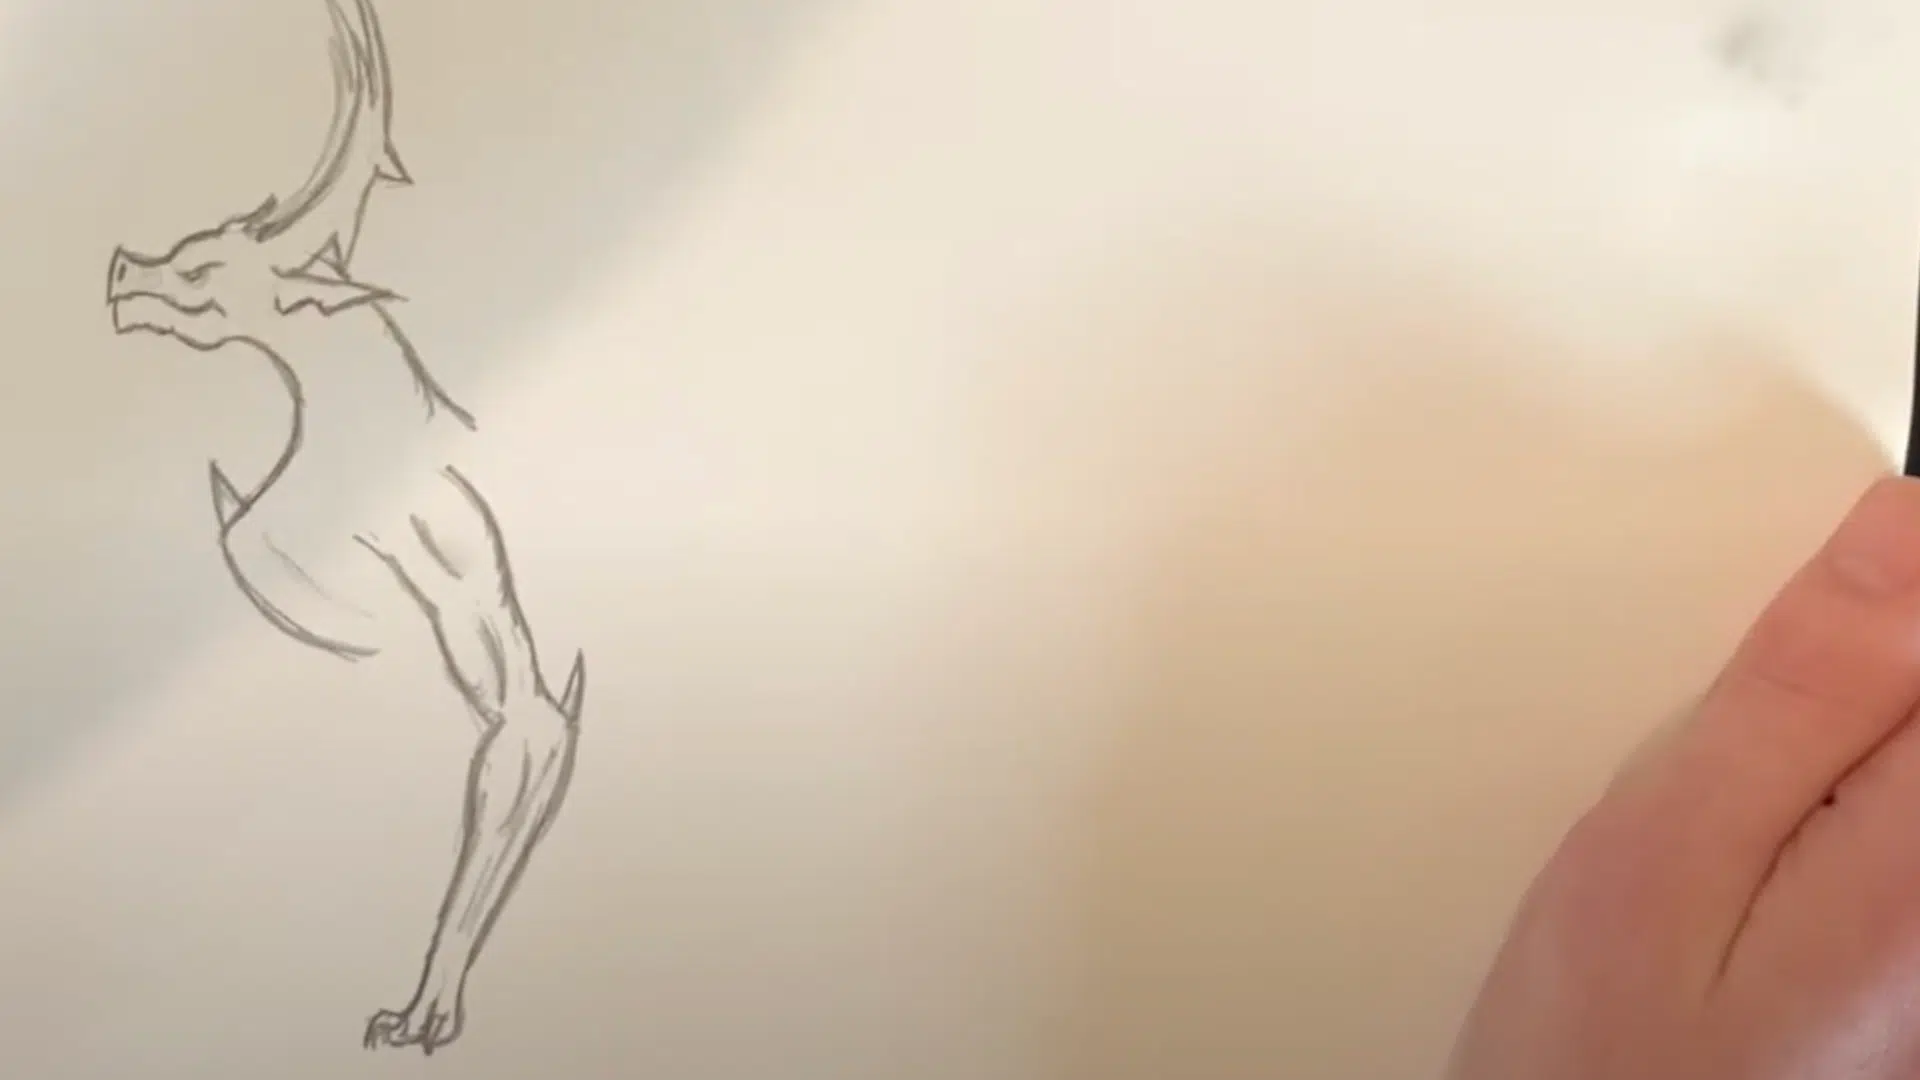
Begin with the front limb that touches the ground. Draw a rounded shoulder muscle flowing into a powerful upper arm or bicep. Curve this down into a long forearm, suggesting weight and grounded stability.
At the elbow joint, add a sharp spike or plate to enhance the creature’s armored, mythic look.
Continue to the hand: three clawed fingers firmly planted on the surface, each slightly spread to suggest grip and balance.
Step 6: Raising the Second Front Limb
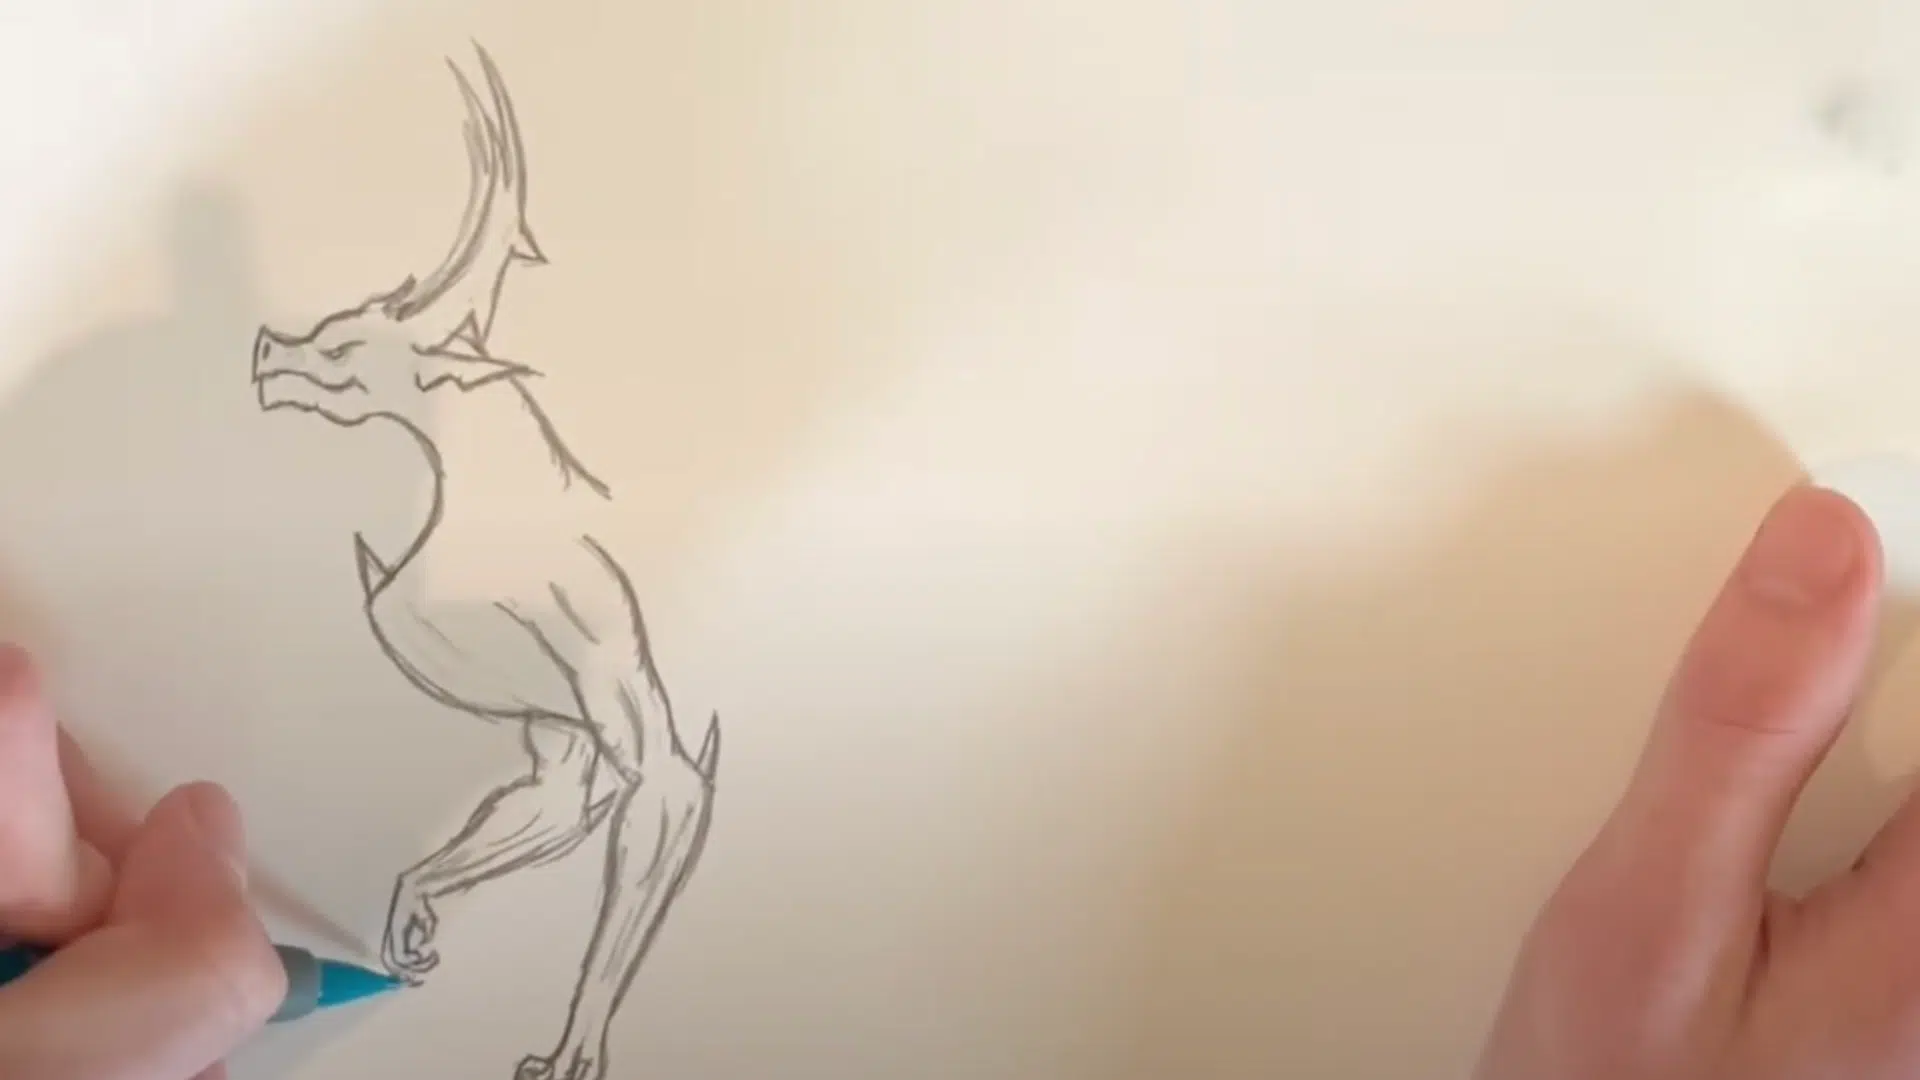
Now sketch the opposite arm, lifted as though mid-motion. Curve the bicep to show strength and tension, with the forearm angled upward.
Curl the claws slightly inward as if the creature is flexing or preparing to strike. This adds energy and tension.
This limb should mirror the anatomy of the first but allow for some dynamic exaggeration in the pose.
Emphasize movement without adding clutter. A well-posed arm here creates a sense of readiness or alertness in the creature’s posture.
Step 7: Expanding the Wings
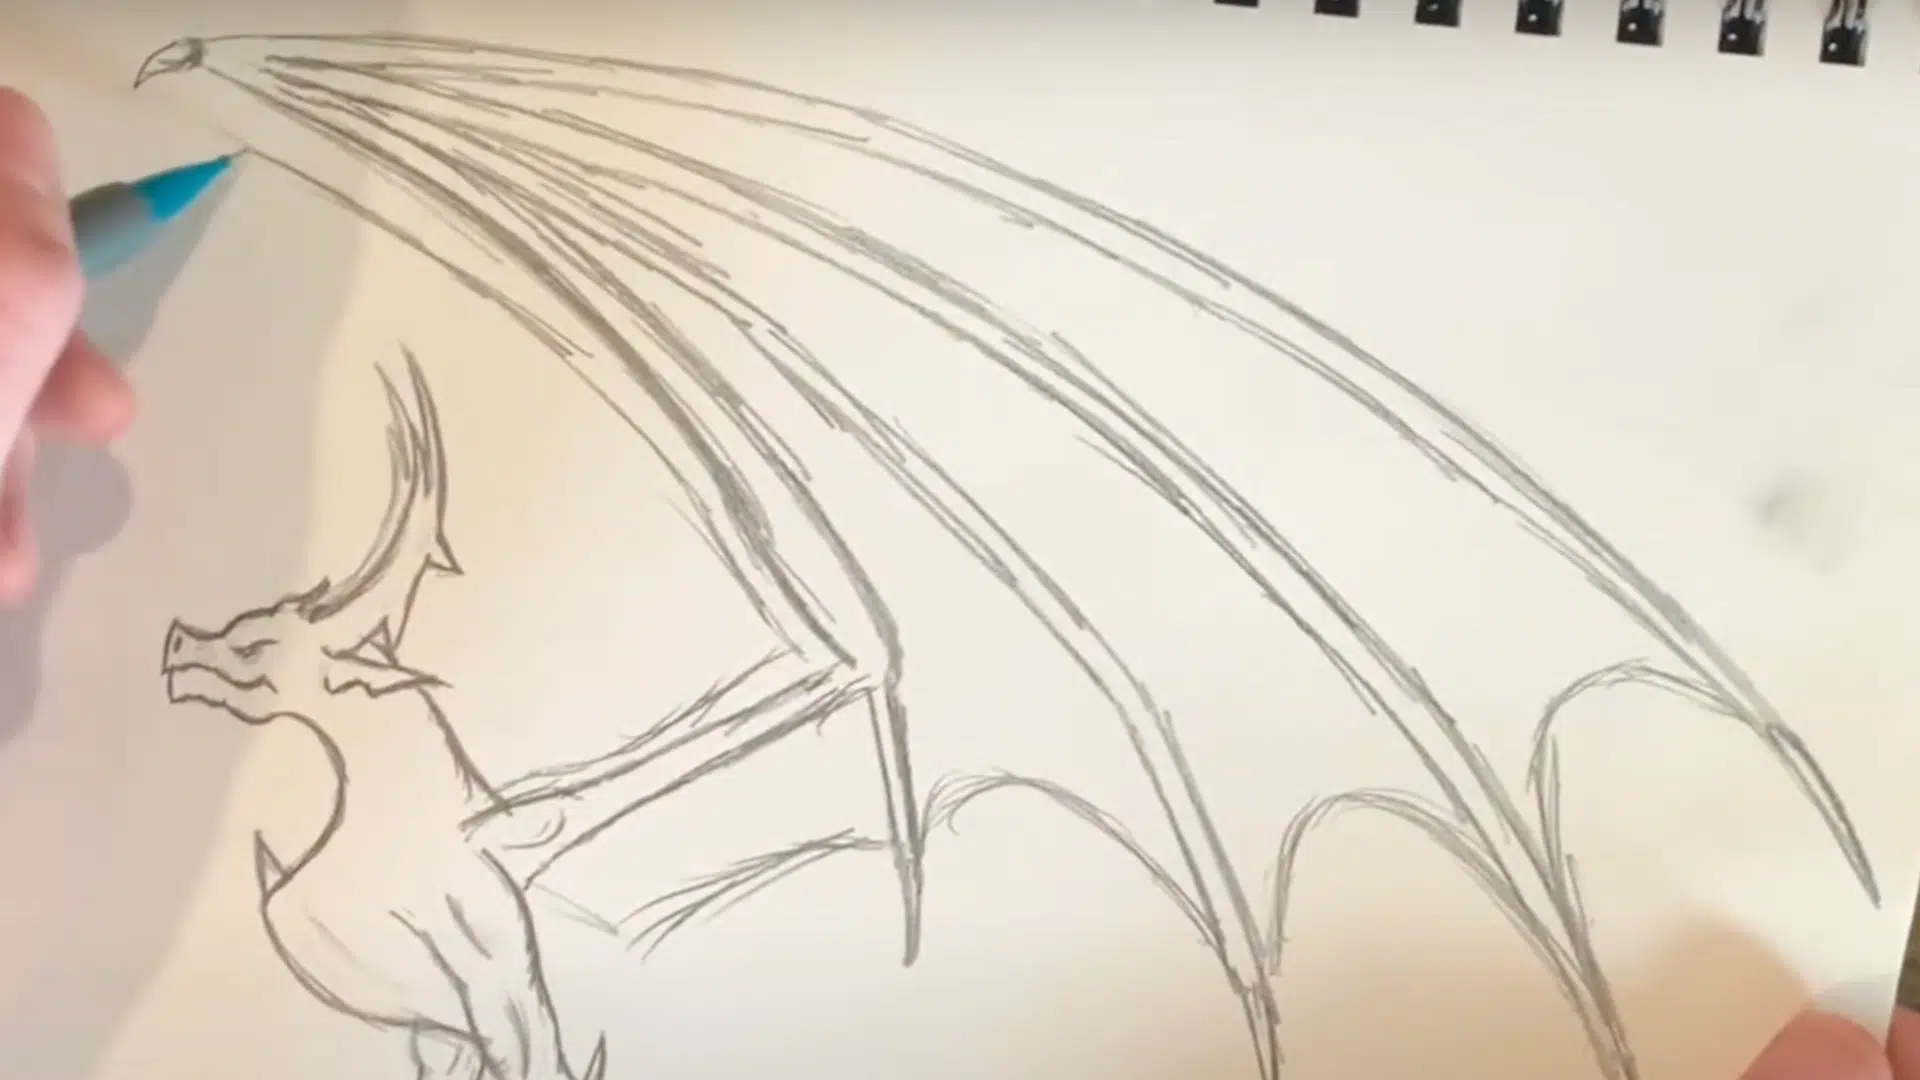
From the upper back, sprout large bat-like wings. Anchor them just behind the shoulders. Each wing should have four elongated, finger-like bones, like skeletal fingers stretching outward. Cap each one with a small claw to echo the hand’s structure.
Stretch curved membranes between each finger, gently sweeping downward to show volume and tension.
Let the wing curve slightly backward, showing that it’s flexible and responsive to wind. Lightly sketch a second, more distant wing behind the first, using fainter lines to imply depth and perspective.
Step 8: Outlining the Back and Hips
Draw the creature’s back arching smoothly from the shoulders into the hips.
Use a gentle downward curve for balance. The hips should appear sturdy yet boxy, hinting at strong hind leg muscles. Add a subtle crease or line to suggest the waist or ribcage.
Begin forming a bent knee from the hips, using soft, rounded shapes that still suggest underlying muscle. A faint calf line helps define leg structure without distracting from the bigger form.
Step 9: Crafting the Hind Legs
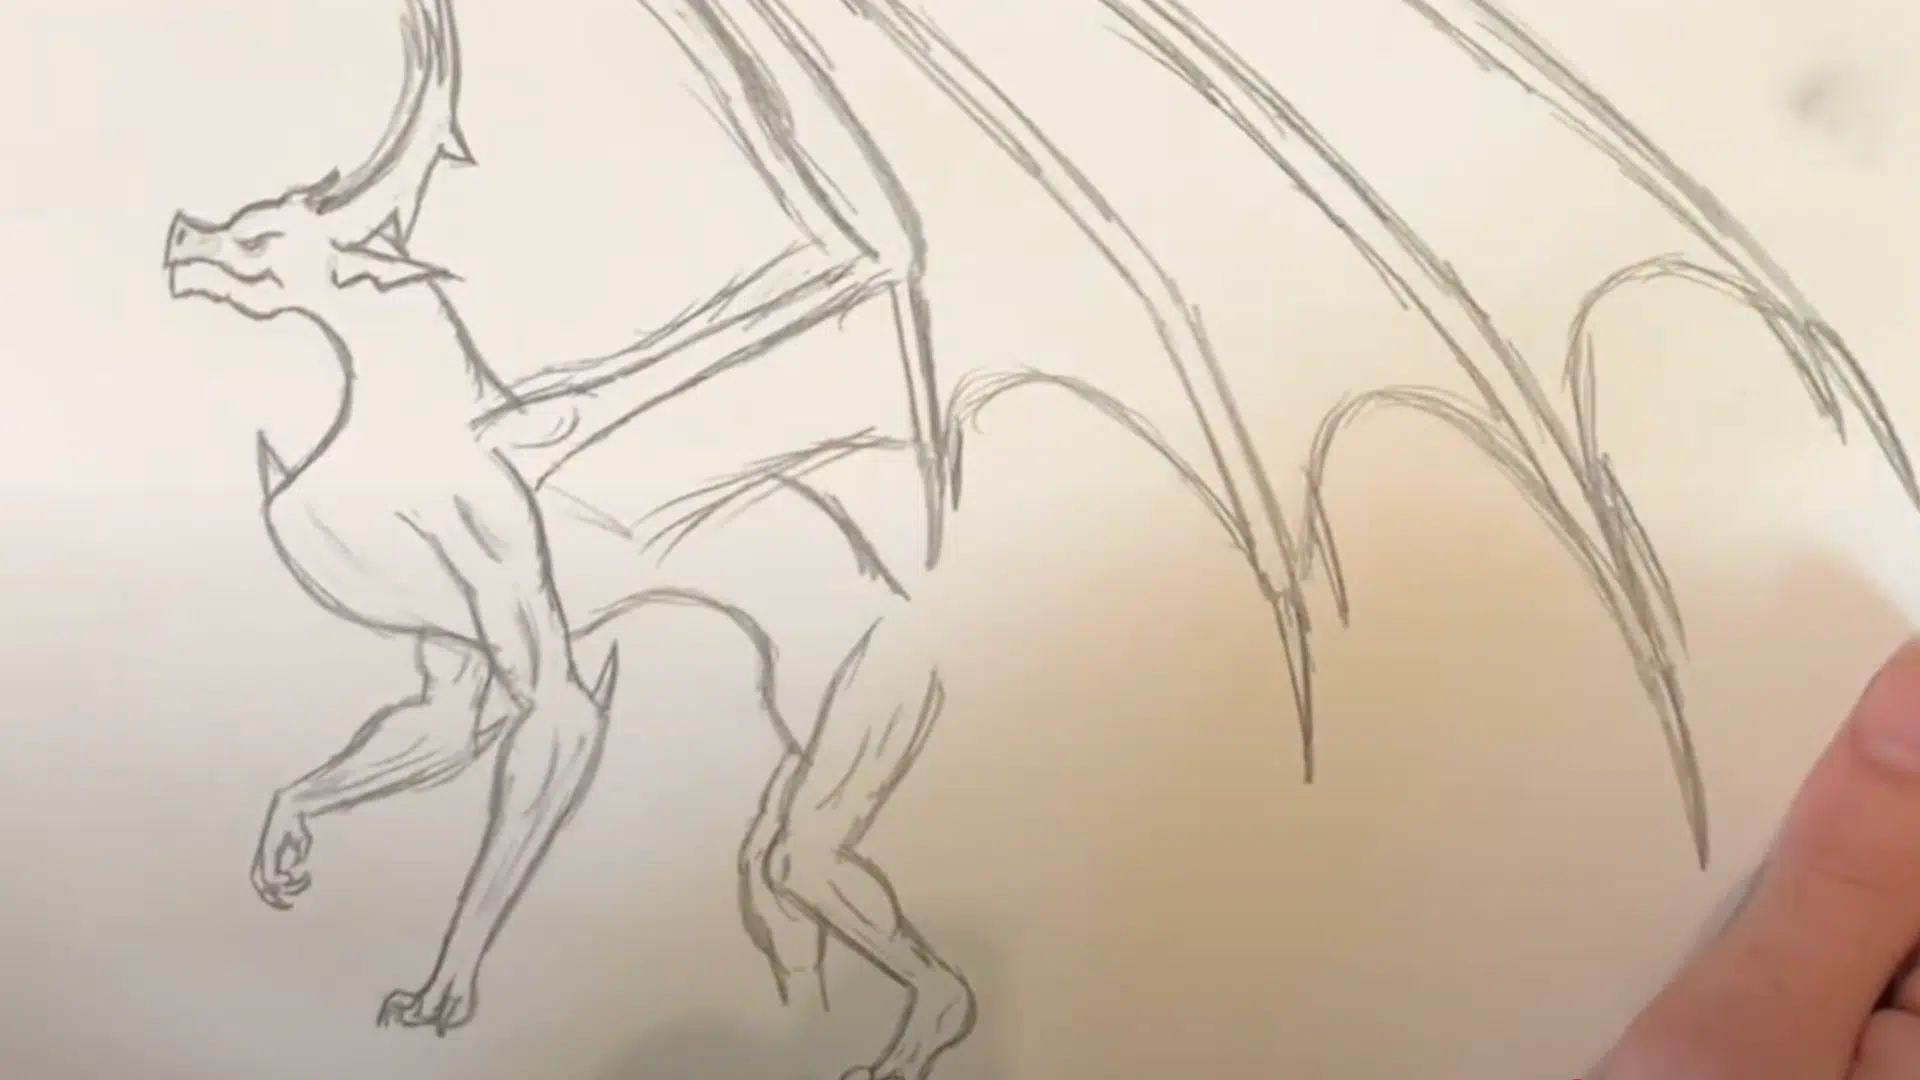
Now bring power into the drawing. Sketch broad thighs with rounded muscle lines. Curve the calves downward and angle them slightly inward.
Add sharply defined claws for each foot, each with varying lengths to add realism. Show the Achilles tendon at the back of the leg. This simple line gives anatomical authenticity.
Mirror the second hind leg, slightly turned outward to suggest three-dimensional positioning.
Step 10: Curling the Tail
Start with a thick base of the tail, showing strength and balance. Curve it gently around the back or side of the body, making sure the arc complements the creature’s pose.
The tail helps guide the eye through the composition. As the tail extends, taper it gradually and add three bony or spiked ridges along its length.
Each spike should grow progressively larger toward the end, culminating in a dramatic, dangerous-looking tip.
Artistic Techniques to Draw Realistically
To master how to draw a realistic dragon full body, focus on blending anatomy, depth, and motion through smart linework.
These techniques help bring life and believability to your dragon without overwhelming the page.
- Line Weight Variation: Use thicker lines for parts closer to the viewer and lighter lines for distant or less important details.
- Foreshortening: Create depth by overlapping shapes and adjusting their size, which is particularly effective for horns, wings, or limbs that point toward the viewer.
- Implied Detail: Suggest texture or form with a few bright lines instead of over-rendering every scale or muscle.
- Lively Curves: Avoid stiff, straight lines. Graceful curves make the dragon feel fluid and alive.
- Animal Reference Blending: Mix features from deer, bats, birds, and cats to create believable, fantasy anatomy.
The Bottom Line
Now you’ve learned the structure, flow, and key features behind how to draw a realistic dragon full body,no guesswork, no shortcuts.
With antlers, wings, claws, and curves placed with purpose, your dragon stands strong and lifelike. This foundation can support any style you develop, whether you’re sketching for fun or something more detailed.
Want to share your thoughts? Love to hear your feedback, ideas, or even requests for future dragon poses. Keep sketching, stay confident, and let your creativity shape the next creature on the page.