That tiny draft near your window? You probably blamed the weather.
But most of the time, it is a failed seal quietly causing the damage. Temperature swings, rain, and years of sun wear out window seals.
Once they go, your energy bill climbs, moisture finds its way in, and small gaps grow into bigger, costlier problems.
The fix is simpler than you think. A caulking gun, the right sealant, and a free Saturday morning are all you need.
This guide covers everything you need to know to reseal windows step by step, so you can stop drafts and keep your home comfortable year-round.
Why Window Seals Fail Over Time
Window seals are made to last, but they are not permanent. Heat, cold, rain, and direct sunlight put constant pressure on the material year after year.
Over time, caulk shrinks, dries out, and loses its grip on the frame. Older seals also break down faster if the original installation was not done well.
Most seals begin showing wear between five and ten years, depending on your climate and window type.
Signs Your Windows Need Resealing
A failing window seal does not always announce itself loudly. Most of the time, it shows up in small ways that are easy to miss.
- You feel air moving near the frame on a calm day. A draft when the window is fully shut is a clear sign the seal has worn out.
- Your energy bill has been climbing for no clear reason. Gaps in the seal force your HVAC system to work harder to hold the temperature.
- There is visible cracking or peeling around the caulk line. Old caulk splits and pulls away from the surface as it dries out.
- You see fog or moisture between the glass panes. This points to a broken inner seal in a double-pane window.
- Water stains or soft spots appear near the frame. Moisture has already found its way through a gap in the seal.
- Outside noise seems louder than it used to be. A properly sealed window blocks sound. Gaps let it through.
How to Reseal Windows: Step-by-Step
Tools and Materials You Will Need
Before you start the job, it helps to have everything ready and within reach. Stopping halfway to look for a tool is how mistakes happen.
| Tool / Material | What It Is Used For |
|---|---|
| Utility knife | Cuts through and removes old caulk |
| Putty knife or scraper | Lifts and peels away old sealant |
| Caulk remover gel | Softens hardened caulk for easier removal |
| Caulking gun | Holds and controls the sealant tube during application |
| Silicone or polyurethane sealant | Main sealing material for exterior joints |
| Latex or acrylic caulk | Best option for interior window joints |
| Painter’s tape | Creates clean, straight lines around the joint |
| Rubbing alcohol or mineral spirits | Cleans and degreases the surface before sealing |
| Damp cloth and dry rag | Removes dirt and dries the area after cleaning |
| Backer rod foam | Fills gaps wider than ¼ inch before applying sealant |
| Gloves | Protects your hands during the entire process |
| Sealant smoothing tool | Creates a neat, even finish on the applied sealant |
Once you have your tools ready, the process moves quickly. Take each step one at a time and do not rush through it.
Step 1: Check for Air Leaks First
Hold a lit candle or an incense stick close to the edges of the window. If the flame flickers or the smoke bends, air is coming through that spot. Mark those areas with tape so you know exactly where to focus your work.
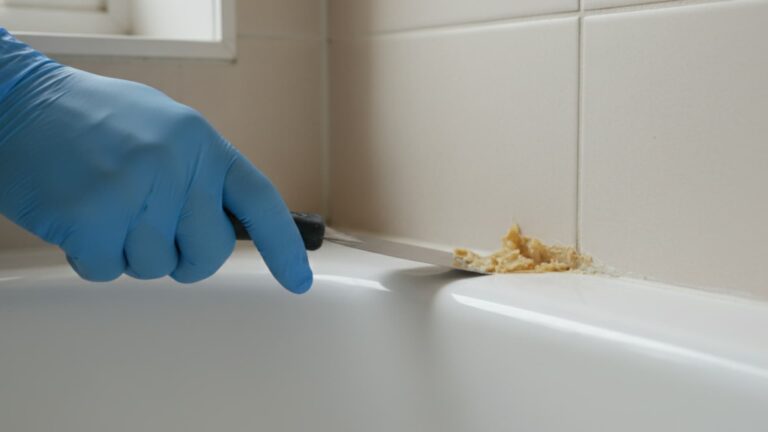
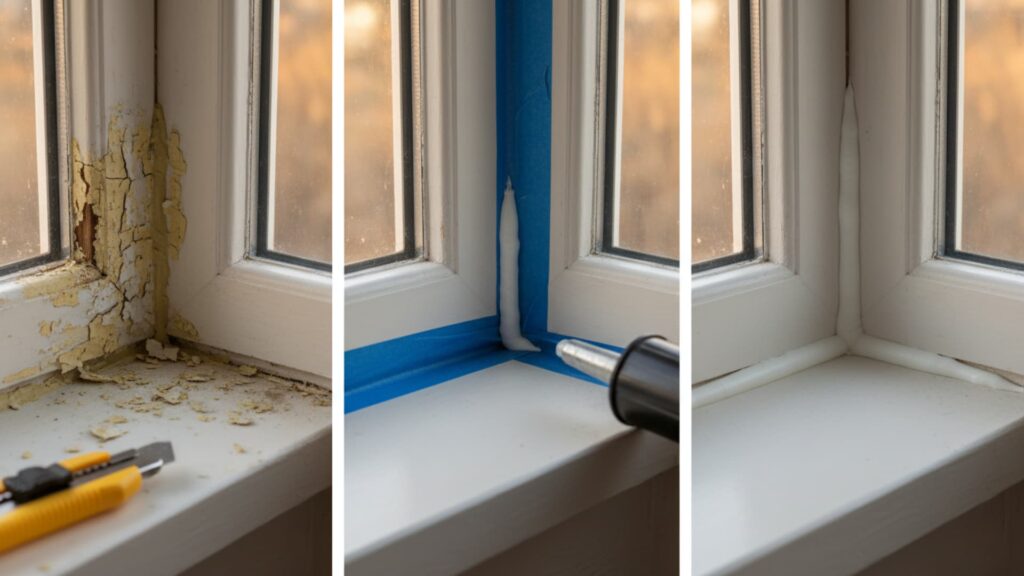
Step 2: Remove the Old Sealant
Use a utility knife to cut along the old caulk line, then lift it away with a putty knife. For hardened or stubborn sealant, apply a caulk remover gel and let it sit for 30 to 60 minutes before scraping. Work slowly to avoid scratching the frame surface.
Step 3: Clean the Window Frame
Wipe the area with mild soap and water to remove dirt and any mildew buildup. Let it dry fully, then wipe it again with rubbing alcohol. Clean, dry surfaces hold new sealant far better than dirty or damp ones.
Step 4: Apply Painter’s Tape
Place tape along both sides of the joint you plan to seal. Keep the lines straight and tight against the frame. This small step gives you a clean, professional-looking finish and makes cleanup much faster after the job.
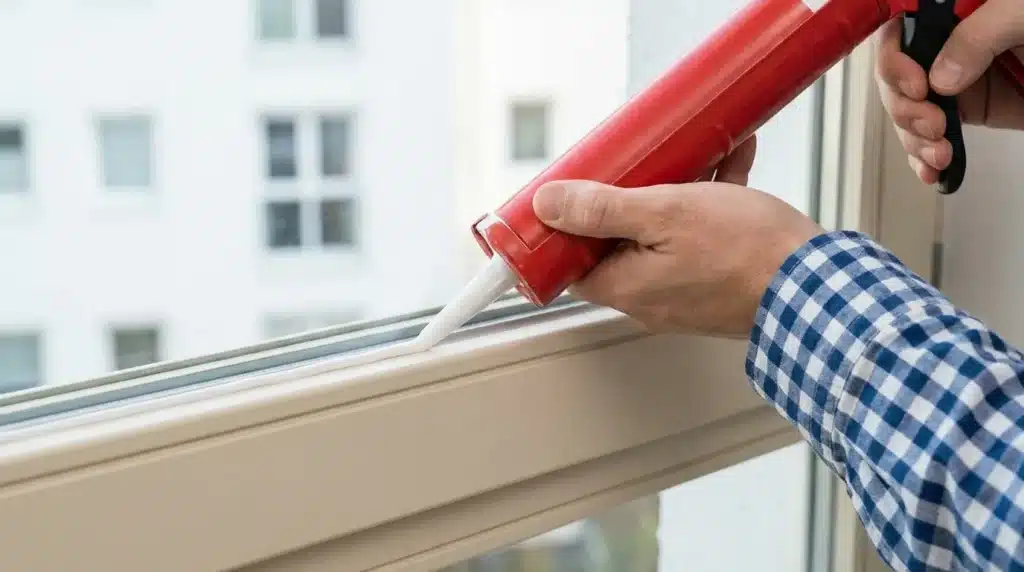
Step 5: Apply the New Sealant
Cut the tip of your sealant tube at a 45-degree angle, then load it into the caulking gun. Run a steady bead along the joint in one smooth, even pass without stopping. For gaps wider than ¼ inch, press backer rod foam into the gap first, then seal over it.
Step 6: Smooth the Sealant
Right after applying, press the sealant firmly into the gap using a gloved finger or a smoothing tool. This creates a tight bond and a flat, clean surface along the joint. Remove the painter’s tape right away before the sealant starts to set.
Step 7: Let It Cure
Most sealants need at least 24 hours to cure fully before any water exposure. Keep the area dry and avoid pressing on it during this time. Always check the product label, as curing times vary with temperature and humidity.
How to Reseal Different Types of Windows
Not all windows are the same, and the sealing process shifts slightly depending on the frame material. Using the right approach for each type extends the seal’s lifespan.
- Wood Windows: Fill any soft or damaged spots with wood filler first, sand smooth after drying, then apply a flexible, paintable caulk over the frame joint.
- UPVC Windows: Clean the smooth plastic surface thoroughly before sealing, and use silicone sealant along with a bubble, flipper, or TPE gasket that bonds well to plastic.
- Aluminum Windows: Use EPDM, silicone, or wedge-type gaskets, since aluminum expands and contracts with heat, and the sealant must remain flexible after curing.
- Double-Pane Windows: Reseal the outer caulk line with silicone. If fog appears between the glass panes, the inner gas seal has failed, and the glass unit needs replacing, not just caulking.
Interior vs. Exterior Window Sealing: What’s the Difference?
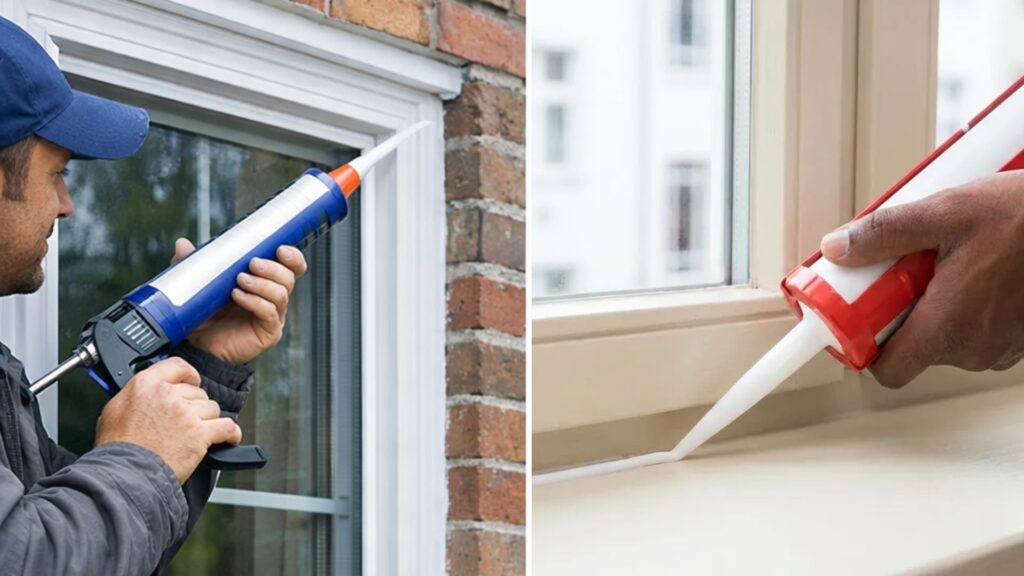
A lot of people seal only the outside and wonder why drafts still get through. Both the interior and exterior joints need attention to ensure the seal holds and performs well.
| Feature | Exterior Sealing | Interior Sealing |
|---|---|---|
| Main Goal | Blocks rain, wind, and outdoor air | Stops indoor air from escaping and reduces noise |
| Best Sealant Type | 100% silicone or polyurethane | Paintable latex or acrylic caulk |
| Where to Apply | Between the window frame and the outer siding | Between the window frame and the interior drywall or trim |
| Can It Be Painted Over? | No (silicone does not accept paint) | Yes (latex caulk accepts paint) |
| Curing Time | Up to 24 hours | 12 to 24 hours |
| Durability | 10 to 20 years with silicone | 5 to 10 years with standard latex caulk |
DIY or Professional Window Sealing: How to Decide
The decision between doing it yourself and calling a professional comes down to the condition of your windows and your comfort level with the work. Here is a clear breakdown to help you decide.
Go the DIY Route When:
- The caulk is cracked or peeling, but the window frame is still solid and undamaged.
- You can reach the windows safely from the ground or a short step ladder.
- You have a free afternoon and basic tools already on hand.
- The total cost of materials ranges from $10 to $50 for most standard jobs.
- You want to do a quick check and touch-up as part of regular yearly maintenance.
Call a Professional When:
- Fog or condensation appears between the panes of a double-pane window.
- The frame feels soft, rotten, or shows clear signs of water damage behind the surface.
- Mold growth is visible around or behind the window frame area.
- The windows are on upper floors and are difficult to reach safely without proper equipment.
- You have re-caulked the same window more than once, and the same problem keeps returning.
Tips to Make Your Window Seal Last Longer
A good seal job does not have to be redone every couple of years. A few simple habits after the work is done can help it last much longer.
- Do not paint over silicone sealant. Paint will peel off silicone, leaving moisture trapped beneath the surface.
- Check your seals once a year. A quick visual check each spring or fall catches small cracks before they grow into bigger gaps.
- Clean the area around window frames regularly. Dirt and mildew near the seal speed up the breakdown of the caulk.
- Use good-quality sealant from the start. A cheap product saves a few dollars now but fails much sooner than a quality one.
- Inspect your windows after major storms. Heavy rain and strong winds can crack or shift a seal that was already starting to wear.
- Keep UPVC drainage channels clear. Blocked channels allow water to pool near the frame, shortening the seal’s overall lifespan.
How Long Does Window Sealant Last?
The lifespan of window sealant depends on two things: the type of product used and the conditions it faces. Silicone sealant, applied correctly to exterior windows, can last 10 to 20 years.
Standard latex caulk typically lasts between 5 and 10 years before it starts to crack and separate. Harsh weather, direct sunlight, and extreme temperature changes all shorten these timelines.
That is why checking your seals once a year matters. Catching a small crack early means a quick touch-up rather than a full redo of the job.
Conclusion
Resealing windows is one of those home tasks you keep putting off until the draft becomes too annoying to ignore.
But once you do it, the difference is real. Lower energy bills, no more cold spots, and a home that stays at the temperature you actually set.
You do not need fancy tools or expert skills. Just the right sealant, a bit of patience, and the steps laid out in this guide.
Go check your windows this weekend. Run your hand slowly along the frame edges and see what you find.
Already resealed yours or have a question about the process? Drop it in the comments below. We would love to hear from you.
Frequently Asked Questions
What Is the Cost to Reseal a Window?
A DIY reseal costs between $10 and $50 for materials. Hiring a professional typically runs $150 to $500, depending on the number of windows and the condition of the frames.
Is It Worth Getting Windows Resealed?
Yes, absolutely. A fresh seal reduces energy loss, prevents moisture from entering, and extends the life of your windows without the cost of a full replacement.
What Is the Best Way to Seal Your Windows?
Remove the old caulk fully, clean and dry the surface, then apply a 100% silicone sealant with a caulking gun for exterior joints. Smooth it out and let it cure for 24 hours.
Can You Reseal a Window Without Replacing It?
Yes, in most cases. If the frame is solid and the issue is just worn or cracked caulk, resealing works well. Replacement is only needed when the frame is damaged or the inner seal of a double-pane unit has failed.