Every parent has been there, standing in the grocery store checkout line while their toddler has a complete meltdown: the tears, the screams, and those judgmental stares from other shoppers.
What if the solution was hiding in the recycling bin? Sensory bottles for toddlers convert ordinary plastic bottles into magical, calm-down tools that work when parents need them most.
These simple creations cost almost nothing to make but provide hours of peaceful entertainment.
Using basic household items, parents can create instant relief for fussy moments, car rides, and those continuous rainy afternoons at home.
Why Sensory Bottles Are Great for Toddlers?
Sensory bottles for toddlers are excellent tools for development and learning. These simple bottles filled with colorful objects, water, and glitter help calm upset children and keep them focused.
Toddlers love shaking and watching the pretty contents move around inside. Sensory bottles help develop essential skills such as hand-eye coordination and visual tracking.
They also teach cause and effect when kids shake the bottle and see things move.
Parents love sensory bottles because they’re safe, quiet, and easy to make at home. These bottles work great during car rides, doctor visits, or quiet time.
They provide toddlers with a fun way to investigate textures, colors, and movement, while keeping them entertained for extended periods.
Tips Before You Start
Follow these essential safety and preparation tips to create perfect sensory bottles for toddlers that are safe, engaging, and built to last through endless play sessions.
- Safety First: Always use plastic bottles, never glass, and ensure lids are securely closed with super glue or taped shut to prevent toddlers from opening them and accessing small parts.
- Test Your Bottles: First, make one bottle and test it for 24 hours to check for leaks, proper movement, and that all materials remain intact before making multiple bottles.
- Choose Age-Appropriate Fillers: Avoid small items that could be choking hazards if the bottle breaks, and select materials that won’t break down or create sharp pieces over time.
- Prepare Your Workspace: Lay out towels, have cleaning supplies ready, and work in a well-ventilated area, as some materials, such as glue, can have strong odors.
- Label and Date: Write the contents and creation date on each bottle so you can track which materials were used and replace bottles after 6-12 months of use.
Common DIY Steps to Make a Sensory Bottle at Home
Steps to create exceptional sensory bottles for toddlers, utilizing basic materials and foolproof techniques that ensure safe and entertaining results every time.
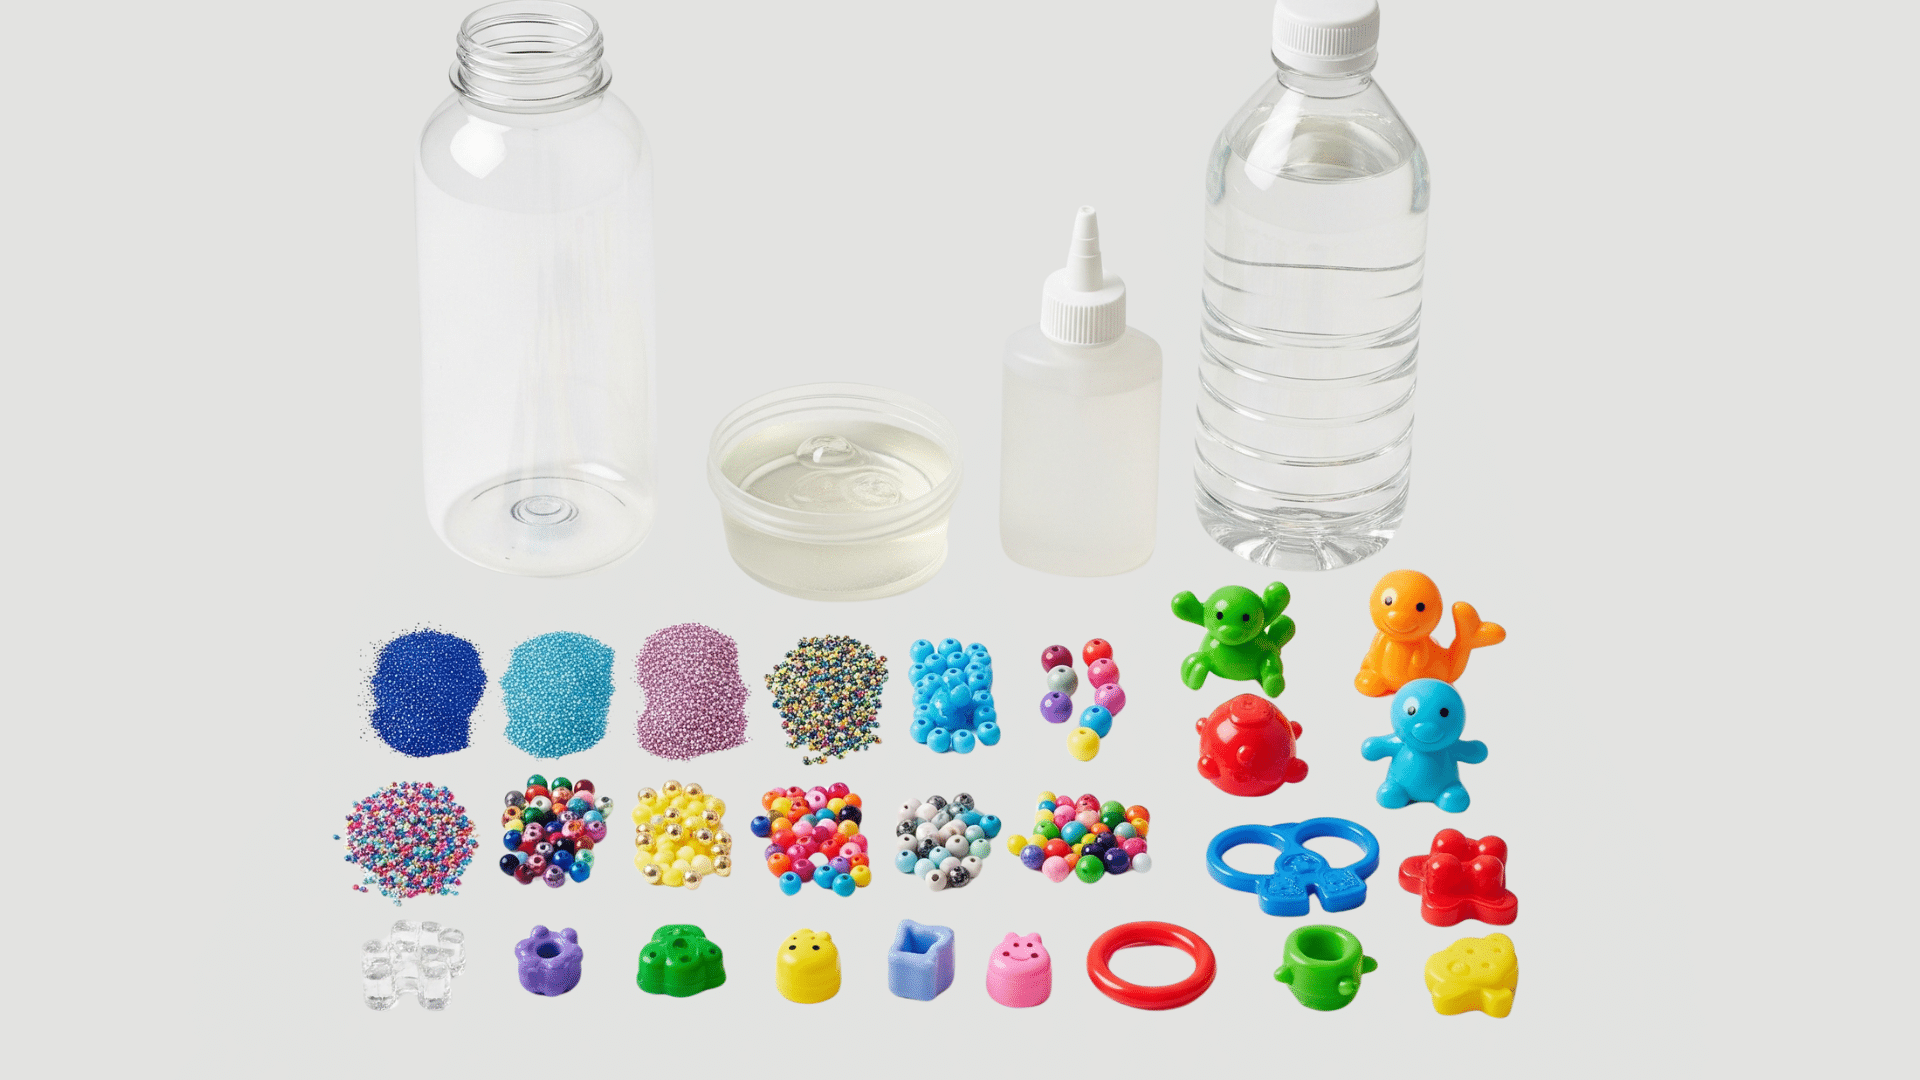
Step 1: Pick Your Perfect Bottle
Use any clear plastic bottle with a tight-fitting lid. Ensure it’s spotless so toddlers can see the action inside.
Step 2: Choose Your Base
Select one option:
- Liquid bases: water, cooking oil, clear hair gel, or white school glue
- Dry bases: colored rice, small pasta, clean sand, or colorful confetti
Step 3: Add the Star Attractions
Add eye-catching items like glitter, pom-poms, colorful beads, tiny plastic animals, or buttons. Mix different textures and sizes for maximum appeal.
Step 4: Make It Extra Special (Optional)
Add food coloring for vibrant colors, essential oil drops for gentle scents, or glow-in-the-dark paint for nighttime play.
Step 5: Lock It Up Tight (Safety First!)
Apply hot glue around the rim of the bottle before screwing on the lid. Wrap duct tape or washi tape around the top for safety.
Step 6: Time for the Big Reveal!
Present it to your toddler and enjoy watching their delight as they shake, flip, and play with their new sensory bottle!
Easy Ideas to Make Sensory Bottles
Here are creative sensory bottle ideas that will keep your toddler entertained, learning, and calm using everyday materials you probably already have at home:
1. Glitter Calm Bottle
This magical bottle creates a mesmerizing, slow-motion glitter show that helps calm angry or upset toddlers. The gentle swirling motion naturally soothes busy minds.
Theme: Relaxation and emotional regulation
Target: Helps toddlers practice deep breathing and self-soothing while developing visual focus and patience.
Glitter Calm Bottle DIY Steps:
- Mix equal parts clear glue and warm water in a bottle
- Add fine and chunky glitter
- Seal tightly and shake
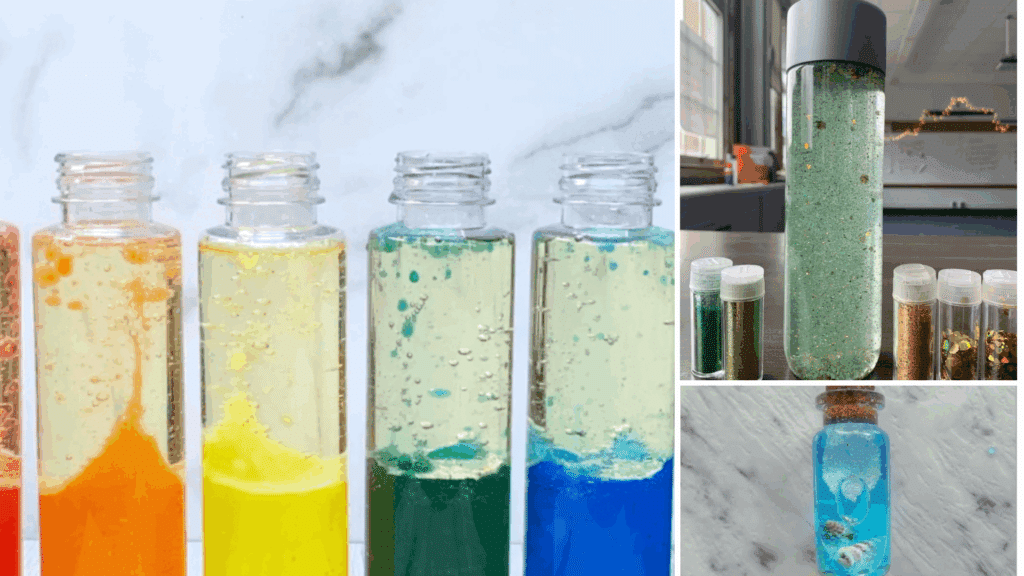
2. Rainbow Rice Bottle
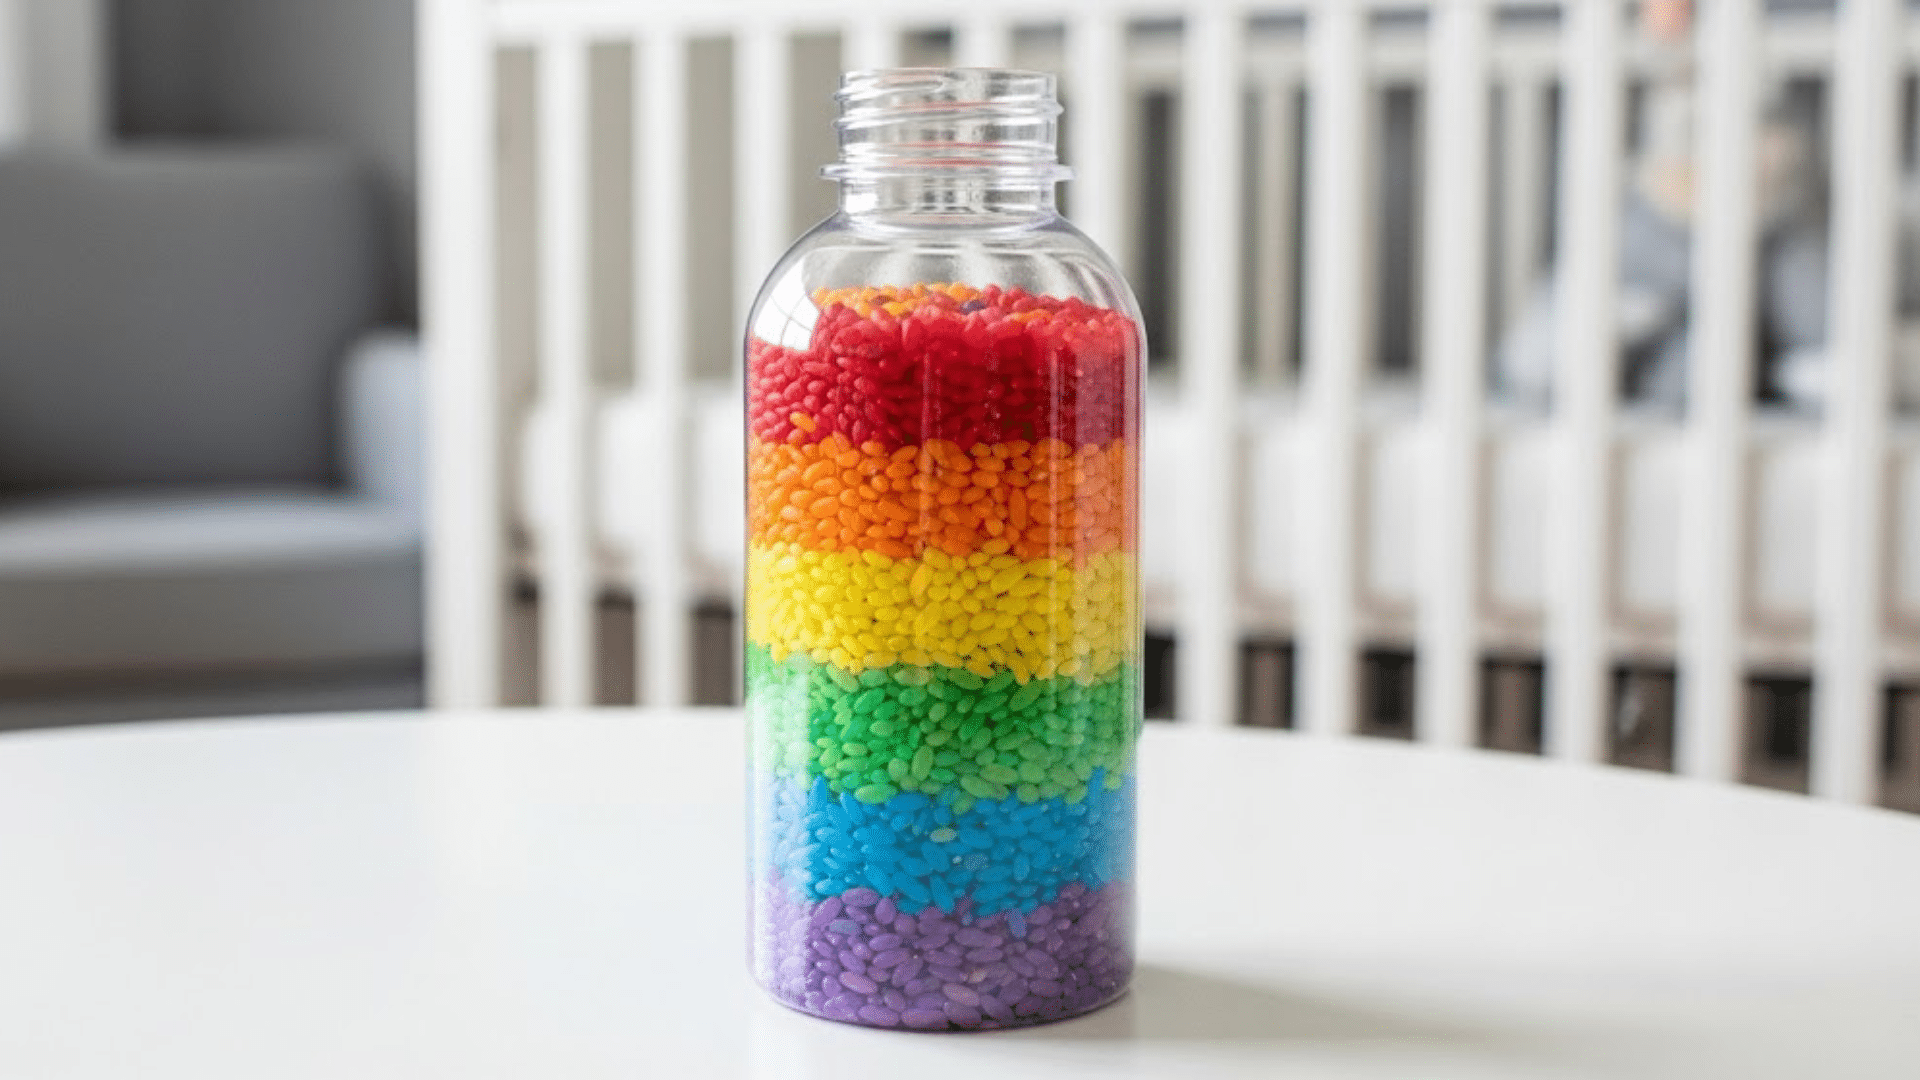
A colorful feast for the eyes that makes beautiful sounds when shaken. Each layer creates a stunning rainbow that toddlers love to tip and explore.
Theme: Color learning and visual stimulation
Target: Develops color recognition, visual tracking skills, and cause-and-effect understanding through movement.
Rainbow Rice Bottle DIY Steps:
- Dye rice with food coloring, let it dry
- Layer different colored rice in a clear bottle
- Fill completely and seal
3. Ocean Explorer Bottle
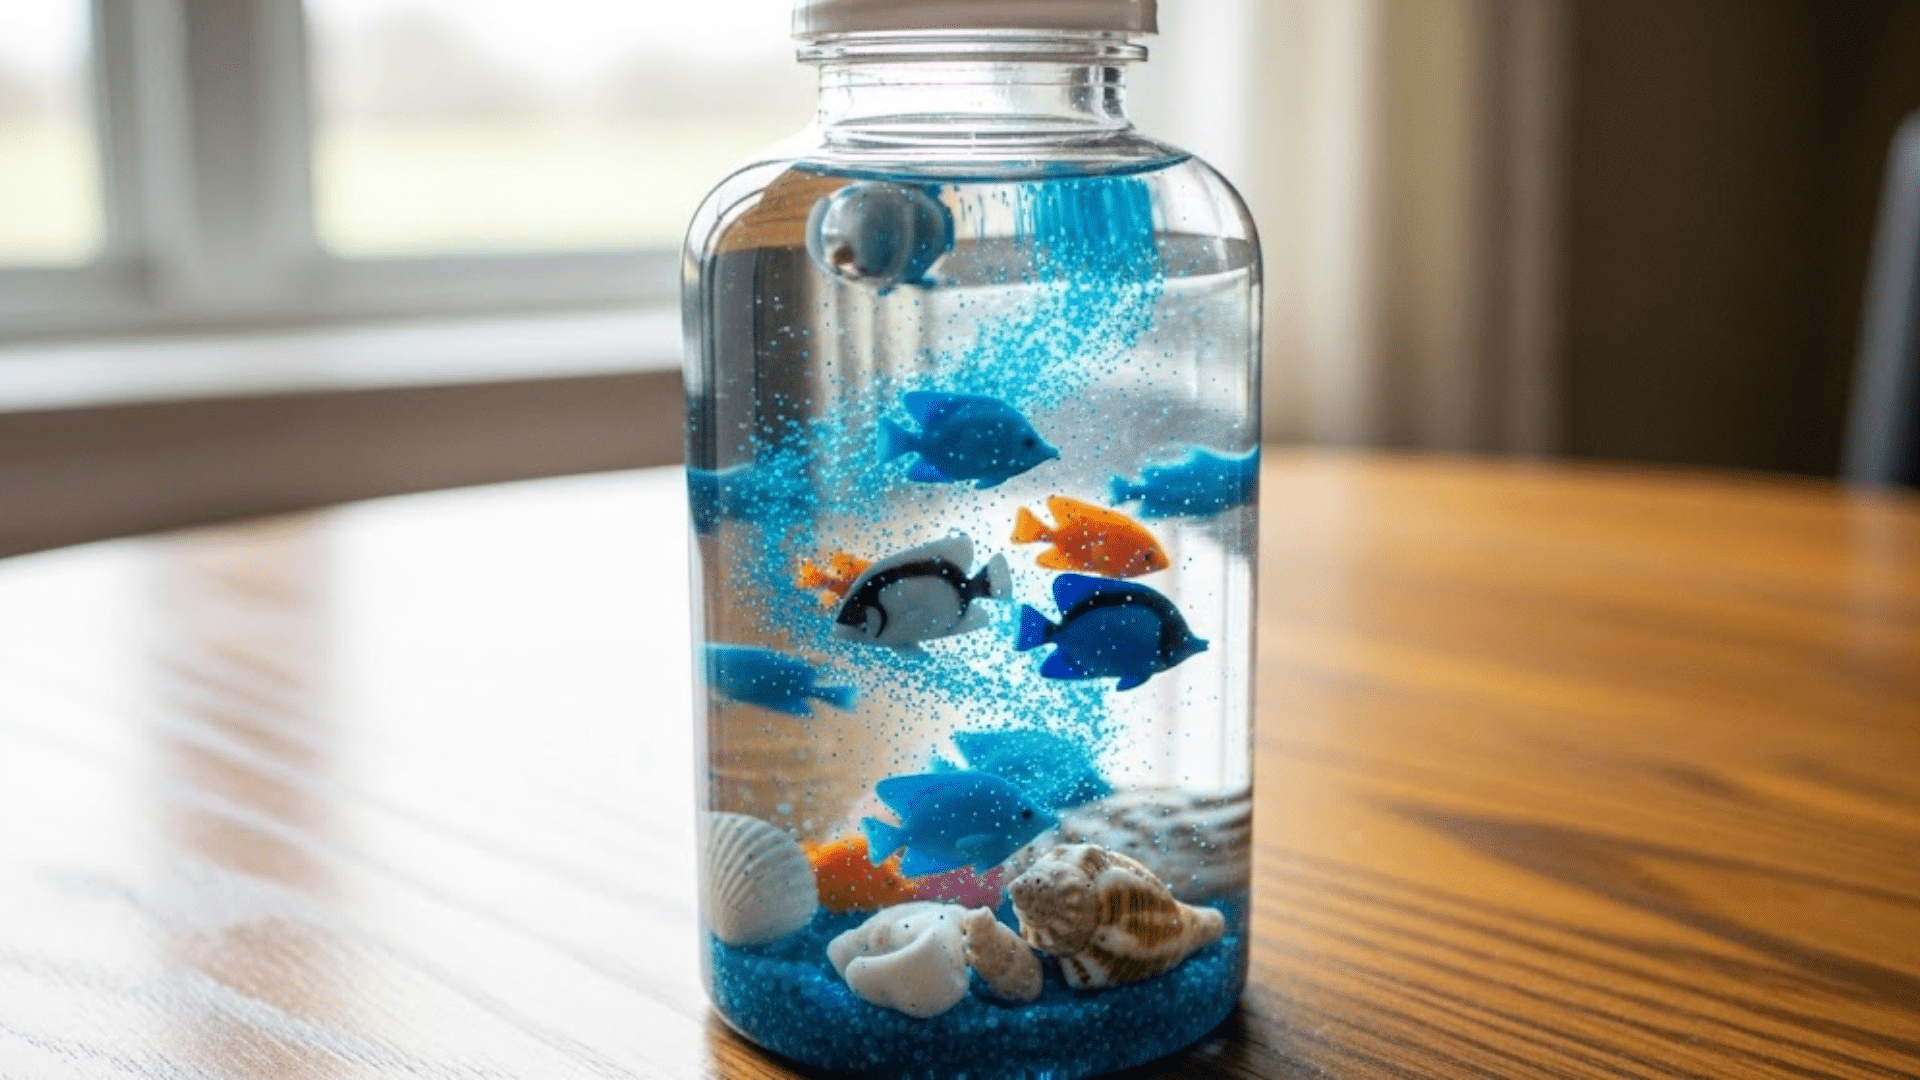
An underwater adventure in a bottle with floating sea creatures and shells. The blue water creates a realistic ocean environment for imaginative play.
Theme: Ocean nature investigation
Target: Builds observation skills, introduces marine life concepts, and encourages storytelling and imagination.
Ocean Explorer Bottle DIY Steps:
- Fill the bottle with blue-tinted water
- Add small plastic sea animals and shells
- Optional: add cooking oil for wave effects
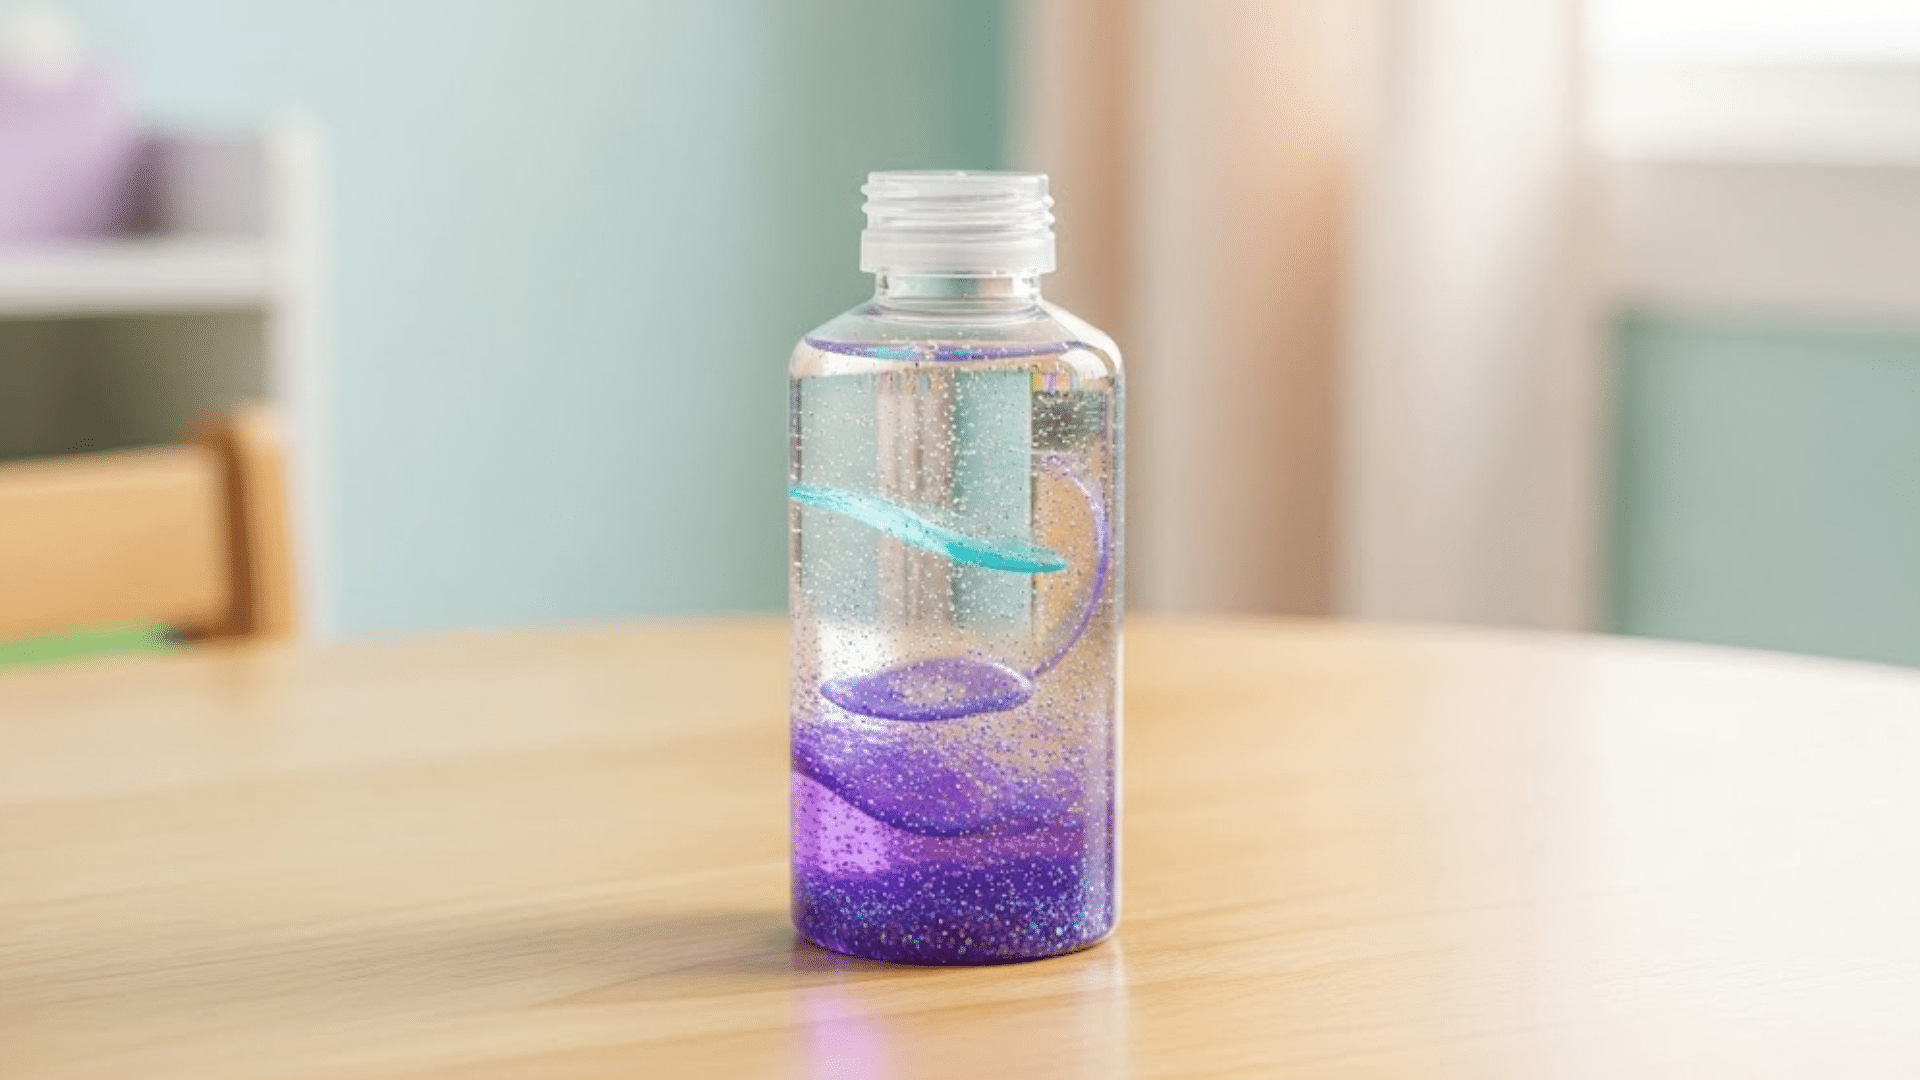
4. Floating Pom-Poms Bottle
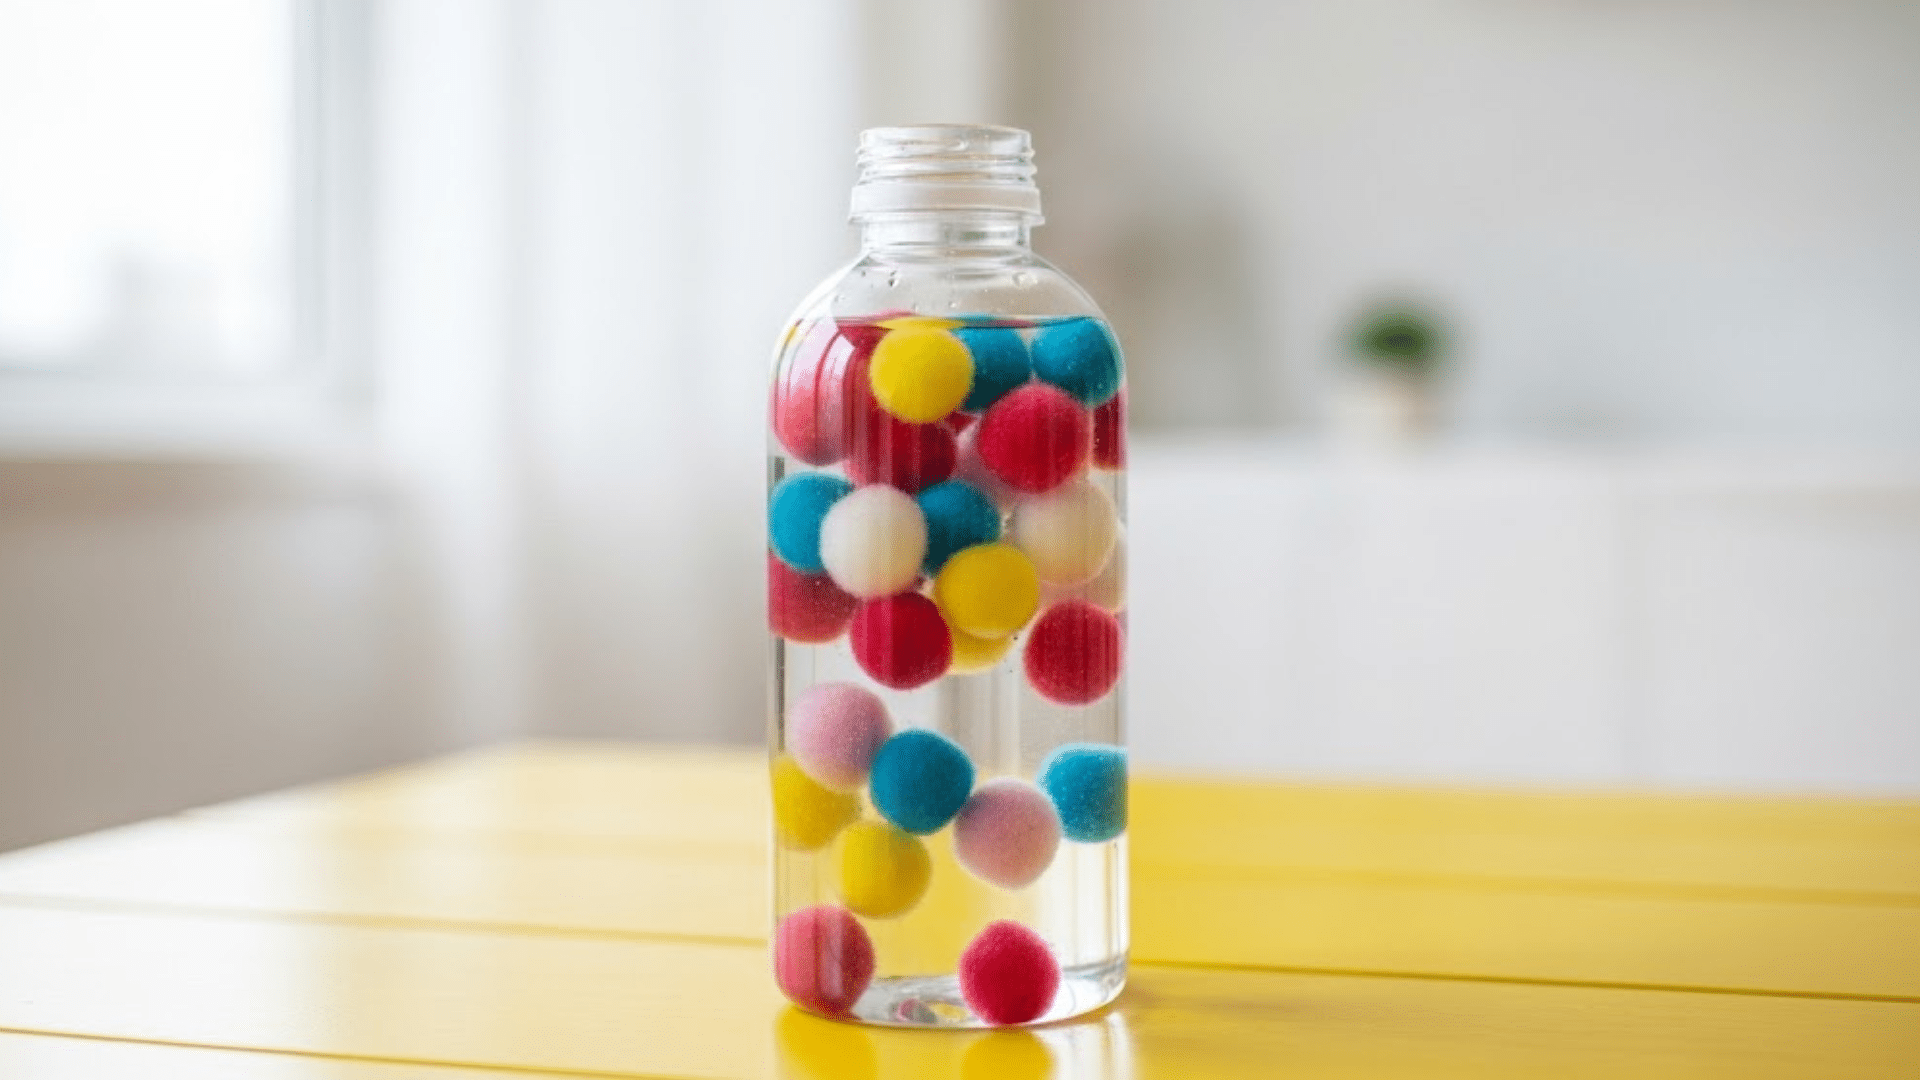
Soft, colorful pom-poms drift gracefully through clear liquid like fluffy clouds. The gentle floating motion captivates toddlers for long periods.
Theme: Gentle movement and texture investigation
Target: Enhances visual tracking abilities and provides calming sensory input for overstimulated children.
Floating Pom-Poms Bottle DIY Steps:
- Fill the bottle with clear hair gel or corn syrup
- Add various-sized colorful pom-poms
- Seal and test the floating speed
5. Nature Discovery Bottle
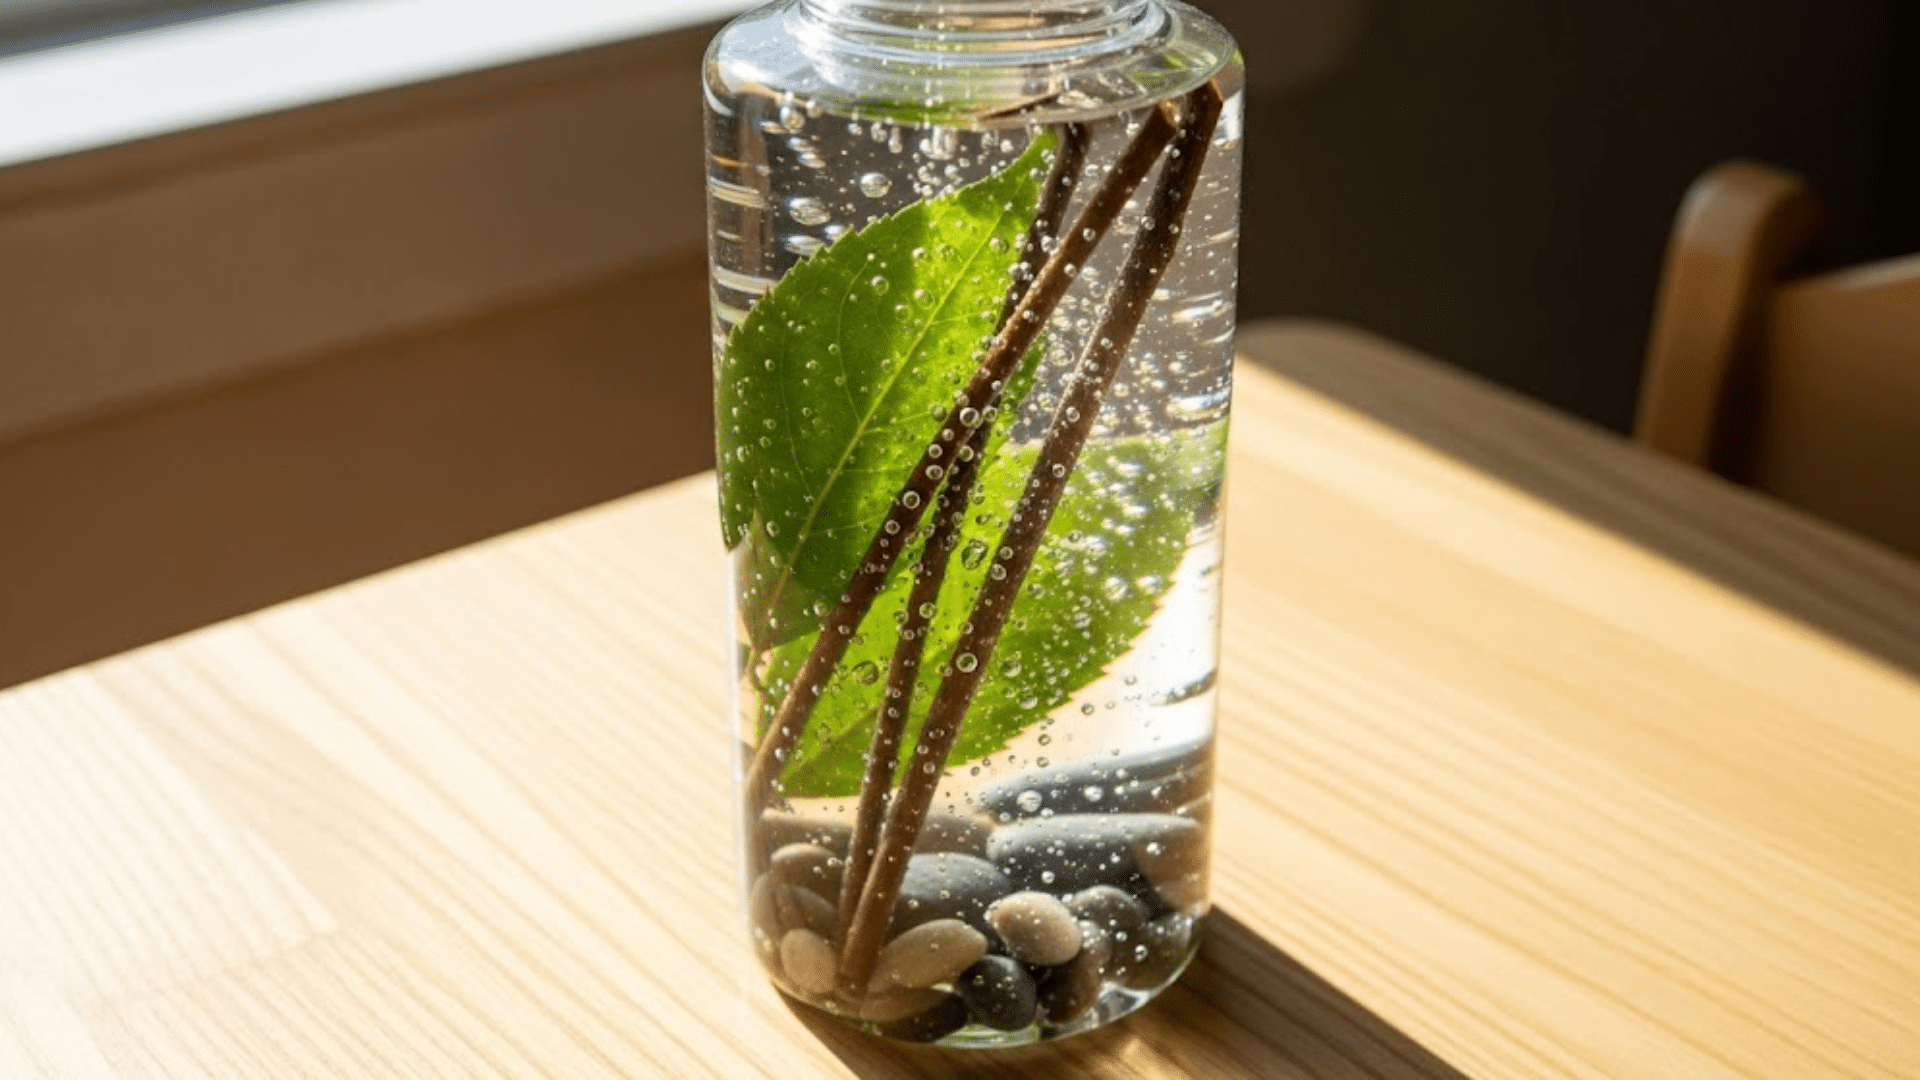
Brings the outdoors inside with real leaves, twigs, and natural treasures. Perfect for toddlers who love nature but can’t always go outside.
Theme: Nature appreciation and outdoor findings
Target: Develops observation skills, introduces natural textures, and connects children with the environment.
Nature Discovery Bottle DIY Steps:
- Collect small leaves, twigs, stones, and dried flowers
- Layer natural items in a clear bottle
- Fill with rice or leave an air space for movement
6. Alphabet Hunt Bottle
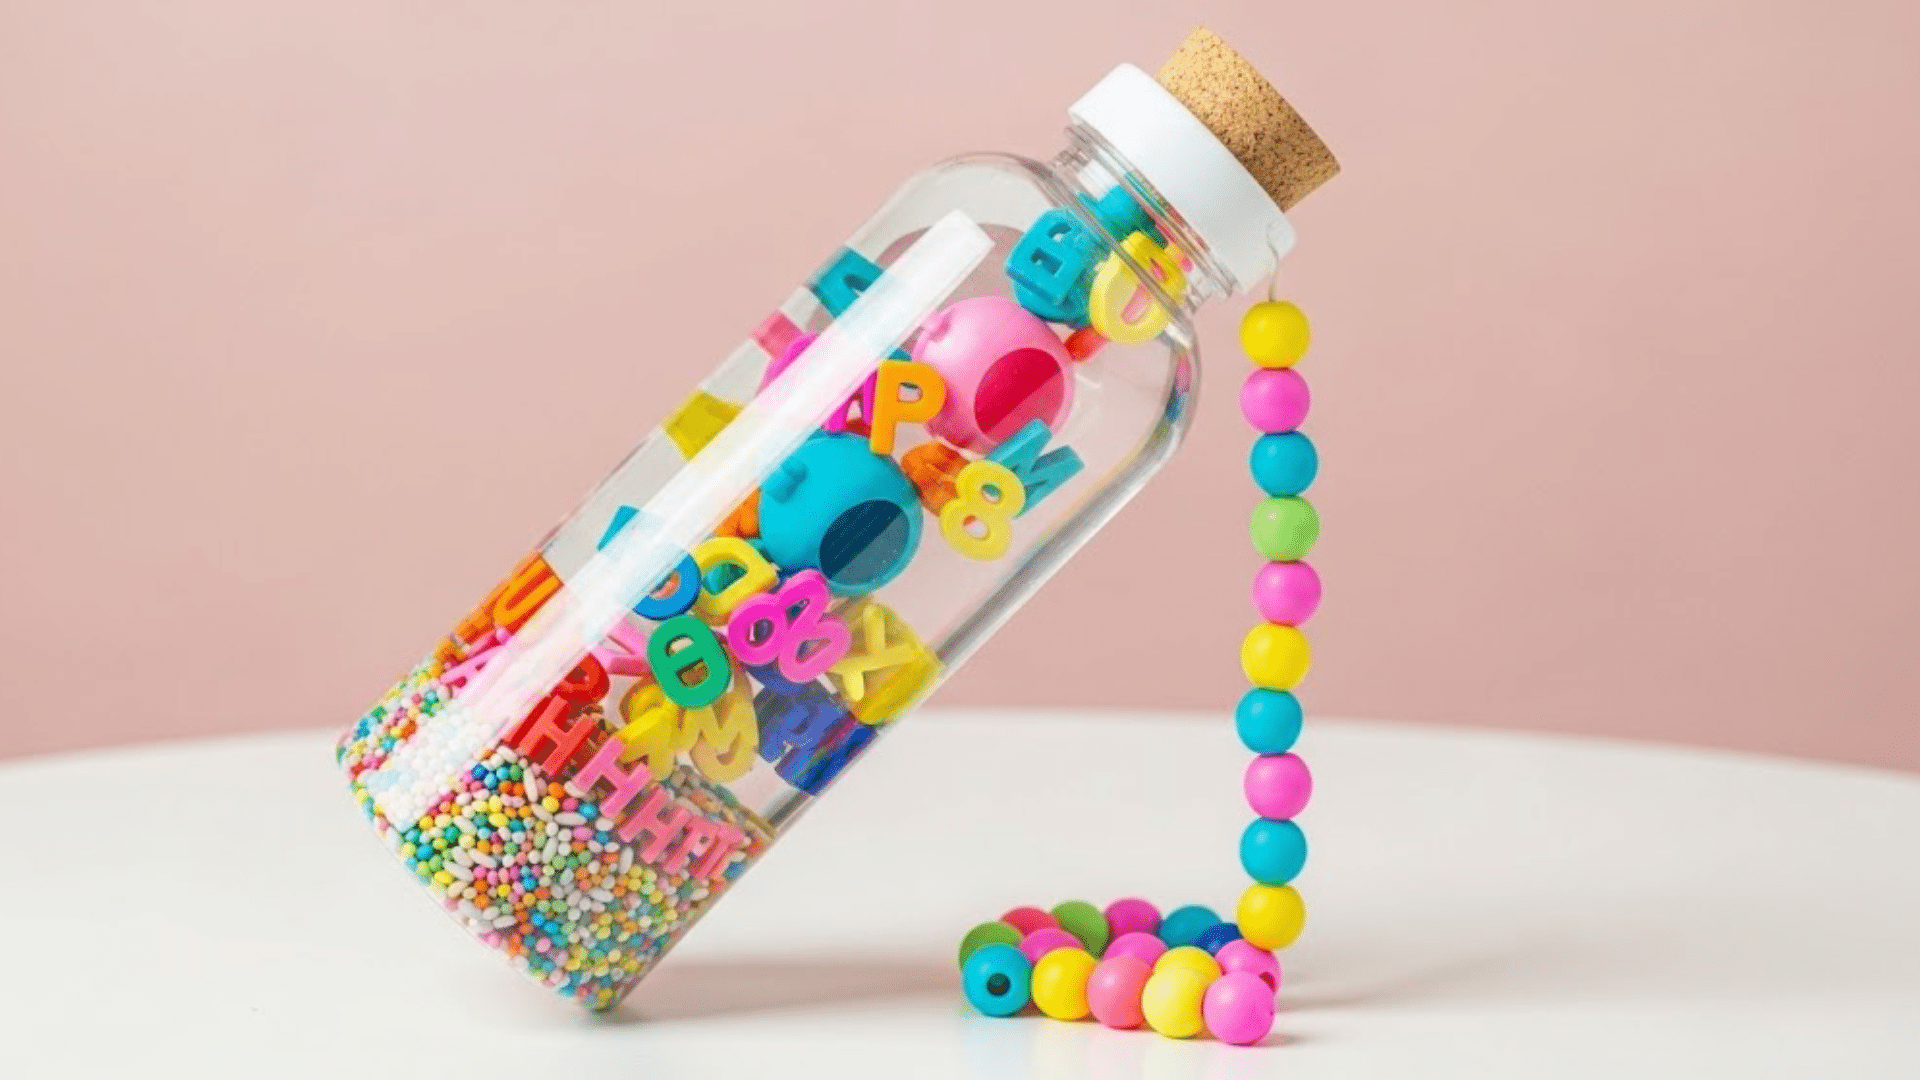
Turn learning letters into an exciting treasure hunt game. Toddlers shake and search for specific letters hidden in the colorful filling.
Theme: Early literacy and letter recognition
Target: Builds pre-reading skills, letter identification, and visual discrimination while making learning fun.
Alphabet Hunt Bottle DIY Steps:
- Mix foam letters with colored rice
- Fill the bottle and seal it tightly
- Call out letters for the toddler to find
7. Lava Lamp Sensory Bottle
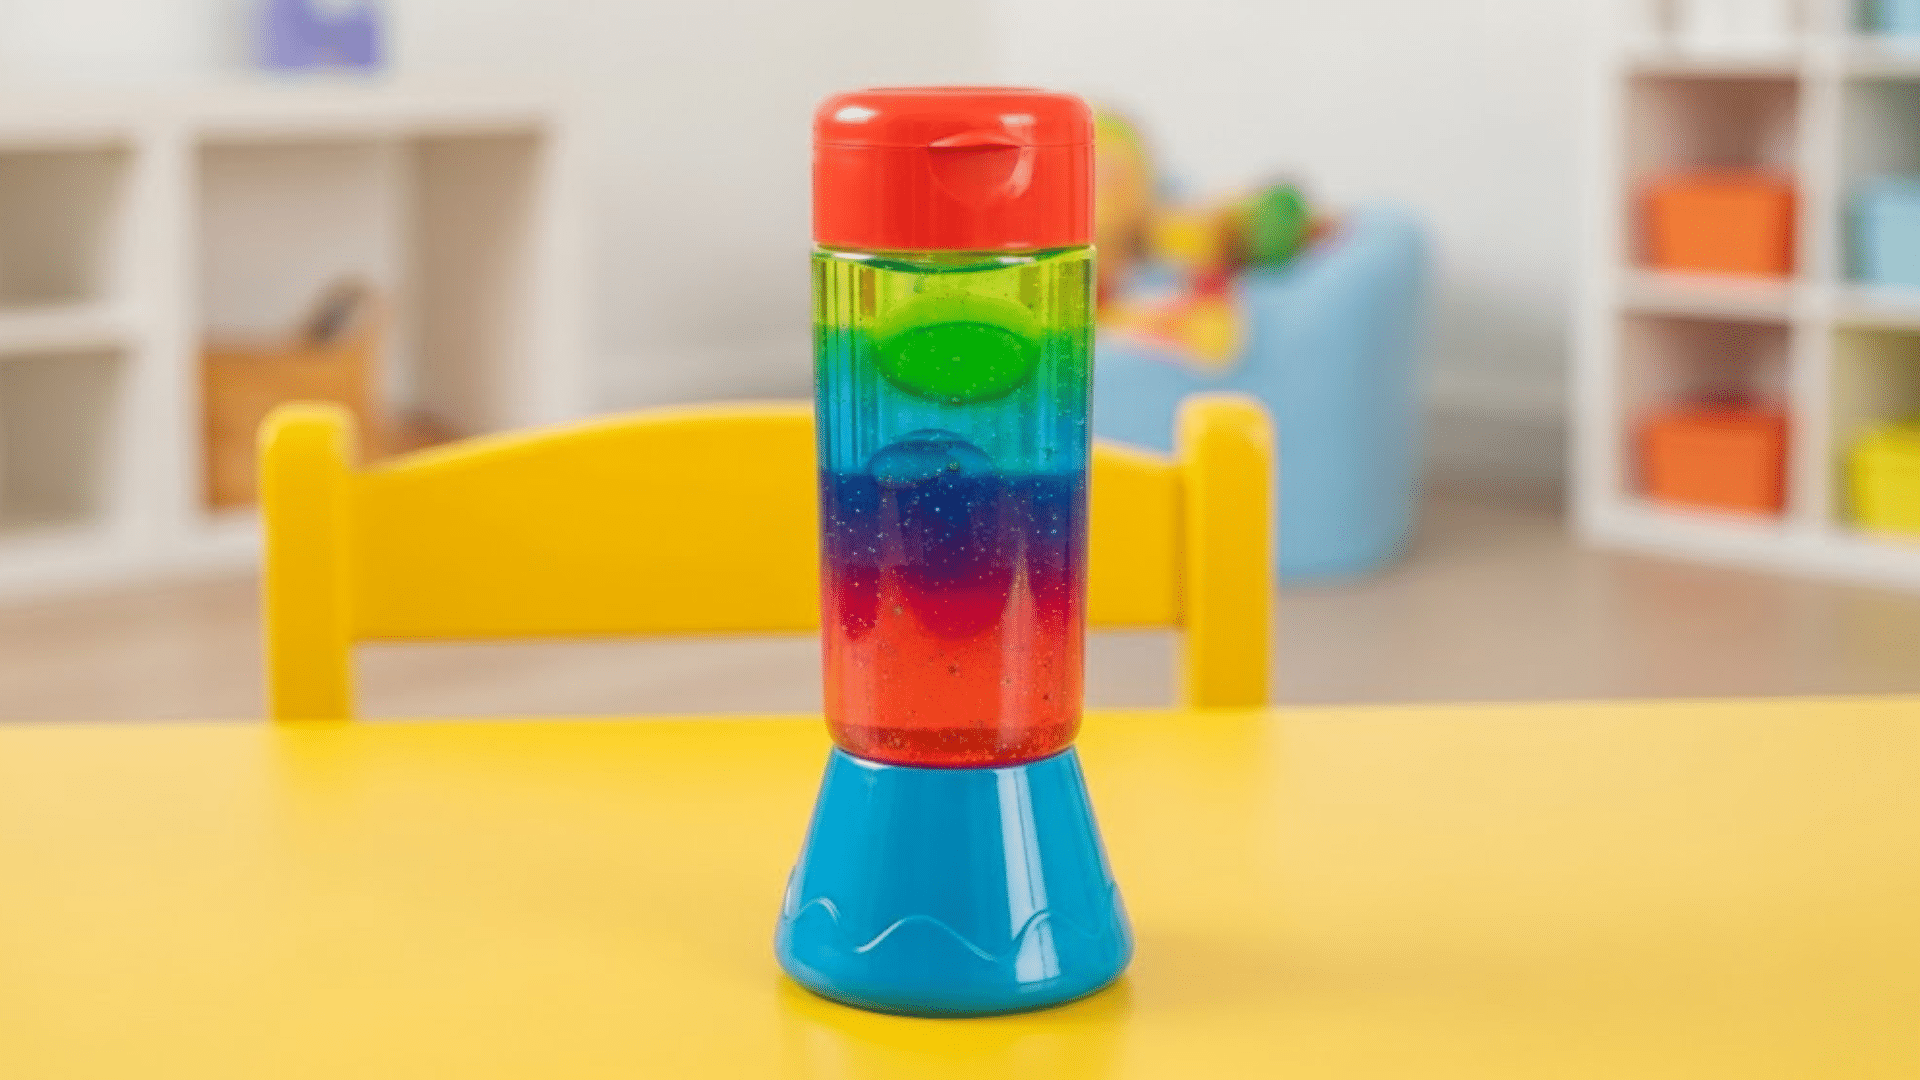
Creates fascinating bubbling action that amazes toddlers with its scientific magic. The separation of oil and water teaches basic science concepts.
Theme: Science and cause-and-effect
Target: Introduces basic chemistry concepts, develops scientific thinking, and provides mesmerizing visual stimulation.
Lava Lamp Sensory Bottle DIY Steps:
- Fill bottle 1/3 with colored water
- Add cooking oil to fill
- Drop in an Alka-Seltzer tablet (adult supervision required)
8. Glow-in-the-Dark Bottle
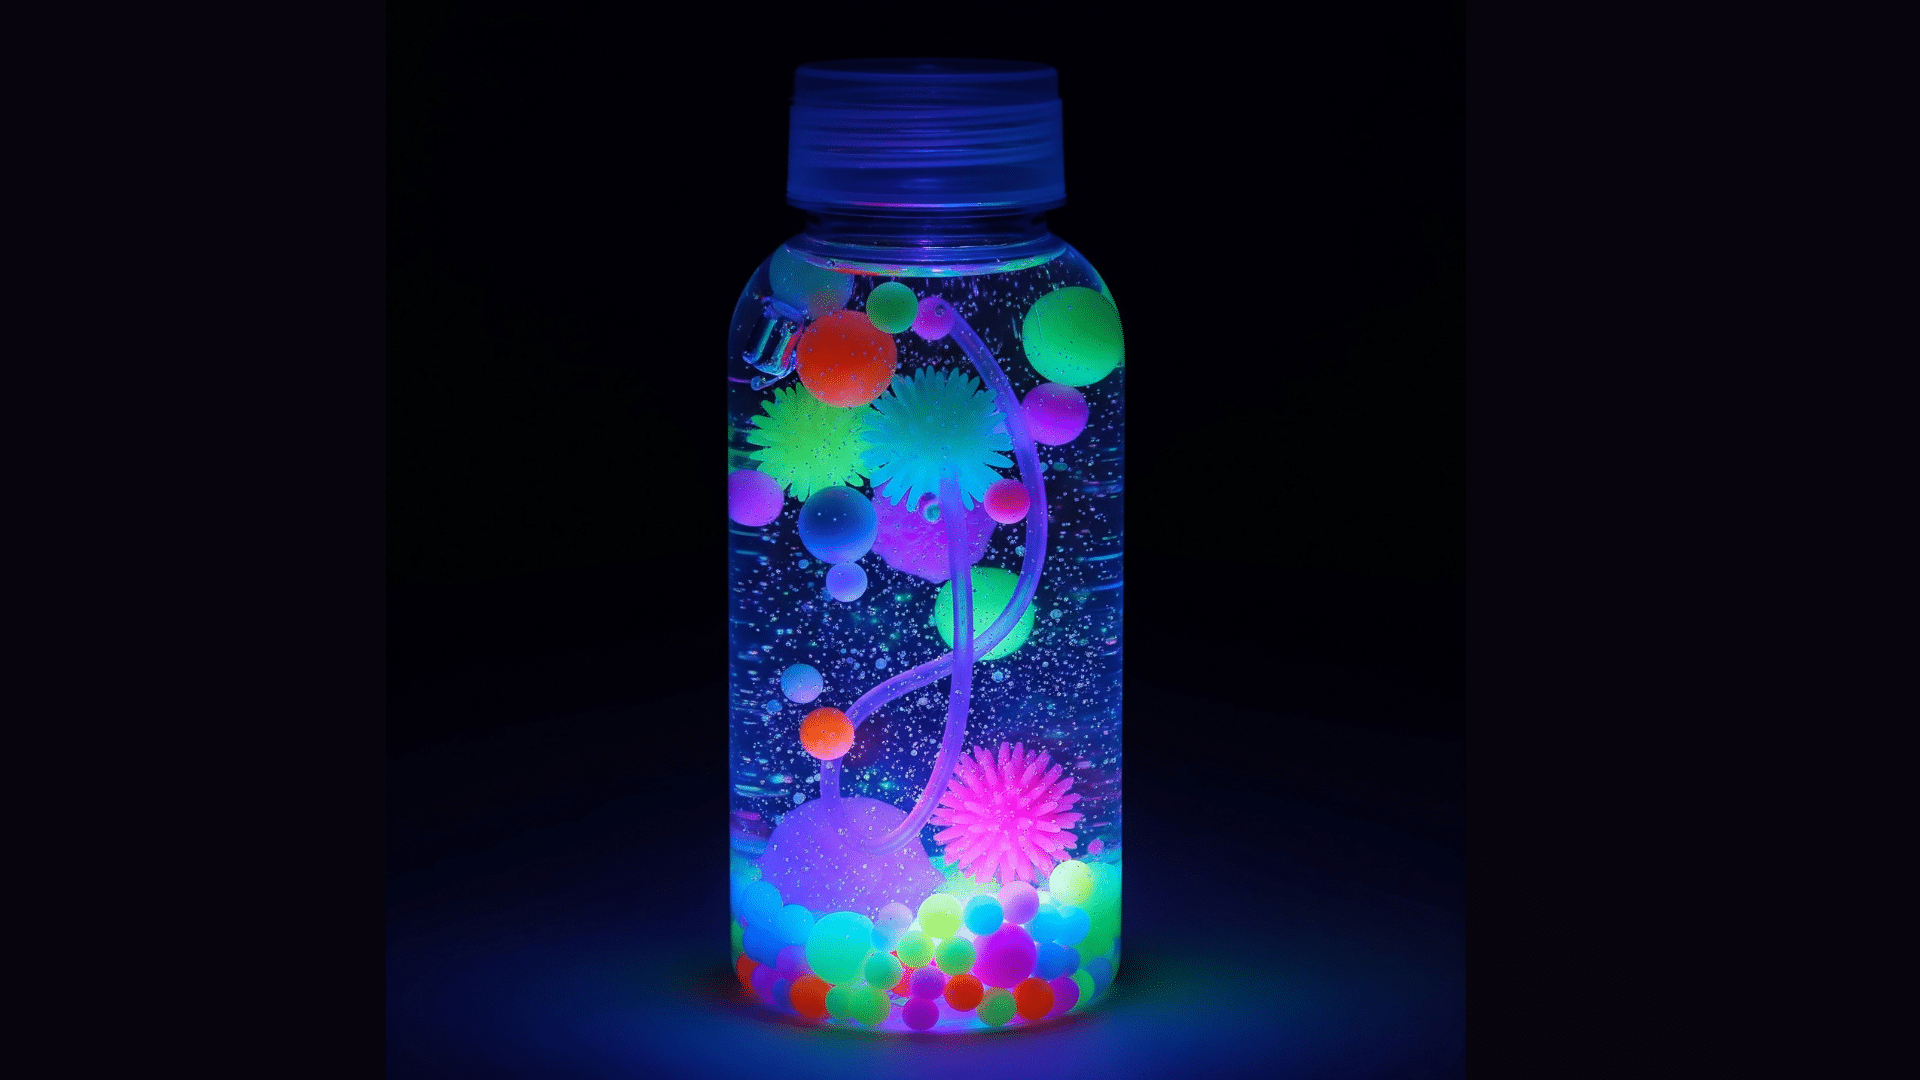
Creates a magical nighttime wonder with glowing elements that shine in the dark. Perfect for bedtime routines or quiet time activities.
Theme: Light and nighttime comfort
Target: Reduces fear of darkness, introduces light concepts, and provides a calming bedtime sensory experience.
Glow-in-the-Dark Bottle DIY Steps:
- Add glow-in-the-dark paint to dark liquid
- Include glow beads or stars
- Charge under light before use
9. Snowstorm Bottle
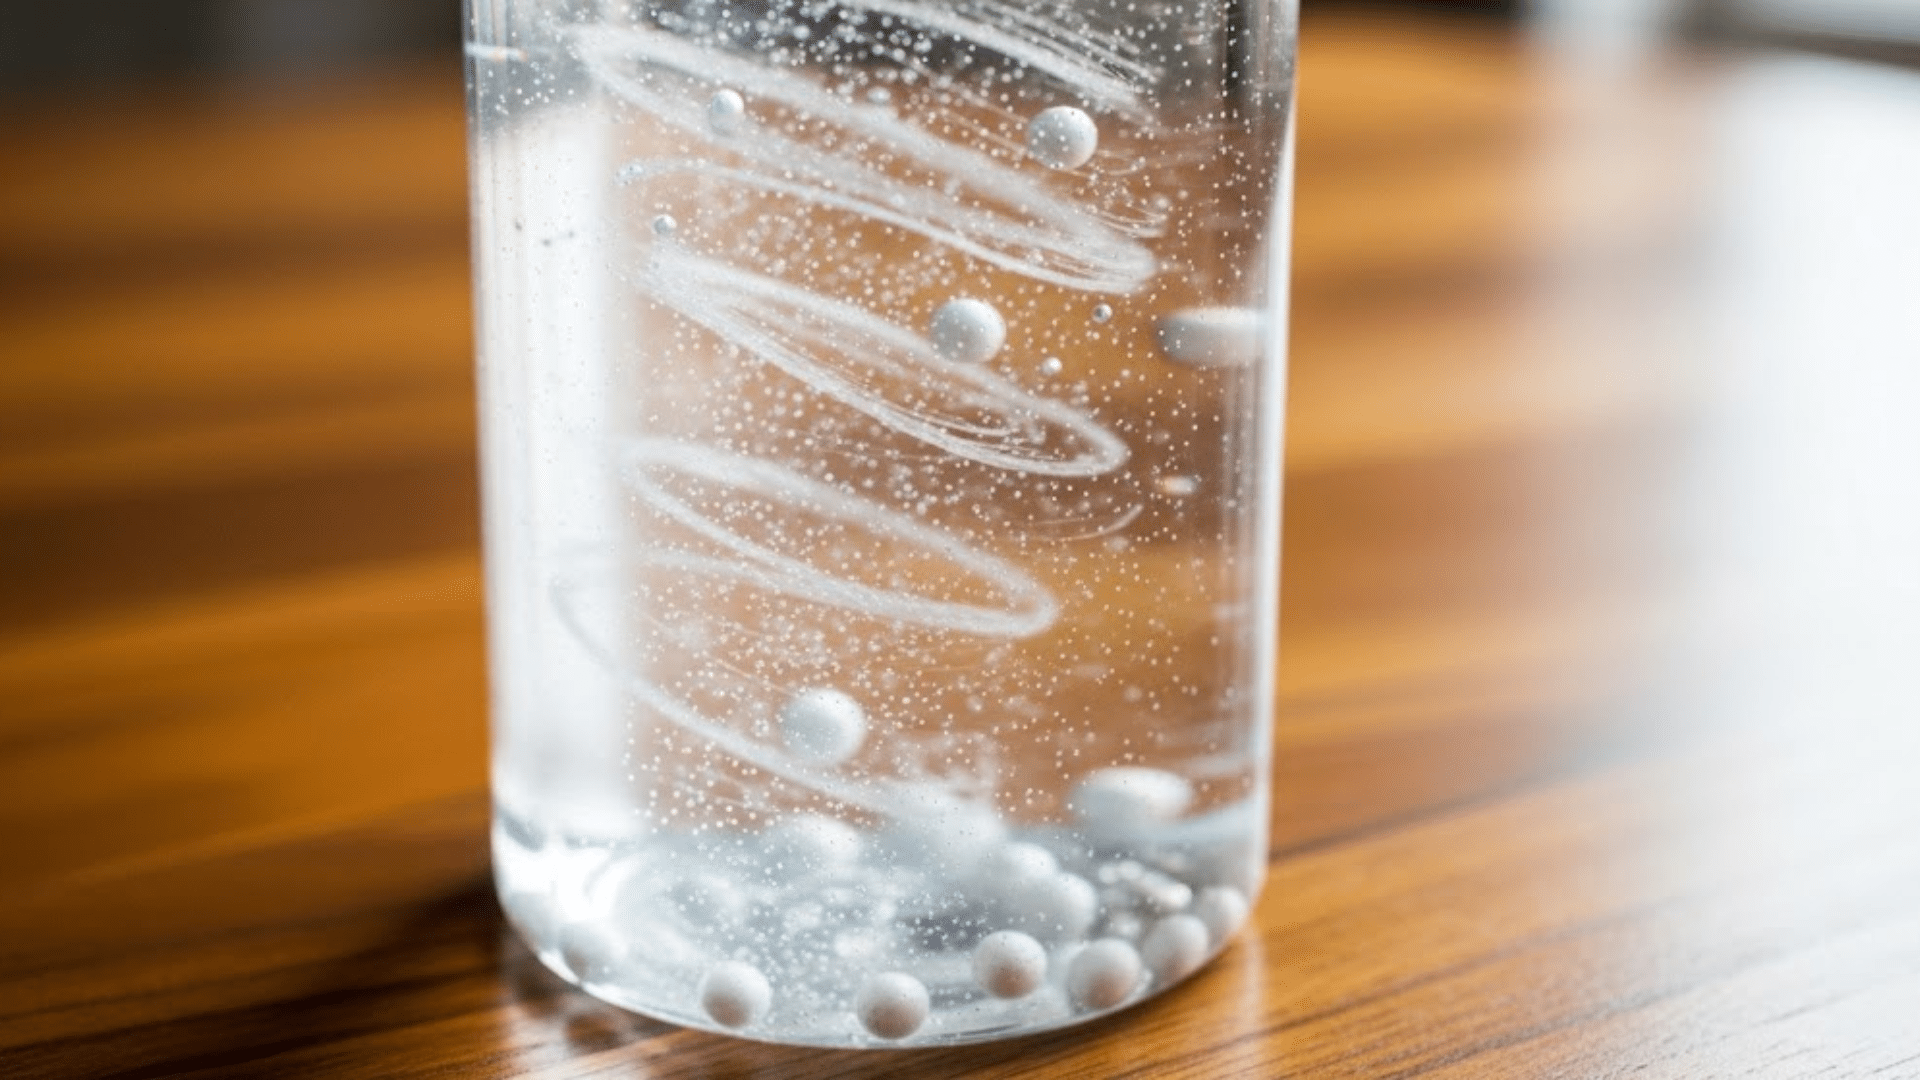
Captures winter magic in a bottle with swirling white glitter that looks like falling snow. Creates a peaceful, wintry scene anytime.
Theme: Weather and seasonal learning
Target: Introduces weather concepts, provides calming visual input, and helps develop patience and focus.
Snowstorm Bottle DIY Steps:
- Mix clear glue with water
- Add white glitter and snowflake confetti
- Seal and shake for a snowstorm effect
10. Bug Safari Bottle
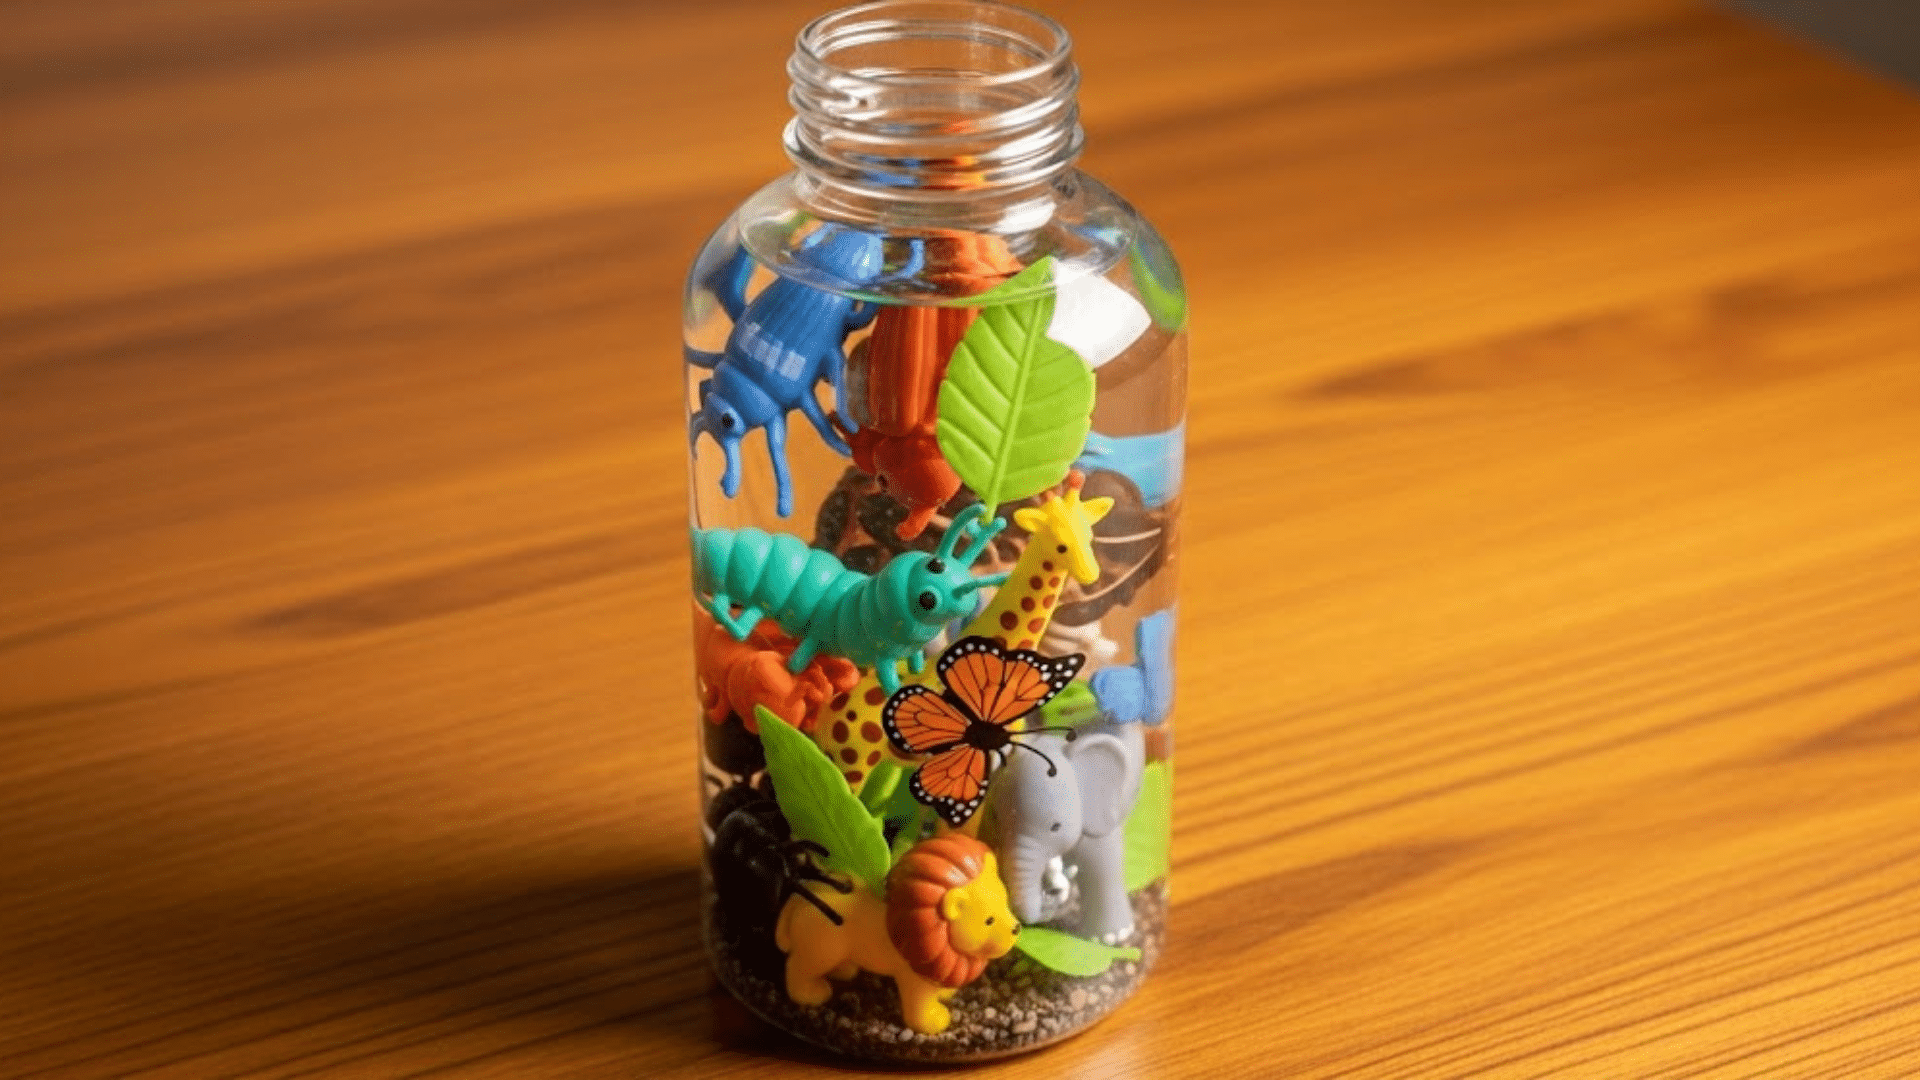
An exciting hunt for hidden insects in the green rice jungle. Toddlers become explorers searching for creepy-crawly creatures.
Theme: Event and insect discovery
Target: Develops searching skills, introduces bug identification, and builds persistence and focus through play.
Bug Safari Bottle DIY Steps:
- Dye rice green and let it dry
- Hide minor plastic bugs in rice
- Fill the bottle and seal for shaking adventures
11. Confetti Celebration Bottle
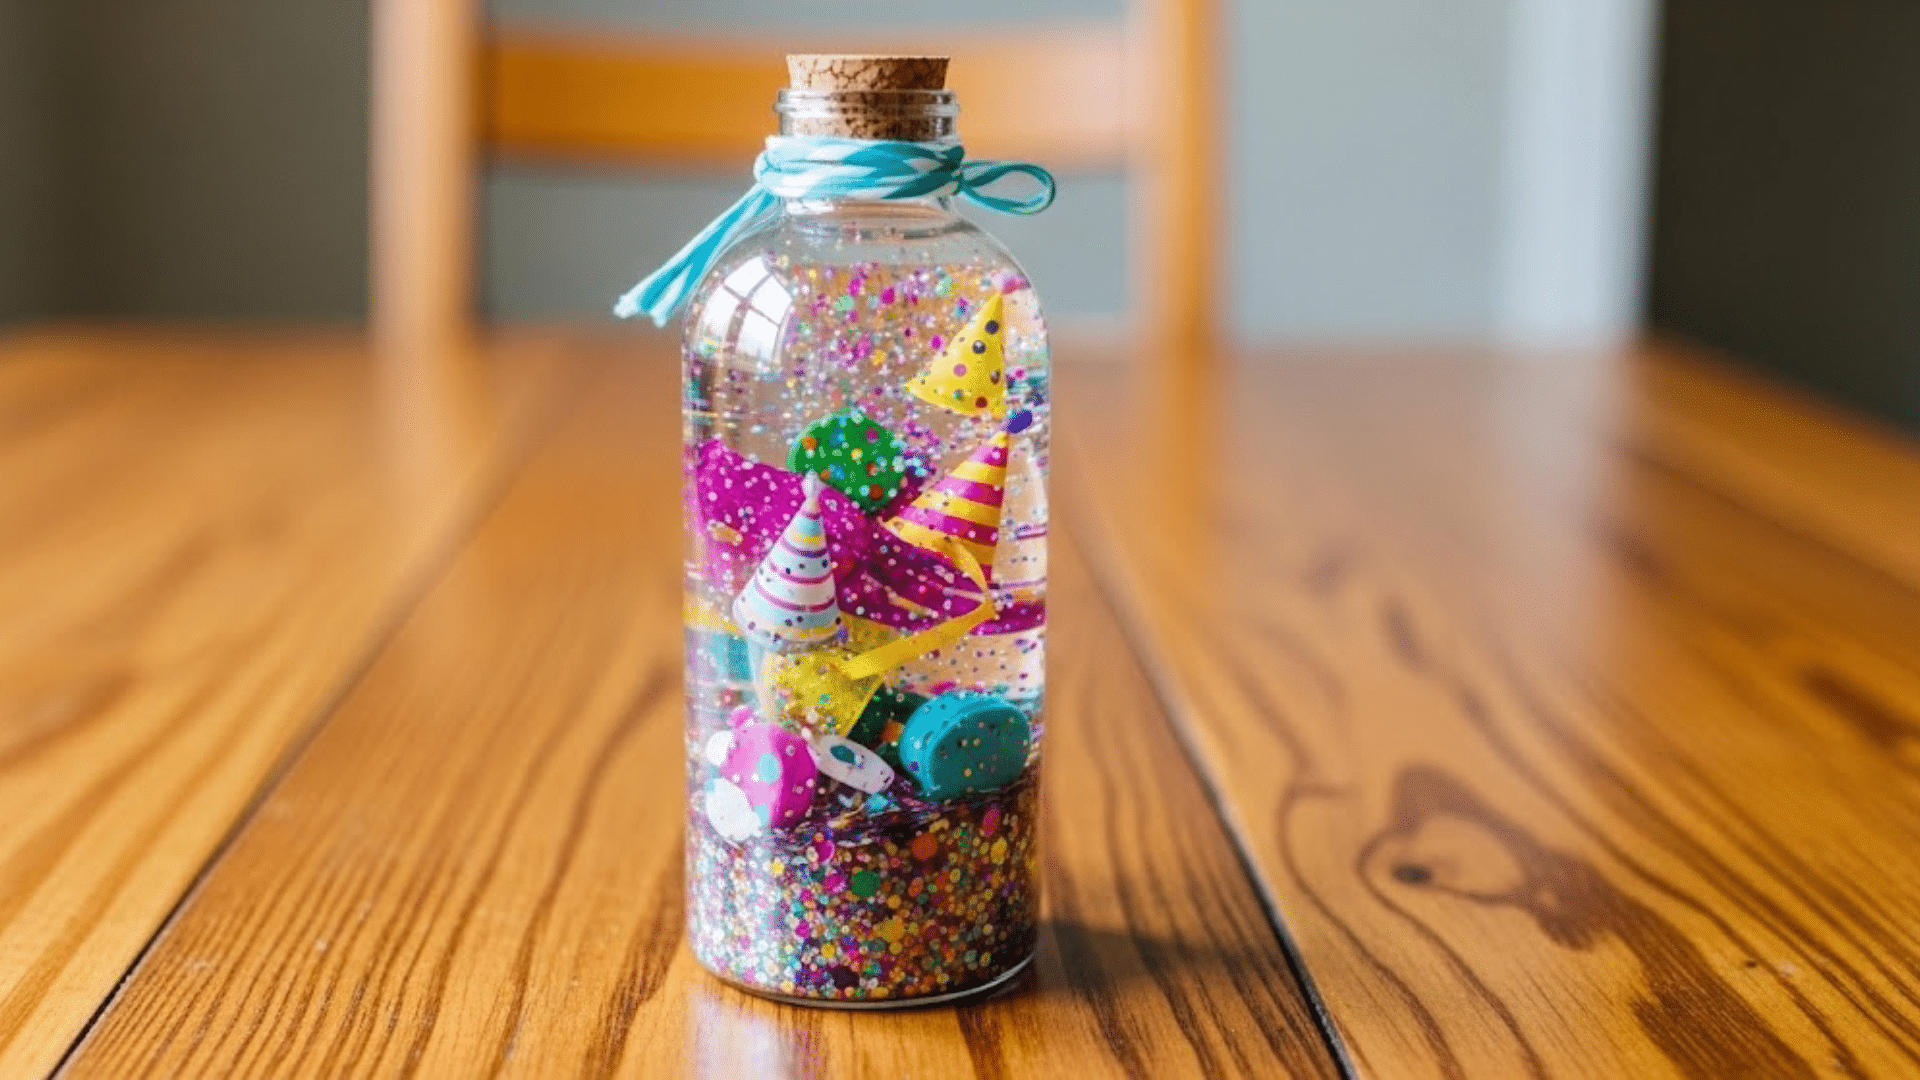
Brings party excitement with dancing confetti and sparkly sequins. Every shake creates a joyful celebration that lifts spirits.
Theme: Joy and celebration
Target: Promotes positive emotions, develops gross motor skills through shaking, and provides happy sensory stimulation.
Confetti Celebration Bottle DIY Steps:
- Fill the bottle with bright confetti and sequins
- Add a small amount of clear liquid
- Seal tightly for safe celebration, shaking
12. Color Mixing Bottle
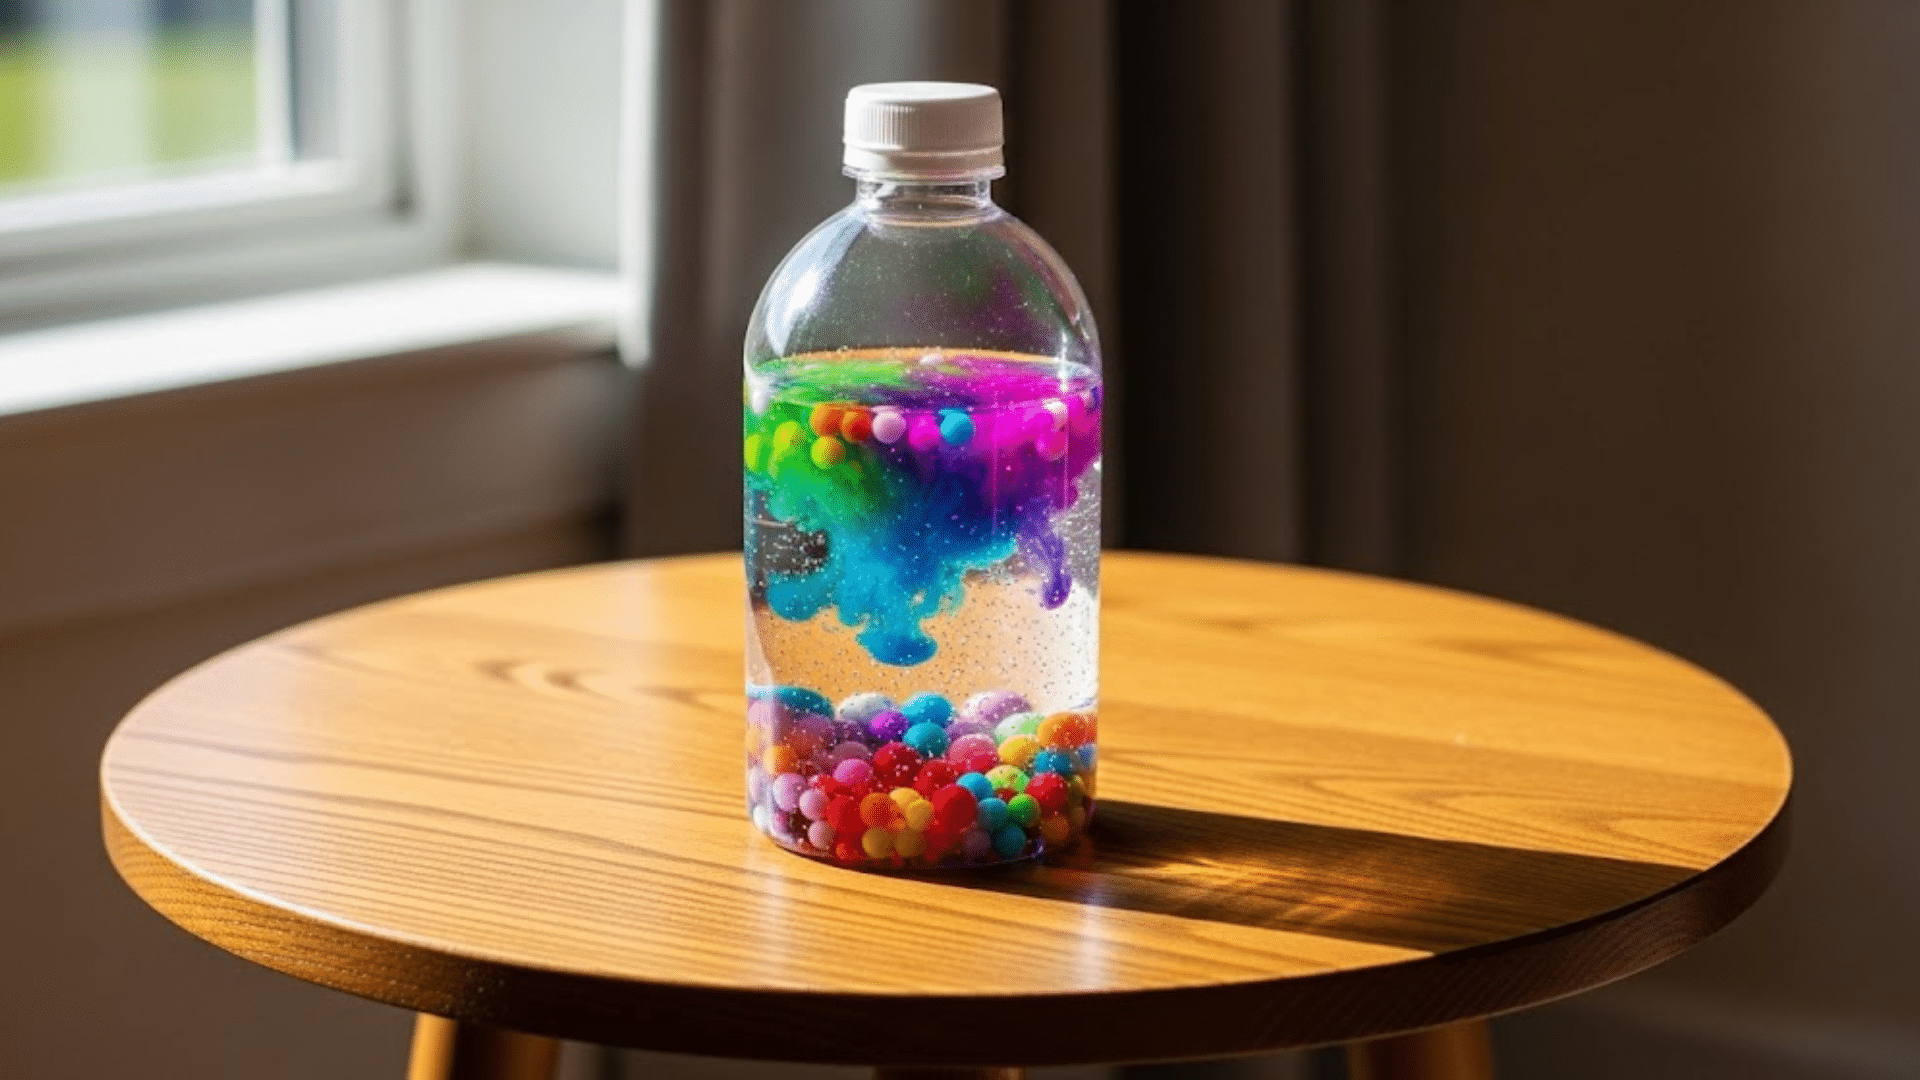
A magical science experiment that shows how colors blend together. Red and yellow combine to form orange right before toddlers’ amazed eyes.
Theme: Science and color theory
Target: Teaches color mixing concepts, develops scientific observation skills, and introduces basic chemistry principles.
Color Mixing Bottle DIY Steps:
- Add primary colored liquids (oil-based food coloring)
- Leave air space for mixing
- Shake and watch colors transform
13. Musical Shaker Bottle
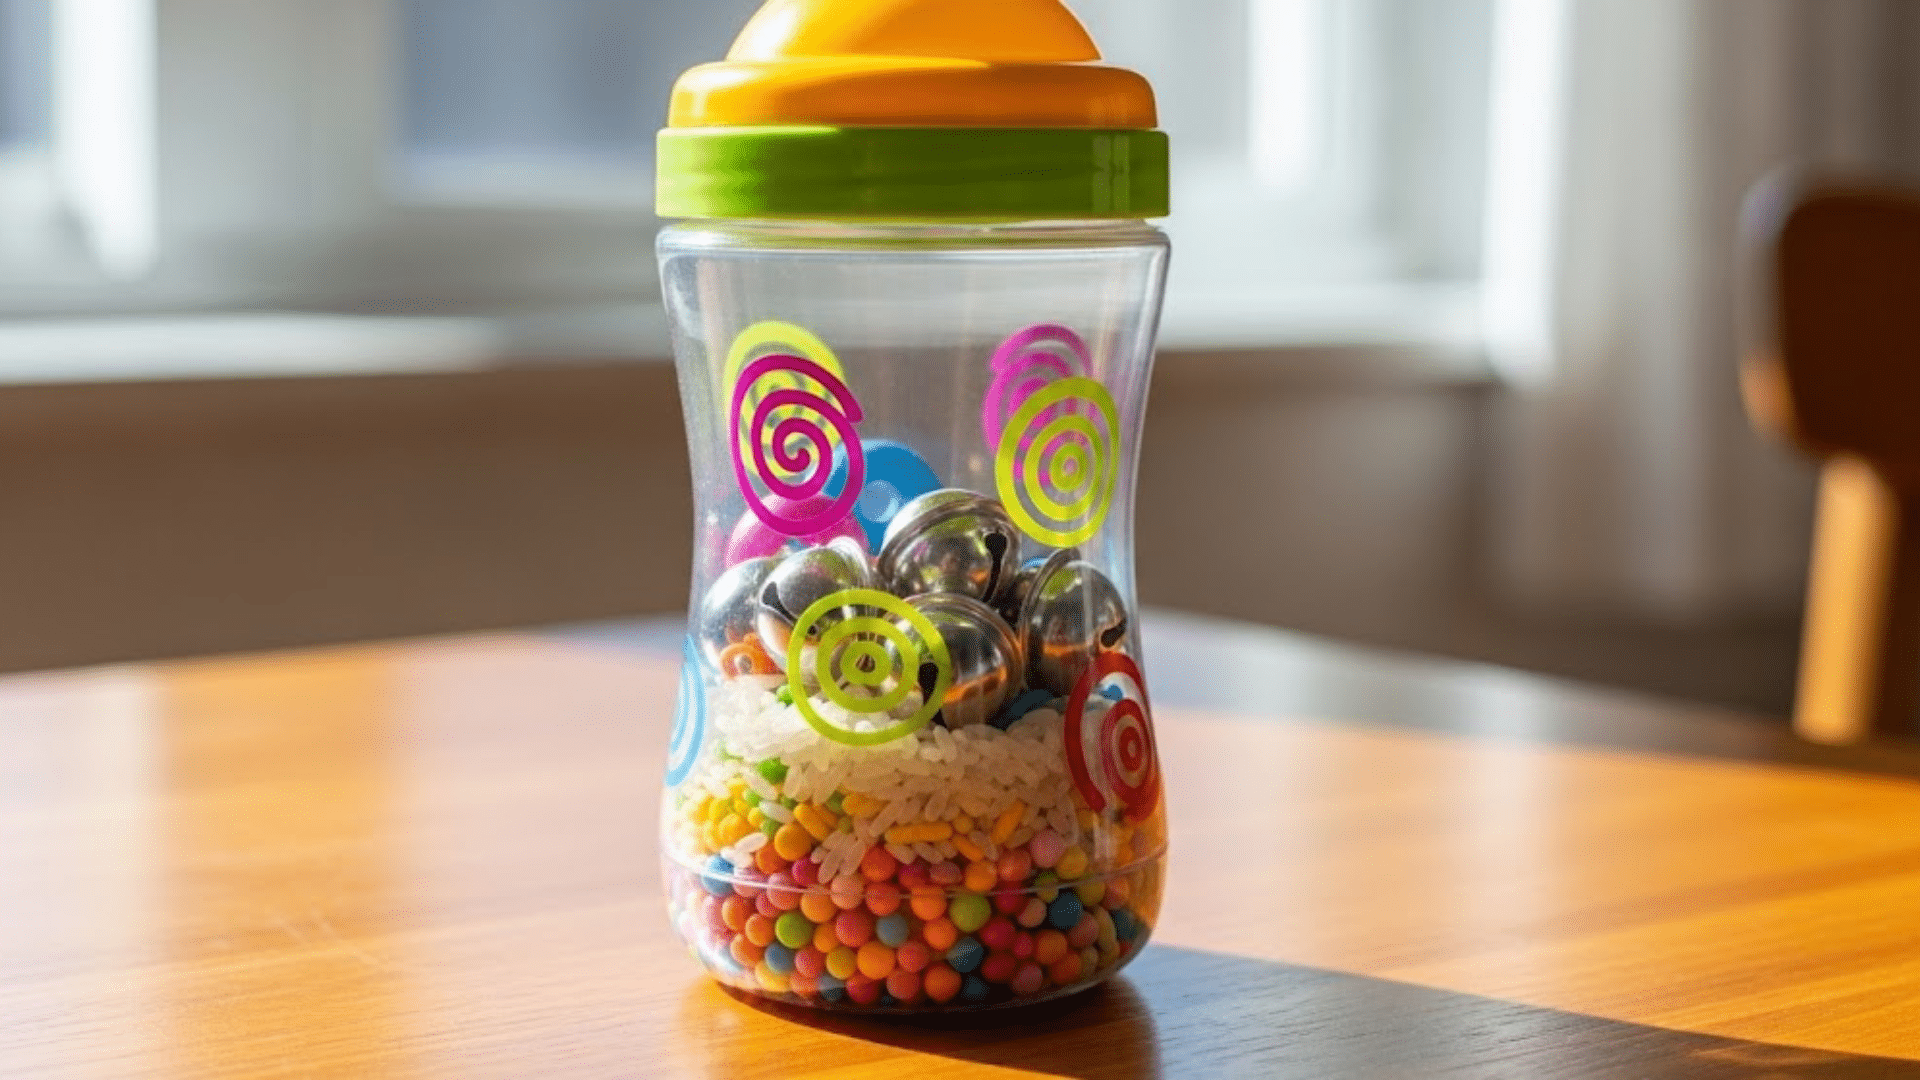
Different materials create unique sounds when shaken, ranging from the gentle tinkling of bells to the rattling of pasta. Each bottle becomes a musical instrument.
Theme: Sound and music making
Target: Develops auditory discrimination, introduces rhythm concepts, and enhances listening skills through sound play.
Musical Shaker Bottle DIY Steps:
- Choose sound makers: bells, pasta, beads, rice
- Fill the bottle with selected materials
- Test different amounts for the desired sound level
How to Rotate Sensory Bottles for Continued Engagement
Regular rotation ensures sensory play remains engaging and meaningful. To maximize developmental benefits and maintain toddler interest, rotate sensory bottles regularly using these simple strategies:
1. Switch Bottles Weekly: Introduce 1-2 new bottles each week, storing the others in a separate location. This keeps the experience novel and helps toddlers rediscover favorites with renewed curiosity.
2. Use Themed Storage: Store unused bottles in labeled bins by theme, such as “Ocean,” “Colors,” “Calming,” or “Alphabet.” This organization makes it easy to choose bottles based on current learning topics or interests.
3. Integrate into Daily Routines: Use specific bottles at set times, such as glitter bottles for calm-down moments before naps or musical bottles during morning activities. This builds consistency and helps toddlers transition between activities.
Bottom Line
Sensory bottles for toddlers transform simple materials into powerful learning tools that calm, entertain, and educate young minds effectively. These homemade creations support essential developmental skills while providing hours of safe engagement daily.
From glittery, calm bottles to alphabet hunts, each design offers unique benefits for growing children everywhere.
With proper safety measures and regular rotation, these bottles become treasured companions for car rides, quiet time, and emotional regulation.
Ready to create magic for your little one? Start crafting these incredible sensory bottles today and watch your toddler’s curiosity flourish beautifully.