Looking for easy drawing techniques without complicated steps? Many beginners feel stuck when trying to sketch creatures with multiple legs and details. Drawing scorpions seems tricky with their curved tails and pincer claws.
Artists can create impressive drawings with just a few simple techniques. This guide shows how to break down scorpion anatomy into basic shapes that anyone can draw.
Readers will learn how to sketch step by step, from body outline to finishing touches. These scorpion easy drawing methods work with regular pencils and paper – no fancy art supplies needed.
Artists ready to try their hand at this craft can keep reading to learn five practical techniques that will help them draw these fascinating creatures with confidence, even if they’ve never picked up a pencil before.
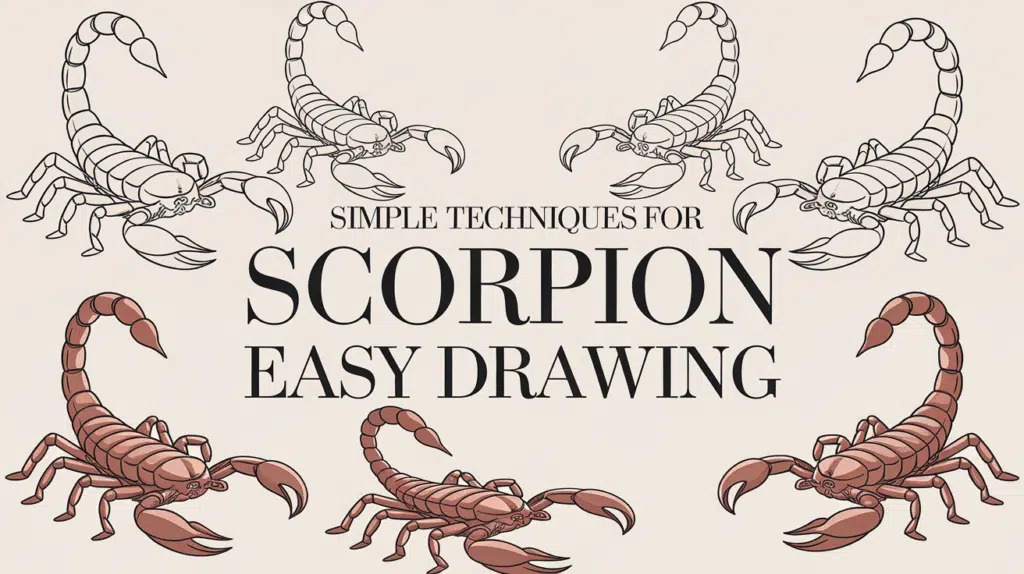
Best Tips for Scorpion Easy Drawing
Artists can improve their scorpion easy drawing skills with several helpful tips. These methods make the process simpler for beginners and help create more realistic results.
The following techniques break down the complex structure of a scorpion into manageable parts that anyone can draw with practice.
1. Basic shapes: Artists should start with simple ovals and circles. One oval forms the body, a circle creates the head, and smaller circles make the joints for legs. This foundation makes scorpion easy drawing much more approachable for beginners.
2. Step-by-step process: Drawing each part separately helps artists stay organized. They can start with the main body, add the head, then work on the legs and tail. This method prevents feeling overwhelmed by the whole scorpion at once.
3. Light sketching: Beginning with light pencil strokes allows for easy corrections. Artists can gradually darken lines as the drawing takes better shape. This technique gives freedom to adjust proportions throughout the process.
4. Reference images: Looking at actual scorpion photos helps artists understand their structure. They can notice important details like leg positioning and tail curves. References improve accuracy without making the drawing too complex.
5. Practice segments: Focusing on one part of the scorpion at a time builds confidence. Artists might spend time just drawing pincers or tails before putting everything together. This approach makes each component feel more manageable
Drawing a Scorpion: Simple Techniques Explained
Drawing a scorpion can seem tricky at first, but with the right approach, you’ll find it’s much easier than it looks. By following these simple steps, you’ll create a detailed scorpion with distinct features like the body, claws, and tail.
All you need are a few basic drawing tools, a bit of patience, and some focus on shape and proportion. Let’s dive in!
Step 1: Draw the Scorpion’s Body Outline
Materials Required:
| Material | Purpose |
|---|---|
| Pencil | For initial sketching |
| Eraser | To remove any unwanted lines |
| Ink Pen | For outlining the drawing |
| Colored Pencils/Markers | To add color and shading |
| Ruler | Optional, for straight lines |
| Reference Image (Optional) | To ensure accuracy |
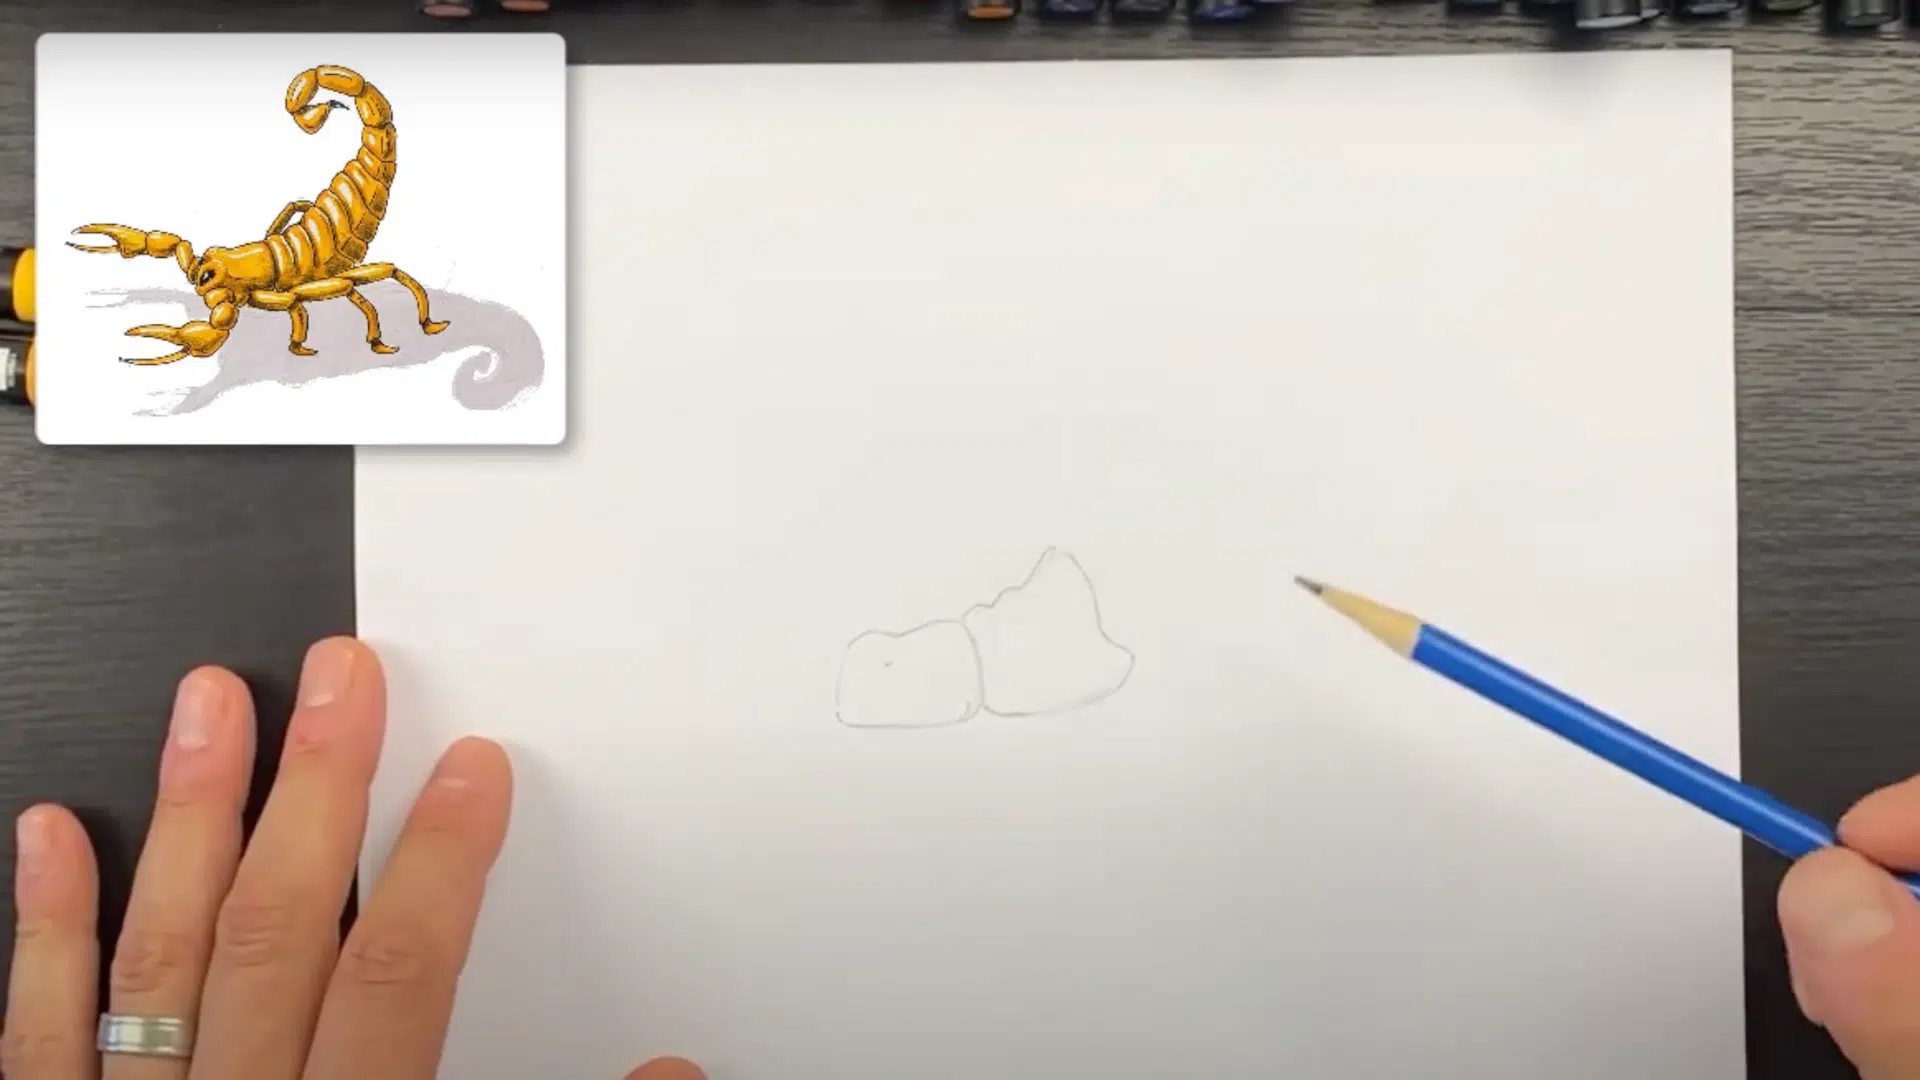
Start by sketching a horizontal line to represent the main body of the scorpion. From this base line, draw two small bumps; one near the front and one in the middle.
Then, draw a larger bump at the back to form the scorpion’s abdomen. This will be the first segment, which should curve slightly upward.
- The body should be slightly wider at the back.
- Ensure the bumps are evenly spaced to maintain proportion.
Step 2: Shape the Body’s Upper Part
From the body’s top, draw a curved line angling upward, creating a slight bump in the middle. This curved line should start from the widest part of the oval body and extend forward, rising at approximately a 30-degree angle.
Make sure to create a noticeable bump or small mound in the middle of this line, as this represents the distinction between the scorpion’s cephalothorax and its front body segment.
Step 3: Draw the Claws
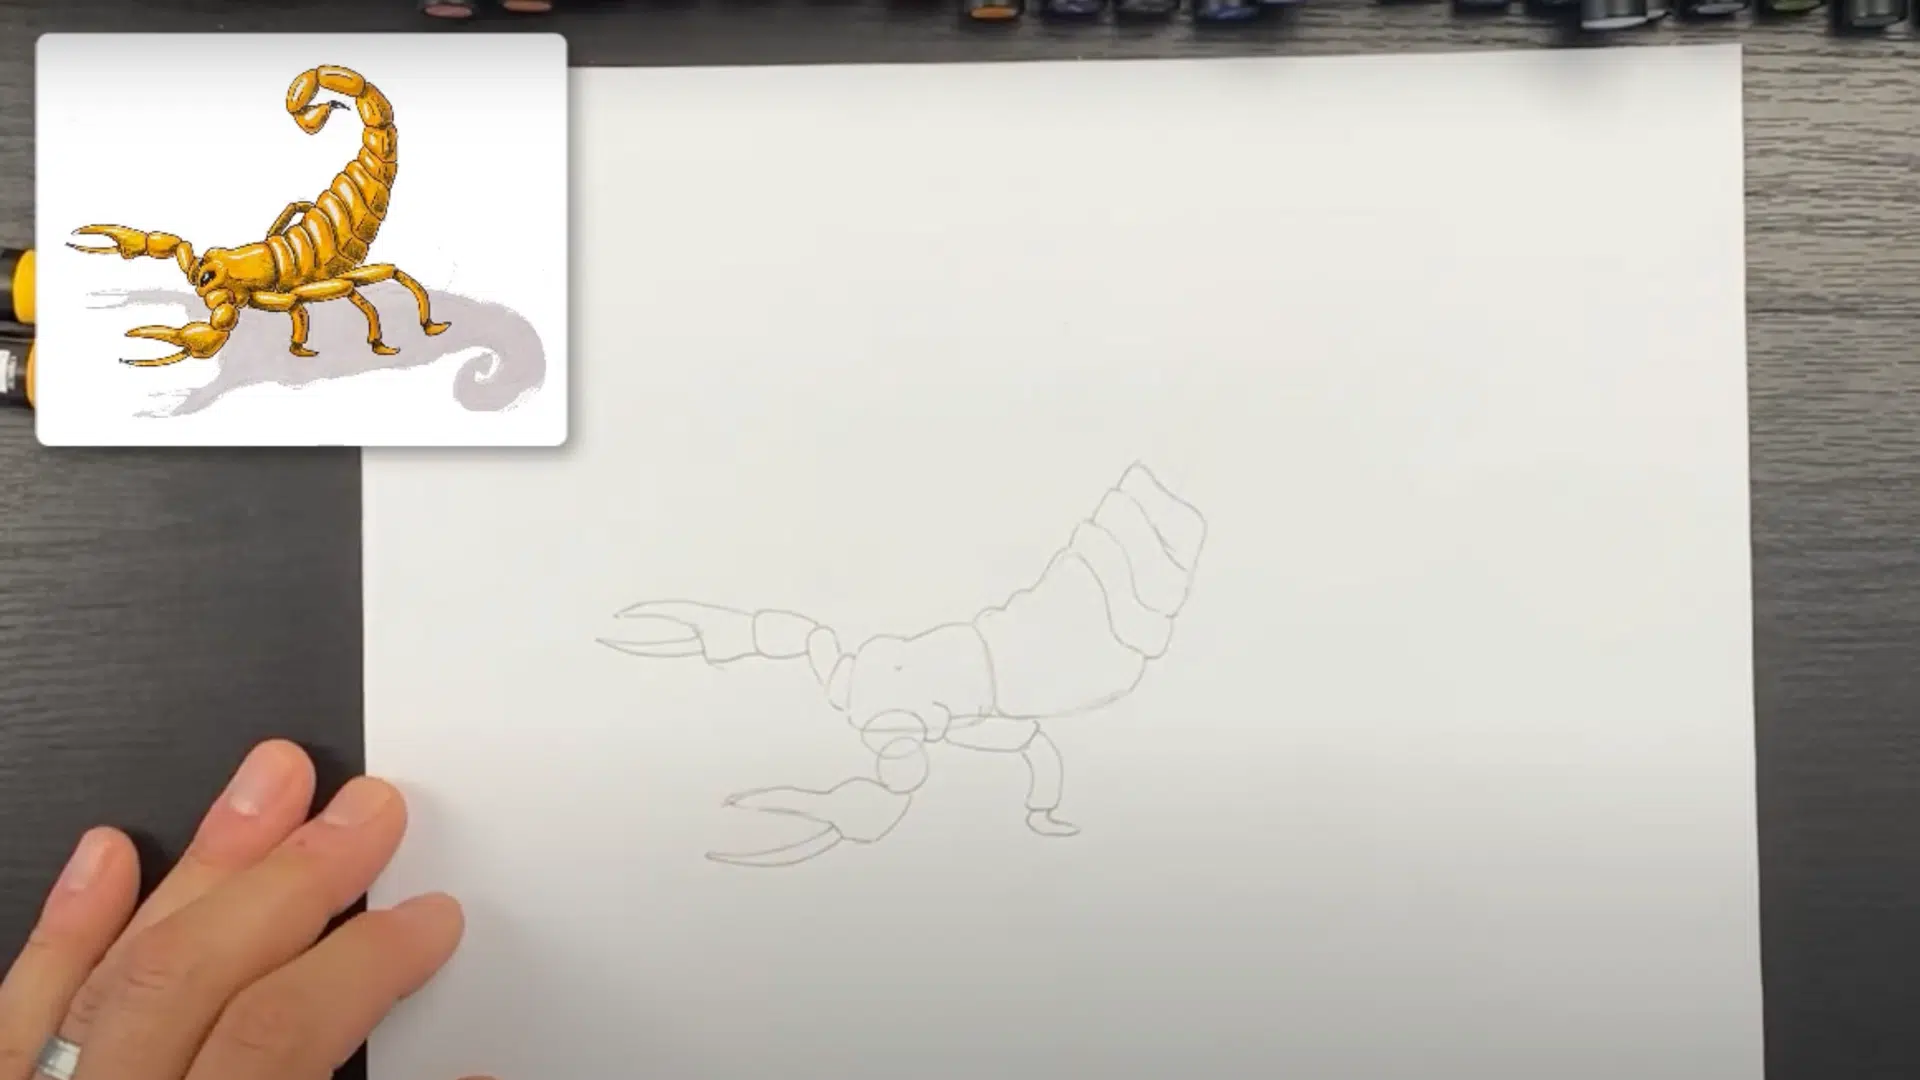
For the scorpion’s claws, start by drawing a circular, elliptical shape for the upper part of the claw, making it about one-third the size of the main body to maintain proper proportions.
From this rounded segment, draw another curve that reaches outward and back toward the main body, creating the elongated middle section of the appendage that connects the body to the pincers.
Step 4: Add the Legs

Begin by drawing the first leg from the middle of the body. Draw a backward C-shape, followed by a rectangle that is rounded on one end. The leg should point diagonally downward.
Repeat for the other legs on both sides of the scorpion’s body, making sure each leg tapers as it extends.
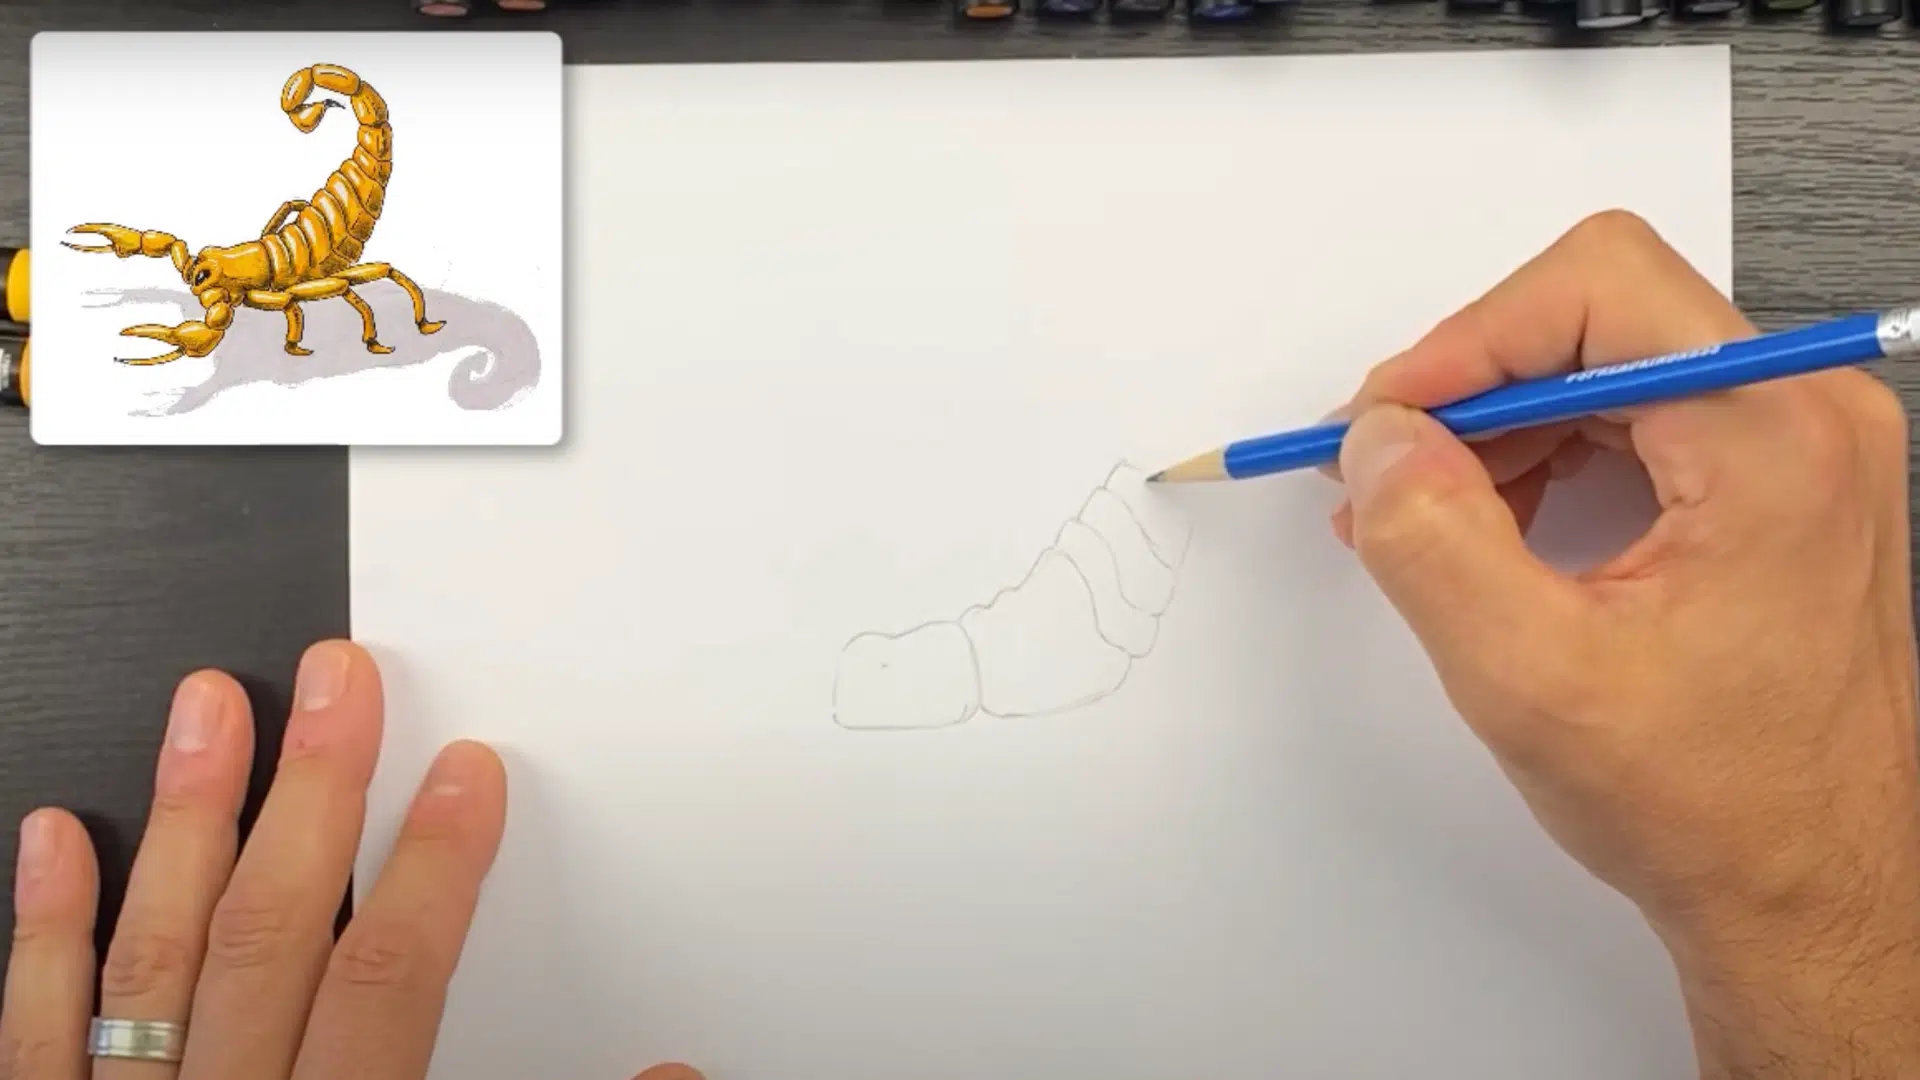
Step 5: Shape the Tail
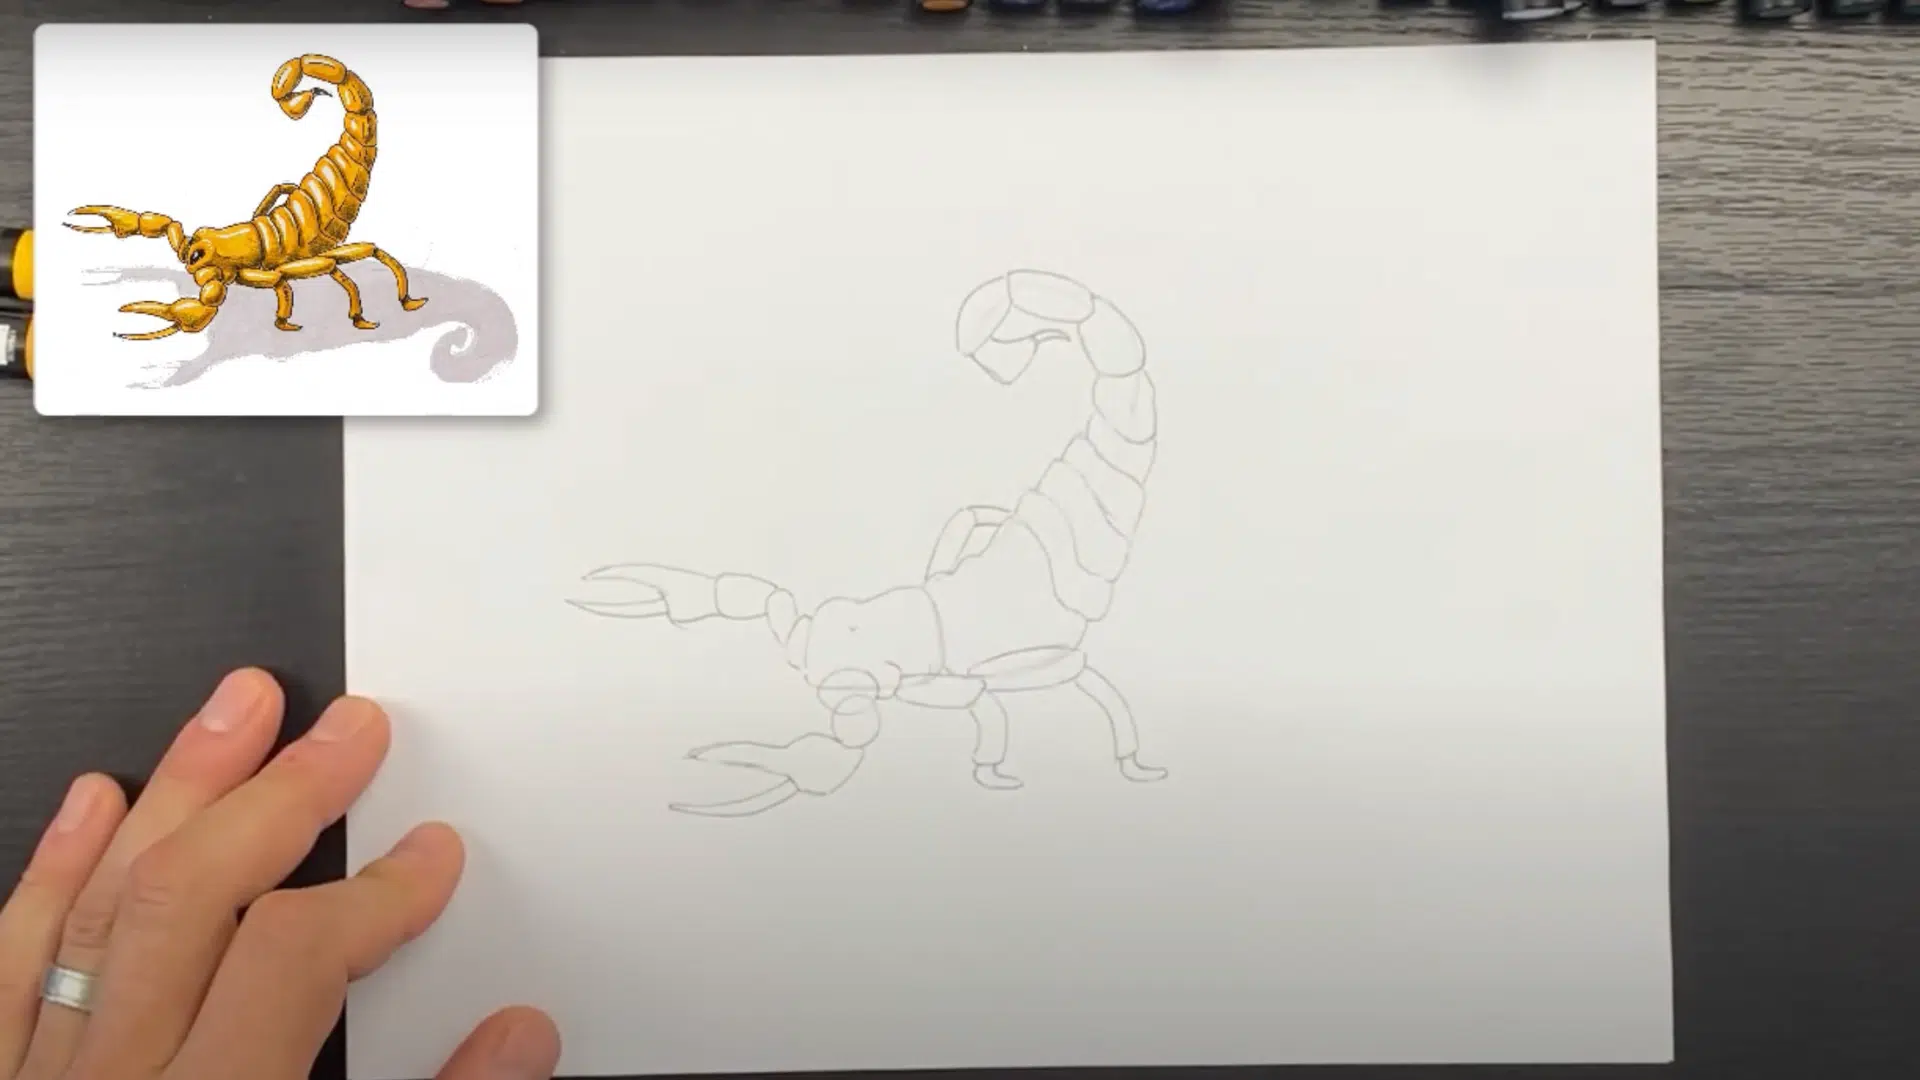
Begin by drawing a curving line from the back of the body to form the scorpion’s tail. This tail should consist of several segments, each curving slightly upward. With each segment, make the curve sharper as you move toward the end.
- Extend each segment slightly longer than the one before it.
- End the tail with a pointed stinger, ensuring it has a thick, sharp shape.
Step 6: Add the Eyes
Draw two small circular shapes on the scorpion’s head for the eyes, keeping them approximately the same size to ensure a balanced appearance.
Place them symmetrically on each side of the head near the top, positioned slightly forward to give the scorpion its characteristic alert look. The eyes should be small enough to be proportionate to the head but large enough to be distinguishable from the rest of the features.
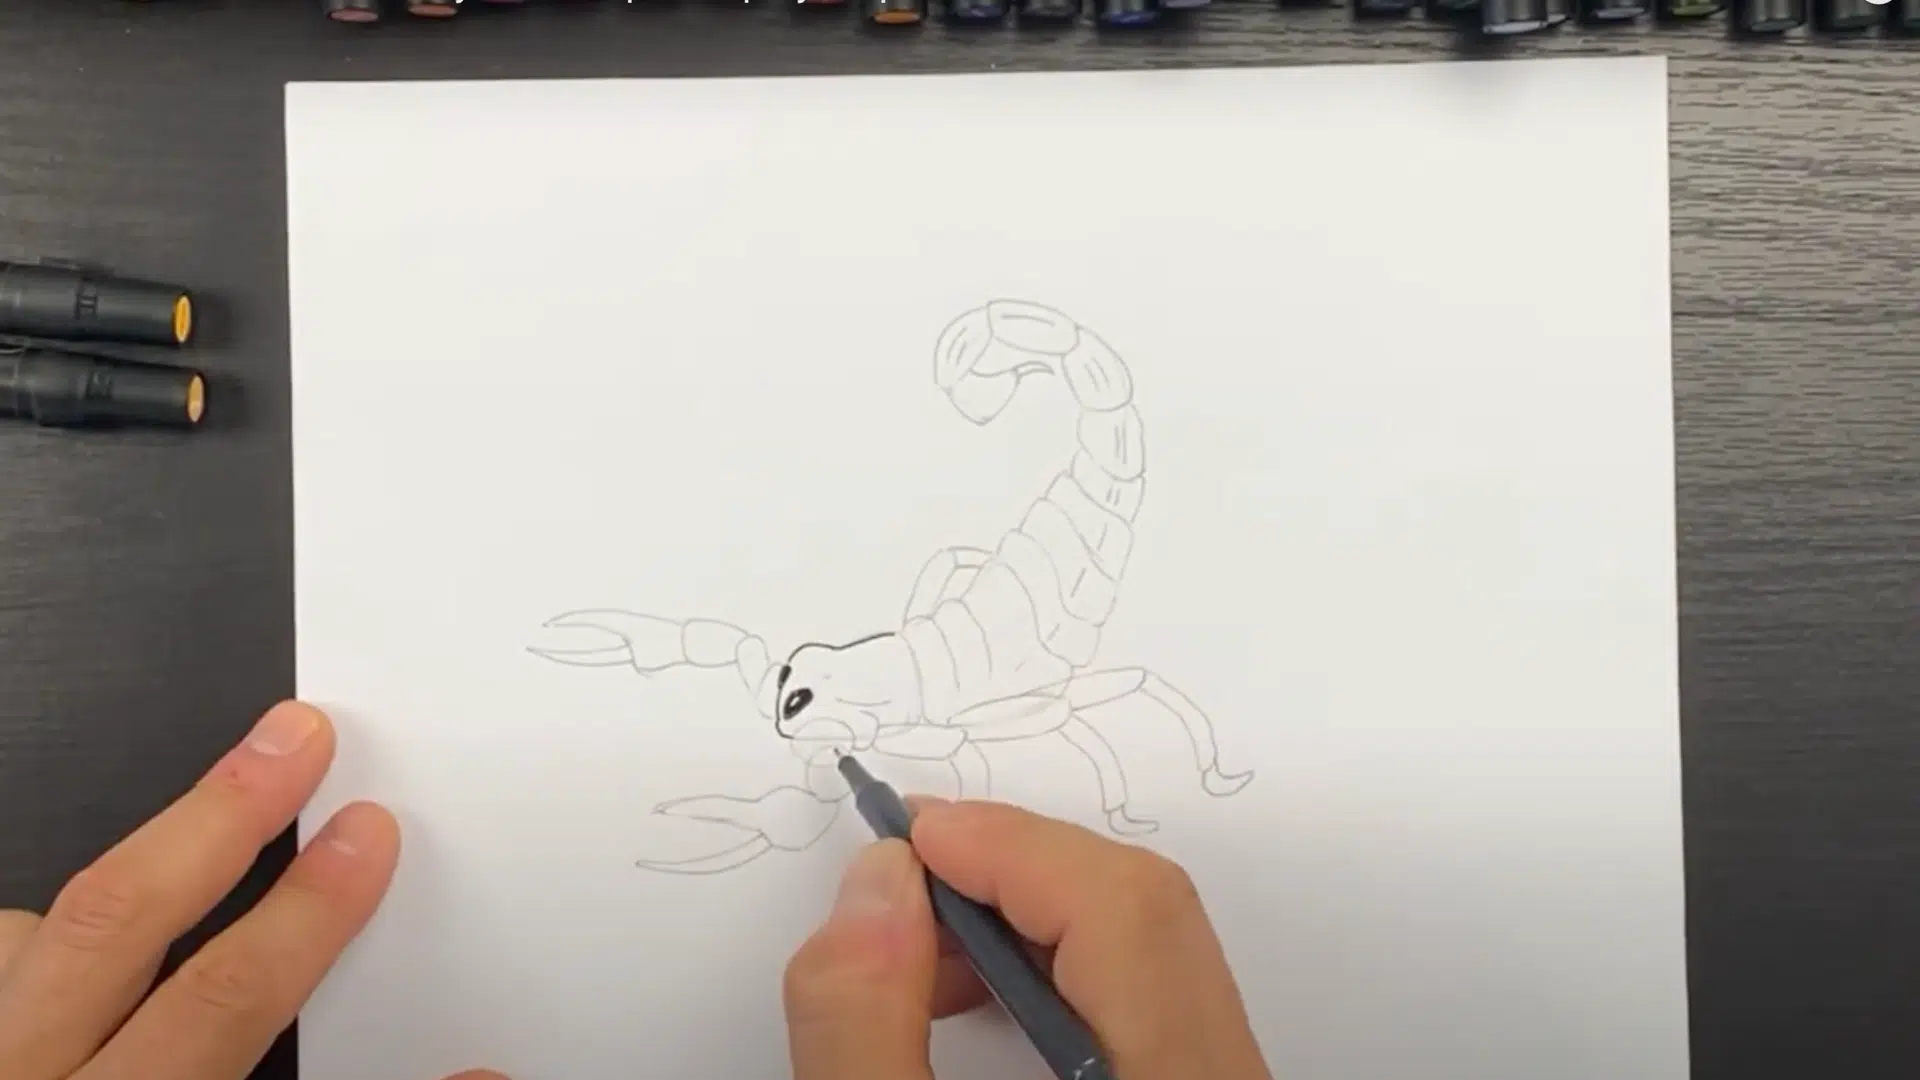
Step 7: Final Touches and Shading
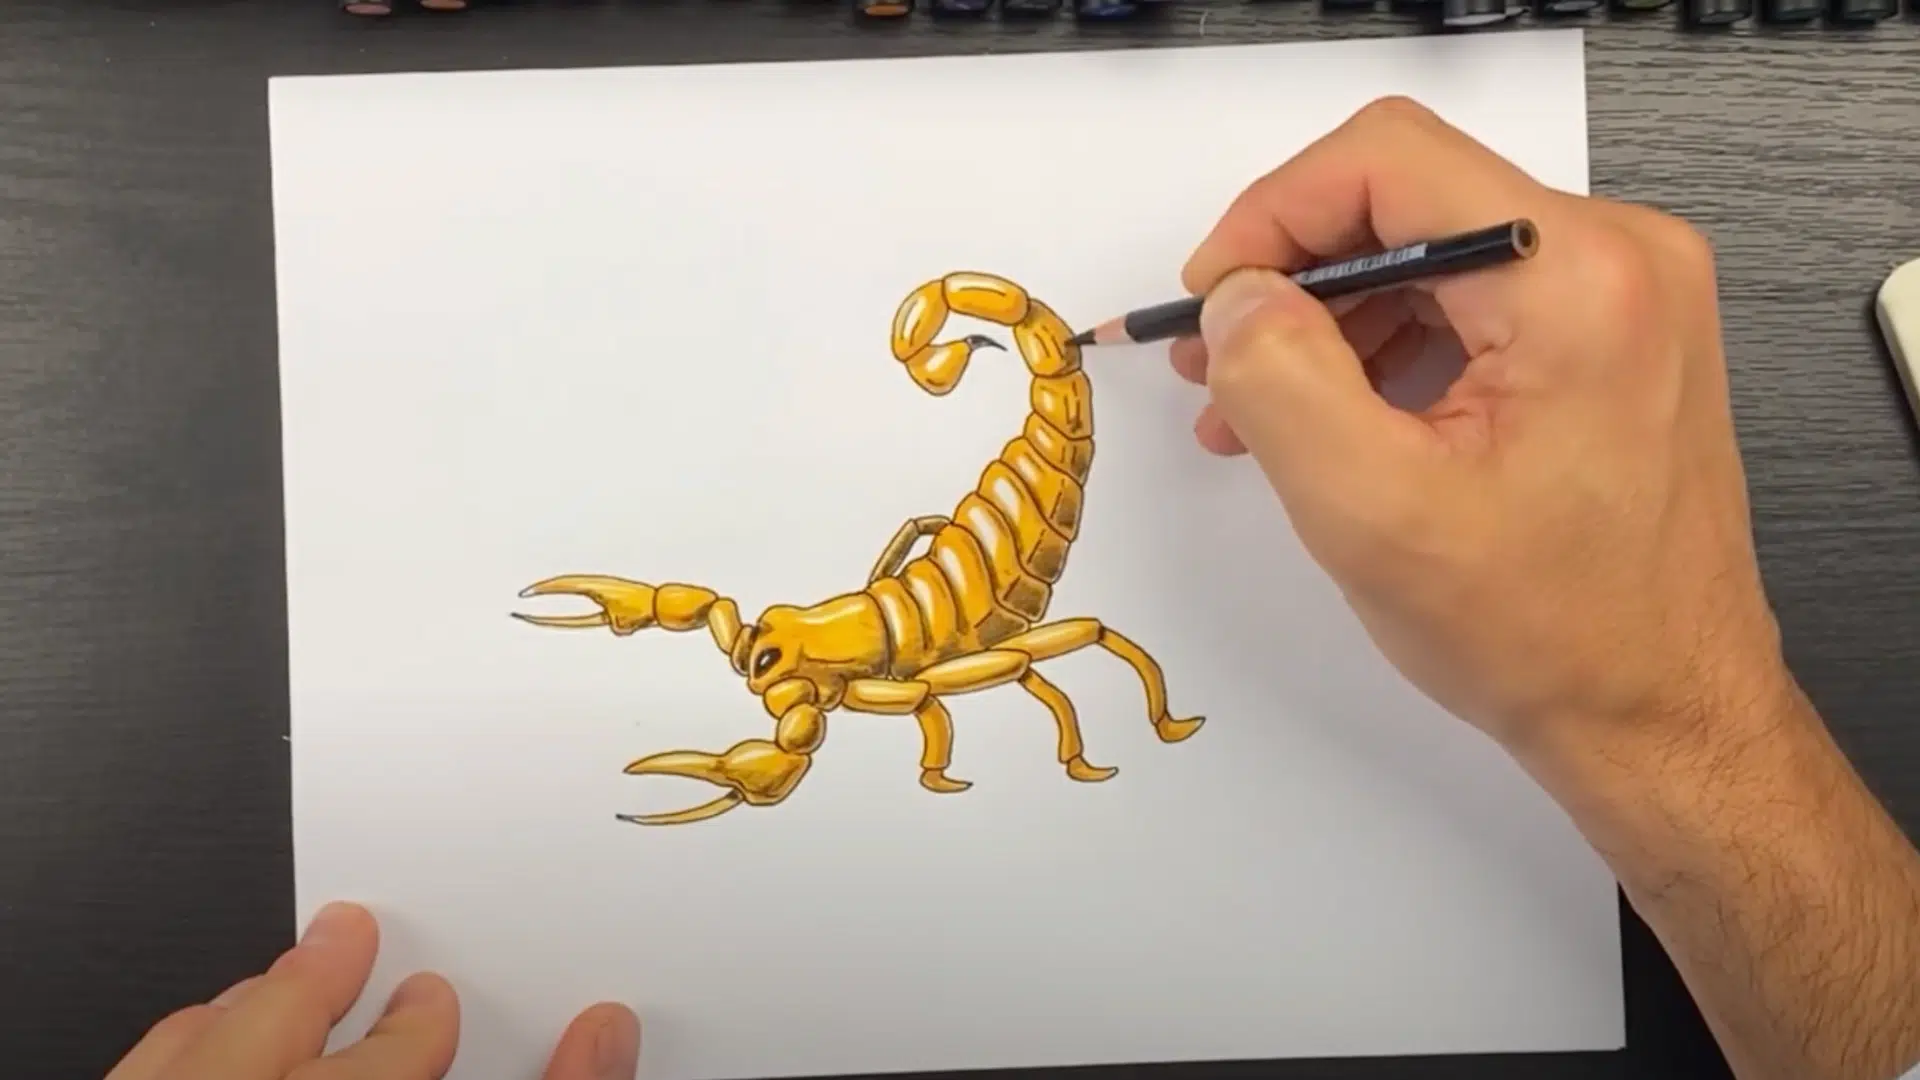
Once you’re happy with the scorpion’s outline, erase any unnecessary pencil lines, especially those from the body and legs.
- Trace the final lines with a dark ink pen for a clean look.
- Add depth by shading the body with brown and orange tones. Use black for shading around the legs and tail, giving the drawing volume.
Pro Tips for Effortless Scorpion Sketching
Even experienced artists can benefit from specialized techniques when creating scorpion drawings. These pro tips can help artists take their work to a higher level while maintaining simplicity in the process.
The following methods focus on adding quality details without making the task too complex.
Gesture drawing: Artists can capture the flow and energy of a scorpion by sketching quick, fluid lines. This method focuses on movement rather than detail, helping to establish a natural-looking pose. Starting with a loose gesture creates a more lifelike foundation for the finished drawing.
Value contrast: Adding proper shading with light and dark areas makes scorpions look more three-dimensional. Artists should note where light hits the body and creates shadows. This contrast brings the drawing to life without requiring complex coloring techniques.
Segmentation details: Paying attention to the natural segments of a scorpion’s body improves realism. Artists can add subtle lines to show body plates and joints. These small additions make a big difference in how authentic the final sketch appears.
Texture suggestion: Using small marks and patterns can suggest the rough texture of a scorpion’s exoskeleton. Artists don’t need to draw every bump – just enough to hint at the surface quality. Simple hatching or stippling techniques work well for this purpose.
Proportion awareness: Maintaining correct size relationships between body parts creates balance. Artists should check that the tail isn’t too long or the pincers too small. Proper proportions help viewers instantly recognize the subject as a scorpion.
Conclusion
Mastering the art of scorpion easy drawing opens doors to a appealing world of arachnid illustration. Artists who follow these simple steps find that recreating these intriguing creatures requires minimal artistic skill but yields impressive results.
The combination of basic geometric shapes evolves into a recognizable scorpion with practice. What begins as simple lines gradually evolves into a detailed representation complete with pincers, segmented body, and distinctive curved tail.
Even beginners find satisfaction in watching their scorpion illustrations improve with each attempt. The techniques presented throughout this guide serve as building blocks for more complex drawings in the future.
Scorpion easy drawing provides an excellent starting point for nature illustration enthusiasts who wish to expand their artistic repertoire while enjoying the creative process.