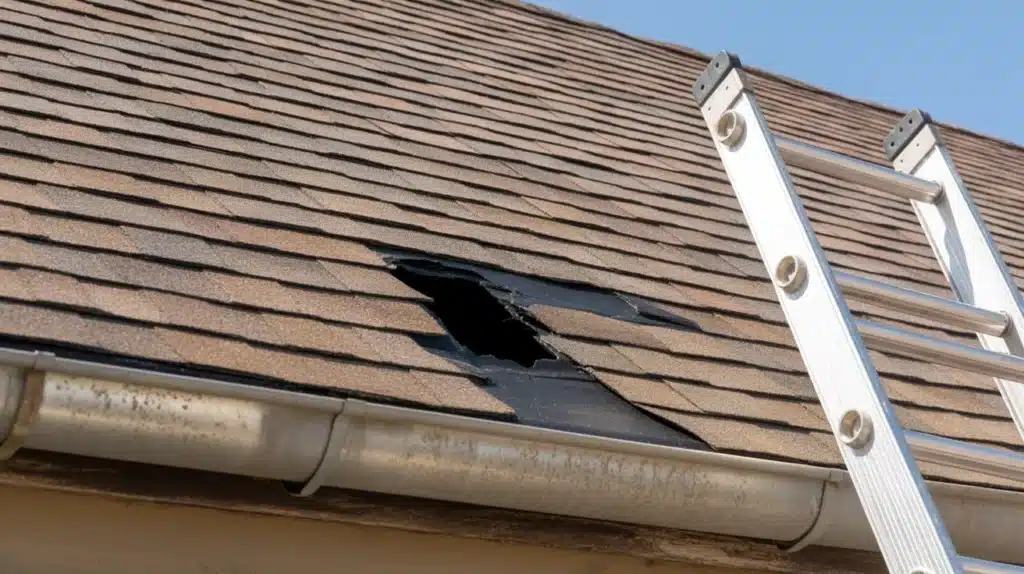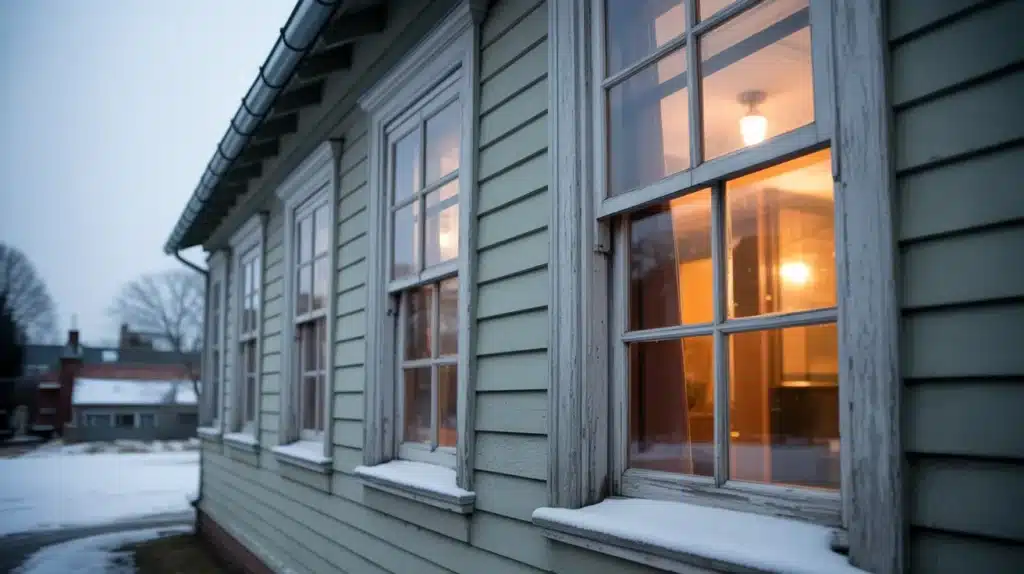
That cold chill near your window is not your imagination. It is your home quietly losing heat through gaps that are often no wider than a coin.
Cold air gets in, warm air gets out, and your heating system keeps running to make up the difference.
The fix, in most cases, is not a new window. It is a few dollars’ worth of caulk or weatherstripping and an hour of your time.
This guide walks you through finding the source of the draft, understanding what is causing it, and fixing it yourself with methods that hold up through the full winter season.
What Are Drafty Windows?
A drafty window is one that lets outside air into your home through worn or broken seals around the frame, sash, or glass. The window does not need to look damaged for this to happen.
Sealing materials age, wood shifts, and small gaps open up over time. Once they do, cold air finds its way in, and your heating costs climb, often without you knowing exactly why.
What Causes Drafty Windows?
Cold air entering through a window almost always comes down to one or more specific weak spots. Knowing which one you are dealing with makes the repair faster and more effective.
- Worn or damaged weatherstripping around the window sash
- Cracked or missing caulk where the frame meets the surrounding wall
- Old glazing putty that has dried out and crumbled away from around the glass
- A warped or rotting window frame that no longer sits flush when closed
- Single-pane glass, which loses heat quickly even without visible gaps
- Whole-house air leaks in the attic or walls that pull cold air through windows indirectly
Tools and Materials You Need Before You Start
Pulling everything together before you begin saves you from having to stop mid-repair to run to the store. The table below lists what you need based on the type of fix you are doing.
| Material or Tool | What It Is Used For |
|---|---|
| Weatherstripping (foam, rubber, or V-strip) | Sealing the gap around the moving sash |
| Silicone caulk | Exterior frame sealing in moisture-prone areas |
| Acrylic caulk | Interior sealing, where you may want to paint over it |
| Caulk gun | Applying caulk in a clean, even line |
| Rope caulk | Pressing into cracks for a removable seasonal seal |
| Plastic window insulation film kit | Covering the full window with a clear shrink barrier |
| Glazing compound | Re-seating glass in older wooden window frames |
| Epoxy wood filler | Patching small damaged or soft spots in the frame |
| Boiled linseed oil | Conditioning bare wood before fresh glazing compound |
| Putty knife and utility knife | Scraping out old material and trimming new applications |
| Hairdryer | Heat-shrinking plastic window film into a tight seal |
| Pry bar and finishing nails | Removing and reattaching trim when insulating behind it |
How to Fix Drafty Windows Yourself: 7 Methods
Each method below starts with a short explanation of why it works, followed by the steps to carry it out. Match the method to what you found during your inspection for the best result.
Method 1: Lock Your Windows the Right Way

Window locks do more than just keep a window shut. They press the sashes together and close up the thin gaps where air slips through. It is a quick, cost-free first step that often reduces cold air noticeably on its own.
Steps:
- Close the window completely and engage the lock.
- For wide windows, fit two locks, spaced a few inches from each outer edge, rather than one in the center. This closes the gap across the full width of the sash.
- On double-hung windows, slide the top sash slightly downward, press the weatherstripping along its top edge, then push it back up and lock it in place.
- Inspect all window locks once a year and swap out any that no longer pull the sashes firmly together.
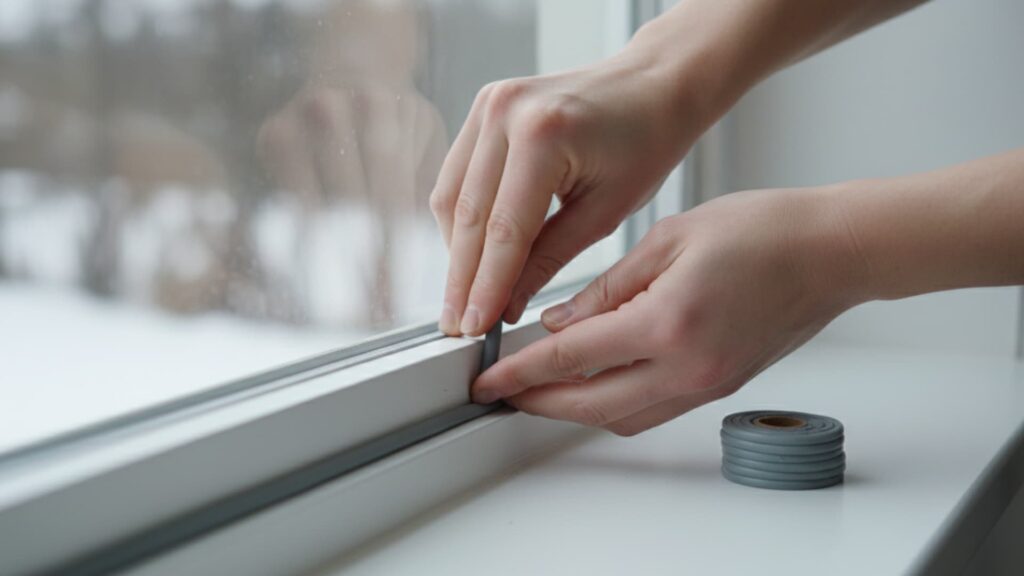
Method 2: Replace Worn Weatherstripping
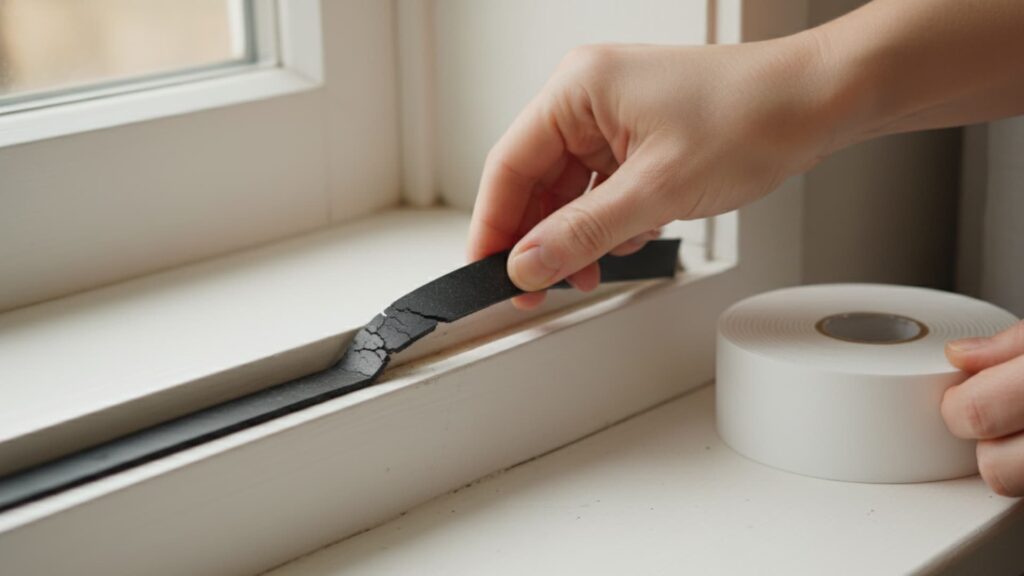
Weatherstripping sits between the sash and the window frame. It flattens and cracks with age until it barely makes contact, and at that point, cold air moves through freely even when the window looks fully closed. Fresh weatherstripping seals that gap and usually takes under 30 minutes per window.
Steps:
- Remove all old weatherstripping completely, then clean the surface to remove adhesive residue.
- Measure each side of the sash and cut the new strip to fit.
- For sliding or single-hung windows, foam strips work well. For casement windows, a rubber or V-strip gives a firmer seal.
- Press the strip firmly in place, then close the window to set the seal.
- Check the condition of your weatherstripping each season and replace it once it starts to look compressed or cracked.
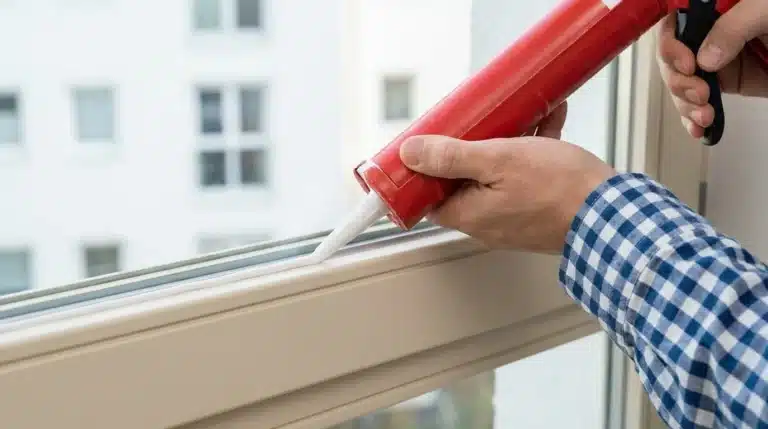
Method 3: Re-Caulk the Window Frame
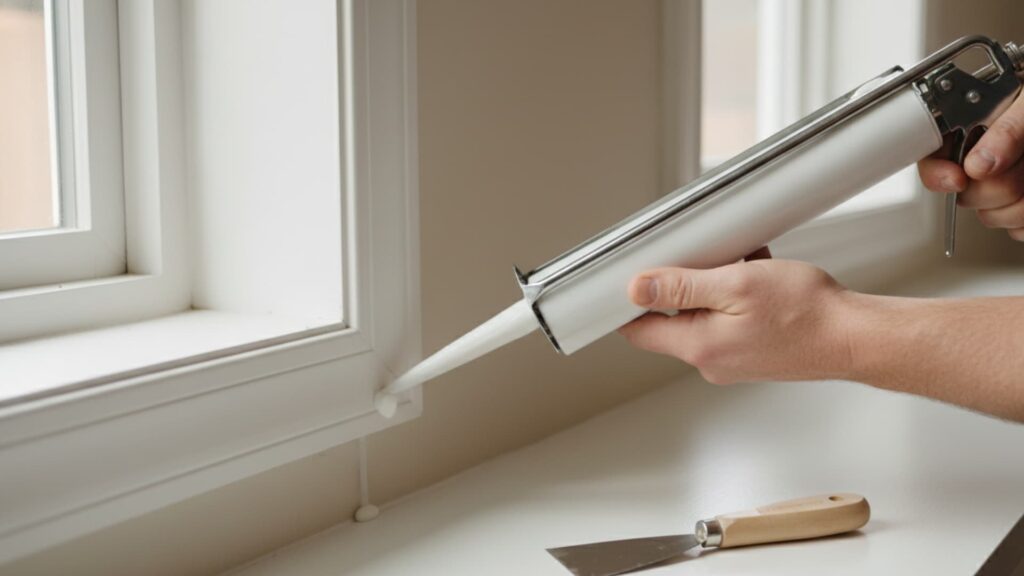
Caulk fills the fixed gap between the window frame and the surrounding wall. Over the years, it shrinks, cracks, and pulls away, leaving gaps that become open paths for cold air. Re-caulking is one of the most common and cost-effective fixes for a window draft.
Steps:
- Use a putty knife or utility blade to remove all loose or crumbling old caulk from the frame edge.
- Wipe the area clean so the new caulk bonds well.
- Use silicone caulk on the exterior and in any wet or moisture-exposed areas. Use acrylic caulk on the interior where you may want to paint over it later.
- Cut the nozzle at a 45-degree angle, then apply a steady bead of caulk along the gap.
- Smooth it with a damp finger, then let it cure fully before the area is exposed to drafts or moisture.
Method 4: Use Rope Caulk as a Seasonal Fix
Rope caulk is a soft, pliable cord that you press into gaps with your fingers. There is no gun, no mixing, and very little prep involved. It works best on windows you will not be opening during winter, and is a solid option when you need a fast fix right now.
Steps:
- Press the rope caulk firmly into any gap or seam around the frame or sash.
- Run your finger along it to push it fully into the crack and create an even seal.
- Do not seal any window that serves as an emergency exit.
- When spring arrives, pull one end and peel it away cleanly. It comes off without damaging the paint or the frame surface.
Method 5: Apply Plastic Window Insulation Film
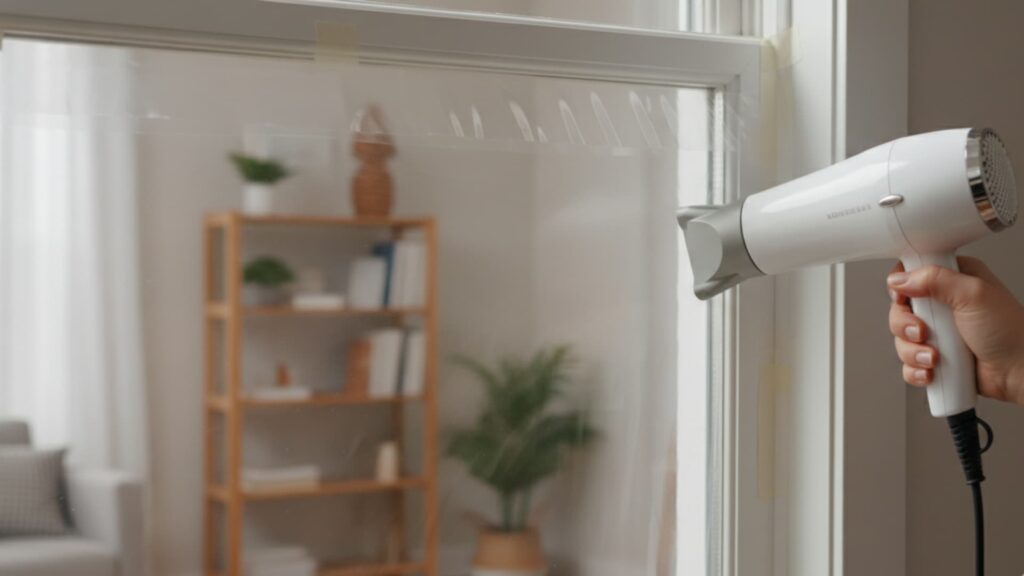
Window film kits use a thin, clear plastic sheet held in place by double-sided tape. Once applied and heat-shrunk, the film adds a full air barrier across the window and becomes nearly transparent. It works especially well on single-pane windows that lose heat quickly through the glass itself.
Steps:
- Clean the window frame surface before applying the tape. Dust and any residue will stop the tape from holding.
- Measure and cut the plastic film a little larger than the window on each side.
- Press the double-sided tape firmly around the full perimeter of the window casing.
- Attach the plastic film to the tape and smooth out any wrinkles.
- Run a hairdryer on low heat across the surface. The film tightens and clears up as it warms.
- If your frames are freshly painted, test the tape on a small area first, as it can lift paint when removed in spring.
Method 6: Reglaze a Loose or Cracked Window Pane
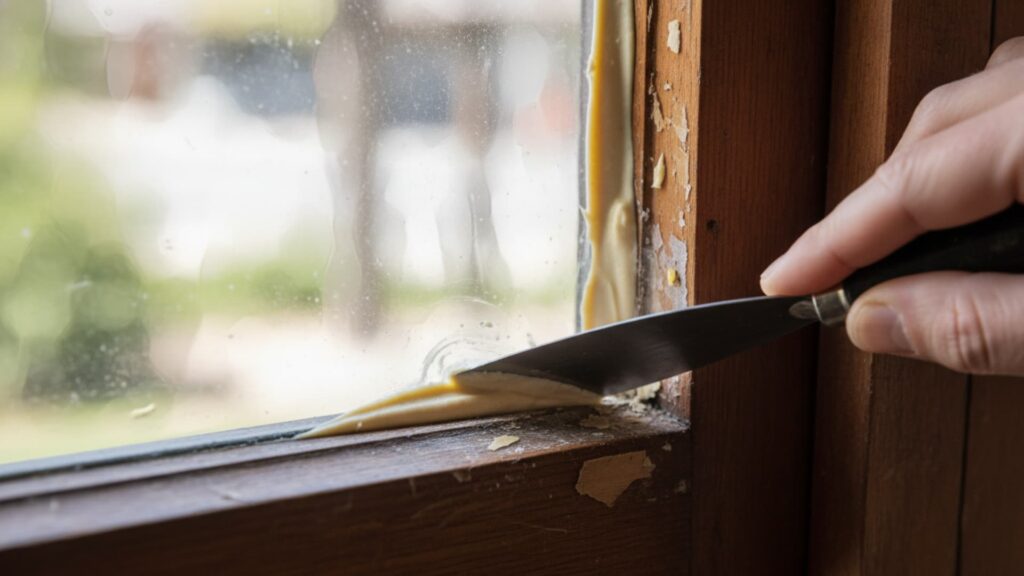
Glazing putty holds the glass pane in place in older wooden window frames. When it dries out and falls away, cold air passes directly through the gap between the glass edge and the wood.
Reglazing brings the seal back and can extend the life of an older window by several more years.
Steps:
- Use a putty knife to chip out all old, brittle glazing compound from around the pane.
- Fill any soft or damaged spots in the wood with epoxy filler and let it set fully.
- Brush a thin coat of boiled linseed oil onto the bare wood to help the new compound stick and hold long-term.
- Roll fresh glazing compound into thin rope-like strips and press them firmly against the glass edge and into the frame.
- Smooth the compound at a 45-degree angle with a putty knife.
- Let it cure for at least seven days before painting, and only work on this when outdoor temperatures are above 50 degrees Fahrenheit.
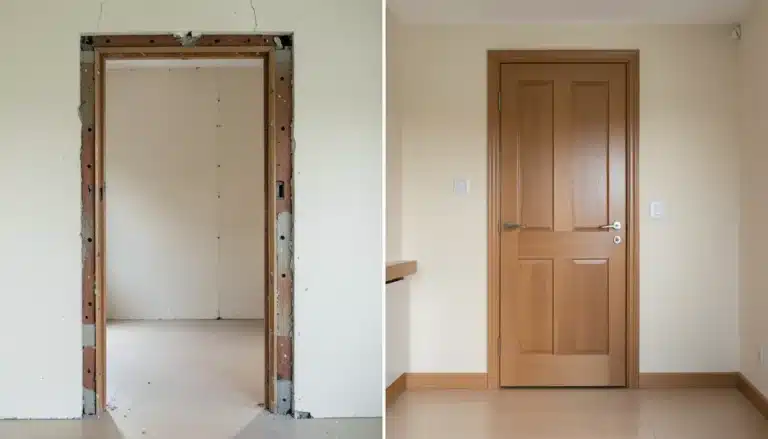
Method 7: Insulate the Gap Behind Window Trim
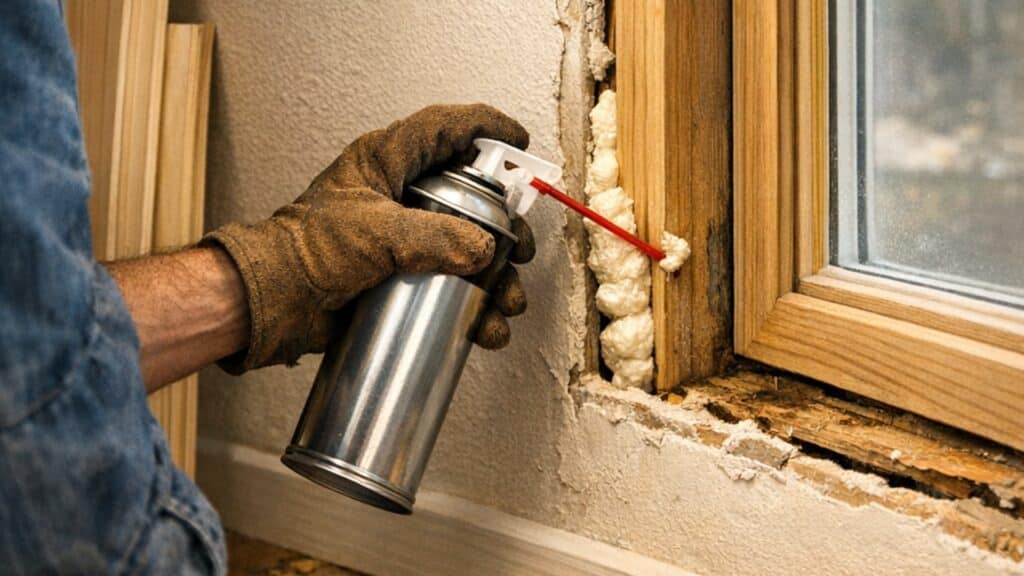
Behind the interior trim around your window is a gap between the window frame and the wall. In many homes, that gap contains nothing at all, or old insulation that has settled over decades.
Filling it makes a real difference in how much cold air gets through, and it is a step most repair guides skip entirely.
Steps:
- Score the painted edge of the trim with a utility knife so it breaks away without tearing the wall.
- Slide a thin putty knife behind the trim near a nail, ease a pry bar in behind it, and work the trim off slowly. Go section by section to keep it intact.
- Fill the gap between the window frame and the wall with expanding foam insulation.
- Once the foam dries, trim the excess flush with a utility knife.
- Apply a paintable trim sealant over any remaining surface gaps, then reattach the trim using new nails.
- Pull old nails from the trim through the back using pliers to avoid splitting the wood face.
How Much Money Can You Save by Fixing Drafty Windows?
Sealing air leaks around windows can cut home energy bills by roughly 20 percent on average, according to the U.S. Department of Energy. The table below breaks down the cost of each fix and the savings you can expect, so you can decide where to start based on your budget.
| Fix Type | Estimated Cost Per Window | Potential Savings | How Long Does It Lasts |
|---|---|---|---|
| Rope caulk | $3 to $6 | Moderate, reduces seasonal heat loss | One winter season |
| Plastic window insulation film | $6 to $15 | High for single-pane windows | One winter season |
| Weatherstripping replacement | $5 to $20 | High, especially on frequently used windows | 3 to 5 years |
| Re-caulking the frame | $5 to $15 | High seals the most common entry point | 5 to 10 years |
| Reglazing window panes | $10 to $25 (DIY) | Moderate to high on older wooden windows | 5 to 10 years |
| Trim insulation | $15 to $40 (DIY) | High addresses a hidden source of heat loss | 10 or more years |
| Professional window reconditioning | $150 to $350 per window | Very high, full restoration of the existing window | 10 or more years |
Most DIY repairs pay for themselves within a single heating season. Professional reconditioning costs more upfront but is still far less than full window replacement, and it covers re-caulking, new weatherstripping, track replacement, and glass repair in a single visit.
Short-Term Fixes vs. Long-Term Solutions: Which One Do You Need?
The right fix depends on how much time you have and what the window actually needs. Some repairs are meant to get you through this winter. Others are meant to last for years.
Short-term fixes (fast, low cost, temporary):
- Rope caulk pressed into gaps on non-operable windows
- Plastic window insulation film applied over the full window
- Draft stoppers or rolled fabric placed along the window sill
- Thermal curtains or cellular shades hung in front of the window
Long-term solutions (more effort, lasting results):
- Replacing weatherstripping around the sash
- Re-caulking the frame where it meets the wall
- Reglazing glass on older wooden windows
- Insulating the gap behind the interior window trim
- Professional air sealing for homes with widespread air leaks
Short-term fixes ease the problem right away. Long-term repairs remove the cause. The smartest move is to do both: a quick fix now, and a proper repair when you have more time.
When to Call a Professional Instead of Doing It Yourself
Most drafty window repairs are well within DIY range, but some situations call for a professional.
If the window frame has large sections of soft or rotted wood that go beyond surface patching, if moisture is trapped and fogging the space between double panes, or if the frame is so warped that the window will not close properly, those are signs that need expert hands.
Drafts that return after several repair attempts are also worth a professional look, particularly if the source turns out to be air leaking through the attic or walls rather than the window itself.
Conclusion
A drafty window rarely needs a full replacement to feel like a different window. A fresh bead of caulk, a new strip of weatherstripping, or a $10 film kit can change how a room feels overnight.
The repairs are short, the materials are cheap, and the results show up on your next heating bill. Pick one method from this guide, try it on the window that bothers you most, and see the difference for yourself.
Small fixes done consistently keep a home comfortable for years. Which method are you trying first? Let us know in the comments below.