That plant has been in that pot for three years. It might be running out of space.
Roots coming through the drainage holes, soil drying out in a few hours, and leaves that look tired, no matter how much you water. All of these things point to something being wrong.
One of the best things you can do for your plant’s long-term health is learn how to repot it. And to be honest, it’s a lot easier than it looks.
This guide tells you when to repot, what you need, and provides a clear, step-by-step process that works for almost all houseplants. Let’s give your plant the room it needs.
What Does Repotting a Plant Mean?
Repotting a plant means giving it fresh soil, more root space, or both. It does not always mean moving it to a bigger pot. Sometimes, keeping the same pot and replacing the old, nutrient-drained soil is enough.
Think of it as a reset for your plant’s growing environment. Either way, the goal is the same: give the roots what they need to keep the plant healthy and growing well.
The Best Time to Repot a Plant
Timing matters more than most people realize. Repotting at the wrong time can slow recovery and put extra stress on your plant.
| Season | Good Time to Repot? | Why |
|---|---|---|
| Spring | Best time | Plants are actively growing and recover faster |
| Early Summer | Good option | Growth is still strong, and conditions are warm |
| Late Summer / Early Fall | Works for some plants | Fine in mild climates; avoid extreme heat |
| Winter | Not recommended | Most plants are slow or dormant; recovery takes longer |
| Mid-Summer Heatwave | Avoid | High heat adds stress on top of the repotting process |
Note: If your plant is severely root-bound or showing signs of root rot, repot it right away regardless of the season.
Clear Signs Your Plant Needs a New Pot
Plants are pretty good at telling you when something is wrong. You just need to know what to look for.
- Roots are growing out of the drainage holes at the bottom. Your plant has run out of space and needs more room.
- Water runs straight through the pot without soaking in. The soil is too compact, or the roots take up all the available space.
- Growth has slowed down or stopped completely. Even with regular care, the plant is not putting out new leaves.
- The plant tips over or falls easily. The roots can no longer support the plant’s weight in the current pot.
- Soil dries out much faster than usual. More root mass means less soil to hold moisture.
- Leaves are yellowing or wilting without a clear cause. Root stress can manifest as leaf problems that appear to be a watering issue.
- Salt or mineral build-up is visible on the soil surface. This is a sign that the soil is old and needs replacing.
Pro Tip: Newly bought plants need 2 to 3 weeks to settle in before you repot them, unless the soil is already poor or waterlogged.
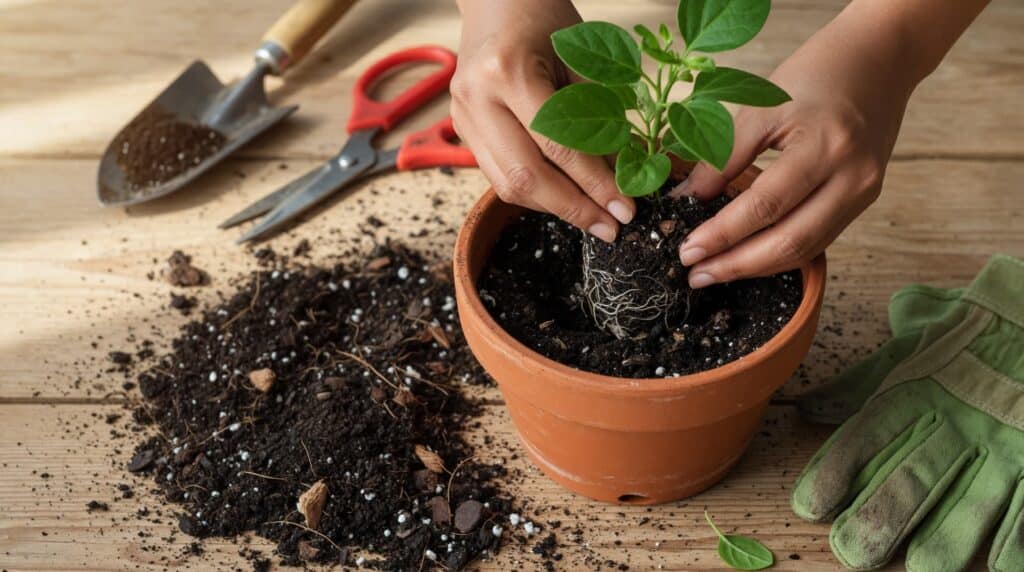
Everything You Need Before You Start Repotting
Before you get started, gather everything in one place. Having your supplies ready makes the whole process much quicker and less stressful for both you and your plant.
| Supply | What It Does |
|---|---|
| New pot (1 to 2 inches wider than the current one) | Gives roots the right amount of extra space without holding too much wet soil |
| Fresh potting mix suited to your plant type | Provides new nutrients for healthy root growth |
| Trowel or small spade | Helps loosen the soil and ease the plant out of its current pot |
| Pruning shears or clean scissors | For trimming damaged or overgrown roots |
| Gardening gloves | Protects your hands from soil and plant irritants |
| Watering can | For a thorough watering right after repotting |
| Old newspaper or a plastic tray | Keeps your work area clean and easy to tidy up |
You do not need expensive tools for this. Most of what you already have at home will work just fine. The key is to make sure your pot is the right size and that your soil matches your specific plant type.
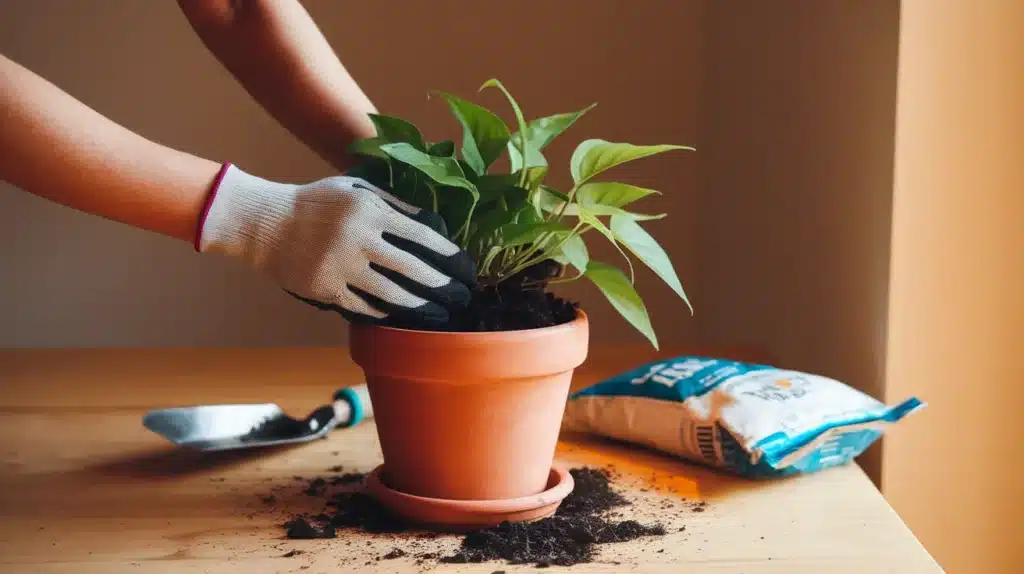
How to Repot a Plant: Step-by-Step Guide
Once you have everything ready, the actual repotting process is straightforward. Follow these six steps and your plant will settle into its new home without any problems.
Step 1: Water Your Plant Today Before
Water your plant 24 hours before repotting. Moist soil holds the root ball together much better than dry soil does. This also makes it easier to slide the plant out of its current pot without damaging the roots.
Step 2: Remove the Plant From Its Current Pot
Tip the pot gently on its side and support the plant at its base. Tap or squeeze the sides of the pot to loosen the soil.
If the plant is stuck, run a butter knife or thin trowel along the inside edge of the pot. Never pull the plant out by its stem, as this can damage both the roots and the stem.
Step 3: Check and Clean Up the Roots
Gently loosen the root ball with your fingers. Look for roots that are dead (dark and mushy), very long and thin, or tightly coiled around the base. Trim those off with clean scissors.
Healthy roots should look firm and light-colored. For badly root-bound plants, you can cut up to one-third of the roots from the bottom.
Step 4: Prepare the New Pot
Add a fresh layer of potting mix to the bottom of the new pot. If your pot does not have drainage holes, lay down a layer of gravel or lava rocks first, then add the soil on top. This setup helps prevent water from sitting around the roots and causing rot.
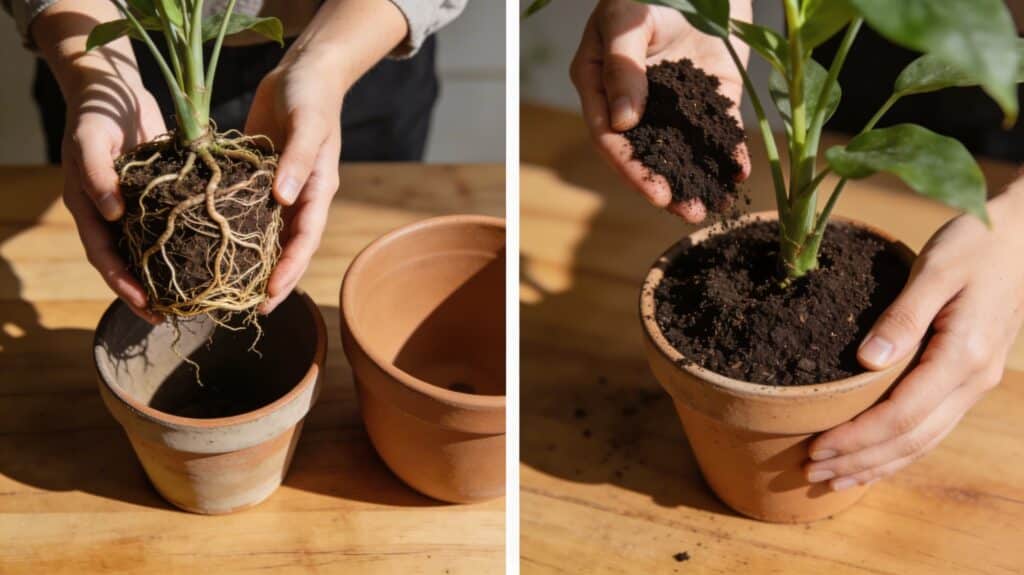
Step 5: Place the Plant and Fill in the Soil
Set the plant in the center of the new pot. Make sure the crown (the point where roots meet the stem) sits at the same level it was before.
Fill in fresh soil around the plant, pressing gently to close any air pockets. Leave about 1 inch of space between the soil and the top of the pot for easy watering.
Step 6: Water Thoroughly and Place in the Right Spot
Water the plant slowly and fully until water drains out of the bottom holes. Let it sit in a saucer for about 30 minutes, then pour out any collected water.
Place the plant in a spot with indirect light for the first few days, away from direct sun, while it gets used to its new space.
How to Repot Plant-Specific Types
Not every plant follows the same rules when it comes to repotting. Here is a quick breakdown of what works best for common houseplant types.
| Plant Type | Best Soil Mix | Best Pot Type | Special Notes |
|---|---|---|---|
| Succulents and Cacti | Fast-draining cactus mix | Terra-cotta | Wait 2 to 3 days before first watering after repotting |
| Tropical Plants (Pothos, Philodendron, Monstera) | Rich, well-draining potting mix | Plastic | Fast growers may need repotting every 12 months |
| Orchids | Bark-based orchid mix | Clear plastic or slatted pot | Never use regular soil; repot every 1 to 2 years when the bark breaks down |
| Snake Plants | Well-draining, loose potting mix | Terra-cotta or any with drainage | Does not mind being slightly root-bound; repot every 2 to 3 years |
| Ferns | Rich, moisture-retaining potting mix | Plastic | Keep soil consistently moist after repotting |
How to Take Care of Your Plant After Repotting
Repotting is done, but your job is not over yet. The first few weeks after repotting are the most important for helping your plant settle in and recover properly.
- Transplant shock is normal. Wilting, drooping, or slowed growth in the first week or two is expected. Most plants bounce back quickly with the right care. Do not panic or overwater.
- Water carefully in the beginning. Water the plant well right after repotting. In the weeks that follow, it may need water less often because it has more fresh soil around it. Always check the soil moisture before watering again.
- Keep it away from direct sunlight. Indirect or filtered light is best for the first few days. Too much direct sun adds stress on top of the repotting process.
- Hold off on fertilizer. Fresh potting soil already contains nutrients. Wait at least 4 to 6 weeks before adding any plant feed.
- Watch for recovery signs. If new leaves appear within 2 to 4 weeks, your plant is doing well and settling in as expected.
Repotting vs. Refreshing Soil: What Is the Difference?
A lot of people use these two terms the same way, but they are actually quite different. Knowing which one your plant needs can save you time and prevent unnecessary stress.
| Factor | Repotting | Refreshing Soil |
|---|---|---|
| What it involves | Moving the plant to a new, usually bigger pot with fresh soil | Replacing the top layer of old soil in the same pot |
| When to do it | When roots are overcrowded or growing out of the pot | When the soil looks old, dry, or crusty, but the plant is not root-bound |
| Best for | Fast-growing plants or root-bound plants | Large plants that are hard to move or slow-growing plants |
| How often | Every 12 to 18 months for most houseplants | Every 6 to 12 months as a maintenance step |
| Plant stress level | Moderate (temporary transplant shock possible) | Low (plant stays in the same environment) |
How to Repot Without Making a Mess at Home?
Lay down old newspaper or a plastic sheet on your work surface before you start. A bathroom or a spot near a sink works well since cleanup is easy.
Keep a damp cloth nearby to wipe the pot, the leaves, and your hands as you go. Work slowly and do one step at a time.
If you are repotting indoors, place a tray under the pot to catch any soil or water that may drip during the repotting.
The Bottom Line
Repotting a plant is not as complicated as it looks. Once you spot the signs early, pick the right pot, and follow the steps, the whole process becomes second nature.
Your plant gets fresh soil, more room to grow, and a much better chance at staying healthy long-term. The key is not to wait too long. Small, timely changes make a big difference for any houseplant.
So take a look at your plants today. If the roots are creeping out or the soil looks worn out, it might be time for a change.
Have you repotted a plant recently? Which one gave you the most trouble? Comment down below.