

Did you know that new parents worry about dropping their baby in the first few weeks? That fear of fumbling with tiny limbs while trying to accomplish daily tasks is incredibly real.
But here’s the thing: baby wrap carrier how to tie newborn have been keeping little ones safe and snug for centuries, and they’re surprisingly simple once you get the hang of them.
Learning how to tie a baby wrap carrier for your newborn might seem daunting at first glance.
All that fabric, those mysterious knots, and the weight of your precious cargo can feel overwhelming.
Yet thousands of parents master this skill every day, turning a piece of stretchy material into a secure, hands-free solution that keeps the baby close while freeing up arms for everything else life demands.
Why Use a Baby Wrap Carrier for a Newborn?
Welcoming a newborn brings both joy and new challenges, especially when it comes to meeting your baby’s needs while managing daily life. One time-tested solution that offers comfort, convenience, and developmental support is using a wrap carrier.
Promotes Bonding (oxytocin release)
The close physical contact stimulates oxytocin production in both parent and baby, strengthening their emotional connection.
This “love hormone” naturally improves attachment, reduces stress levels, and creates a calming environment that benefits the entire family’s well-being.
Helps with Colic, Sleep, and Regulation
Newborns often struggle with self-regulation outside the womb. The gentle pressure and rhythmic movement of being carried mimic the uterine environment, soothing fussy babies and promoting longer, more restful sleep periods while reducing crying episodes.
Allows Hands-Free Multitasking
Parents can tackle household tasks, care for older children, or simply move around freely while keeping their newborn content and secure.
This practical benefit makes daily routines more manageable during those demanding early weeks of parenthood.
Supports Healthy Hip Development
When positioned correctly, wrap carriers maintain the newborn’s natural “M” position with knees higher than hips. This ergonomic positioning promotes proper hip socket development and reduces the risk of hip dysplasia, supporting long-term skeletal health.
For Convenient Breastfeeding
Many wrap carriers allow discreet nursing while maintaining the baby’s secure position. This feature proves invaluable for mothers who need to feed frequently throughout the day, offering privacy and comfort, whether at home or in public spaces.
Wrapping Your Newborn: Step-by-Step Process
If you’re wondering about using a baby wrap carrier, how to tie a newborn safely and comfortably, follow these clear steps to ensure proper support, ergonomic positioning, and a cozy, hands-free bonding experience.
Step 1: Find the Center of the Wrap
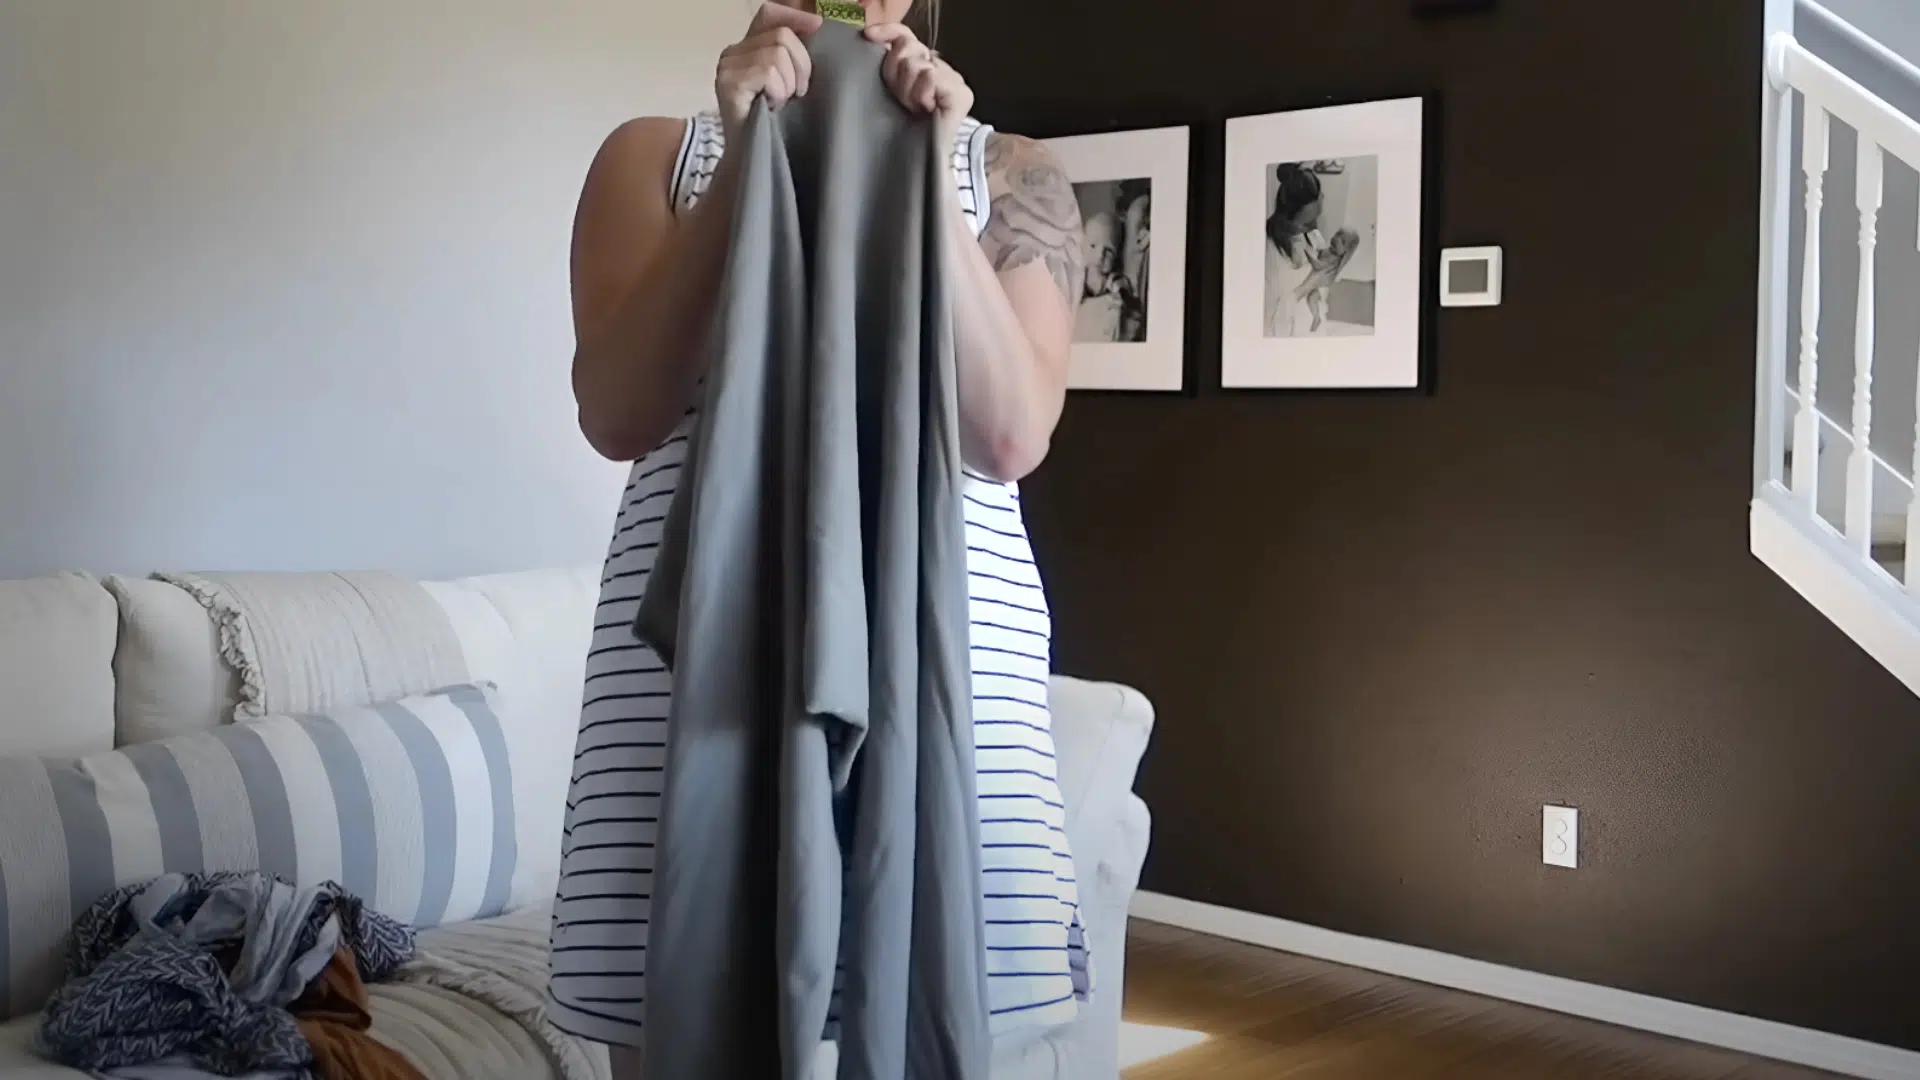
To begin wrapping, first locate the center of the fabric by finding the tag or logo that marks it. This center point is crucial because starting here ensures the wrap will be evenly balanced around you and your baby.
Properly identifying the center helps distribute weight evenly, making the wrap more comfortable and secure during use.
Step 2: Position the Center at Your Chest
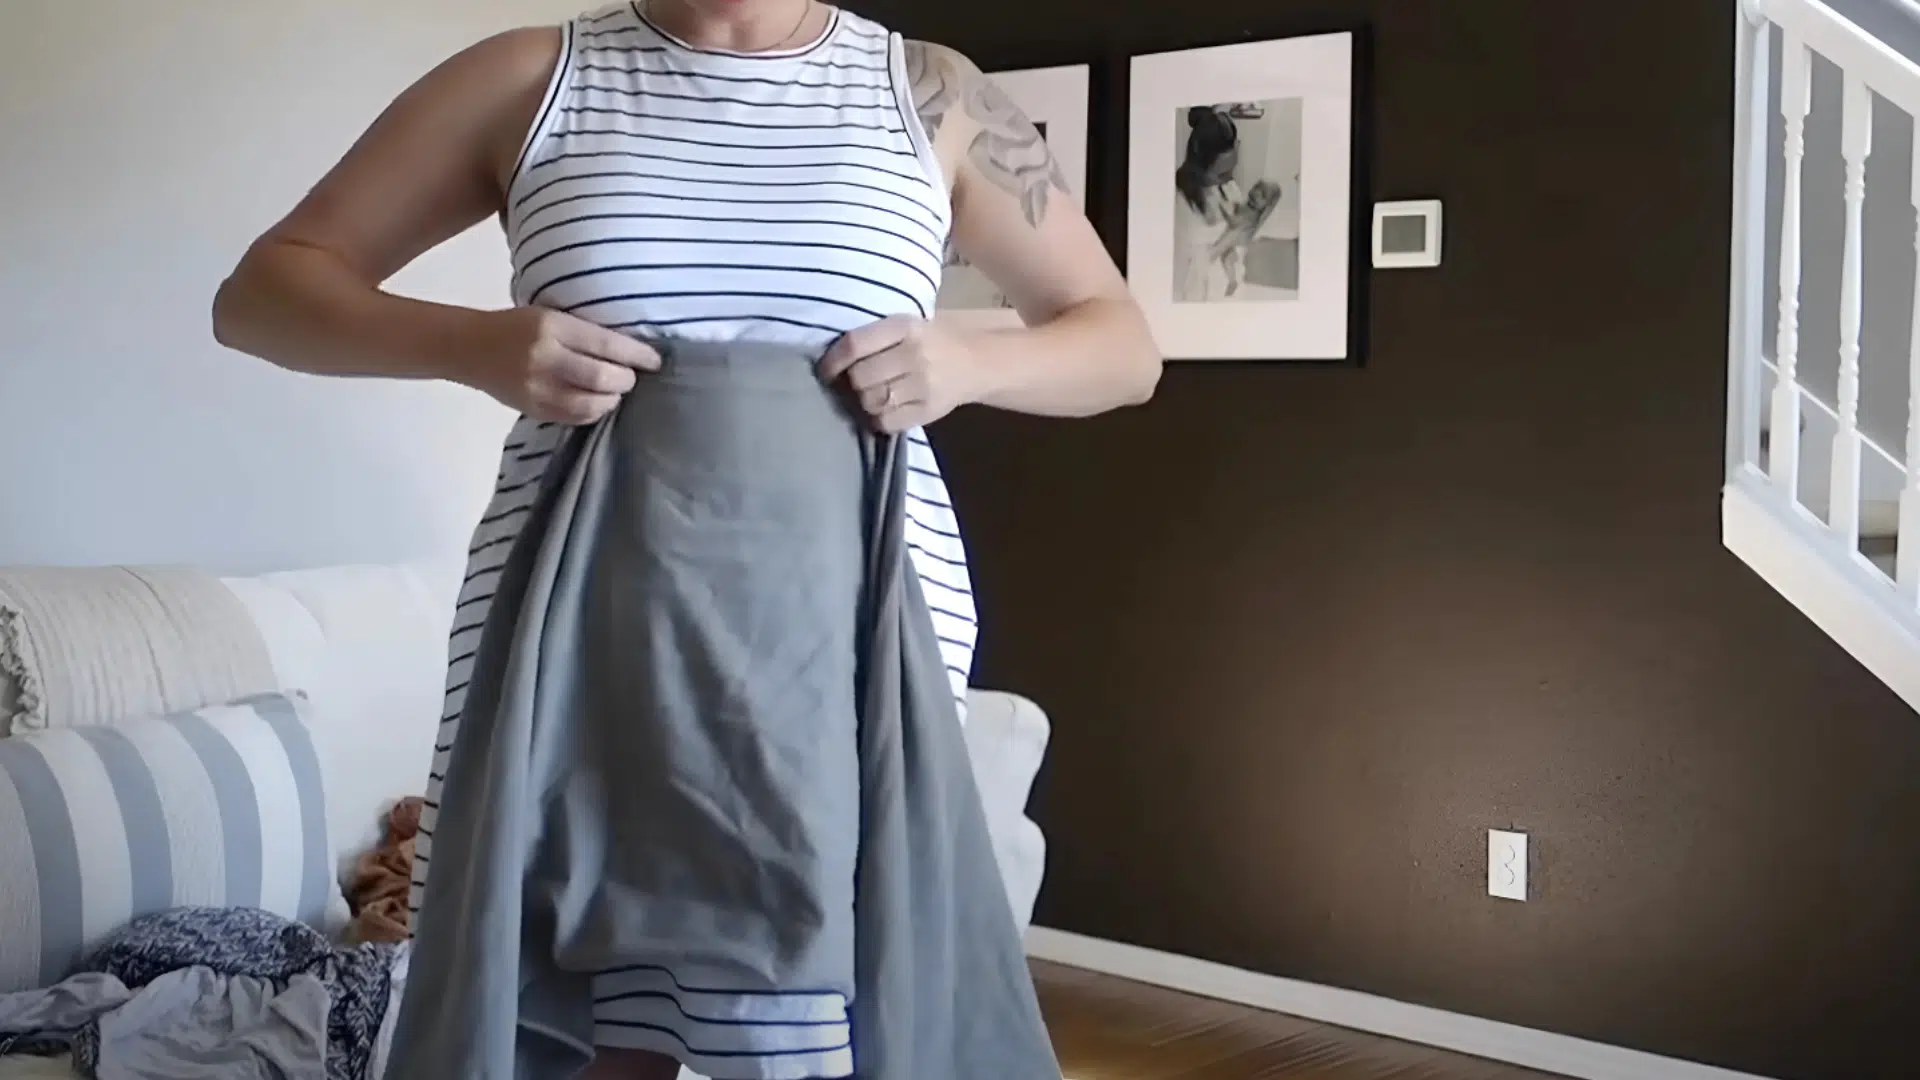
Place the center of the wrap just above your bust line to create a secure and comfortable base for wrapping. Doing this over a snug-fitting top helps keep the wrap in place and prevents slipping.
Avoid loose or flowing clothing like dresses, which can shift and make the wrap less stable, so ensure the fabric is properly tucked before proceeding.
Step 3: Wrap Around Your Waist

Pull the wrap snugly around your waist and cross it behind your back to create a secure foundation. It’s important to tighten the fabric enough to provide good support for both you and your baby, but avoid making it too tight.
Aim for a comfortable “hug” feeling, firm yet breathable, so you can move and breathe easily throughout the day.
Step 4: Bring Ends Over Your Shoulders

Pull each end of the wrap up and over your shoulders, letting the fabric drape down your back and form an “X” shape across it.
As you do this, spread the fabric out smoothly over your shoulders. This helps distribute your baby’s weight evenly and prevents the wrap from digging in or causing discomfort during more extended periods of wear.
Step 5: Tuck Ends Through the Waist Panel
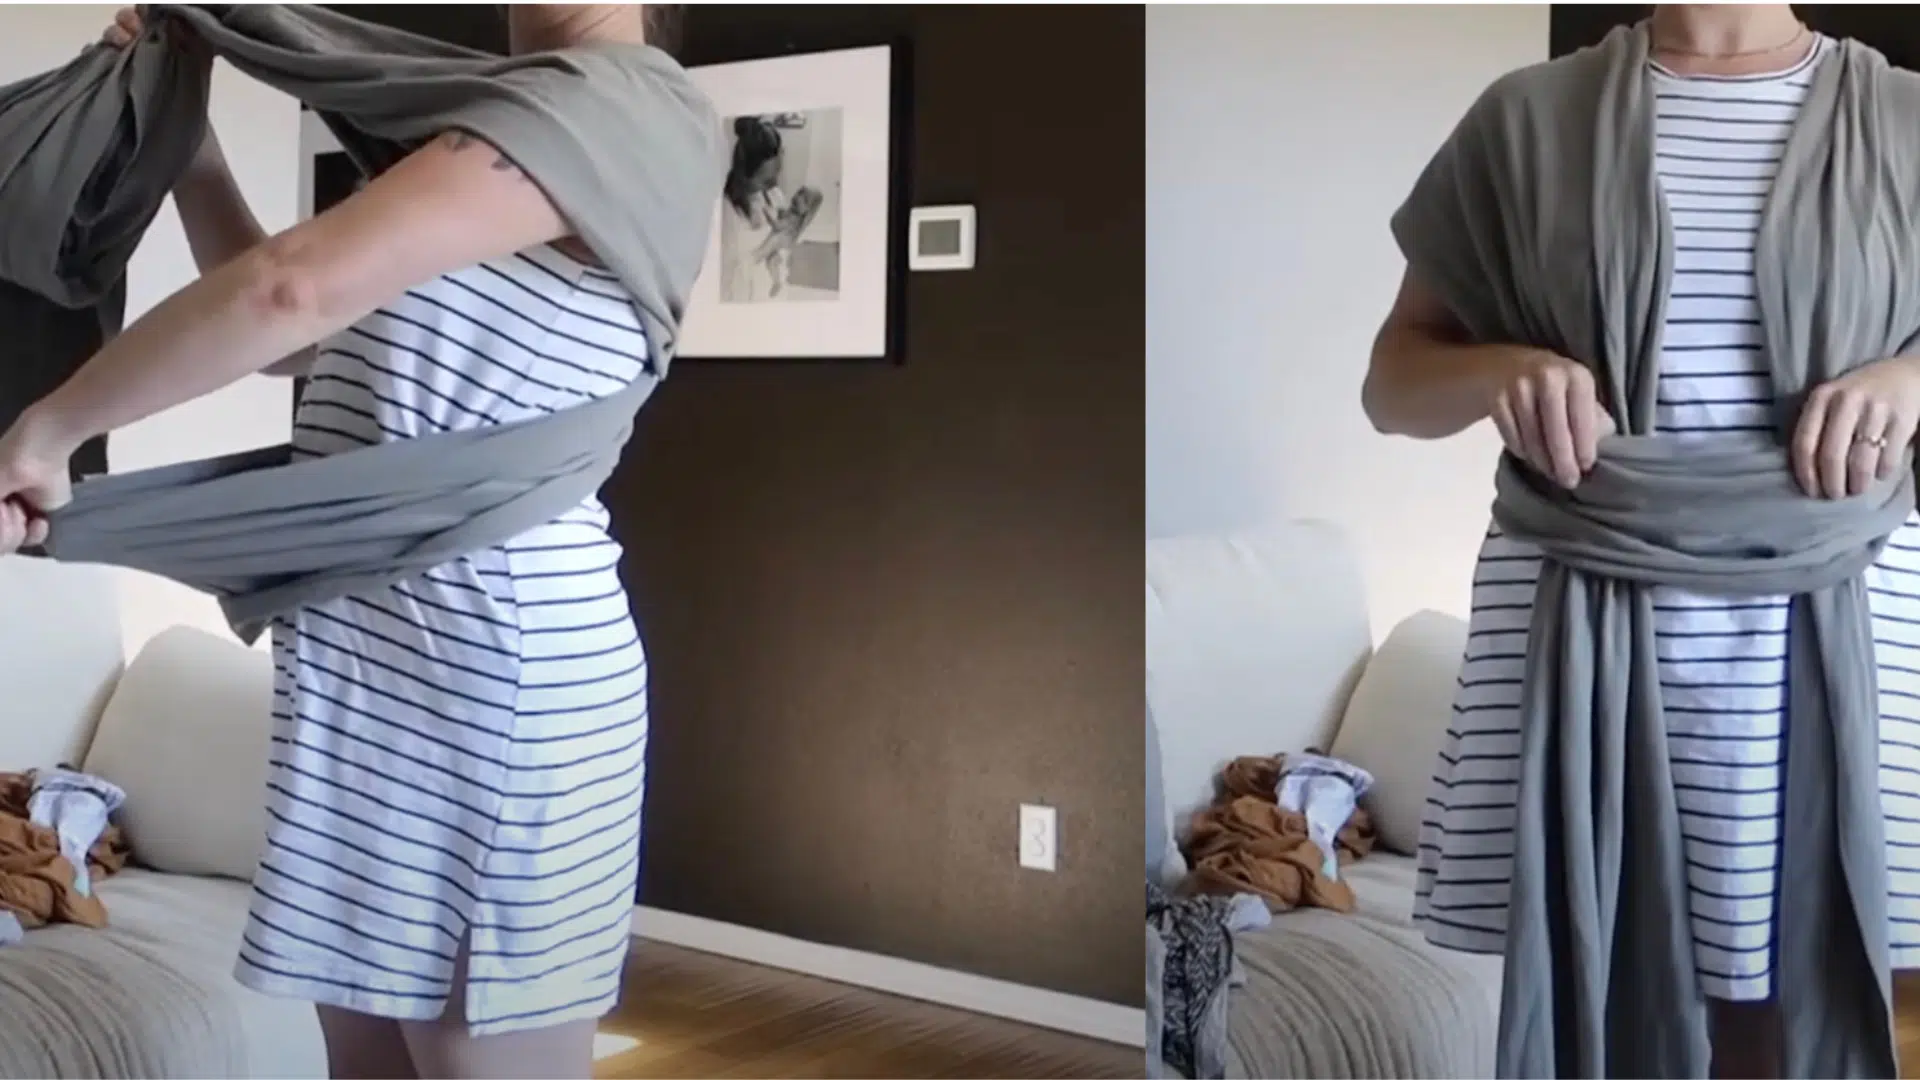
Take both shoulder ends and pull them down, threading each through the horizontal waist panel at your front.
Make sure the middle panel lies flat and smooth against your tummy; this will provide important support for your baby’s bum once they’re placed in the wrap.
Keeping the fabric flat also helps maintain comfort and proper weight distribution as you continue wrapping.
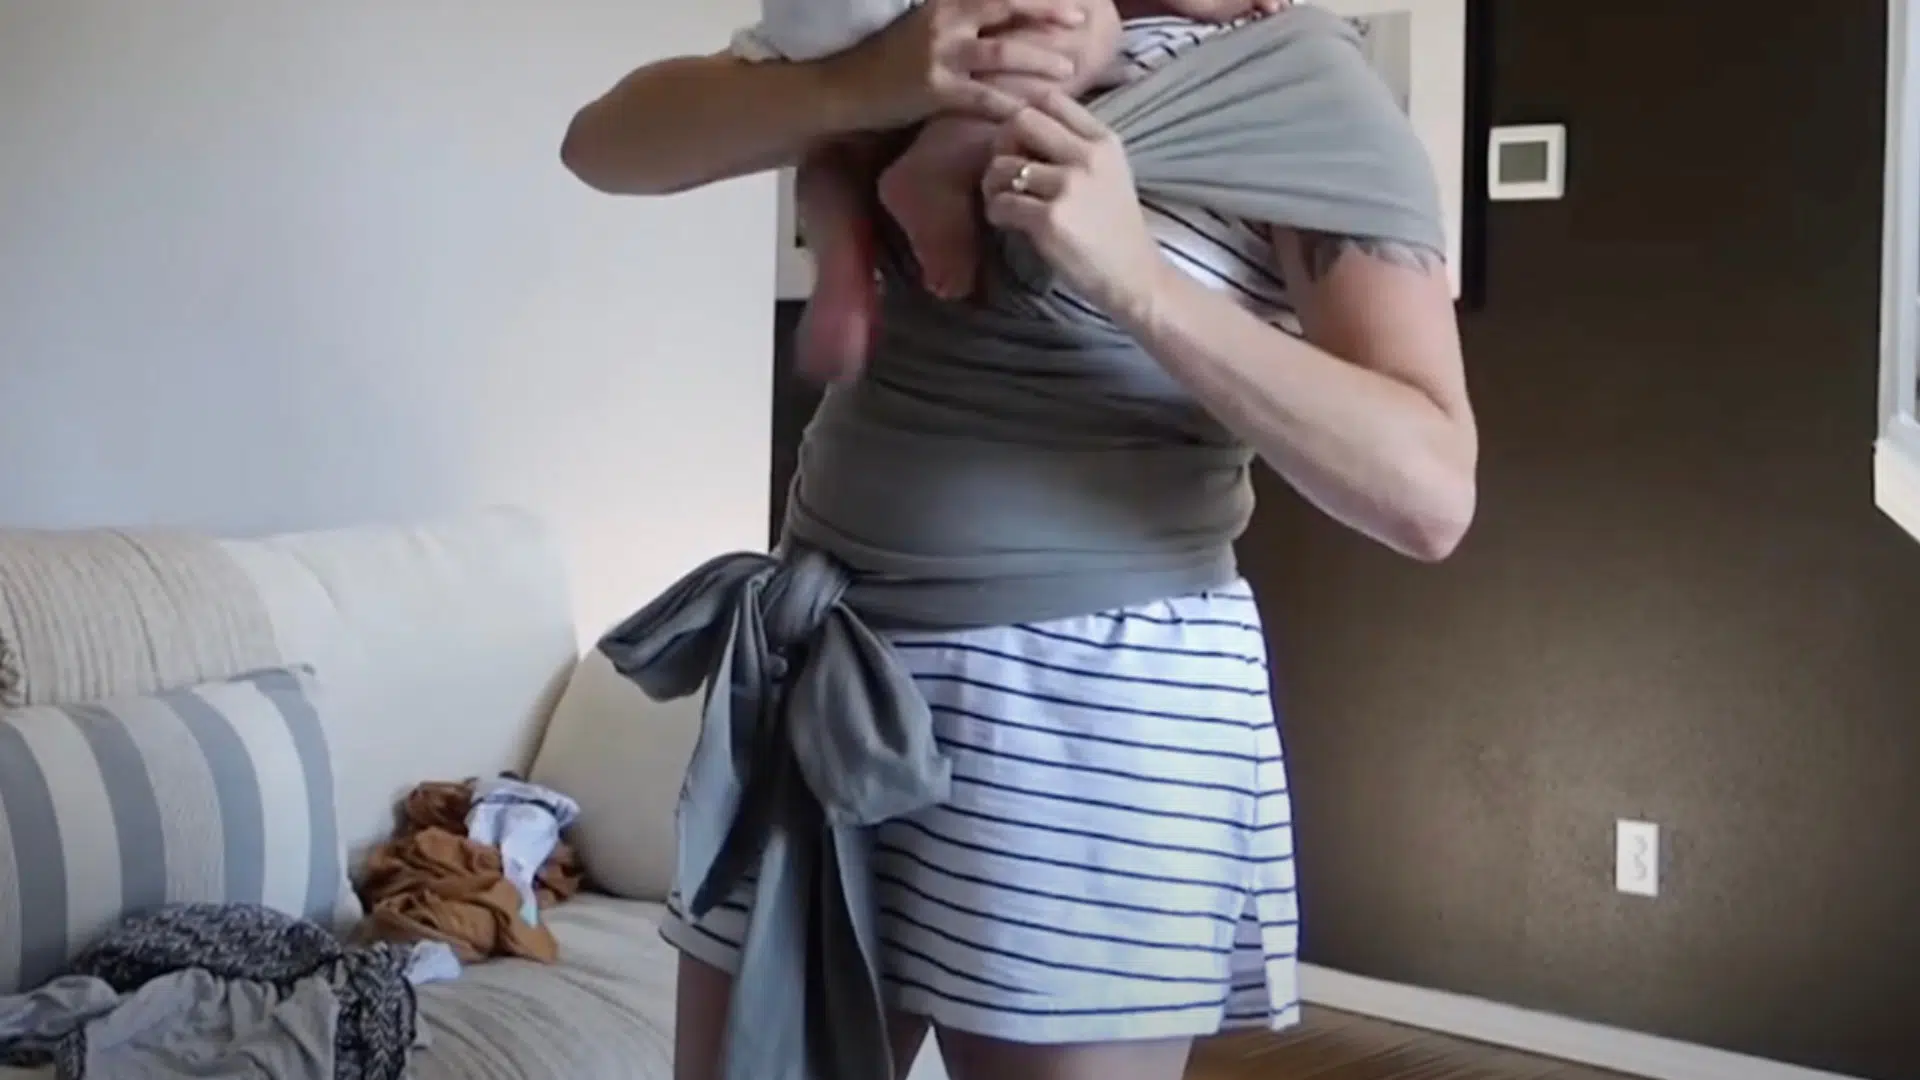
Step 6: Cross and Tie
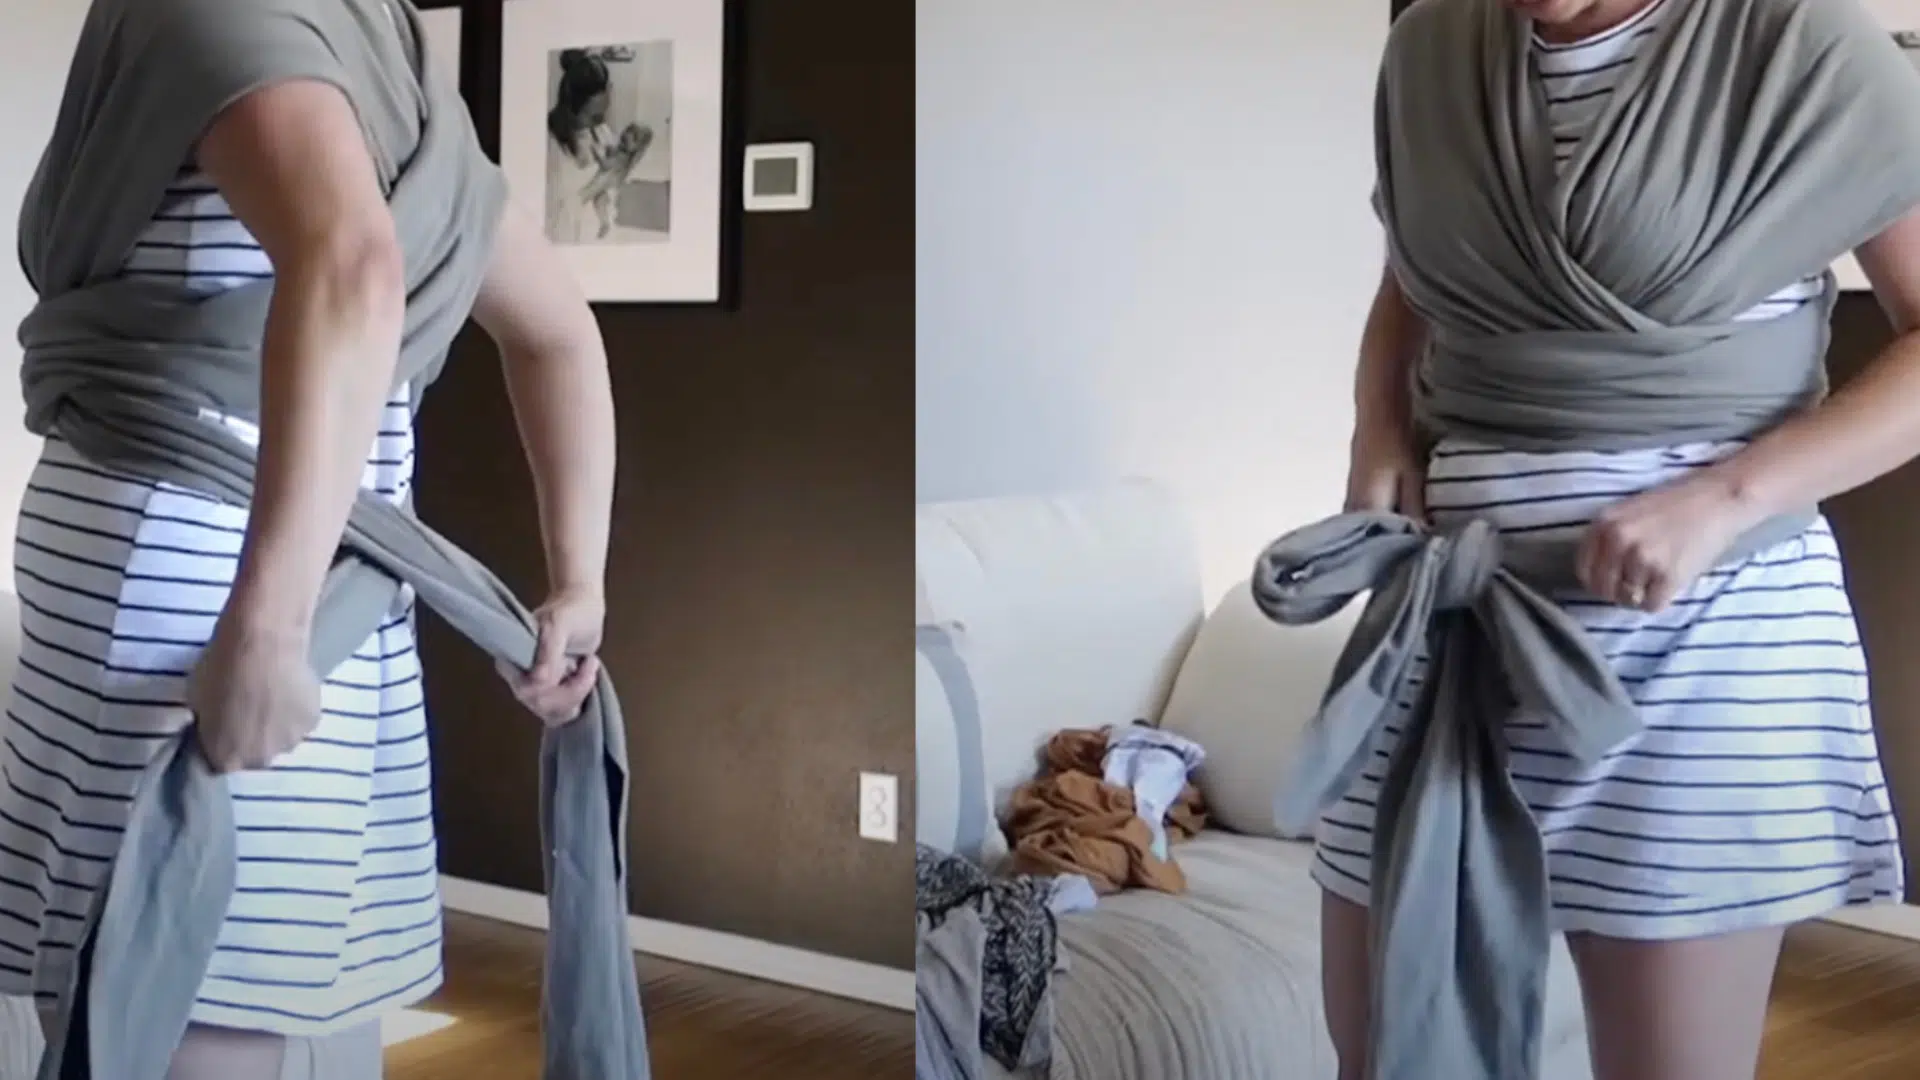
After tucking the ends through the waist panel, cross them again underneath and wrap them around your back. Bring the ends to the front or back, depending on their length, then tie a secure knot.
Using a double knot ensures the wrap stays firmly in place. Be sure to tuck in any extra fabric to prevent tripping hazards or your baby grabbing loose ends.
Step 7: Insert the First Leg into the Inside Panel
Begin with the shoulder strap that sits closest to your body, this is the inside panel. Gently slide your baby’s first leg through this strap, then pull the fabric across their back and under their bum.
Starting with the inner strap helps secure your baby right away, preventing them from sliding or shifting as you continue positioning them in the wrap.
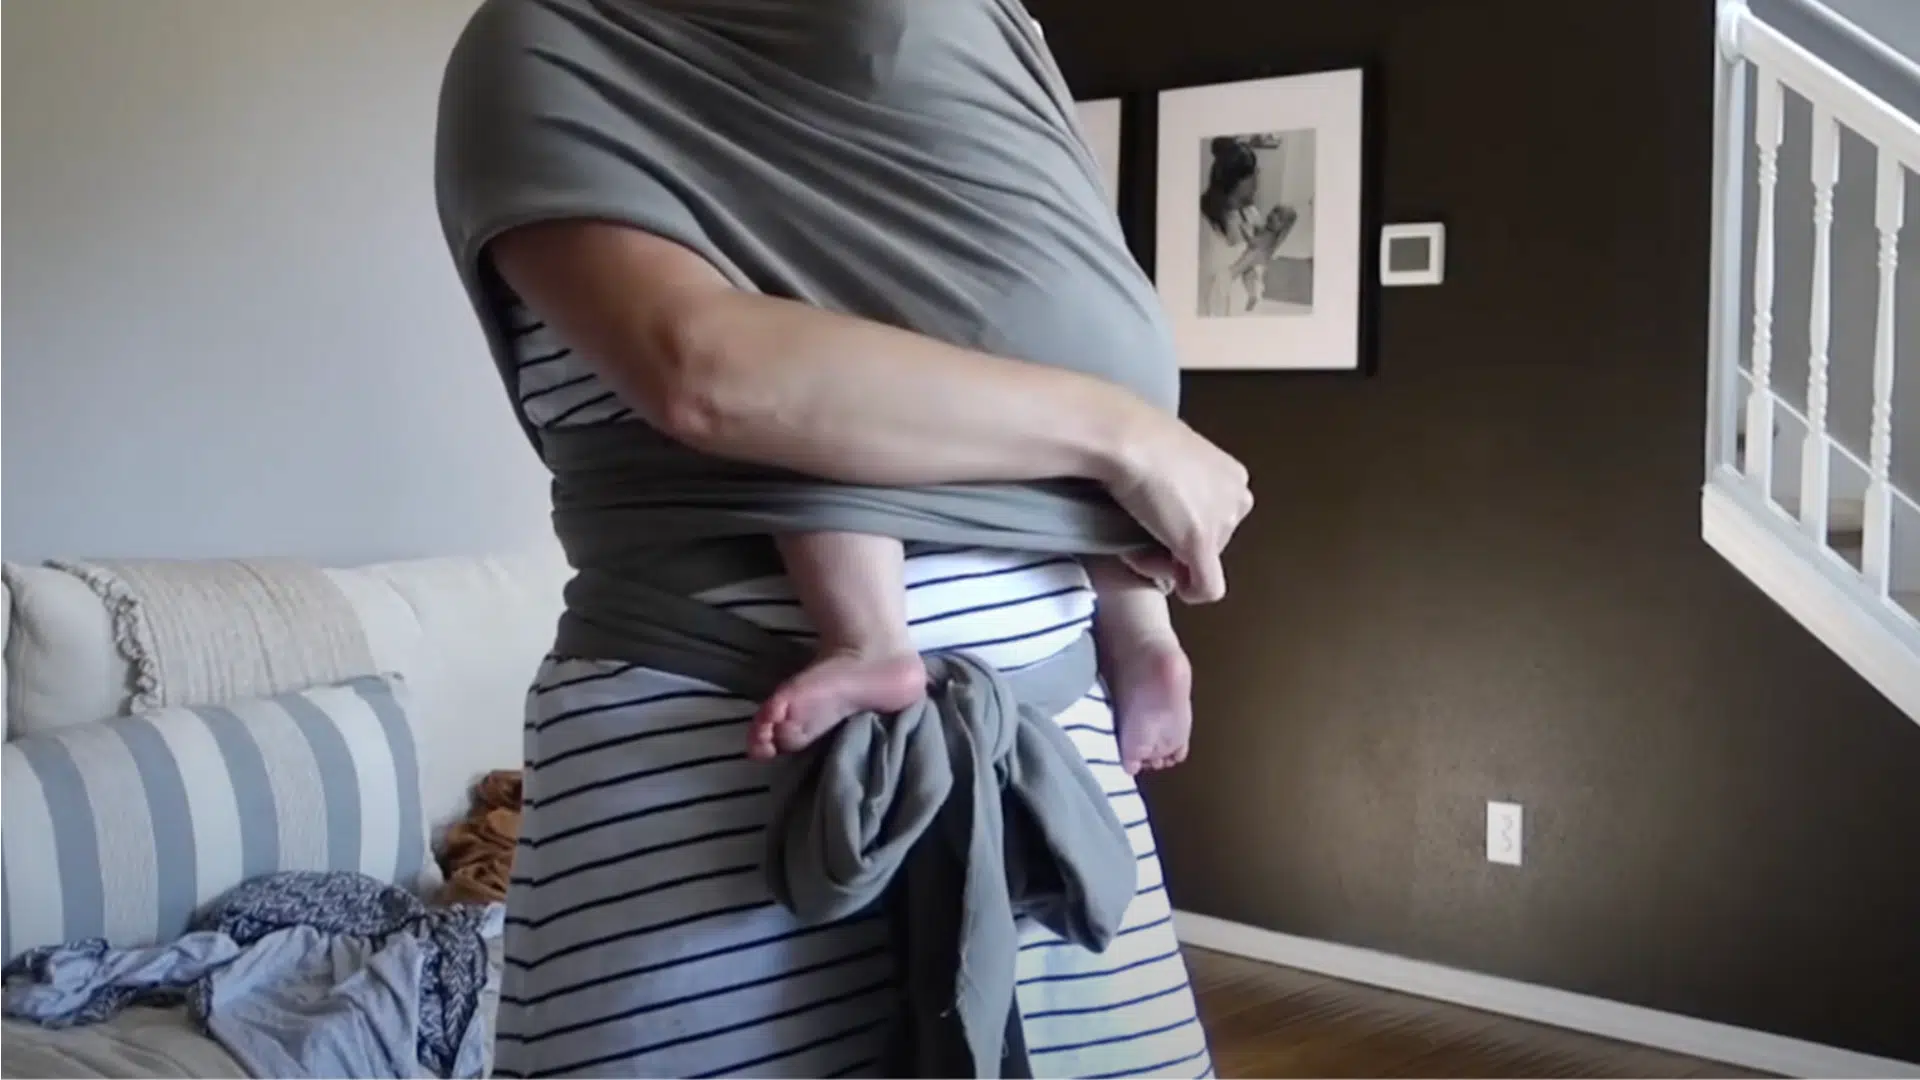
Step 8: Insert the Second Leg into the Outer Panel

Now, take the outer shoulder strap and gently slide your baby’s second leg through it, just as you did with the first.
As you pull the fabric across, flatten and spread it wide over your baby’s back and under their bum. This creates a secure “seat,” ensuring your baby’s knees are higher than their bum in the recommended M-position for healthy hip support.
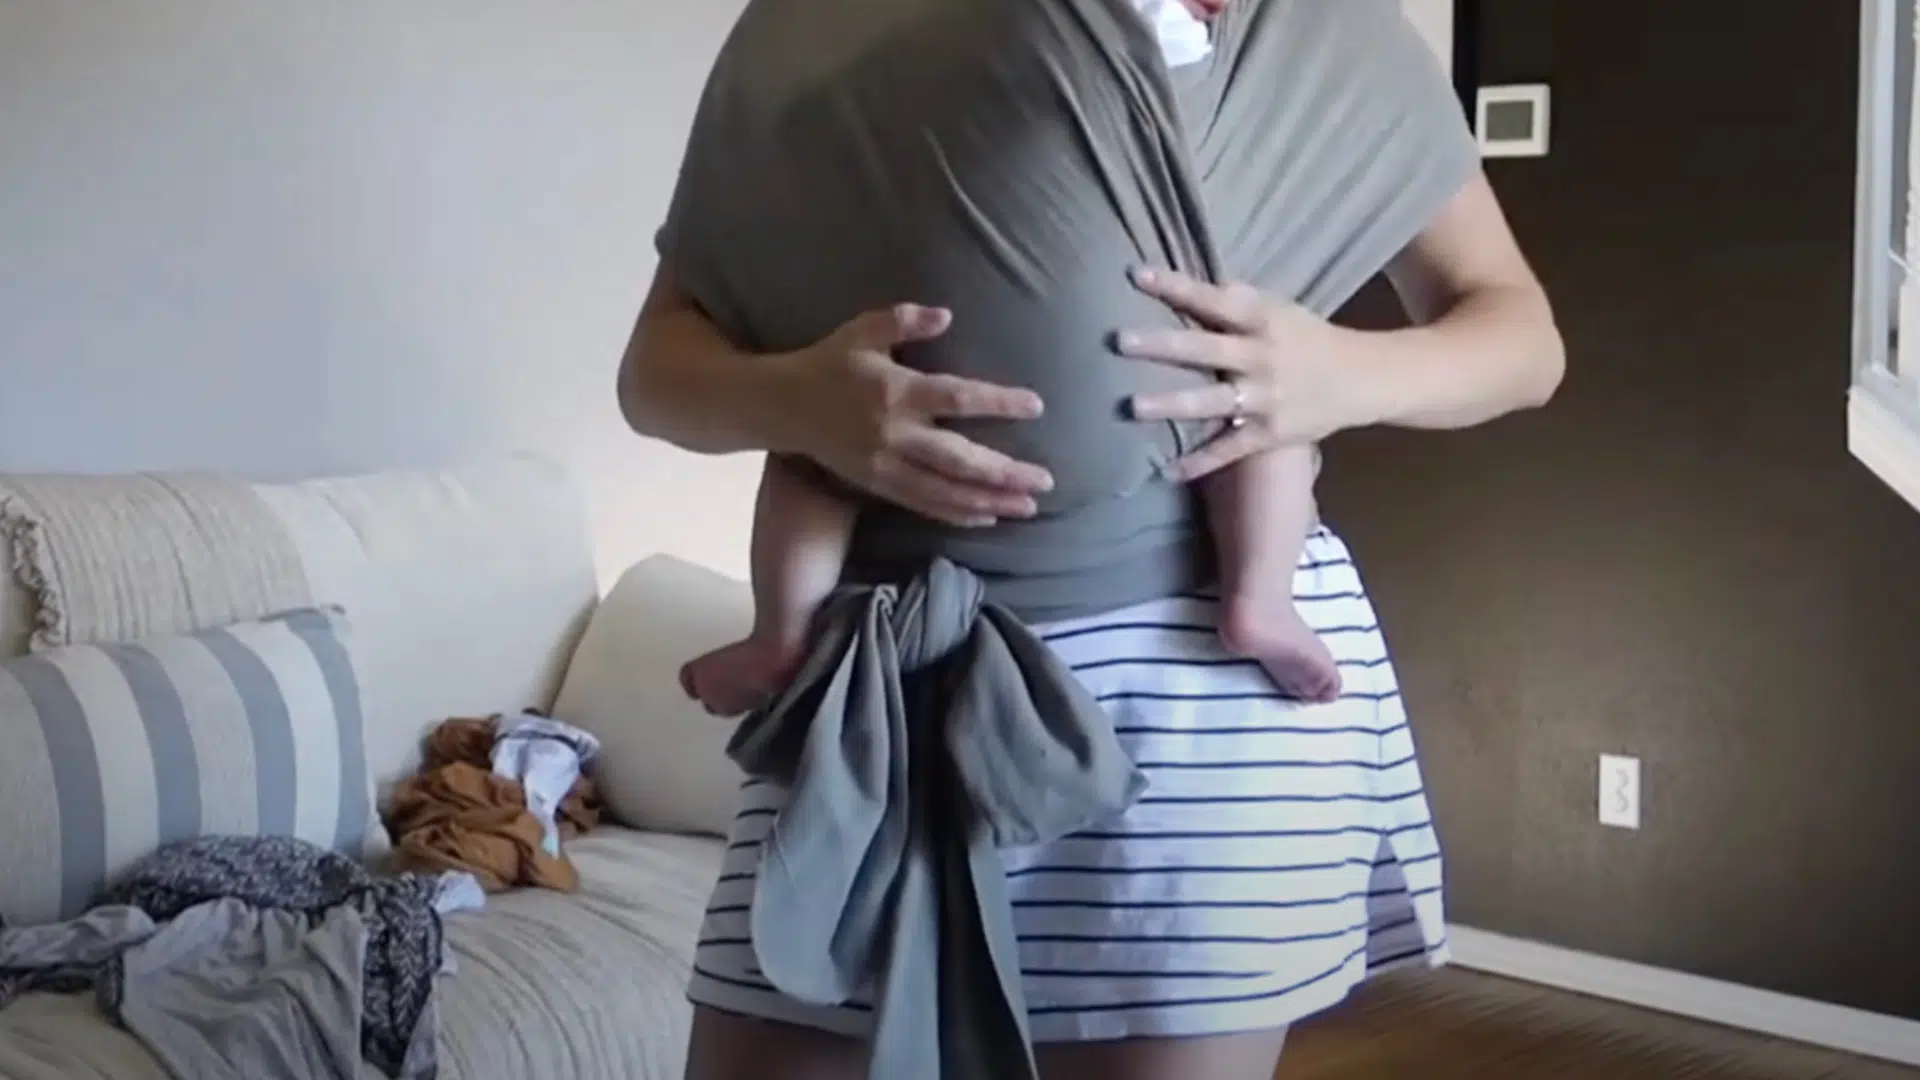
Step 9: Cover with Middle Panel
Lift the horizontal waist panel, the one across your tummy, and pull it up over your baby’s legs and bum. This step secures your baby in the wrap and adds an extra layer of support across their back and bottom.
For smaller babies or during nap time, you can also gently pull this panel higher to help support your baby’s head, keeping them snug and comfortable.
Step 10: Final Adjustments
Once your baby is positioned, decide whether to tuck their arms inside the wrap for extra security or leave them out for comfort, depending on their age and preference.
Gently bounce or walk around to help your baby settle into the wrap. It’s normal if your baby fusses at first; keep moving, as the gentle motion usually soothes them within a few minutes.
For a more detailed tutorial on how to baby wrap carrier and how to tie a newborn, check out the video below:
Top Comfortable Baby Wrap Carriers
Choosing the right baby wrap carrier is essential for ensuring both your baby’s safety and your own comfort during daily routines.
Here are some of the top baby wrap carriers that combine ergonomic support, ease of use, and cozy materials for parents and newborns:
It is a top choice for its soft, breathable French Terry Cotton, providing ergonomic support and a secure, cozy fit for newborns and infants, while allowing hands-free bonding and easy maintenance.
Its award-winning design ensures proper weight distribution and comfort for both baby and parent, making it ideal for daily use from 7 lbs upwards.
Stands out for its affordability and lightweight, stretchable fabric, offering comfortable, hands-free carrying for parents on the go. Its simple design makes it easy to use and adjust, making it a practical and accessible option for new parents.
Hands Free GROWNSY Baby Carrier
Newborn to Toddler is favored for its ergonomic structure and built-in head support, providing safety and comfort as your child grows from newborn to toddler.
The adjustable fit and hands-free design make it suitable for both indoor and outdoor use, supporting long-term babywearing needs.
It is loved for its ultra-soft material and snug fit, creating a womb-like environment that soothes babies and promotes bonding.
Its flexibility and gentle support are ideal for newborns and young infants, especially for parents seeking comfort and closeness.
Troubleshooting Common Issues
Using a baby wrap carrier can be challenging for new parents, but most common issues have simple solutions. Here’s how to troubleshoot frequent problems for a safer, more comfortable babywearing experience.
- Baby slumping or sliding: The wrap is likely too loose. Retighten all panels so the fabric hugs your body snugly before placing your baby inside.
- Wrap digging into your back: Straps cutting in means uneven weight distribution. Spread the fabric wide across your shoulders and keep the cross pattern flat and untwisted.
- Baby too low or not visible: If your baby sits below chest level, adjust the shoulder panels upward and tighten the wrap to keep your baby “close enough to kiss.”
- Fabric bunching or twisting: Smooth out all fabric sections and keep panels flat to avoid pressure points and ensure even support.
- Difficulty positioning baby: Start with your baby on the opposite shoulder, then gently guide each leg into place while leaning back slightly for better control and stability.
To Conclude
Mastering a baby wrap carrier makes those overwhelming newborn days into manageable, connected moments. What starts as wrestling with yards of fabric soon becomes second nature, like muscle memory that clicks into place.
Remember, every parent fumbles through their first attempts. That’s completely normal.
Focus on safety fundamentals, practice when the baby is content, and don’t hesitate to adjust as needed.
Your newborn doesn’t need perfection; they need closeness, security, and your steady presence. With time and patience, this ancient practice becomes an invaluable tool in your parenting toolkit.