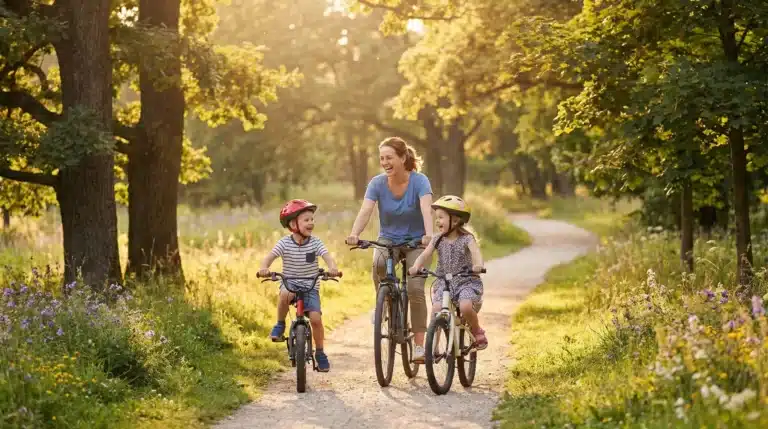
Parents today want their children to spend less time indoors and more time playing outside. Yet many struggle to find activities that truly capture their kids’ attention away from screens and gadgets.
A mud kitchen might be the perfect solution you’ve been looking for.
This blog will show you exactly what a mud kitchen is and why it’s becoming a favorite among families who value outdoor play.
You’ll learn how these simple setups can transform any backyard into a creative playground where children can cook, mix, and play for hours.
What is a Mud Kitchen?
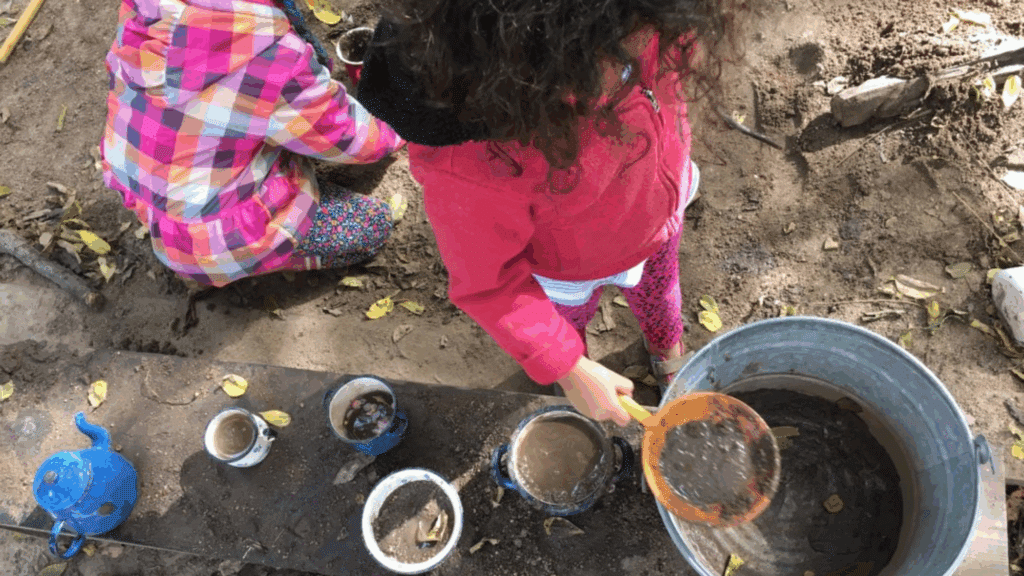
A mud kitchen is an outdoor play setup that features a worktop, sink or bin, shelves, and hooks, allowing children to cook with natural materials.
Think of it as a pretend kitchen set up in your backyard or garden, but instead of plastic food, kids use real dirt and water to make their culinary masterpieces.
These outdoor cooking stations typically include basic kitchen elements, such as old pots, pans, wooden spoons, and mixing bowls.
Mud Kitchen encourages messy play, creativity, and connection with nature.
Children can spend hours making mud pies, leaf soup, and dirt cakes while developing their imagination and sensory skills
Children can independently create, mix, and serve their muddy masterpieces while developing practical life skills through hands-on outdoor exploration.
Is It Healthy to Play in Mud?
Yes, mud play is healthy and beneficial for children’s development.
Playing in mud provides rich sensory experiences, boosts creativity, and supports problem-solving skills.
While there are small risks, proper hygiene practices, such as handwashing and using clean soil, make mud play safe. Outdoor play with natural elements promotes both physical and cognitive growth in children.
Benefits of Playing in A Mud Kitchen
This outdoor play experience provides children with multiple learning opportunities as they create and explore.
Language & social:
- Role-playing with menus and restaurant scenarios
- Learning turn-taking during shared play experiences
- Developing negotiation skills with playmates
- Building communication through collaborative cooking games
STEM & cognition:
- Practicing measuring and counting with natural materials
- Understanding viscosity through mixing different textures
- Learning cause-and-effect relationships through recipe experiments
- Engaging in early science conversations about natural processes
Sensory & motor:
- Developing fine-motor skills using scoops, whisks, and tools
- Building bilateral coordination through stirring and pouring
- Strengthening proprioception through hands-on material manipulation
- Enhancing tactile awareness through varied textures
Wellbeing & confidence:
- Making independent choices in open-ended play environments
- Tackling challenges without predetermined outcomes
- Building confidence through outdoor exploration
- Experiencing freedom in unstructured play settings
How to Build
Follow these steps to create the perfect outdoor cooking space.
Step 1. Plan the site: Choose level ground with shade, hose access, and clear adult sightlines; add gravel drainage below the sink area.
Step 2. Dimensions that work: Target 24-26 inch counter height; width should suit your space, with 120-150 cm being ideal.
Step 3. Frame & top: Use weather-resistant wood; avoid railroad ties treated with creosote. Smooth the sand edges and apply a protective seal.
Step 4. Sink/bin: Install a stainless or plastic basin with a drainage hole leading to gravel; consider a water jug for running water.
Step 5. Storage & tools: Add shelves and hooks; include metal bowls, whisks, measuring cups, and muffin tins for play.
Step 6. Fill choices: Use bagged loam topsoil in dedicated tubs; add play sand in lidded compartments for variety.
Step 7. Hygiene station: Set up a handwashing station with a jug, soap, and a towel line; establish a ‘wash before snack’ routine.
Step 8. Budget builds: Consider pallet or repurposed furniture options; many DIY projects cost under $100 to complete.
What Kind of Soil to Use (and Avoid)
The best texture for mud kitchen play is loam, a type of topsoil that balances the components of sand, silt, and clay. This mixture holds its shape well yet drains properly, creating the perfect “mud” consistency that children love.
Purchase bagged, verified loam topsoil rather than using unknown garden soil or pet-trafficked areas.
Never use compost for mud play activities. You can adjust the texture by adding clay soil for stickier mud pies or incorporating sand for easier pouring.
Remember to follow proper sand hygiene practices when making these modifications.
Can Sand Be Used in A Mud Kitchen?
Yes. Sand adds valuable dry-to-wet texture variety for pouring, measuring, and pretend baking activities. Choose washed play sand and cover when not in use, while keeping pets away.
Many setups combine mud, sand, and water.
Mud Kitchen vs. Sandbox
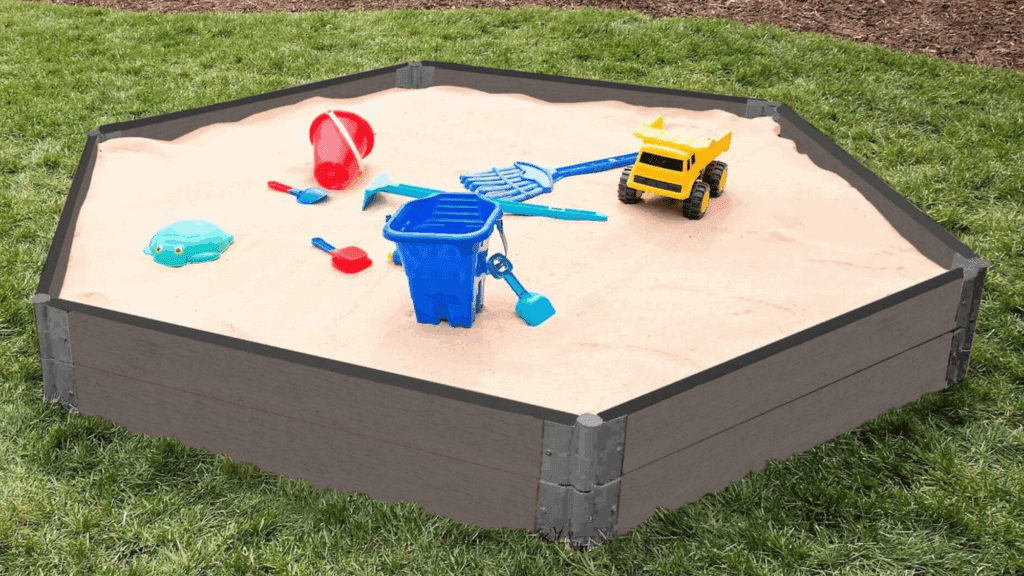
Both offer valuable outdoor play experiences but serve different developmental purposes.
Each has unique benefits for children’s learning and growth.
| Aspect | Mud Kitchen | Sandbox |
|---|---|---|
| Play pattern | Pretend cooking, role-play, recipe creation, and science experiments | Construction projects, engineering challenges, and pouring activities |
| Learning focus | Language development, executive function, and social skills | Spatial reasoning, engineering concepts, and fine motor skills |
| Hygiene | Requires handwashing after play sessions | Requires handwashing; must cover to prevent animal contamination |
| Care | Needs proper drainage and periodic soil refresh | Requires periodic sifting, sand replacement, and a secure lid |
At What Ages Do Children Play with Mud Kitchens?
The core users are children aged 1-7 years, from toddlers through early primary school.
Toddlers benefit from big handles and low benches for safe access. Pre-kindergarten children engage with measuring tools and written play orders.
Early primary students can handle fraction recipes and menu math activities.
Older children often transform mud kitchens into science laboratories, cafés, or potion-making stations, extending the play value well beyond the typical age range through creative reimagining.
Red Flags to Watch Out For
Creating a safe mud kitchen means knowing what to avoid. These common mistakes can turn a fun activity into a hazard for children.
- Pet contamination: Keep cats, dogs, and wild animals away from play areas to prevent harmful bacteria and parasites
- Toxic materials: Avoid railroad ties, creosote-treated wood, or composted manure that contains dangerous chemicals
- Sharp objects: Remove glass, metal debris, rocks, or broken tools that could cause cuts and injuries
- Standing water: Prevent mosquito breeding and drowning risks by ensuring proper drainage in all play areas
- Unsupervised access: Always maintain adult sightlines and never leave young children alone during mud play sessions
Final Thoughts
Setting up a mud kitchen doesn’t require expensive equipment or perfect planning.
With just a few old pots, some water, and a designated outdoor space, you can create hours of entertainment for your children.
Plus, you’ll love watching them play independently outdoors instead of asking for screen time.
Ready to get started? Gather those unused kitchen items from your cabinets and head outside. Your children are waiting to become the next great mud chefs in your backyard.