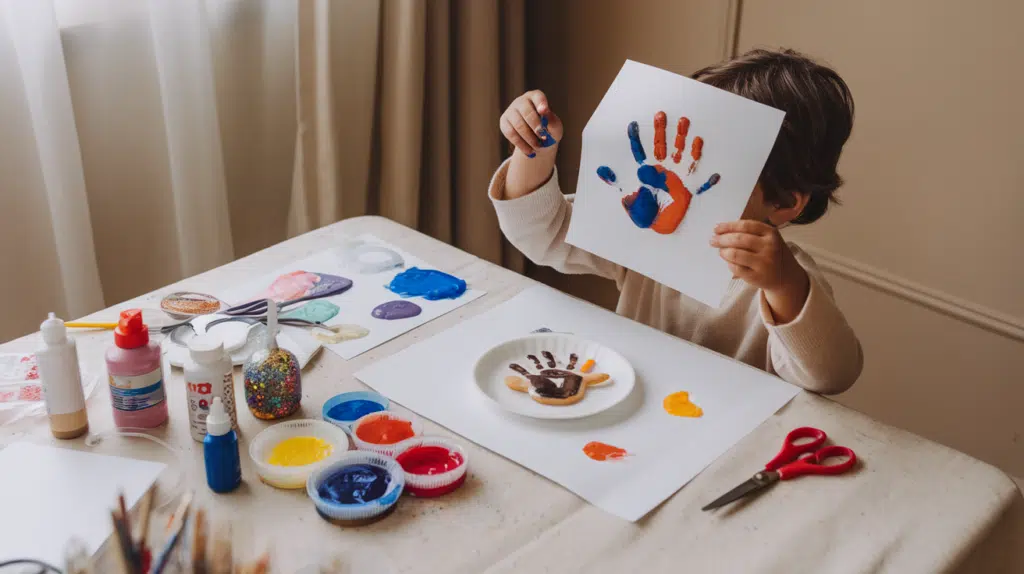
Toddler crafts don’t need to be complicated to be meaningful.What little ones enjoy most is the feel of soft paint, the sound of crinkly paper, and the fun of sticking things wherever their hands decide to place them.When crafts are simple and sensory-based, toddlers naturally stay engaged without pressure to create something perfect.
This list offers easy, age-appropriate ideas for children ages 1 to 3, using safe materials and steps you can set up quickly.
Each activity shows you what supplies to gather, how to do it, and how it supports your toddler’s development.
If you want a quiet tabletop craft, a seasonal project, or a creative outdoor idea, there’s something here to match every day and every mood.
What Makes a Good Craft for Toddlers?
For toddlers, the best crafts are:
-
Simple: Few steps, short instructions, and no pressure to “get it right.”
-
Sensory-rich: Lots of textures, soft, squishy, bumpy, sticky
-
Open-ended: There is no wrong way to place a sticker or dab paint
-
Safe and sturdy: Big pieces, non-toxic supplies, and easy cleanup
With that in mind, here is a continuous list of toddler craft ideas, all numbered so you can work through them or pick what fits your day.
Easy Toddler Craft Ideas for Ages 1–3
Toddlers learn best through simple, hands-on activities that let them touch, press, and explore at their own pace.
This section gathers beginner-friendly crafts that use soft textures and big motions, perfect for introducing little ones to art time.
Simple First Art & Craft Projects for Toddlers
These are great “starter” crafts for toddlers who are new to art time.
They use big motions, gentle textures, and very little setup, so you can focus on enjoying the moment instead of managing chaos.
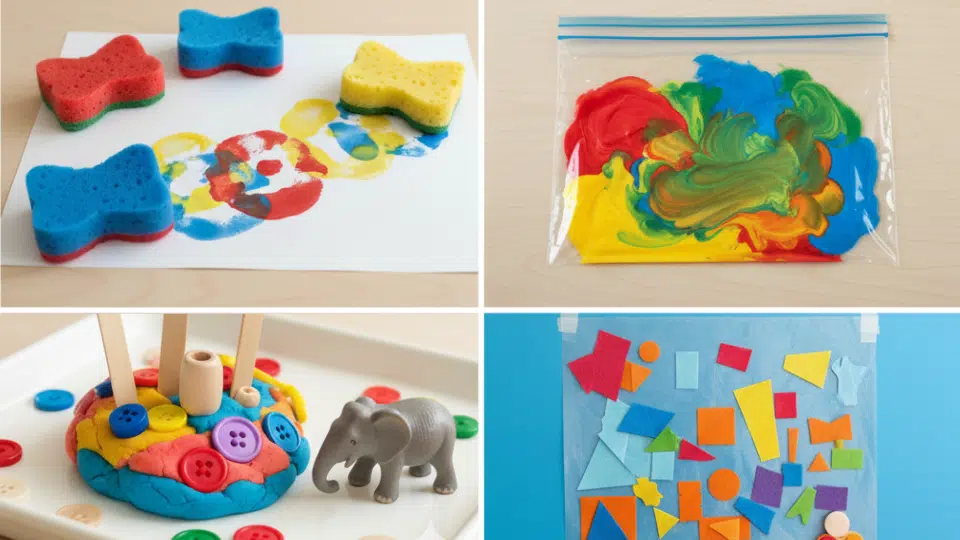
1. Soft Sponge Painting
Age group: 1–2 years
Supplies Needed:
- Sponge chunks or cut-up kitchen sponges
- Washable paint
- Tray or plate for paint
- Thick paper
- Old shirt, apron, or smock
How to Do It:
Pour small puddles of paint onto the tray in two or three colours.
Show your toddler how to press a sponge into the paint, then tap it onto the paper.
Say colour names as you go, “red dab, blue dab,” so they hear simple language.
Let them try bouncing, dragging, and pressing harder or softer to see different marks.
When they lose interest, put the painting aside to dry and chat later about the colours and shapes they created.
How It Helps:
Builds early hand control, introduces colour words, and shows that their actions leave visible marks on the page.
2. Mess-Free Zip-Bag Painting
Age group: 1–2 years
Supplies Needed:
- Resealable plastic bag (large)
- A sheet of paper cut to fit inside
- A few small blobs of washable paint
- Tape
- Cardboard or a table surface underneath
How to Do It:
Place the paper inside the bag so it lies flat.
Squeeze two or three small blobs of paint onto the paper inside the bag.
Press out most of the air and seal the bag very firmly.
Tape the bag to the table or a piece of cardboard so it doesn’t slide around.
Invite your toddler to pat, push, drag, and poke the paint through the plastic.
Talk about how the colours move and blend without anything getting on their hands.
How It Helps:
Offers a rich sensory experience with colour mixing, but keeps hands clean, perfect for toddlers who dislike sticky textures or for low-energy days.
3. Contact-Paper Sticky Wall
Age group: 1–3 years
Supplies Needed:
- Clear contact paper
- Masking tape
- Felt pieces, tissue paper squares, or light craft foam shapes
- Small bowl or tray for the shapes
How to Do It:
Cut a big rectangle of contact paper.
Tape it to the wall at your toddler’s height, sticky side facing out.
Peel off the backing slowly so they can see and touch the sticky surface.
Place the bowl of shapes nearby and show how to press one shape onto the wall.
Let them add, remove, and move pieces around as often as they like.
When it’s full, you can trim the edges and keep it as a “window” picture.
How It Helps:
Improves fine motor skills, teaches “stick” and “peel,” and lets toddlers arrange and rearrange without frustration.
4. Handprint or Footprint Keepsakes
Age group: 1–3 years
Supplies Needed:
- Washable paint
- Thick paper or card
- Small plate for paint
- Wipes or a warm cloth for quick clean-up
How to Do It:
Pour a thin layer of paint onto the plate.
Gently press your toddler’s hand or foot into the paint so it’s lightly coated.
Guide their hand or foot down onto the paper and press evenly.
Lift straight up to keep the print clear.
Add the date and a short note like “Age 2 – Little Hands” around the print.
Once dry, let your toddler decorate around the print with dots, scribbles, or stickers.
How It Helps:
Builds body awareness (“This is my hand!”) and gives you simple keepsakes to look back on later.
5. Playdough & Loose Parts Station
Age group: 2–3 years
Supplies Needed:
- Playdough (store-bought or homemade)
- Large buttons, lids, chunky beads
- Craft sticks or popsicle sticks
- Small plastic animals (optional)
How to Do It:
Give your toddler a ball of playdough about the size of their fist.
Offer a small selection of loose parts; there is no need to put out everything you own.
Show how to push buttons into the dough, stand sticks up like trees, or press animals into make “footprints.”
Let them squish, roll, poke, and build freely, changing the dough as often as they like.
Swap the loose parts on another day so the same playdough feels fresh and new.
How It Helps:
Strengthens hand muscles, encourages imagination, and supports early problem-solving as they figure out how pieces balance and stay in place.
Nature & Outdoor Crafts for Curious Toddlers
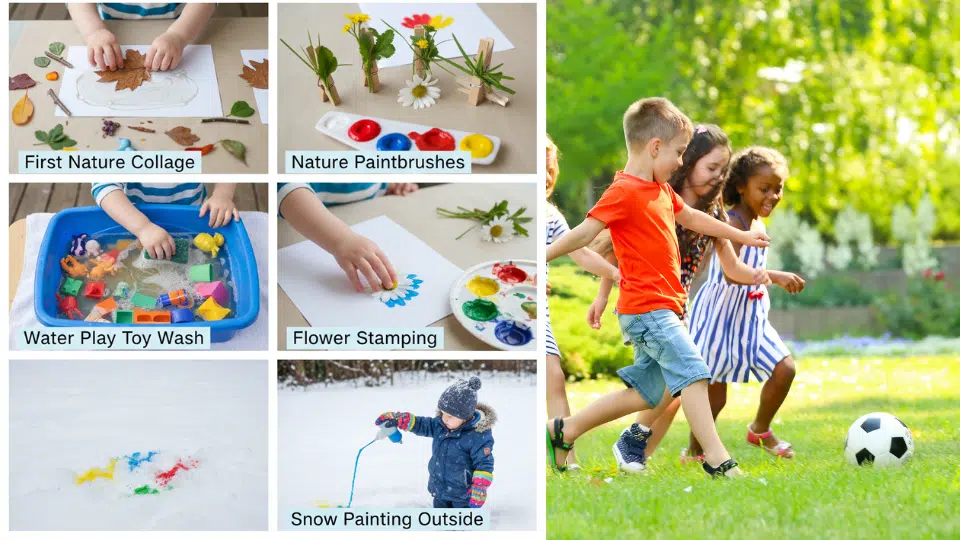
These crafts connect simple art with the outside world. They’re perfect when you want to add fresh air, textures from nature, and big body movement to your day.
6. First Nature Collage
Age group: 1–2 years
Supplies Needed:
- Fallen leaves, petals, small sticks (collected safely)
- Thick paper or cardboard
- Child-safe glue or glue stick
How to Do It:
Take a short walk and help your toddler gather a few safe items from the ground.
Back inside, spread a thin layer of glue onto the paper, or dab glue where items will go.
Hand your toddler one item at a time and let them decide where to place it.
Gently press each piece down together so it sticks.
Name items as you go: “crunchy brown leaf,” “rough stick,” “soft petal.”
How It Helps:
Connects outdoor noticing with creativity and builds early describing words like colours and textures.
7. Nature Paintbrushes
Age group: 2–3 years
Supplies Needed:
- Clothespins
- Small leaves, short grass bundles, or flowers
- Washable paint
- Tray or plate
- Paper
How to Do It:
Clip leaves, grass, or flowers into clothespins to create little “brushes.”
Pour paint onto a tray in thin puddles.
Show your toddler how to dip a nature brush into the paint.
Invite them to sweep, dab, or tap the brush on the paper to see the marks it makes.
Offer different brushes and talk about which ones make thick, thin, or speckled lines.
How It Helps:
Encourages curiosity about materials and helps toddlers compare how different textures behave with paint.
8. Water Play Toy Wash
Age group: 1–3 years
Supplies Needed:
- Shallow tub or basin
- Warm water
- A few drops of tear-free soap
- Small cloths or sponges
- Plastic toys (cars, animals, blocks)
- Towel for underneath
How to Do It:
Place a towel on the floor and set the tub on top.
Fill the tub with a little warm water and add a small squeeze of soap.
Put a few plastic toys beside the tub.
Show your toddler how to dunk a toy, scrub it with the cloth, and then lay it on the towel to “dry.”
Use simple language like “wash,” “rinse,” and “dry” as they play.
How It Helps:
Combines sensory play with simple care routines and supports coordination as they hold toys and cloths together.
9. Flower Stamping with Real Flowers
Age group: 2–3 years
Supplies Needed:
- Sturdy flowers (like daisies or similar)
- Washable paint
- Shallow tray
- Paper
How to Do It:
Pour a thin layer of paint into the tray.
Let your toddler dip a flower head lightly into the paint.
Show them how to press the flower onto the paper like a stamp.
Encourage them to try pressing softly, then more firmly, or turning the flower a little.
Look together at the different shapes, some clear, some smudgy, and talk about which they like.
How It Helps:
Blends nature and art, and shows that painting tools can be everyday objects, not just brushes.
10. Snow Painting Outside
Age group: 2–3 years (with close supervision)
Supplies Needed:
- Spray bottles or squeeze bottles
- Water mixed with a few drops of food colouring or liquid watercolours
- Snowy area outside
- Warm clothing and waterproof mittens
How to Do It:
Fill bottles with coloured water, one colour per bottle works best.
Head outside to a clean patch of snow.
Show your toddler how to spray or squeeze colour onto the snow surface.
Let them make spots, zigzags, or large patches of colour.
Later, you can check together how the colours change as the snow melts or refreezes.
How It Helps:
Offers big-movement art, outdoor sensory play, and clear cause-and-effect as the snow changes with the colour and weather.
Everyday Tabletop Crafts at Home
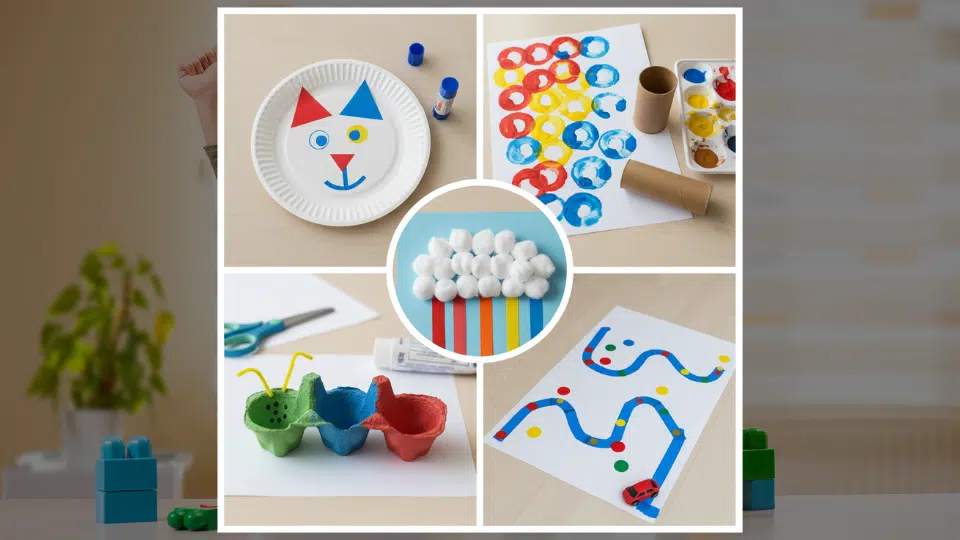
These crafts are ideal for rainy days or quiet afternoons. They use simple household materials and encourage pretend play, early drawing, and small hand movements.
11. Paper Plate Animal Faces
Age group: 2–3 years
Supplies Needed:
- Paper plates
- Glue stick
- Scrap coloured paper (triangles, circles, strips)
- Crayons or markers
- Optional: googly eyes
How to Do It:
Give your toddler a paper plate as the “face.”
Place small paper shapes in a pile: triangles for ears, circles for eyes, strips for whiskers or manes.
Ask which animal they want, but allow them to place pieces however they choose.
Help with glue if needed, pressing pieces down, and naming them as you go.
Let them finish with scribbles, spots, or stripes using crayons or markers.
How It Helps:
Supports imagination, shape awareness, and pride as they create a “lion,” “cat,” or completely new creature.
12. Cotton-Ball Cloud and Rainbow Craft
Age group: 2–3 years
Supplies Needed:
- Cotton balls
- Glue
- White or blue card
- Strips of coloured paper or crayons
How to Do It:
Draw a simple cloud outline at the top of the page.
Invite your toddler to dab glue inside the cloud shape.
Show them how to press cotton balls onto the glue until the cloud looks soft and fluffy.
Offer strips of coloured paper and say they can be “rainbow lines” coming down from the cloud.
Help them glue the strips on, or let them draw rainbow arcs with crayons instead.
How It Helps:
Builds finger strength, introduces simple ideas about weather, and brings in colour patterns in a relaxed way.
13. Sticker Paths & Tape Roads
Age group: 2–3 years
Supplies Needed:
- Painter’s tape or masking tape
- Dot stickers or shape stickers
- Large sheet of paper or clear floor space
- Small toy cars or animals (optional)
How to Do It:
Lay painter’s tape on the floor or paper in straight lines, curves, or simple shapes.
Describe it as a “road” or “path” your toddler can decorate.
Give them stickers and show how to place them along the tape like lights, flowers, or stepping stones.
If using toy cars, let your child drive cars along the tape routes between placing stickers.
Make a small story as you go, “The car is going to the sticker house.”
How It Helps the Toddlers:
Boosts fine motor accuracy, supports early ideas of direction and pathways, and can turn into simple pretend play.
14. Cardboard Tube Stamping
Age group: 2–3 years
Supplies Needed:
- Empty toilet paper or paper towel rolls
- Washable paint
- Shallow tray or plate
- Paper
How to Do It:
Pour a small amount of paint into the tray.
Show your toddler how to dip one end of a cardboard tube into the paint.
Press the painted end onto the paper to make circle prints.
Encourage them to overlap circles, make rows, or cluster them in one area.
Gently squeeze a tube into an oval or heart shape to see how the print changes, and let them try too.
How It Helps:
Supports grip strength and pattern-making, and introduces a very simple form of printmaking.
15. Egg-Carton Bugs
Age group: 2–3 years
Supplies Needed:
- Cardboard egg carton
- Child-safe scissors (adult use)
- Washable paint
- Glue
- Pipe cleaners (for legs/antennae)
- Markers
How to Do It:
Cut the egg carton into single or double “cups” to form bug bodies.
Let your toddler paint each cup in any colour they like and set them aside to dry.
Help poke small holes where pipe cleaners can slide through as legs or antennae.
Invite your child to choose where eyes, spots, and stripes go using markers or glued-on bits.
Let them crawl the bugs around the table or across the floor when finished.
How It Helps:
Introduces simple 3D crafting, encourages creativity, and sparks early talk about real insects and pretend ones.
Christmas, Holiday & Seasonal Crafts for Toddlers
These ideas fit naturally around Christmas, Easter, autumn, and Halloween, but many can be adapted for any celebration by changing colours or shapes.
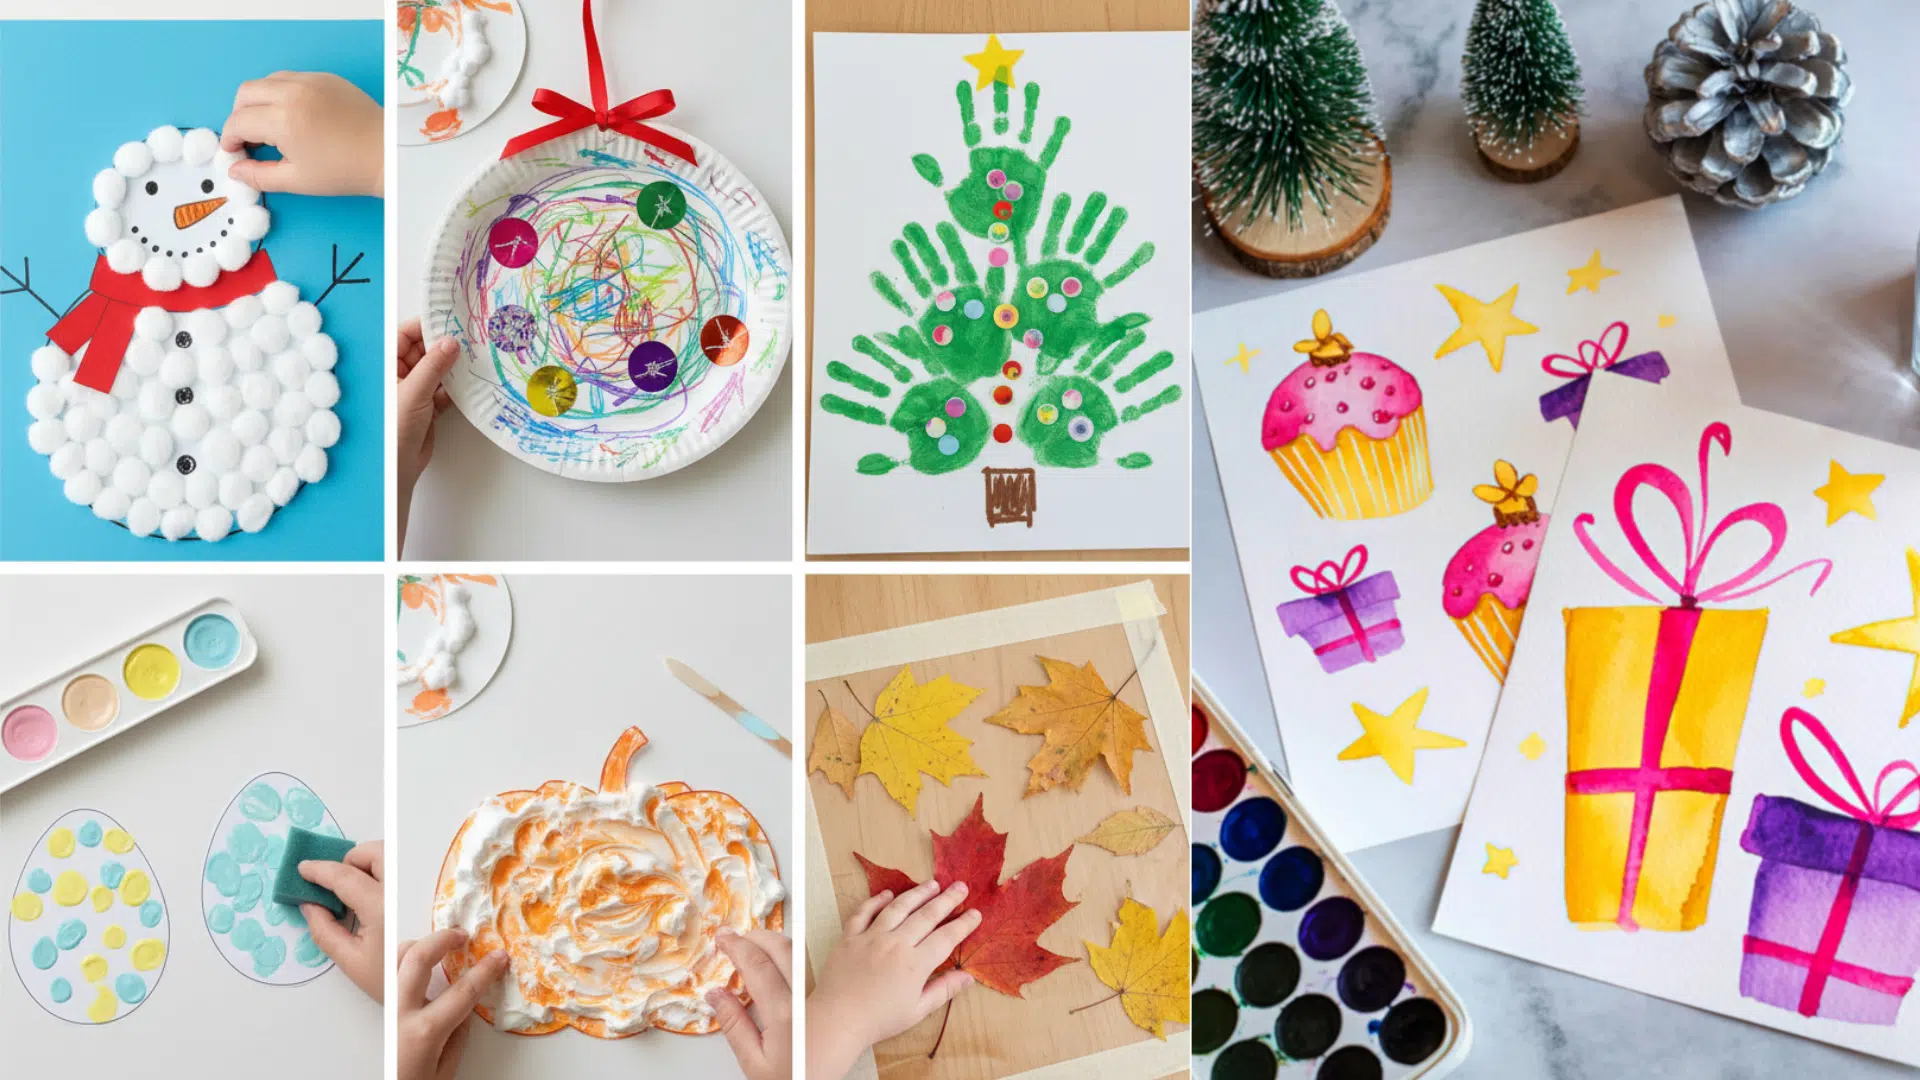
16. Christmas Cotton-Ball Snowman
Age group: 2–3 years
Supplies Needed:
- White or coloured paper
- Cotton balls
- Glue
- Small orange paper triangle (for nose)
- Black circles or markers for eyes and buttons
- Optional: scrap paper for a hat or a scarf
How to Do It:
Draw three circles stacked on the page to suggest a snowman.
Help your toddler dab glue inside the circles.
Show them how to press cotton balls on until the body looks fluffy and full.
Offer the orange triangle and black circles for nose, eyes, and buttons, or let them draw those details themselves.
Add a paper scarf or hat if they’re still interested.
How It Helps the Toddlers:
A cosy Christmas craft for toddlers that supports fine motor skills and simple body-part words (head, body, buttons).
17. Paper Plate Christmas Ornament
Age group: 2–3 years
Supplies Needed:
- Paper plate
- Crayons or markers
- Stickers, sequins, or colourful paper scraps
- Glue
- Hole punch
- Ribbon or yarn
How to Do It:
Give your toddler a paper plate and invite them to colour or scribble all over it.
Place a small bowl of stickers, sequins, or paper scraps on the table.
Show how to stick or glue decorations onto the plate.
When they are satisfied, punch a small hole near the top.
Help them thread ribbon or yarn through and tie a loop so it can hang.
How It Helps the Toddlers:
Encourages choice-making, builds pride when they see their ornament displayed, and brings toddlers into family holiday decorating.
18. Handprint Christmas Tree
Age group: 2–3 years
Supplies Needed:
- Green washable paint
- Paper
- Small dots of paint or stickers for ornaments
- Brown crayon or paper for the tree trunk
- Optional star sticker
How to Do It:
Paint your toddler’s hand green or let them dip it gently into green paint.
Press the hand onto the page with fingers pointing down.
Repeat overlapping handprints slightly above and to the side to form a tree shape.
Let the green paint dry.
Give them small stickers or paint to add dots as “ornaments” on the tree.
Draw or glue a brown trunk at the bottom and add a star at the top if you wish.
How It Helps the Toddlers:
Combines body awareness with layered printing and gives toddlers a simple way to join in Christmas craft traditions.
19. Spring Sponge-Stamp Eggs
Age group: 2–3 years
Supplies Needed:
- Egg-shaped paper cutouts
- Small pieces of sponge
- Pastel paints (or any light colours)
- Tray or plate
How to Do It:
Cut egg shapes from card or thick paper.
Pour a little pastel paint into a tray and give your toddler sponge pieces.
Show them how to dab the sponge in the paint and tap it onto the egg shapes.
They can make dots, stripes, or random patches, and mix colours if they choose.
Hang the finished eggs on a string or tape them to a window for simple spring décor.
How It Helps the Toddlers:
Gives a gentle Easter craft for toddlers, supporting colour play and simple pattern ideas.
20. Shaving-Cream Pumpkin
Age group: 2–3 years (with very close supervision to keep foam away from eyes and mouth)
Supplies Needed:
- Shaving cream (plain, unscented if possible)
- Orange paint or food colouring
- Tray or shallow dish
- Pumpkin-shaped card or paper
- Craft stick or spoon
How to Do It:
Squirt shaving cream into a tray and add a little orange paint.
Mix together until it looks light and fluffy.
Place the pumpkin-shaped card nearby.
Show your toddler how to scoop foam onto the pumpkin shape and spread it around.
Let them make swirls and peaks with a craft stick or fingers if they like the sensation.
Allow the foam to sit for a while, then gently scrape off extra to reveal a marbled pumpkin.
How It Helps the Toddlers:
Rich, seasonal sensory play that supports hand coordination and helps some toddlers become more comfortable with messy textures.
21. Fall Leaf Collage
Age group: 2–3 years
Supplies Needed:
- Fallen leaves in different colours and sizes
- Clear contact paper
- Masking tape
How to Do It:
Tape a sheet of contact paper, sticky side up, onto a table or low window.
Place collected leaves in a basket within easy reach.
Invite your toddler to place leaves onto the sticky surface in any arrangement they like.
They might line them up, stack them, or scatter them randomly.
Place another sheet of contact paper on top and press down firmly to seal.
Trim edges to turn it into a placemat or hang it in a window.
How It Helps the Toddlers:
A simple autumn craft that encourages sorting, noticing leaf differences, and gentle pressing movements.
Big, Bold & Wall or Window Toddler Art

These ideas use big surfaces and whole-arm movements. They are great when your toddler has lots of energy and you want a creative outlet that still feels contained.
22. Simple Night-Sky Collage
Age group: 2–3 years
Supplies Needed:
- Dark blue or black paper
- Star stickers
- White crayon or chalk
- Optional glitter glue
How to Do It:
Give your toddler the dark paper and a sheet of star stickers.
Show how to peel and place stars anywhere in the “sky.”
Offer a white crayon or chalk for tiny dots as faraway stars.
If they enjoy it, add tiny glitter glue dots together for extra sparkle.
Talk softly about nighttime, the moon, and sleepy houses while they work.
How It Helps the Toddlers:
Encourages calm focus, strengthens sticker skills, and introduces simple ideas about day and night.
23. Paper Plate Sun
Age group: 2–3 years
Supplies Needed:
- Paper plate
- Yellow and orange paint or crayons
- Strips of yellow/orange paper or pipe cleaners
- Glue or tape
How to Do It:
Invite your toddler to paint or colour the whole plate in bright sunshine colours.
While it dries a little, cut strips of yellow or orange paper, or offer pipe cleaners.
Show how to glue or tape strips around the edge of the plate as “sun rays.”
Let them decide how many rays and where they go, even if it looks irregular.
Add a face in the middle if they want, or leave it as a simple glowing circle.
How It Helps the Toddlers:
Helps toddlers notice shapes (circle with radiating lines) and allows simple chat about the sun, warmth, and daytime.
24. Yogurt Cup Wind Chimes
Age group: 2–3 years (with supervision for string and beads)
Supplies Needed:
- Clean yogurt cups
- Paint or stickers for decorating
- String or yarn
- Large beads or bells (no small choking-size pieces)
- Stick or hook for hanging
How to Do It:
Let your toddler decorate the outside of each yogurt cup with paint or stickers.
Once dry, help poke a small hole in the bottom of each cup.
Thread the string through the hole from inside to outside and tie a bead or bell at the end so it hangs below.
Tie the other end of the string to a stick or directly to a hook, leaving space between each cup.
Hang the chimes in a breezy but safe spot and let your child gently tap or nudge them to hear the sounds.
How It Helps the Toddlers:
Combines crafting with soft sound play and introduces the idea of reusing everyday containers in creative ways.
25. Tempera Paint Stick Wall Mural
Age group: 2–3 years
Supplies Needed:
- Tempera paint sticks
- Large sheet or roll of paper
- Tape
How to Do It:
Tape a big sheet of paper to the wall at your toddler’s height.
Offer a few paint sticks, not every colour at once, to keep it simple.
Show how to twist the stick up and make long lines, circles, or dabs on the paper.
Encourage broad arm movements and let them choose where the colours go.
When they’re finished, stand back together and talk about the colours, shapes, and marks they see.
How It Helps the Toddlers:
Uses whole-arm movement for early mark-making, builds confidence on a large scale, and keeps clean-up quick since paint sticks dry fast and don’t drip.
Conclusion
Toddler crafts work best when they stay simple, sensory, and flexible enough for little hands to learn freely.
They do not need to be complicated to be meaningful.
With simple supplies, clear steps, and plenty of freedom, these toddler craft ideas can fit into everyday life, holidays, and changing seasons.
Each project builds small skills like grip strength, language, and imagination while giving you shared, playful time together.
Pick one or two that match your child’s age and mood, and let the craft unfold at their own pace.
The goal isn’t a perfect result; it’s the joy, curiosity, and confidence that grow during the process.