Your craft supplies have a way of taking over. One day, it is a small bag of yarn. Next, there are ribbon rolls on the dining table, glitter on the counter, and three half-finished projects on the couch.
Sound familiar?
You do not need a big room to fix this. A closet, a corner, or a spare wall is enough. With the right setup, even the smallest space can hold everything you need and still leave room to actually work.
This blog covers DIY small craft room ideas, a quick planning checklist, honest cost estimates, and simple tips to stay organized long after setup day.
Plan Before You Buy
Setting up a small craft room without a plan is how you end up with bins that do not fit and shelves that block the door. A few minutes of thinking now saves hours of fixing later.
| Factor | What to Think About |
|---|---|
| Room size | Measure length, width, and ceiling height before buying anything |
| Craft type | List the five supplies you use most. Those need to be within arm’s reach |
| Lighting | Note where natural light falls and where your nearest outlets are |
| Workflow | Think about how you move while crafting. Will you sit, stand, or both? |
| Budget | Set a number before you start. It keeps you from overbuying on day one |
Once you have these five things written down, you will know exactly what kind of setup fits your space. Most craft room problems come from skipping this step entirely.
21 DIY Small Craft Room Ideas
These ideas work across different space types, budgets, and craft styles. You do not need to use all 21. Start with two or three that fit your setup right now and build from there.
Idea 1: Wall-Mounted Fold-Down Desk
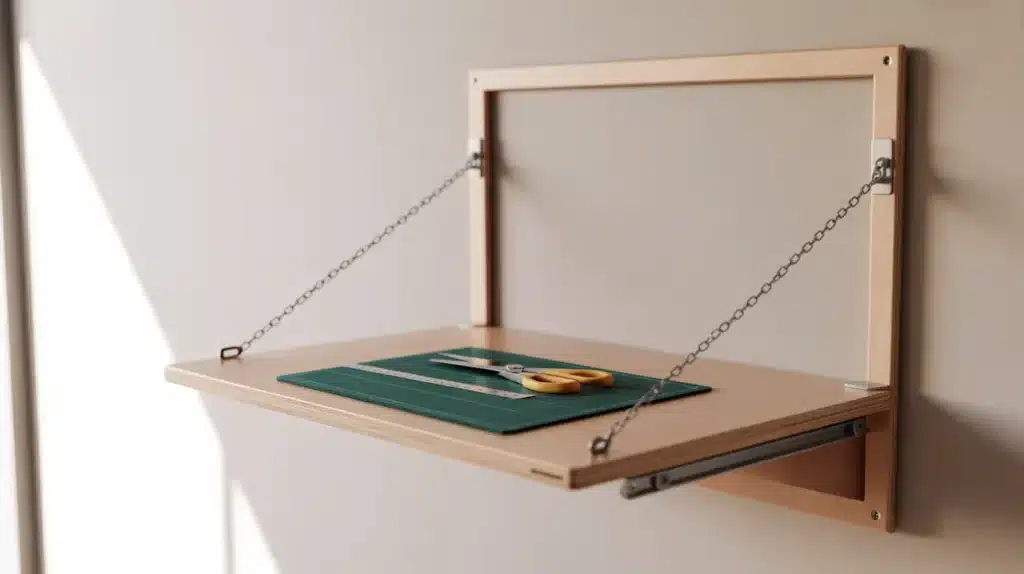
A fold-down desk gives you a full work surface when you need it and disappears when you do not. It is one of the smartest setups for a room that doubles as a guest room or home office.
Materials: Wooden board (at least 24” x 36”), two heavy-duty hinges, two support chains or folding brackets, wall anchors, and screws
Steps:
- Find the wall studs and mark where your hinges will go. Mount the top hinge into a stud first, then attach the board.
- Attach the support chains or brackets to both the wall and the underside of the board to keep it level when open.
- Sand the edges smooth and seal or paint the wood surface before use.
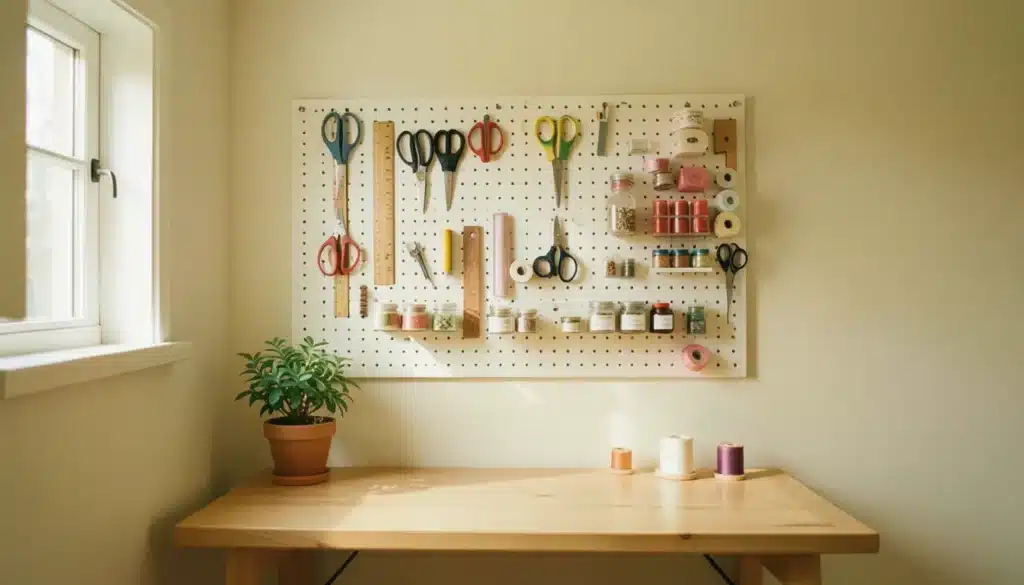
Idea 2: Pegboard Tool and Supply Wall
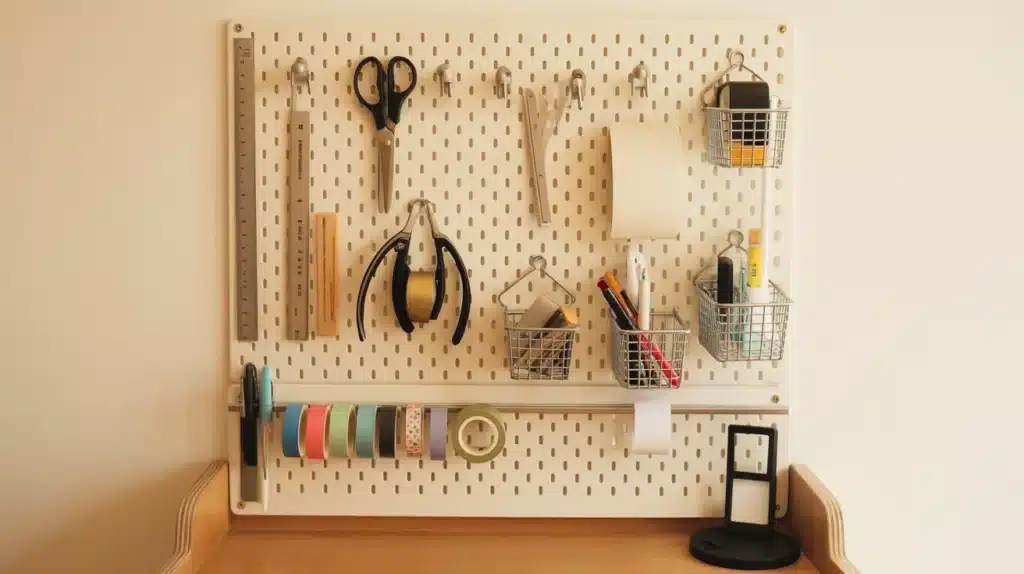
A pegboard stores tools flat against the wall so nothing takes up desk or floor space. You can move the hooks around any time your storage needs change, without patching holes.
Materials: Pegboard sheet (2×4 ft), mixed pegboard hooks, small wire baskets, wall mounting strips or anchors, paint (optional)
Steps:
- Hold the pegboard against the wall and mark the anchor points. Leave at least half an inch between the board and the wall so hooks fit in properly.
- Mount the board securely. Paint it first if you want a specific color.
- Hang hooks, baskets, and small shelves based on use frequency. Put the tools you grab most at eye level.
Idea 3: Corner Desk Built from a Repurposed Door
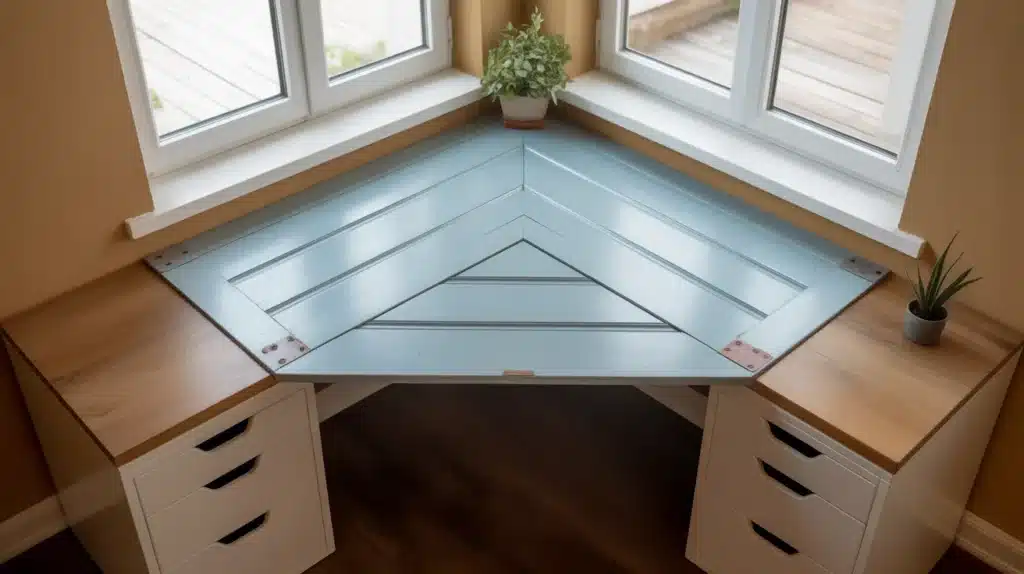
An old interior door laid flat across two short filing cabinets creates a wide, solid corner desk at a very low cost. It gives you far more surface area than most store-bought options.
Materials: One old interior door (solid core works best), two filing cabinets or sawhorses, sandpaper, paint or wood sealer, furniture pads
Steps:
- Sand the door surface smooth to remove any old finish or rough spots.
- Set your two base supports in the corner at equal height, then lay the door flat across them.
- Seal or paint the surface, let it dry fully, then add furniture pads under the base pieces to protect your floor.
Idea 4: Closet Craft Room Conversion
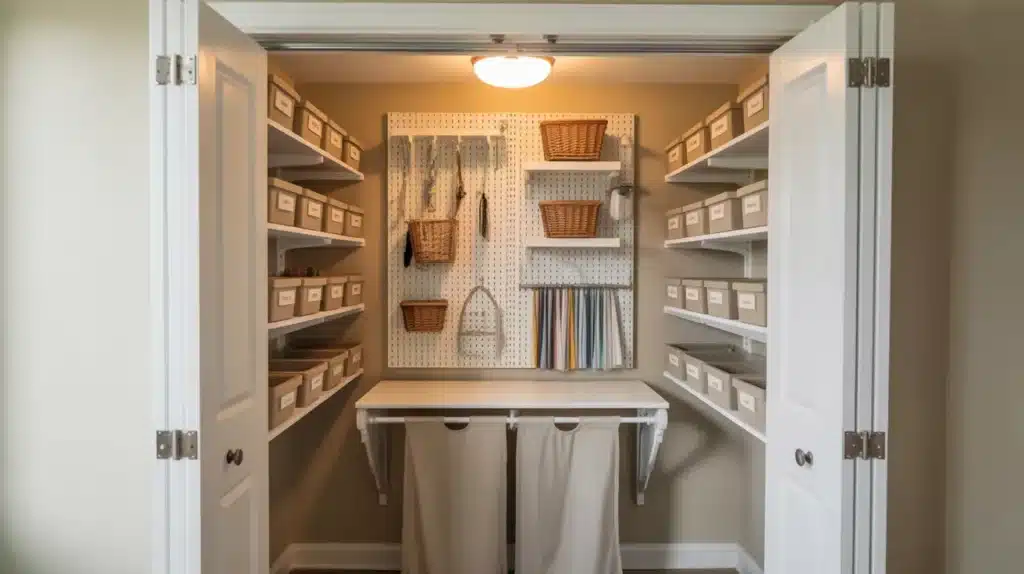
A closet, even a small one, works well as a full craft station once you add the right storage inside. The back wall, side walls, and floor space all become useful.
Materials: Pegboard for the back wall, small floating shelves, a curtain rod and curtain (to replace the door), a small folding table or wall-mounted surface, labeled bins
Steps:
- Remove the closet door and install a curtain rod above the opening. Hang a curtain that pulls open and closed easily.
- Mount a pegboard on the back wall and floating shelves along the side walls.
- Place a small folding table or wall-mounted surface inside at a comfortable working height.
Idea 5: Three-Tier Rolling Cart Station

A rolling cart holds your active project supplies, moves with you from room to room, and tucks behind a door when not in use. It is one of the most flexible tools for a small craft space.
Materials: Three-tier rolling cart (metal or plastic), small bins or cups to fit each tier, and removable contact paper
Steps:
- Sort your supplies by how often you use them. Active project supplies go on top, tools in the middle, bulk or backup supplies on the bottom.
- Add small bins or cups to each tier to keep loose items from shifting when you move the cart.
- Cover the sides with contact paper in a color you like to make it look intentional rather than thrown together.
Idea 6: Floating Shelf System with Labeled Bins
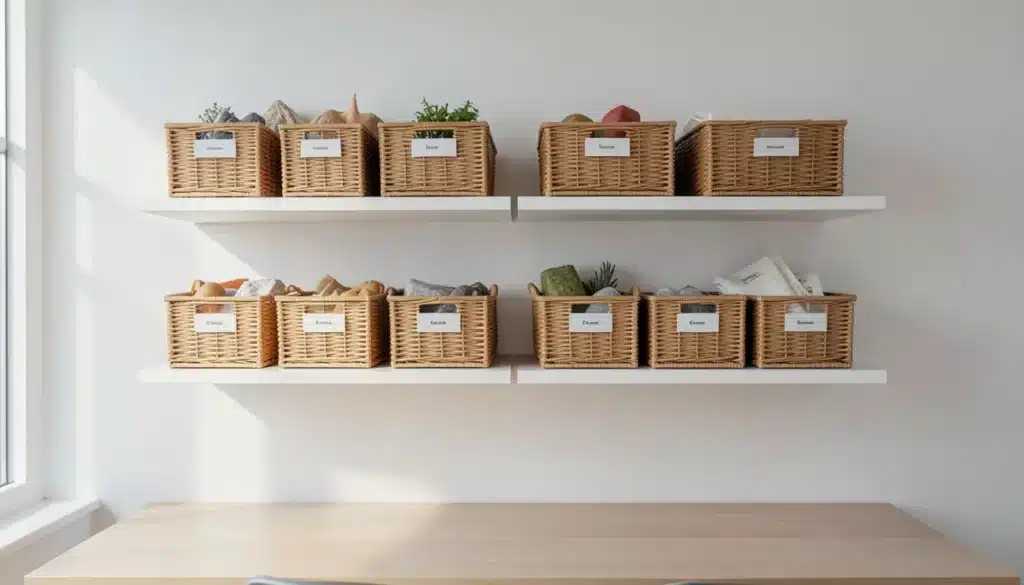
Floating shelves mounted above your desk keep supplies off the work surface while staying easy to grab. Pair them with matching bins and clear labels for a system that holds up over time.
Materials: Floating shelves (at least 8″ deep), wall anchors and screws, matching storage bins or baskets, label maker or printed labels
Steps:
- Mark stud locations and mount shelves at different heights based on what you plan to store. Taller items go lower, shorter items go higher.
- Group similar supplies into separate bins before placing them on the shelves. Do not mix categories in one bin.
- Label every bin specifically. “Washi tape and ribbon” is far more useful than just “tape.”
Idea 7: Curtain Rod Ribbon and Washi Tape Holder
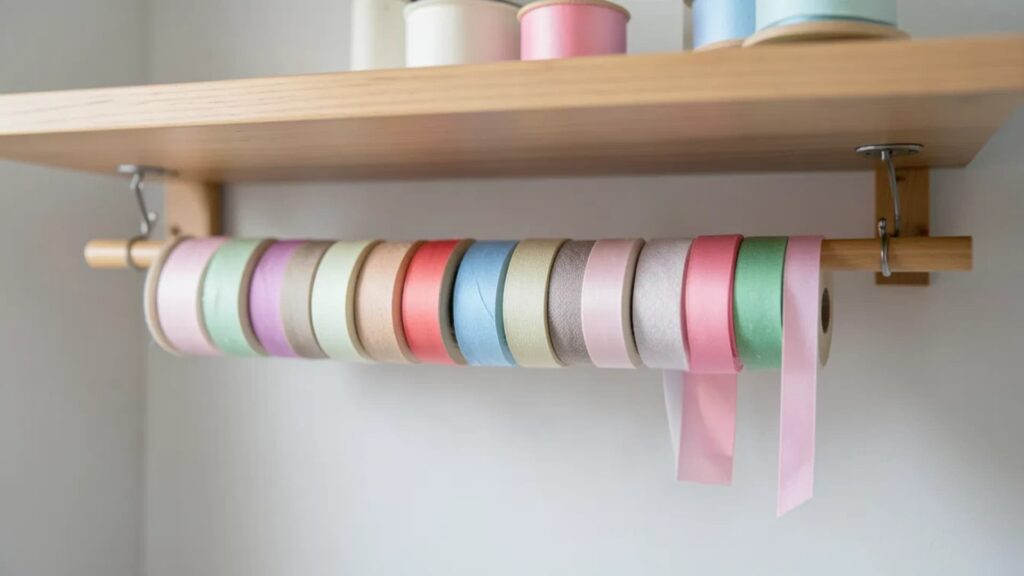
A basic curtain rod mounted under a shelf holds ribbon spools and washi tape rolls so they hang in a row and pull off cleanly. It keeps colors visible and takes up no floor or desk space.
Materials: Short tension curtain rod or wall brackets, small S-hooks for extra hanging items
Steps:
- Mount or extend the curtain rod under a shelf at a height where rolls can hang freely without touching the shelf below.
- Slide ribbon spools and washi tape rolls directly onto the rod in whatever order works for you.
- Add a few S-hooks along the rod for scissors, small bags, or flat tools.
Idea 8: Magnetic Strip for Small Metal Tools
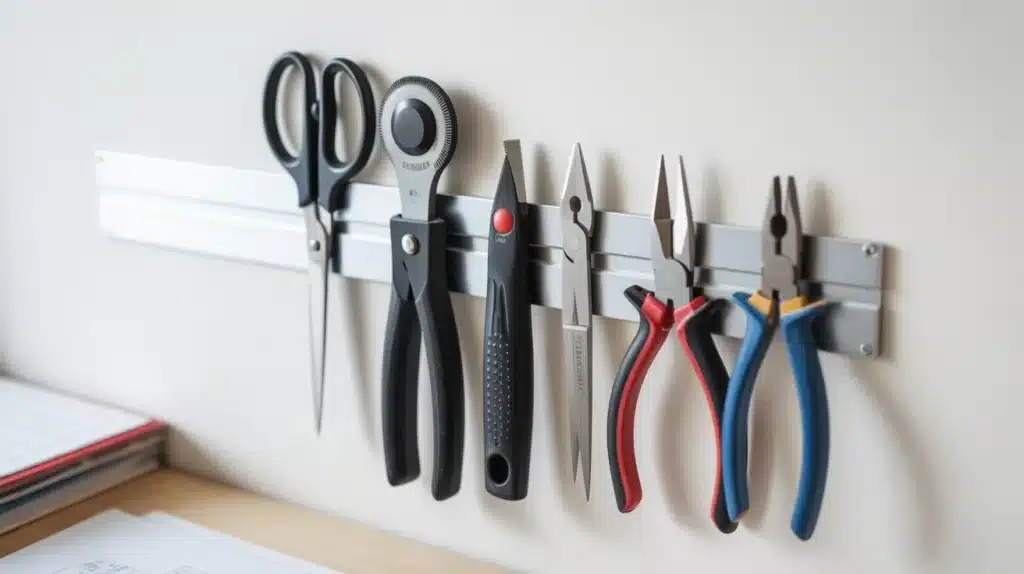
A magnetic strip on the wall holds scissors, rotary cutters, craft knives, and other metal tools safely in place. It keeps sharp tools out of drawers where they get buried and off the desk where they take up room.
Materials: Magnetic tool strip (12” to 24” long), screws, wall anchors
Steps:
- Choose a spot on the wall above or beside your desk so tools stay within reach.
- Mount the strip into wall studs or use anchors for drywall. Check that it is level before tightening.
- Press your metal tools onto the strip. Arrange by size or type, whichever makes grabbing them faster.
Idea 9: Mason Jar Wall-Mounted Storage

Mason jars mounted on a wooden board give you open storage for pens, brushes, scissors, and small supplies. The jars stay visible, and the whole board hangs flat on the wall without taking up any shelf or desk space.
Materials: Mason jars (wide-mouth), a wooden board or pallet piece, hose clamps or metal pipe straps, and screws
Steps:
- Sand and seal the wooden board. Mark and drill holes where the board will mount on the wall.
- Screw hose clamps or pipe straps into the board at even intervals, slide a jar into each one, and tighten firmly.
- Mount the board on the wall and fill each jar with one category of supplies.
Idea 10: Under-Desk Rolling Drawer Unit
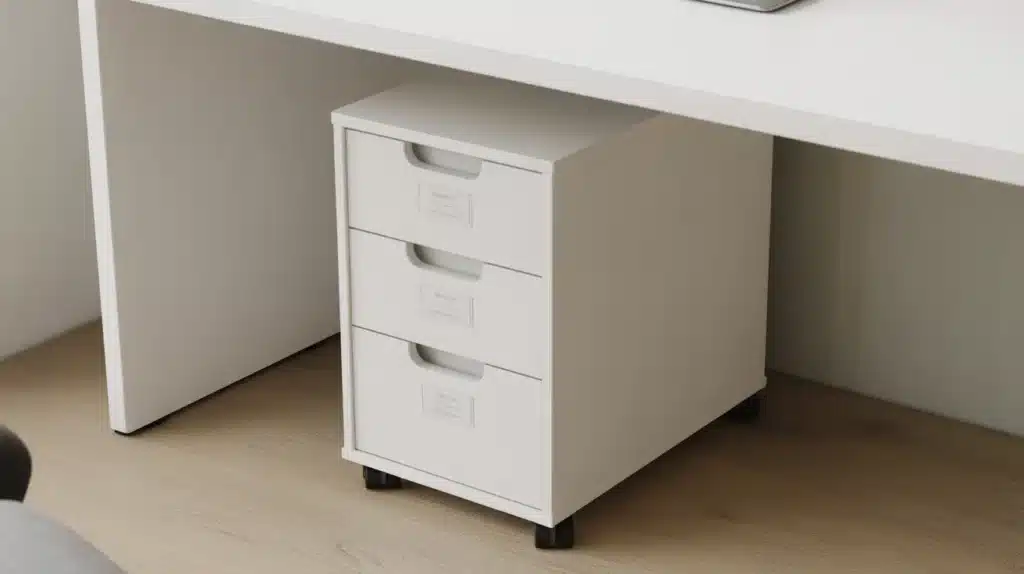
The floor space under your desk is often completely wasted. A slim rolling drawer unit slides underneath, holds supplies within arm’s reach, and rolls out easily when you need it.
Materials: Slim rolling drawer unit (measure your desk clearance first), labels for each drawer
Steps:
- Measure the height from your floor to the underside of your desk. Choose a unit that fits with a little clearance so it rolls in and out without catching.
- Assign each drawer one specific category before you fill it. Mixed drawers slow everything down.
- Label the front of every drawer so you never have to guess what is inside.
Idea 11: Stackable Clear Bin Tower
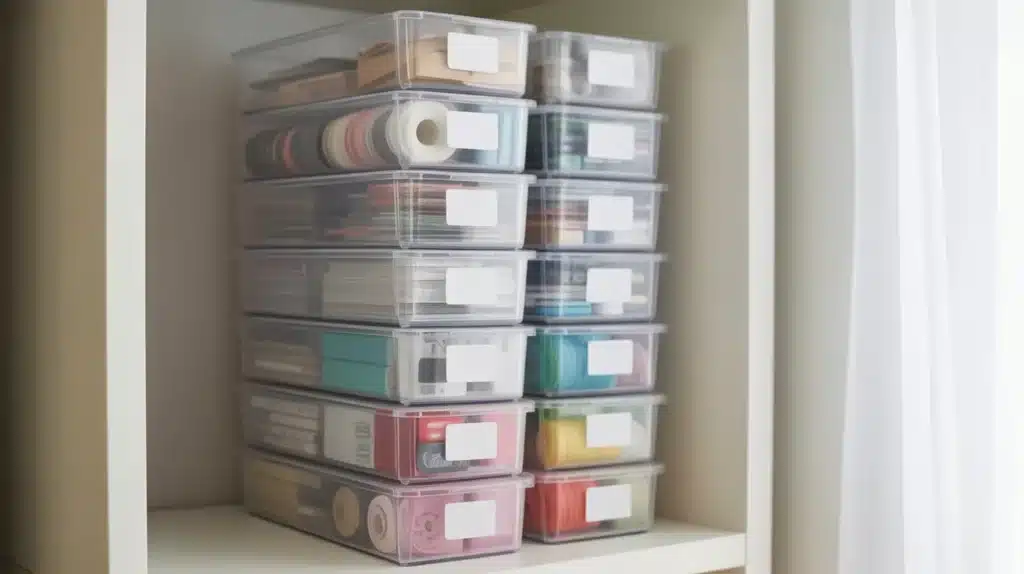
A tower of clear, stackable bins uses vertical space rather than floor area. Because the bins are clear, you can see every supply without opening a single one.
Materials: Clear stackable bins (pick one brand and size and stick with it), labels, a stable flat surface
Steps:
- Sort all your supplies into piles by type before you buy bins. This tells you exactly how many you need.
- Fill each bin with one category only. Do not overfill. Every bin should close completely.
- Stack them with the most-used bins at eye level or lower. Label the front of each bin before stacking.
Idea 12: Over-the-Door Supply Organizer
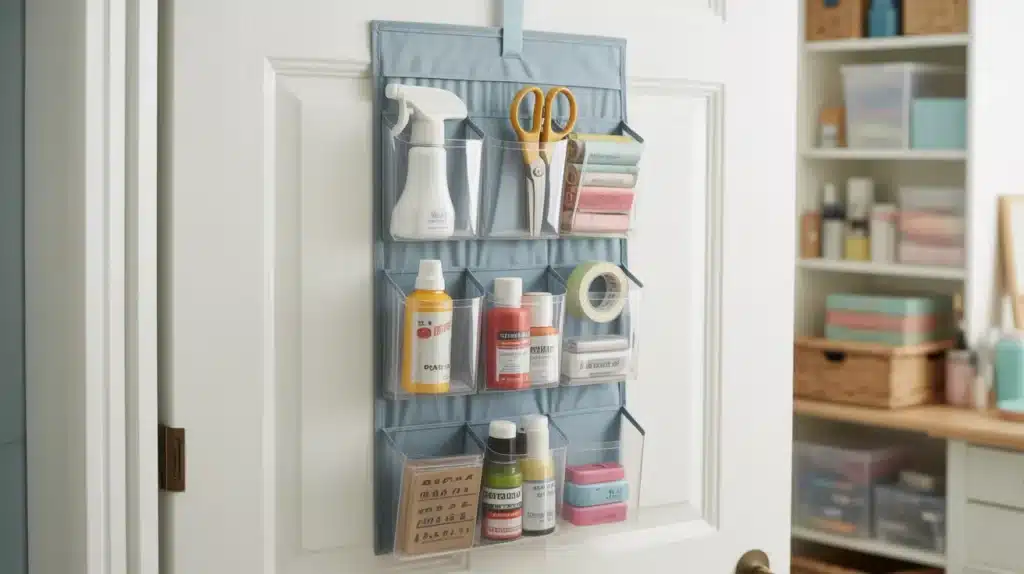
The back of a door is free storage space that most people completely ignore. An over-the-door organizer holds scissors, tape, small tools, paint bottles, and more without using any wall or floor space.
Materials: Over-the-door organizer with pockets or hooks (clear pockets work best), a door with clearance behind it
Steps:
- Hook the organizer over the top of the door. Check that the door still opens and closes fully with it in place.
- Sort supplies into pockets by type. Put taller items in lower pockets and smaller items in upper pockets.
- Add a strip of foam behind the door hook to prevent the organizer from rattling or swinging when the door moves.
Idea 13: Ceiling Hook and Basket System
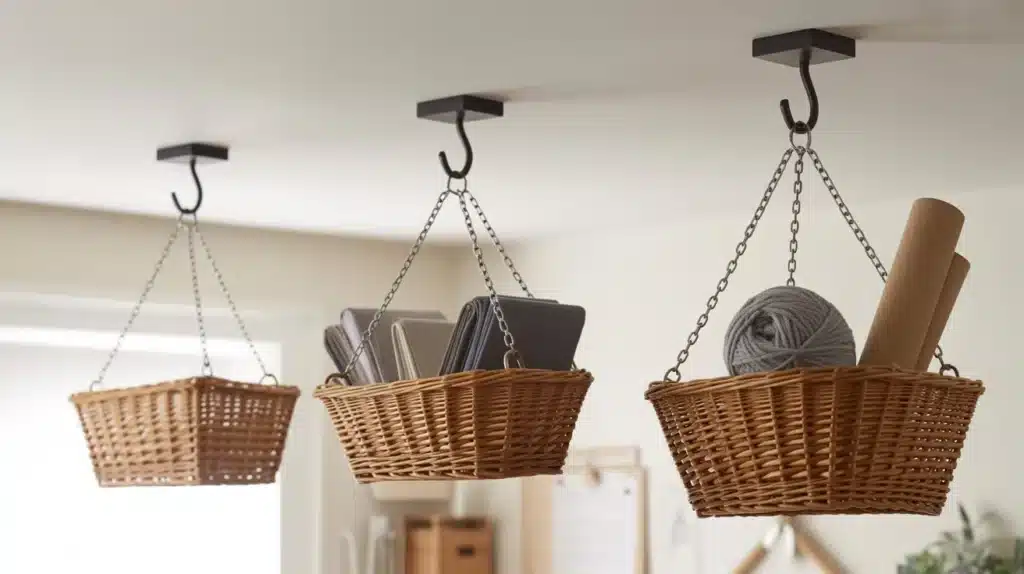
Ceiling hooks let you hang baskets of bulky supplies like yarn, fabric, or rolled paper overhead where they stay out of the way but remain reachable. This works especially well in rooms with limited wall space.
Materials: Ceiling hooks rated for weight, wire or wicker baskets with handles, short chains or S-hooks
Steps:
- Use a stud finder to locate ceiling joists. Mark each joist location before drilling. Never install hooks into drywall alone for anything with weight.
- Screw hooks into the marked joist locations.
- Hang baskets from the hooks using chains or S-hooks. Adjust the length so the baskets hang at a height you can comfortably reach.
Idea 14: Tension Rod Inside a Cabinet or Deep Shelf
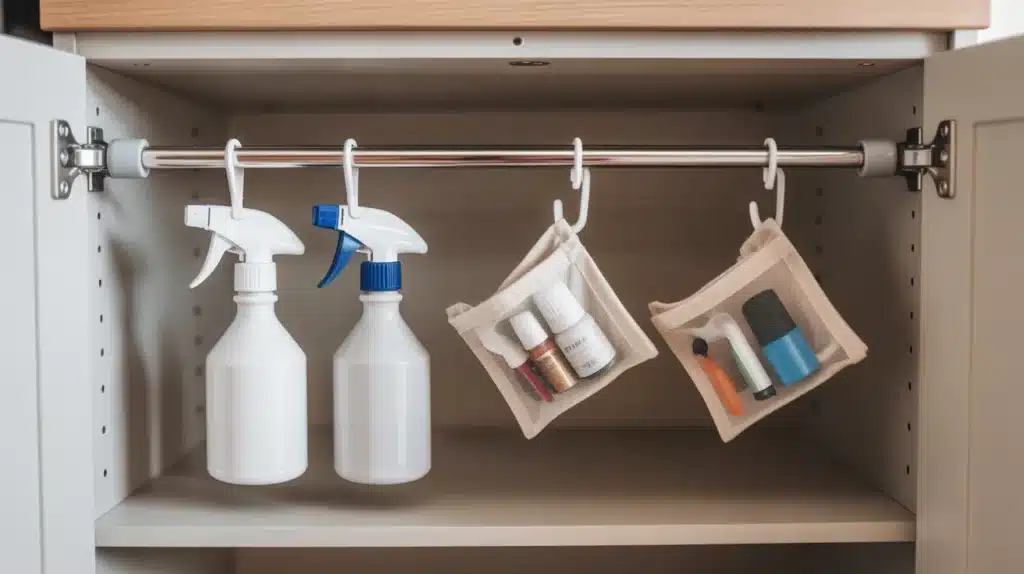
A tension rod inside a cabinet creates a hanging bar for spray bottles, small supply bags, or any item with a handle or loop. No drilling, no damage, and completely removable.
Materials: Tension rod sized to fit your cabinet width, S-hooks
Steps:
- Measure the inside width of your cabinet or shelf opening. Buy a tension rod in that size range.
- Press the tension rod between the two inner walls of the cabinet and twist to extend and lock it in place.
- Hang spray bottles, bags, or looped items directly from the rod using S-hooks or their own handles.
Idea 15: DIY Cardboard Drawer Dividers
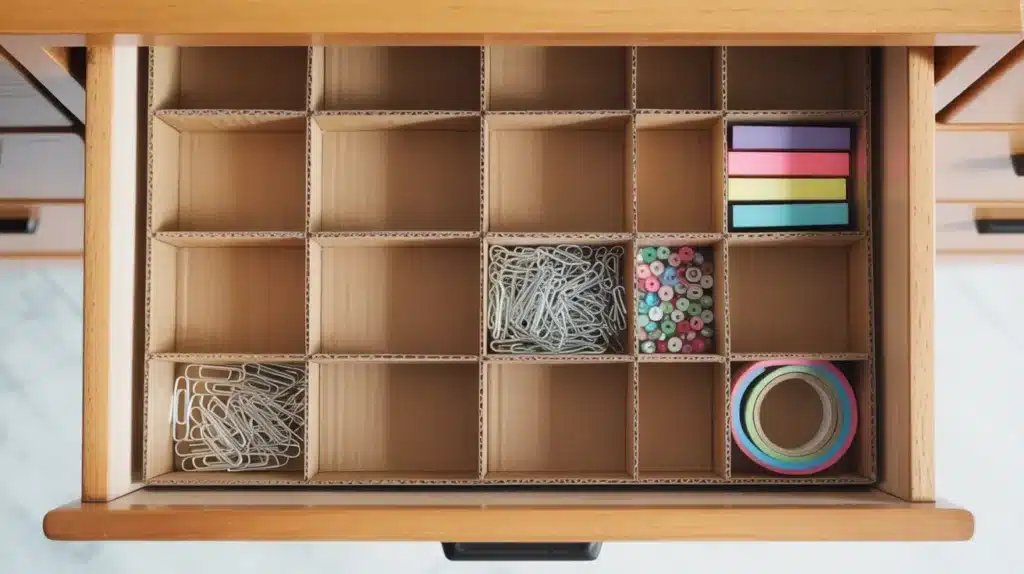
Drawer dividers keep small supplies from turning into a single mixed pile. You can cut them from the cardboard you already have. Free, fast, and fully sized to your drawer.
Materials: Sturdy cardboard (from cereal or shipping boxes), scissors or a craft knife, ruler, pencil
Steps:
- Measure the inside length and width of your drawer. Cut cardboard strips to match the exact height of the drawer sides.
- Cut small notches halfway through each strip, so they slot together at right angles and hold each other in place.
- Slide the grid into the drawer and adjust the spacing to fit what you plan to store in each section.
Idea 16: Repurposed Old Dresser as Craft Storage
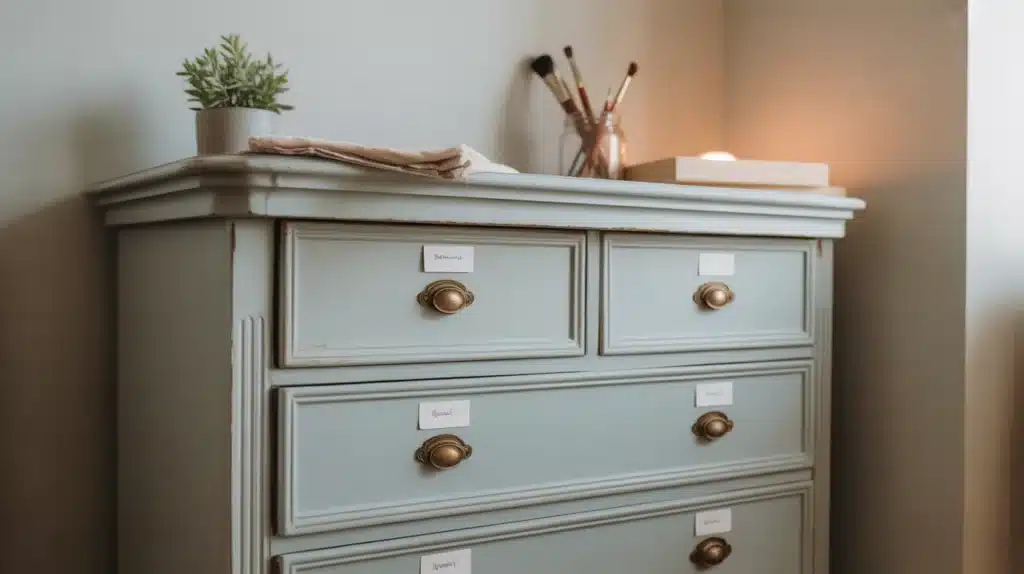
An old dresser offers multiple deep drawers for organized craft storage at a fraction of the cost of new furniture. Sand it, paint it, and it looks like it was always meant for the room.
Materials: Old dresser (thrifted or from another room), sandpaper, paint, brush or roller, drawer liners, labels
Steps:
- Lightly sand the surface to help the new paint adhere. Wipe away the dust with a damp cloth, then let it dry completely.
- Paint the dresser in your chosen color. Two thin coats give a better finish than one thick coat.
- Line each drawer, assign one category per drawer, and label the front of every drawer before you fill it.
Idea 17: Wire Wall Grid Panel
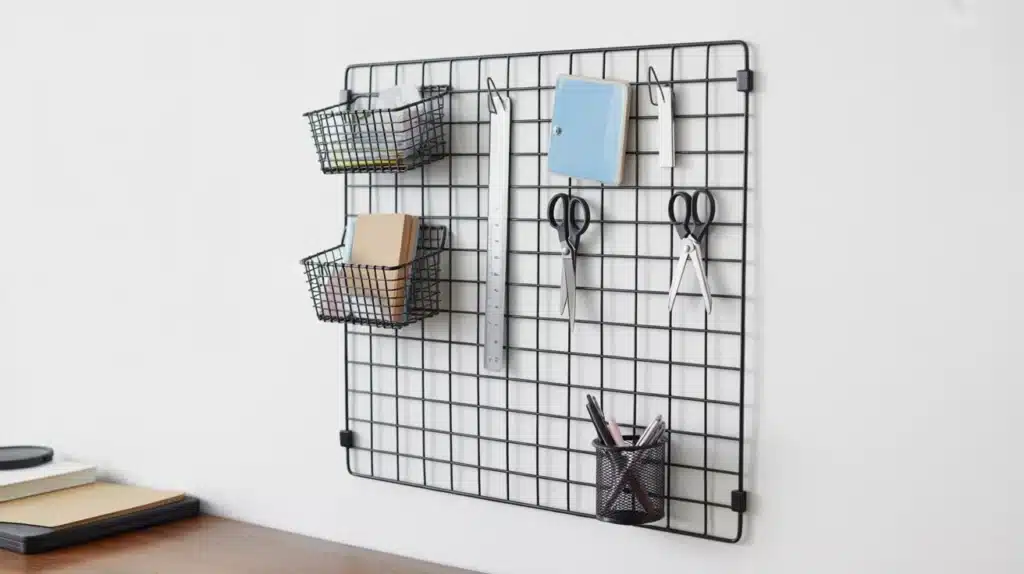
A wire grid panel mounts flat on the wall and holds baskets, hooks, clips, and small shelves. It works like a pegboard but has an open, lighter look and requires no special brackets to mount.
Materials: Wire wall grid panel (12×12″ or larger), grid-compatible clips, baskets and S-hooks, wall anchors and screws
Steps:
- Mount the grid panel to the wall using anchors or into studs. Use a level to make sure it sits straight before tightening.
- Attach wire baskets and S-hooks in a layout that fits what you plan to store.
- Clip note holders, small shelves, or pen cups into the remaining grid space. Rearrange whenever you need to without any tools.
Idea 18: Vertical File Holder for Paper and Vinyl Sheets
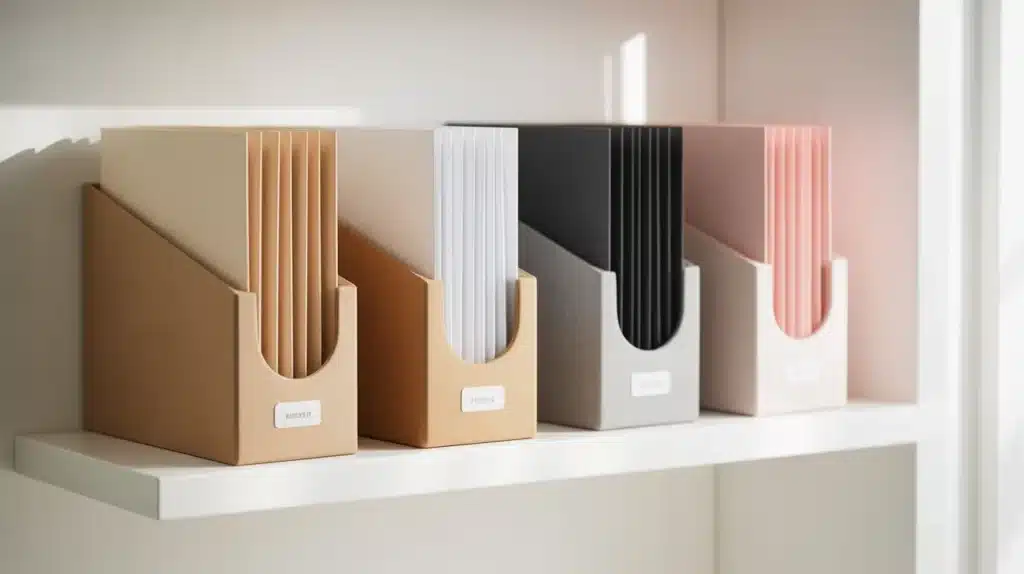
Flat paper and vinyl sheets bend and crinkle when stored in a stack. Vertical file holders keep each sheet type upright, sorted, and easy to pull out one at a time without disturbing everything else.
Materials: Vertical file holders or magazine holders (at least 13″ tall for 12×12″ paper), labels, a shelf or desktop surface
Steps:
- Sort your paper and vinyl by type or size before placing them into holders. Keep all categories separate from the start.
- Stand the holders upright on a shelf at eye level or within arm’s reach of your work surface.
- Label the front of each holder with its contents, and put sheets back in the correct holder after use.
Idea 19: Under-Stair Craft Nook
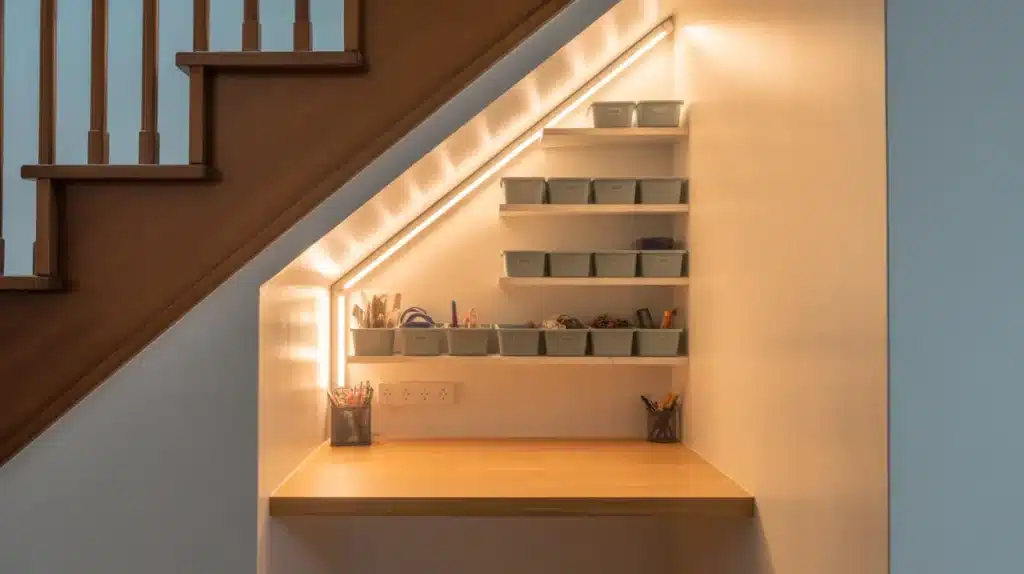
The empty space under a staircase is often large enough for a full craft setup. Add shelves along the back wall, a small desk or surface in front, and you have a proper, dedicated craft corner.
Materials: Floating shelves or a freestanding shelf unit, small desk or wall-mounted surface, plug-in LED task light, light paint for the back wall (optional)
Steps:
- Measure the full depth and width of the under-stair area. Map out where the shelves and a desk will fit without hitting the lowest point of the stair frame.
- Mount shelves on the back wall into studs. Place the desk or work surface in the widest part of the opening.
- Add a plug-in LED task light since this area usually has no natural light. Paint the back wall a light color to make the space feel more open.
Idea 20: Corkboard for Notes and Active Project Inspiration
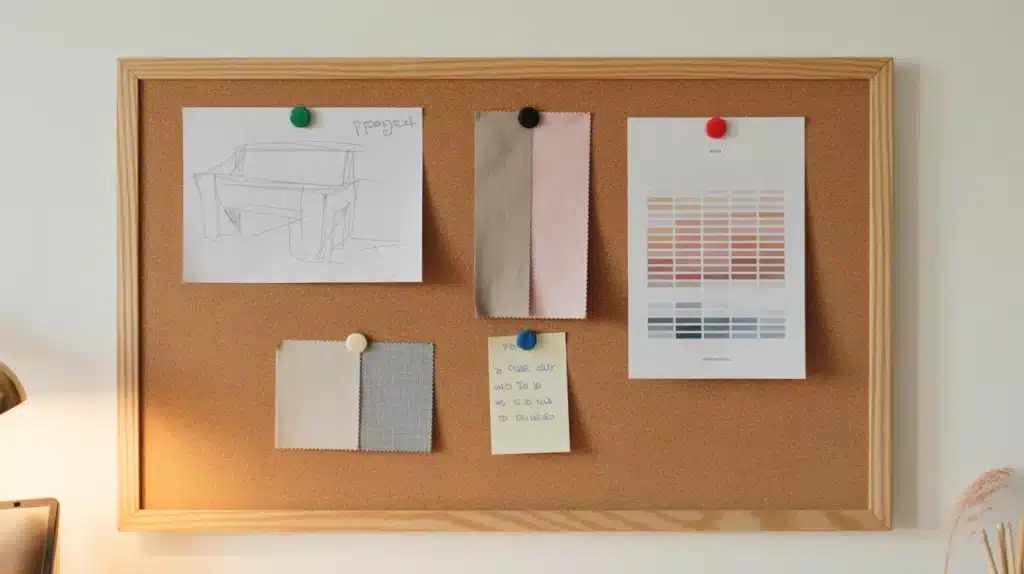
A corkboard above your desk keeps project notes, color swatches, fabric samples, and to-do items off your desk and in plain sight. It holds everything in one place without tape or sticky notes scattered across the wall.
Materials: Corkboard (at least 17×23″ for useful space), colored pushpins, wall mounting hardware
Steps:
- Mount the corkboard directly above your main work surface at a comfortable viewing height.
- Pin active project notes and reference items to the board. Use colored pins to sort by project or priority.
- Clear the board fully at the end of each project so it never gets so packed that it stops being useful.
Idea 21: PVC Pipe Vinyl Roll Holder
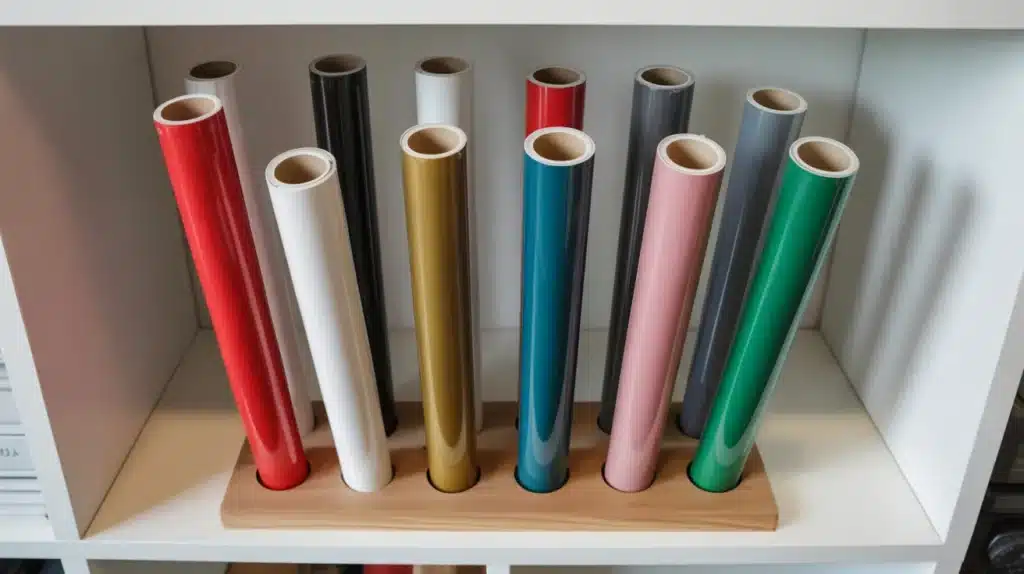
Vinyl rolls crease and crinkle when stored flat or loose. Upright PVC pipes keep each roll standing straight, easy to spot by color, and simple to grab without disturbing the others.
Materials: PVC pipe (cut into 12 to 15” lengths, 2 to 3″ diameter), a flat wooden base board, wood screws or strong adhesive, paint or contact paper (optional)
Steps:
- Cut PVC pipes into equal lengths or have a hardware store do it. Sand the top edges smooth, so they do not scratch vinyl rolls.
- Attach the pipes to the wooden baseboard using strong adhesive or short screws drilled from underneath. Space each pipe at least 3” apart.
- Stand one vinyl roll in each pipe section. Paint the base or wrap pipes with contact paper to match your room if you like.
How Much Will Each Idea Cost?
Before you start buying, it helps to know what each setup actually runs. The table below gives you honest estimates so you can plan your spending before you shop.
| Range | Ideas It Covers |
|---|---|
| Free – $25 | Cardboard dividers, mason jars, tension rods, curtain rod holders, magnetic strips, corkboard |
| $25 – $75 | Pegboard, rolling cart, floating shelves, stackable bins, wire grid panel, over-door organizer |
| $75 – $200 | Fold-down desk, closet conversion, corner door desk, under-stair nook setup |
How to Keep Your Small Craft Room Organized?
Do a quick reset at the end of every crafting session, not once a week. Put each item back in its labeled spot before you leave the room.
Once a month, pull out anything you have not touched in 60 days and move it out of the space. When new supplies come in, something old should leave.
Seasonal items like holiday craft materials can sit in a labeled bin in another room until you actually need them. The goal is a space that takes five minutes to tidy, not an hour.
Final Touches
A small craft room is not a problem. It is just a space waiting for a plan. You do not need to redo everything at once.
Start with one idea from this list. A pegboard above your desk. A rolling cart for your current project. A labeled bin for daily supplies. Small steps add up faster than you expect.
When your supplies have a home, and your desk stays clear, crafting stops feeling like a task to set up first. It becomes something you actually want to sit down and do.
Pick one DIY small craft room idea and try it this week. Your space is closer to working well than you think.