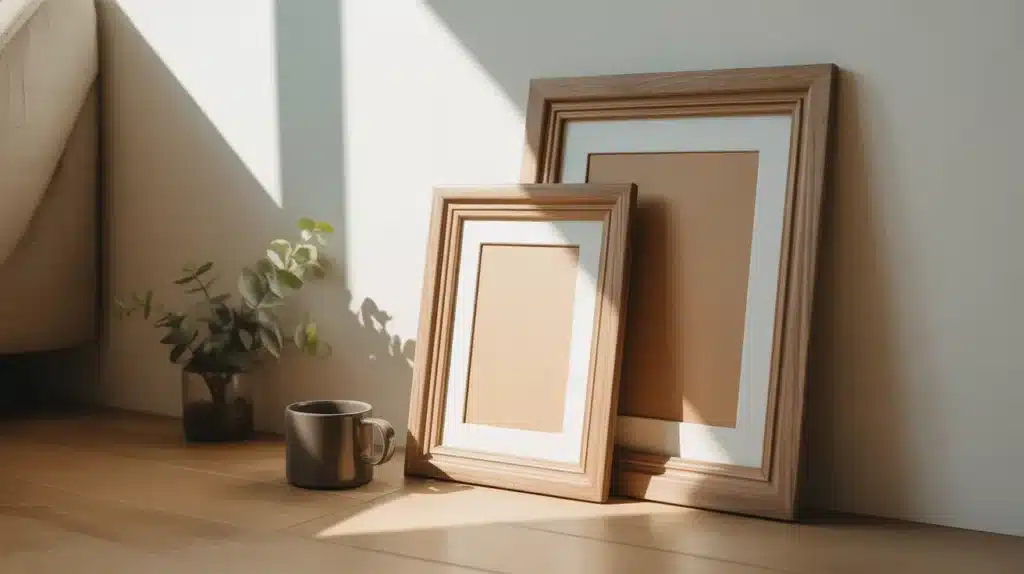
You have a photo sitting in a drawer right now. Maybe two. Maybe a whole stack. You meant to frame them months ago. But store-bought frames never fit right.
Custom framing shops charge a small fortune. And somehow, the whole thing just keeps getting pushed to next weekend.
Building your own DIY picture frame is not as hard as it looks. You do not need a full workshop or years of experience. A few basic tools, some wood, and a free afternoon are enough to get the job done.
This guide walks you through every step, from picking your wood to hanging the finished frame on your wall.
Why Make Your Own DIY Picture Frame?
Store-bought frames are expensive, especially in large sizes. A single custom frame from a shop can cost anywhere from $100 to $300.
When you build your own DIY picture frame at home, the same result costs under $20.
You also get to choose the wood species, the size, the finish, and the style, no settling for something that is just “close enough.” The whole build takes only a few hours.
Types of DIY Picture Frames
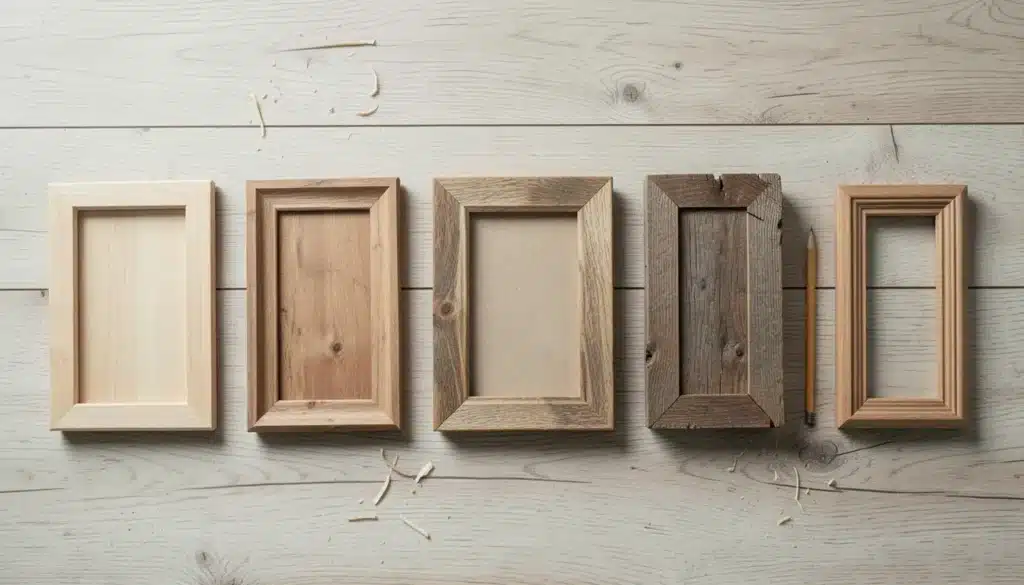
Not all frames are built the same way. The one you pick depends on your tools, your skill level, and the look you are going for.
- Simple flat wood frame: Four straight pieces joined at the corners. The easiest starting point for any beginner.
- Frame with a bevel: Has an angled cut on the inside edge that lets more light fall across your artwork with less shadow.
- Rustic barn wood frame: Built from reclaimed or rough-cut wood for a worn, natural, lived-in look.
- Frame with exposed splines: Small wood strips glued across the miter joints add both strength and a clean furniture-style detail.
- No-power-tool frame: Uses pre-routed molding and a hand miter box. No table saw or miter saw needed.
How to Make a DIY Picture Frame: Step-by-Step
Making a frame from scratch sounds like a lot. But once you break it into steps, each one is short and straightforward.
Before you start, gather everything you need:
| Tools | Materials |
|---|---|
| Table saw, or miter saw | Rough or pre-milled lumber (ash, pine, cedar) |
| Thickness planer (optional) | Wood glue |
| Hand plane | Acrylic sheet or glass |
| Feather board | Backing board |
| Dado stack or single blade | Spray lacquer or wood stain |
| Ratchet strap frame clamp | Hanging hardware |
| Measuring tape and pencil | 150-grit sandpaper |
Step 1: Prep Your Lumber
You can skip this step by buying pre-milled lumber and heading straight to ripping. If you are working with rough lumber, run it through a thickness planer first to flatten and surface both faces.
Then use a hand plane to straighten the edge and square it to the face. If the edge drifts slightly off, reposition the plane on the high side.
That removes more material from that spot and brings the board back to square. Once all your stock is flat and uniform, rip everything to your desired frame width on the table saw.
Step 2: Cut the Bevel and Rabbet
Two profile cuts shape the frame and make it work:
The bevel sits on the inside face of the frame. It lets more light hit the artwork and keeps the shadow line around the photo small. Use a feather board during this cut to keep the pass safe and consistent.
The rabbet is the small groove on the back inside edge of each frame piece. It holds the glass and backing board in place.
A dado stack buried slightly into a sacrificial fence is the fastest method; it cuts the rabbet cleanly all the way to the edge.
No dado stack? Use a single blade and make one pass at a time, nudging the fence over slightly each time. The rabbet must be exactly 3/8 of an inch deep. That number directly affects the rail calculations in the next step.
Step 3: Calculate and Cut the Frame Parts
Use this formula to get the right rail length every time:
Rail Length = Picture Size + (2 × Rail Width) + (2 × Rabbet Width)
For example, a photo that is 11 inches wide, with 1-inch rails and a 3/8-inch rabbet, gives you 13¾ inches for the top and bottom rails.
Trim one end of each piece at 45° before doing the full calculation. Then slowly sneak up on your mark for the first cut. Once you hit the right length, clamp a stop block in place.
Every piece after that will be exactly the same length. This step matters more than any other. If two parallel sides differ even slightly, the frame turns into a trapezoid, and every miter joint will show a gap.
Pro Tip: Sand all inside faces of your frame pieces before gluing. Once the frame is assembled, those inside corners are almost impossible to reach.
Step 4: Glue Up and Add Splines
Use a ratchet strap picture frame clamp for the glue-up. It applies even pressure to all four corners at the same time. Standard clamps do not do this well. The frame will be ready for splines once the glue sets.
Splines are small strips of wood glued into a slot cut across each miter joint. They place long-grain material across the joint, increasing the glue surface area.
This matters because miter joints are end-grain to end-grain by nature, which makes them inherently weak. To set the cut correctly, mark two equal points at the end of each miter joint.
Line the blade teeth up to both marks. Set a clamp as a stop block and cut. Splines are not strictly required, but they add both durability and a sharp visual detail at every corner.
Step 5: Cut the Glass, Sand, and Finish
Acrylic is a better choice than glass. It does not yellow over time, and it cuts cleanly with standard woodworking tools.
Keep the protective film on the sheet while cutting; the surface scratches faster than you would expect. Once you cut the acrylic to size, do not touch the fence or stop block.
Cut the backing board using the exact same settings. Both pieces will come out the same size every time.
After that, trim the splines flush, do a final sanding pass over the whole frame, and apply spray lacquer for a clean, fast coat. Start to finish, the whole build takes only a few hours spread across a couple of days.
Video Tutorial
I’d like to give credit to Keaton Beyer Woodworking for their informative video, which served as a reference for this guide.
How to Finish Your Frame (Paint vs. Stain vs. Lacquer)
The frame is built, now you get to decide how it looks. The finish you choose changes the entire feel of the frame.
| Finish Type | Best For | Difficulty | Drying Time |
|---|---|---|---|
| Spray Lacquer | Clean, natural wood look | Easy | 30–60 min per coat |
| Wood Stain | Warm tones, rustic style | Easy | 2–8 hours |
| Paint | Bold colors, modern style | Easy | 1–2 hours |
| Wax or Oil | Matte, organic finish | Medium | 24 hours |
Important: Sand off any dried glue before staining. Stain over glue leaves blotchy, uneven spots that cannot be fixed after the fact.
How to Hang Your DIY Picture Frame
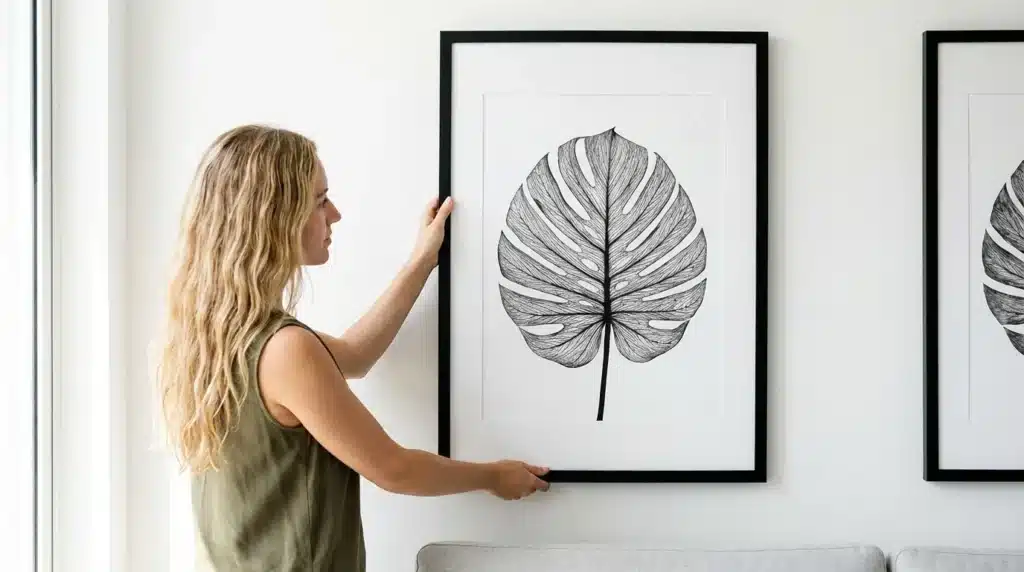
The frame looks great on your workbench. Now you need it on the wall. Here is what to use based on weight and size.
- Sawtooth hangers: Best for small, lightweight frames. Attach one centered on the back top edge and hang directly on a nail.
- D-ring hangers with picture wire: Best for medium to large frames. Place one D-ring on each side of the back, thread the wire between them, and hang on a wall hook.
- Two-hook wall method: Place two picture hanging hooks in the wall at equal heights and hang each D-ring directly onto its own hook.
- Heavy-duty double-sided tape: Works for very small, light frames on smooth walls where you do not want to use nails.
Pro Tip: For frames with two side hangers, measure and mark equal distances from the top before attaching them. This keeps the frame level from the start.
How Much Does It Cost to Make a DIY Picture Frame?
A basic DIY picture frame built at home costs between $10 and $30, depending on wood choice and frame size. Pine is the cheapest option; a standard 8-foot 1×2 board runs about $4 to $8.
The acrylic sheet is usually the most expensive single item, ranging from $10 to $35. Everything else, glue, sandpaper, lacquer, and hardware, adds only a few dollars.
Compare that to a custom framing shop, which charges $100 to $300 for a single frame, and the math makes the decision easy.
Wrapping It Up
A DIY picture frame is one of those projects that feels bigger than it actually is. You measure. You cut.
You glue. You finish. And then you step back and see something real sitting on your wall, something you built with your own hands.
That photo that has been hiding in a drawer for a year finally gets the spot it deserves. The whole project costs under $20 and takes just a few hours.
No excuses left. Pull out that photo, pick up some wood, and get started. You will wish you had done this sooner.
Built your first frame? Drop a photo in the comments. We want to see what you made.