Want to get better at drawing but don’t know where to start? Staring at a blank page feels intimidating.
Your hand feels stiff. Your lines look shaky. But here’s something encouraging: improvement doesn’t require talent. It requires the right exercises and consistent practice.
Drawing practice exercises are your shortcut to building real skills. Ten minutes a day can change your abilities in weeks.
This guide covers everything you need. You’ll learn which exercises actually work, how to avoid common beginner mistakes, and how to build a daily routine that sticks.
We’ll also share the best practice tools and show you exercises tailored to your skill level. Let’s get started.
How to Use Drawing Practice Exercises Effectively?
Set aside 10 to 30 minutes daily for your drawing practice exercises. This keeps you consistent without burning out. Start with basic pencils like HB or 2B and a simple sketchbook.
You don’t need fancy tools to improve. Focus on the process, not perfection. Every sketch teaches you something new. Track your progress by dating your work and reviewing it monthly.
You’ll see real growth over time. The key is showing up regularly and enjoying the practice itself.
Tools and Materials for Drawing Practice
Having the right tools makes your drawing practice exercises more enjoyable. You don’t need expensive gear to start, just a few basics.
| Tool/Material | Recommendation | Why It Works |
|---|---|---|
| Pencils | HB, 2B, 4B | Different hardness for various tones and shading effects. |
| Erasers | Kneaded eraser, vinyl eraser | Kneaded for lightning. Vinyl for clean removal. |
| Sketchbook | 9×12 inches, medium-tooth paper | Good size for practice. Smooth enough for details. |
| Drawing Apps | Procreate, Krita, Adobe Fresco | Digital practice with unlimited space. Easy corrections. |
Drawing Practice Exercises for Hand Dexterity
Hand dexterity is the foundation of good drawing. These exercises warm up your muscles and improve control over your pencil movements.
1. Straight Lines and Curves Practice
Drawing long, continuous lines helps you build steady hand control. This exercise loosens your arm and wrist muscles. You’ll notice smoother strokes after just a few minutes of practice.
How to do it:
- Draw horizontal lines across your page without using a ruler.
- Practice vertical lines, then diagonal lines in both directions.
- Add curved lines, making them as smooth and consistent as possible.
2. Freeform Scribbles
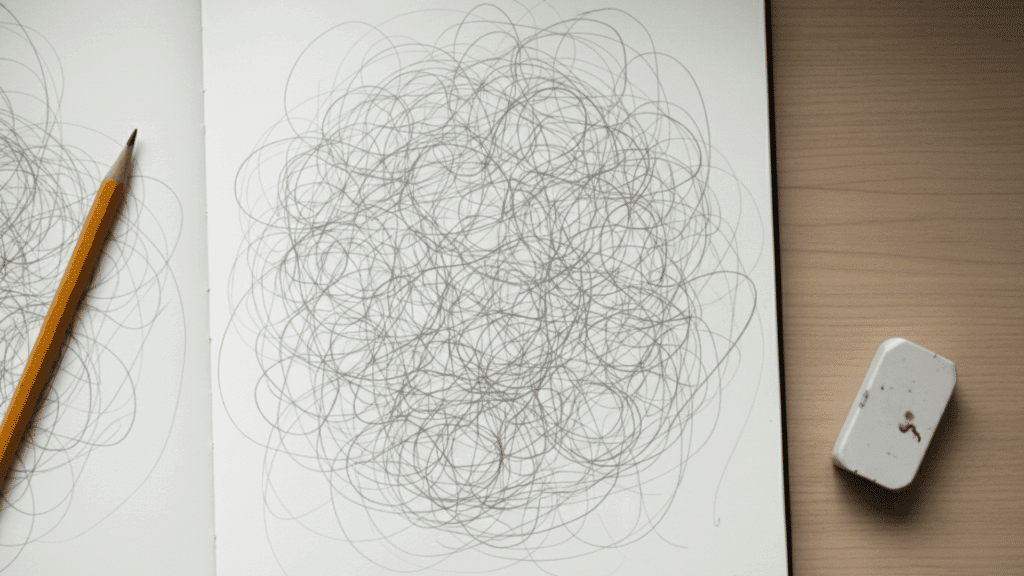
This exercise releases tension in your hand and arm. Let your pencil move without any plan or pattern. It builds natural fluidity in your movements and gets your creative energy flowing.
How to do it:
- Start moving your pencil randomly across the page without thinking.
- Vary your speed and pressure as you scribble.
- Continue for 2 to 3 minutes until your hand feels loose and relaxed.
3. Dot-to-Dot Coordination
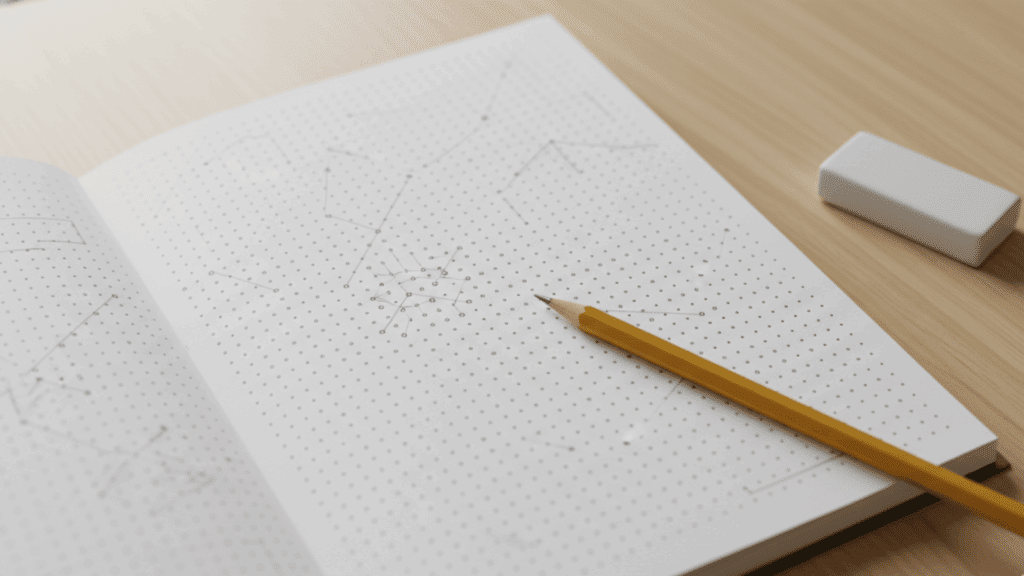
Connecting random dots sharpens your hand control and spatial awareness. This exercise trains your eye and hand to work together. It’s simple but highly effective for building precision.
How to do it:
- Place 10 to 15 random dots across your page.
- Connect them with straight lines, moving from one dot to another.
- Try connecting them in different orders to challenge your coordination.
4. Shape Transitions
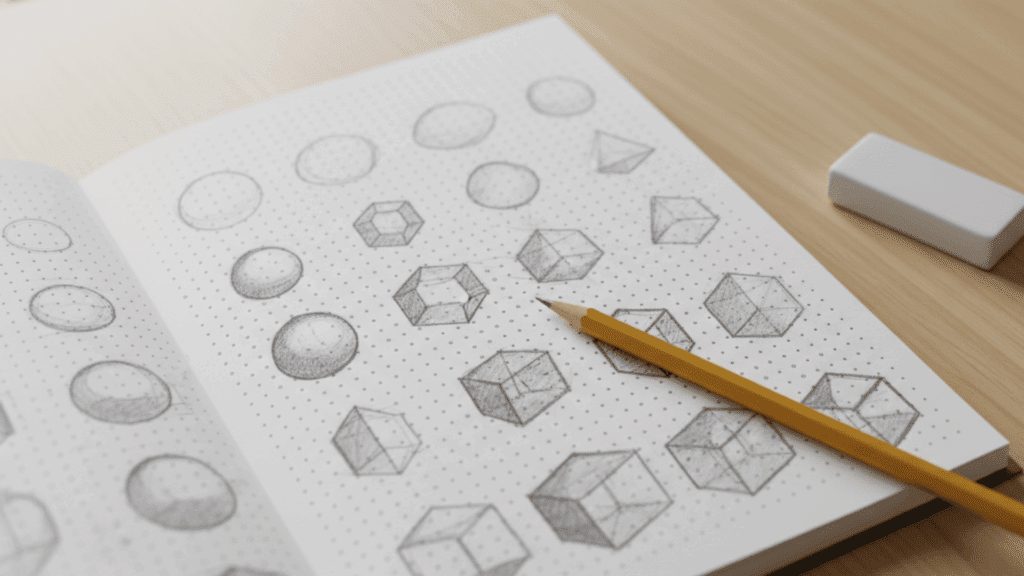
Turning flat shapes into 3D forms strengthens your understanding of dimension. This exercise builds control while teaching you basic perspective. It’s essential for drawing realistic objects later.
How to do it:
- Draw basic 2D shapes like squares, circles, and triangles.
- Add lines to change them into cubes, spheres, and pyramids.
- Practice shading one side to show depth and volume.
5. Gesture Drawing (Quick and Fluid)
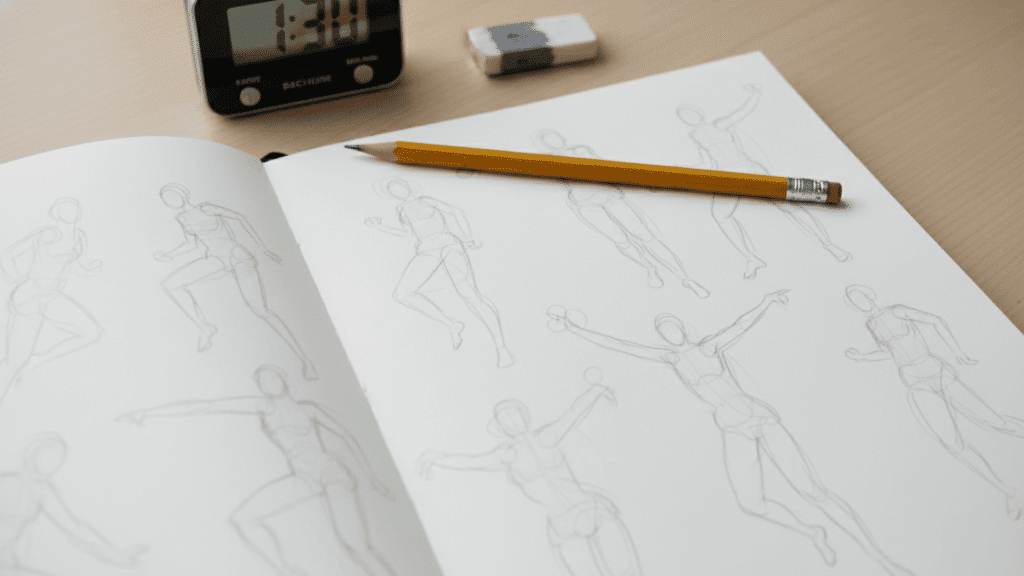
Quick gesture drawings capture movement and energy in seconds. Set a short timer and sketch loosely. This builds speed and helps you see the big picture before the details.
How to do it:
- Set a timer for 30 seconds to 1 minute.
- Draw a person or object using quick, loose lines.
- Focus on capturing the overall pose or form, not tiny details.
6. Continuous Line Drawing
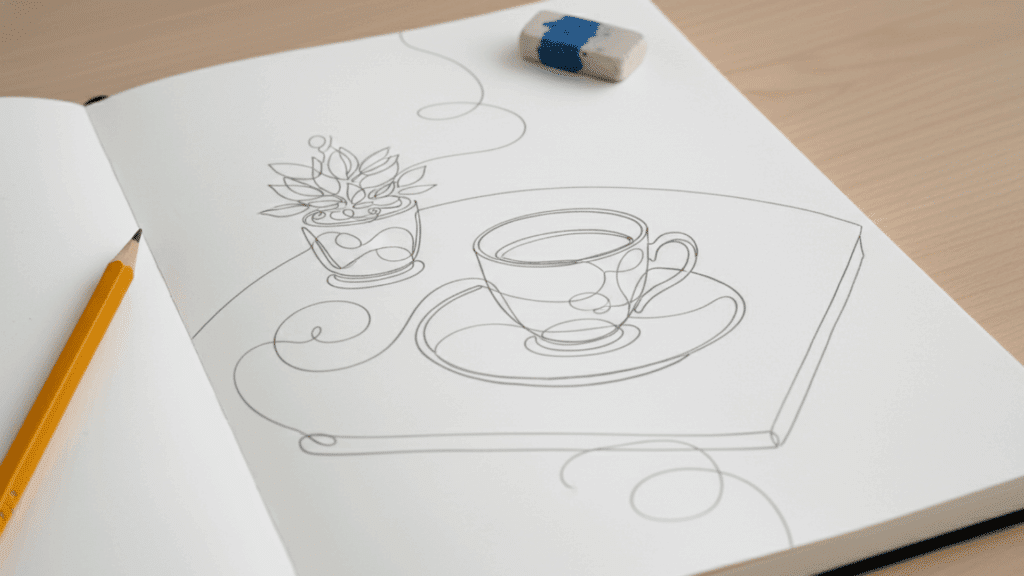
Drawing without lifting your pencil builds hand-eye coordination. This exercise forces you to look closely at your subject. It’s challenging but improves your observational skills quickly.
How to do it:
- Choose a simple object or shape to draw.
- Place your pencil on the paper and don’t lift it until you’re done.
- Let your eyes guide your hand as you trace the entire form.
7. Shading and Hatching Practice
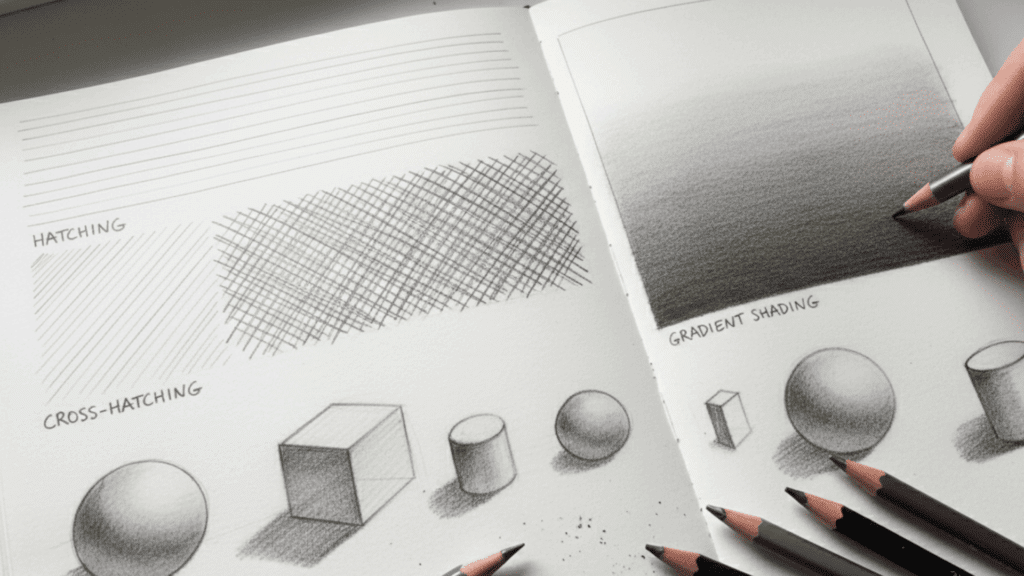
Shading adds depth and realism to your drawings. Hatching uses parallel lines to create tone and texture. Practicing these techniques refines your fine motor skills and observation.
How to do it:
- Draw a simple shape like a sphere or cube.
- Add parallel lines (hatching) on one side to create a shadow.
- Practice smoothly blending tones from light to dark.
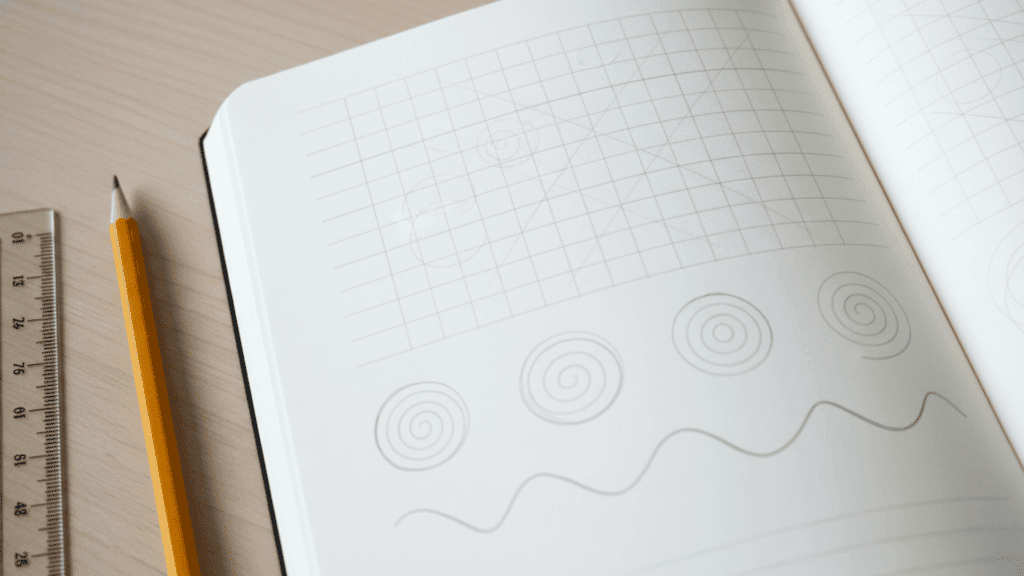
8. Circle and Spiral Exercises
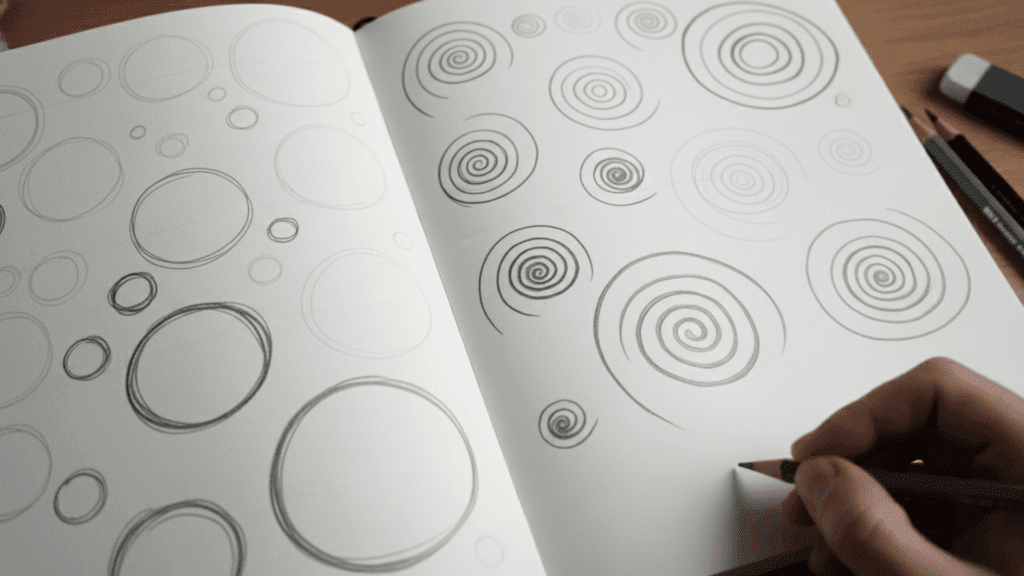
Drawing circles and spirals improves your precision and hand steadiness. Vary the sizes and pressure to challenge your control. This simple exercise produces noticeable improvements in consistency.
How to do it:
- Draw circles of different sizes, keeping them as round as possible.
- Practice spirals, starting from the center and moving outward.
- Repeat with varying pressure to control line weight and darkness.
Drawing Exercises for Different Skill Levels
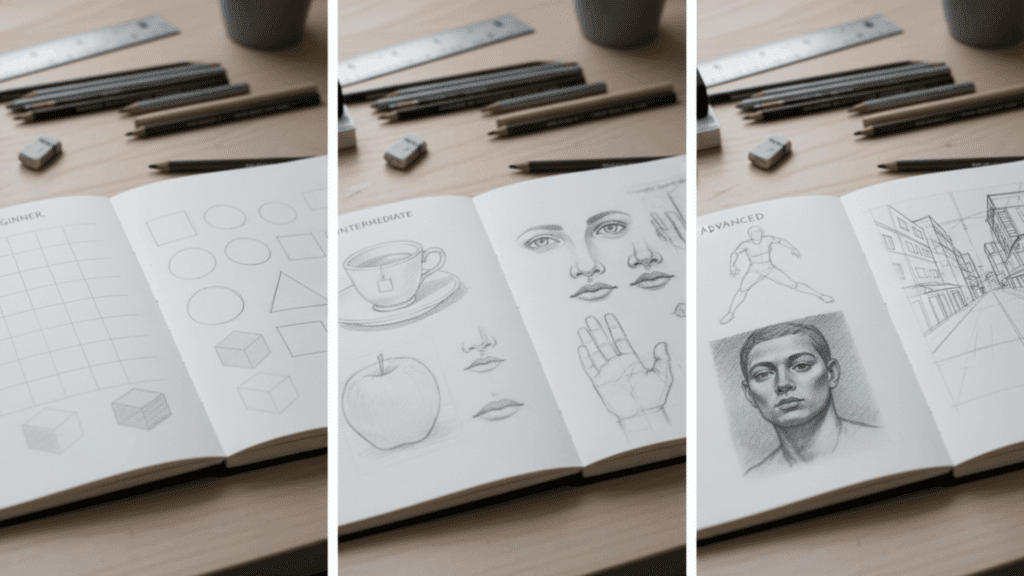
Your skill level determines which drawing practice exercises will help you most. Matching exercises to your abilities keeps you challenged without feeling overwhelmed.
Beginner
Start with simple shapes like circles, squares, and triangles. Practice drawing straight lines and curves to build hand control. Try freeform sketches without worrying about perfection. These basics create a strong foundation for everything else you’ll learn.
Intermediate
Focus on shading techniques to add depth to your drawings. Work on getting proportions right when drawing objects or people. Practice basic perspective by drawing simple boxes and buildings in one-point or two-point perspective. These skills make your drawings look more realistic and three-dimensional.
Advanced
Challenge yourself with complex compositions that tell a story. Study anatomy to draw humans and animals accurately. Add fine details like textures, wrinkles, and lighting effects. Push yourself to create finished pieces, not just studies.
| Practicing at the right level keeps you motivated and growing. Beginners who try advanced exercises get frustrated and quit. Advanced artists doing only basic drills get bored and stop improving. Match your practice to where you are now, then gradually increase the difficulty. |
Mistakes to Avoid in Your Drawing Practice
Even dedicated artists make mistakes that slow their progress. Avoiding these common errors will help you get better results from your drawing practice exercises.
| Mistake | Fix |
|---|---|
| Over-focusing on Details | Start with basic shapes. Add details last. |
| Skipping Warm-ups | Warm up 5 to 10 minutes before drawing. |
| Not Reviewing Progress | Date your work. Review monthly. |
| Gripping Pencil Too Tightly | Hold loosely. Let your arm move freely. |
| Practicing Inconsistently | Draw for 10 to 15 minutes daily. |
How to Build a Daily Drawing Routine?
Start small with 10-15 minutes of drawing practice each day. Pick a time that works for you, like morning coffee or before bed. Personalize your routine based on what you want to improve.
If shading needs work, focus there. If proportions are your weakness, practice that instead. Set tiny goals like “draw three circles perfectly” or “complete one gesture sketch.” Small wins keep you motivated.
Track your streak on a calendar. Missing one day is fine, but get back to it the next day. The key is consistency, not perfection.
Final Notes
Drawing practice exercises are your path to real improvement.
You don’t need fancy tools or natural talent. Just 10 to 15 minutes a day with basic exercises like lines, shapes, and gesture sketches will steadily build your skills.
Remember to warm up before each session, avoid getting stuck on tiny details, and track your progress monthly. Match exercises to your current skill level so you stay motivated without feeling overwhelmed.
Ready to start? Pick one exercise from this guide and try it today. Grab a pencil and sketch for just 10 minutes. Your future drawings will thank you.
Have questions or want to share your progress? Drop a comment below. We’d love to see how you’re improving.