Drawing a flamingo is much simpler than it looks. You can create a beautiful flamingo drawing using basic shapes and simple techniques that anyone can master.
In this blog, we’ll show you how to draw a flamingo easily. We’ll break down the process into easy stages, starting with simple circles and lines. By the end, you’ll have a complete flamingo drawing and the confidence to try it again on your own.
Easy Steps on How to Draw a Flamingo Easy
Drawing a flamingo can be easy and fun, especially with simple step-by-step instructions designed for kids and beginners. With just a few basic shapes and lines, you’ll be able to create a cute and colorful flamingo in no time.
Flamingo drawings make great craft projects too! You can use your finished drawing to decorate cards, bookmarks, or even turn it into a paper puppet.
Step 1: Draw the Eye
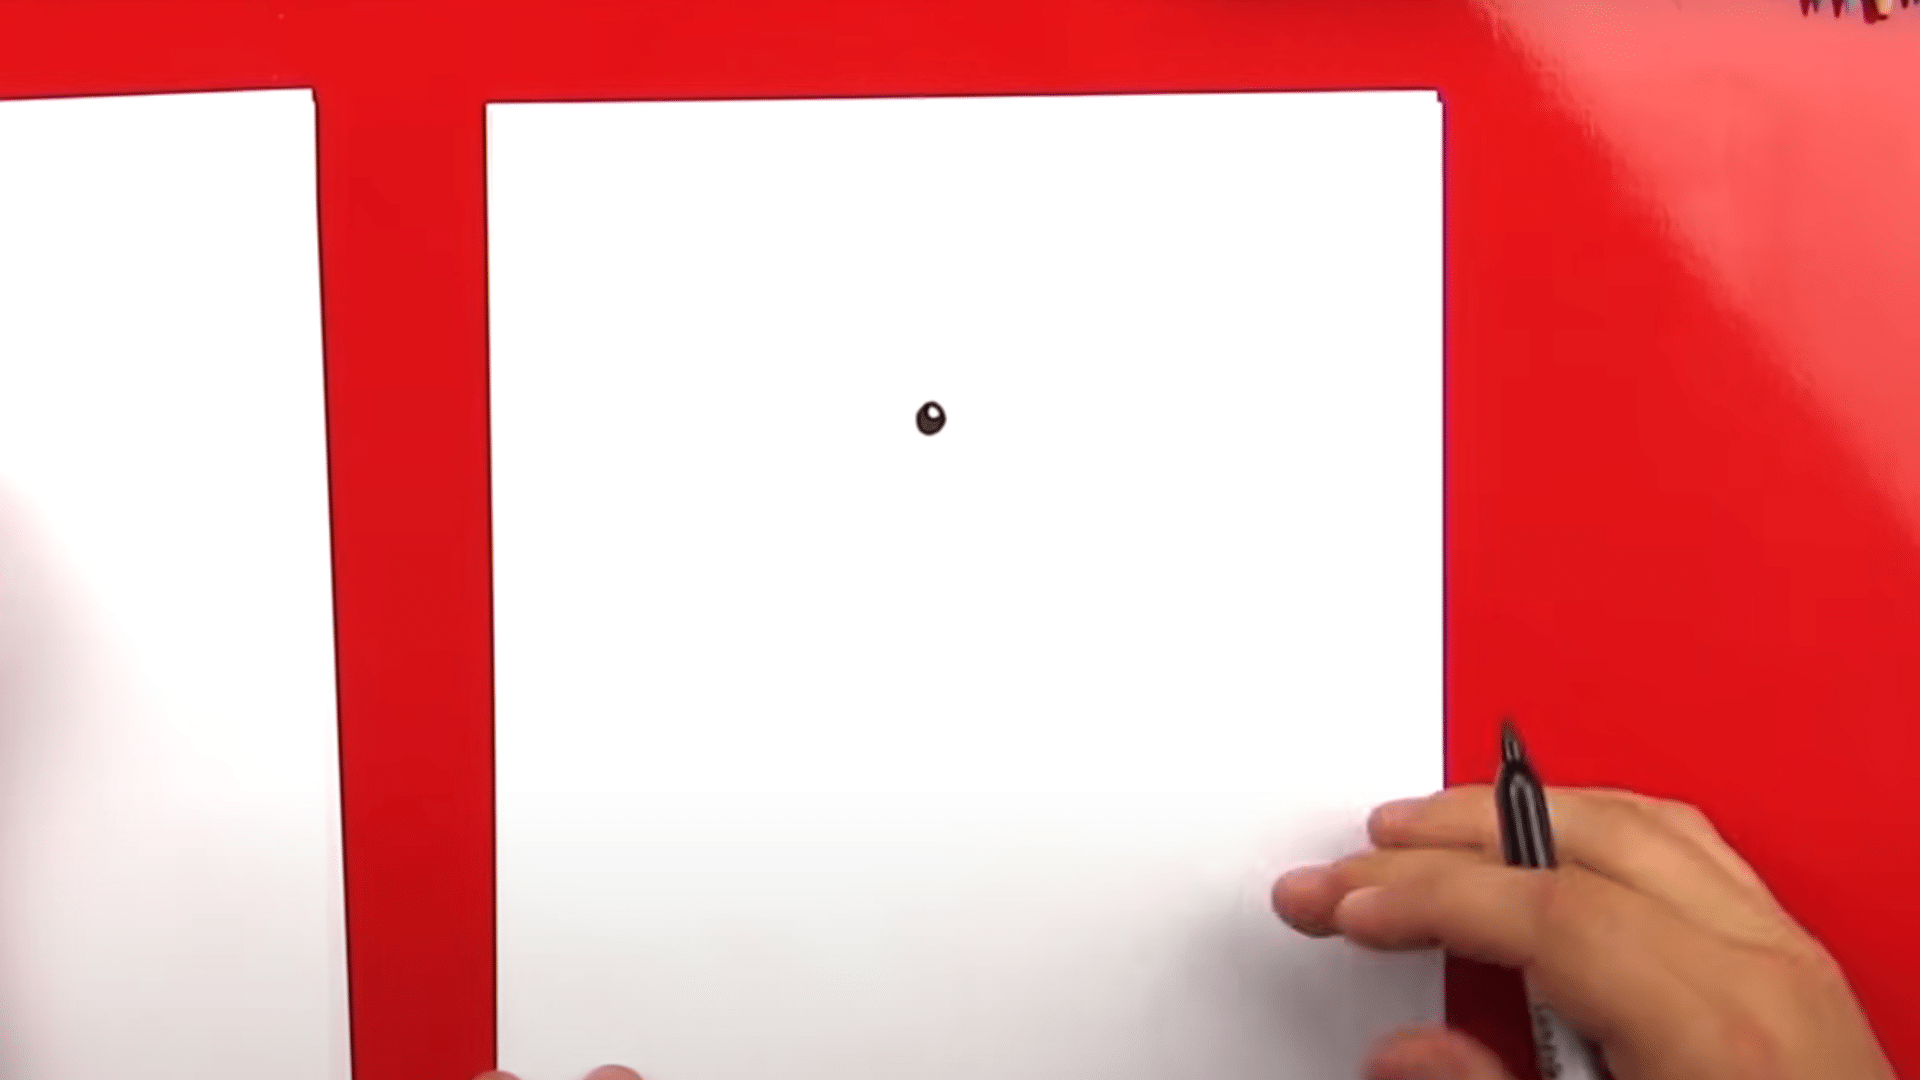
Start with a small circle near the top center of your paper to represent the flamingo’s eye. Leave a tiny white spot in the circle to mimic light reflection. This placement gives enough room for the tall body below. Once the circle is done, fill it in using black, except the white spot for added realism.
Step 2: Draw and Sketch the Beak
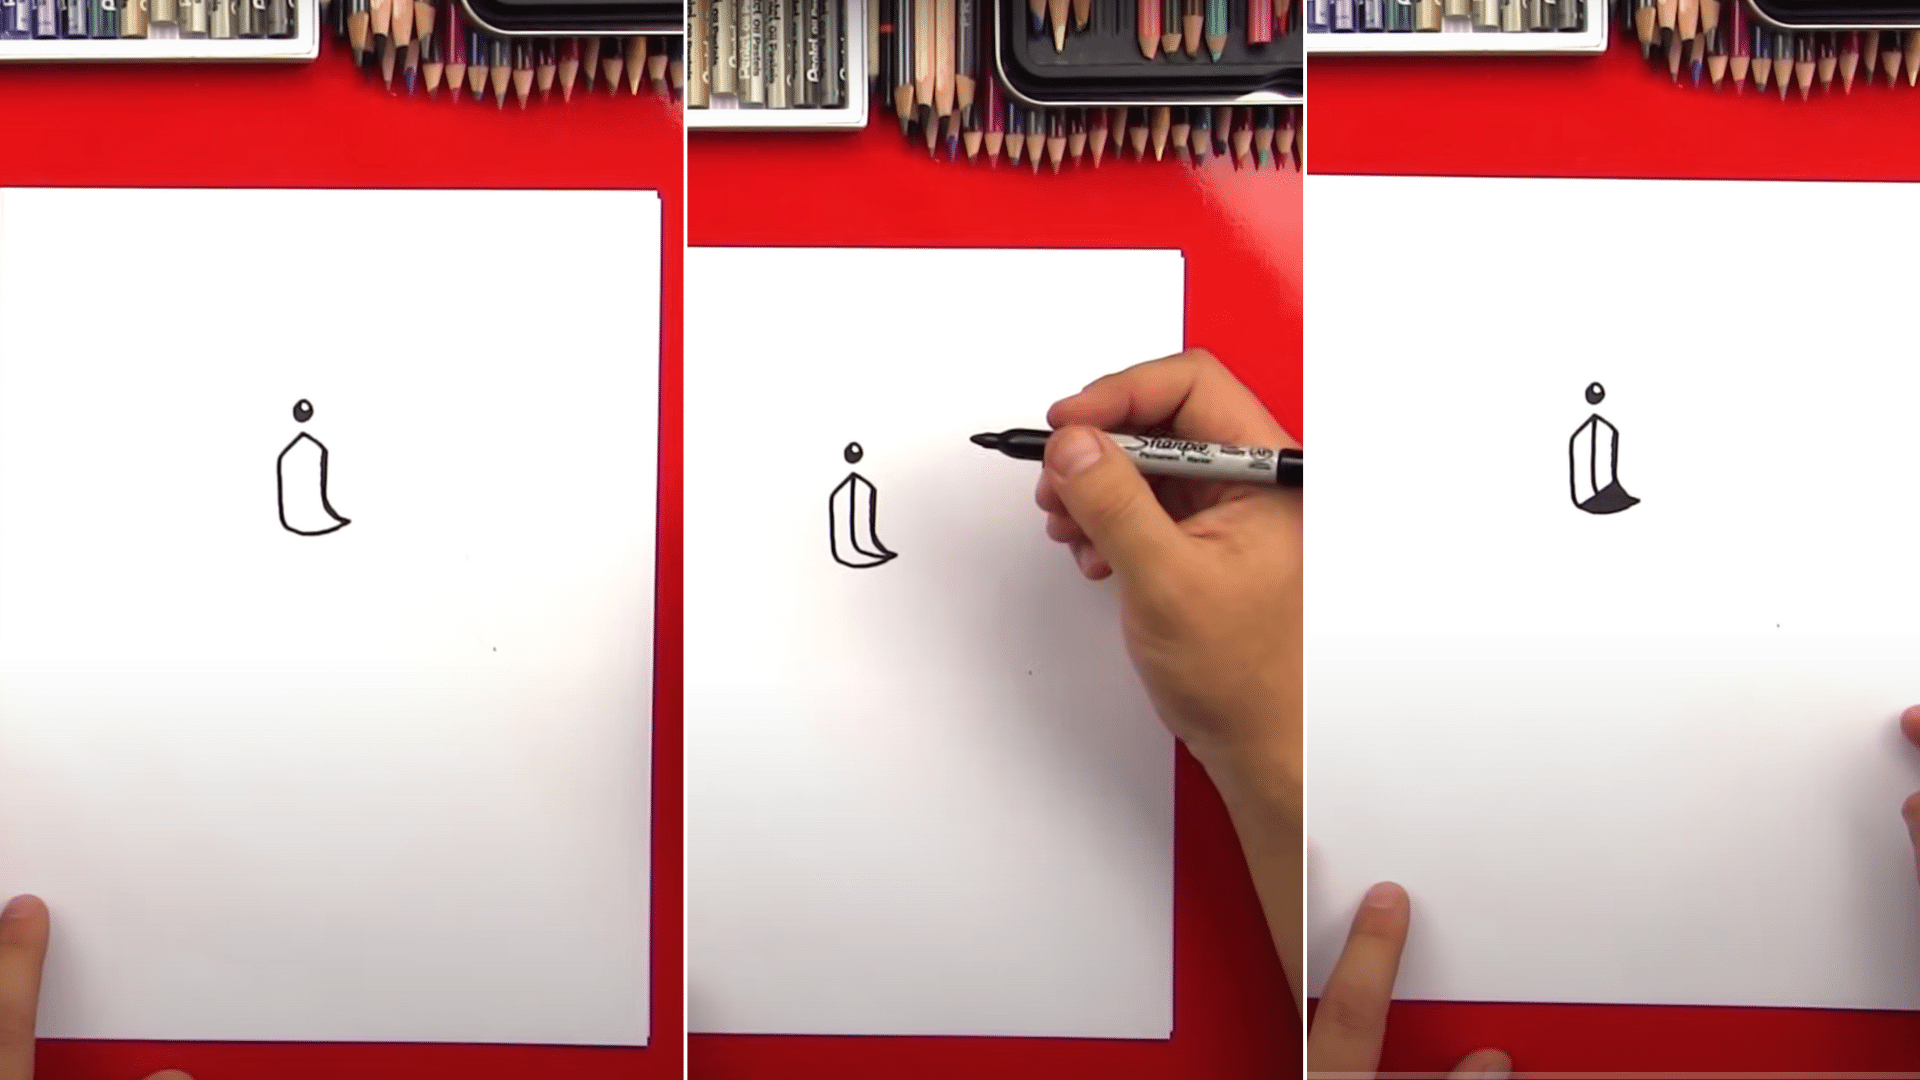
Right next to the eye, draw an upside-down V to begin the beak. Then create an L-shape by drawing a line down and across from the V. Add a second line below for the lower beak and connect it to the first. Color in the tip black and add a curve inside the beak for the mouth.
Step 3: Outline the Head and Neck
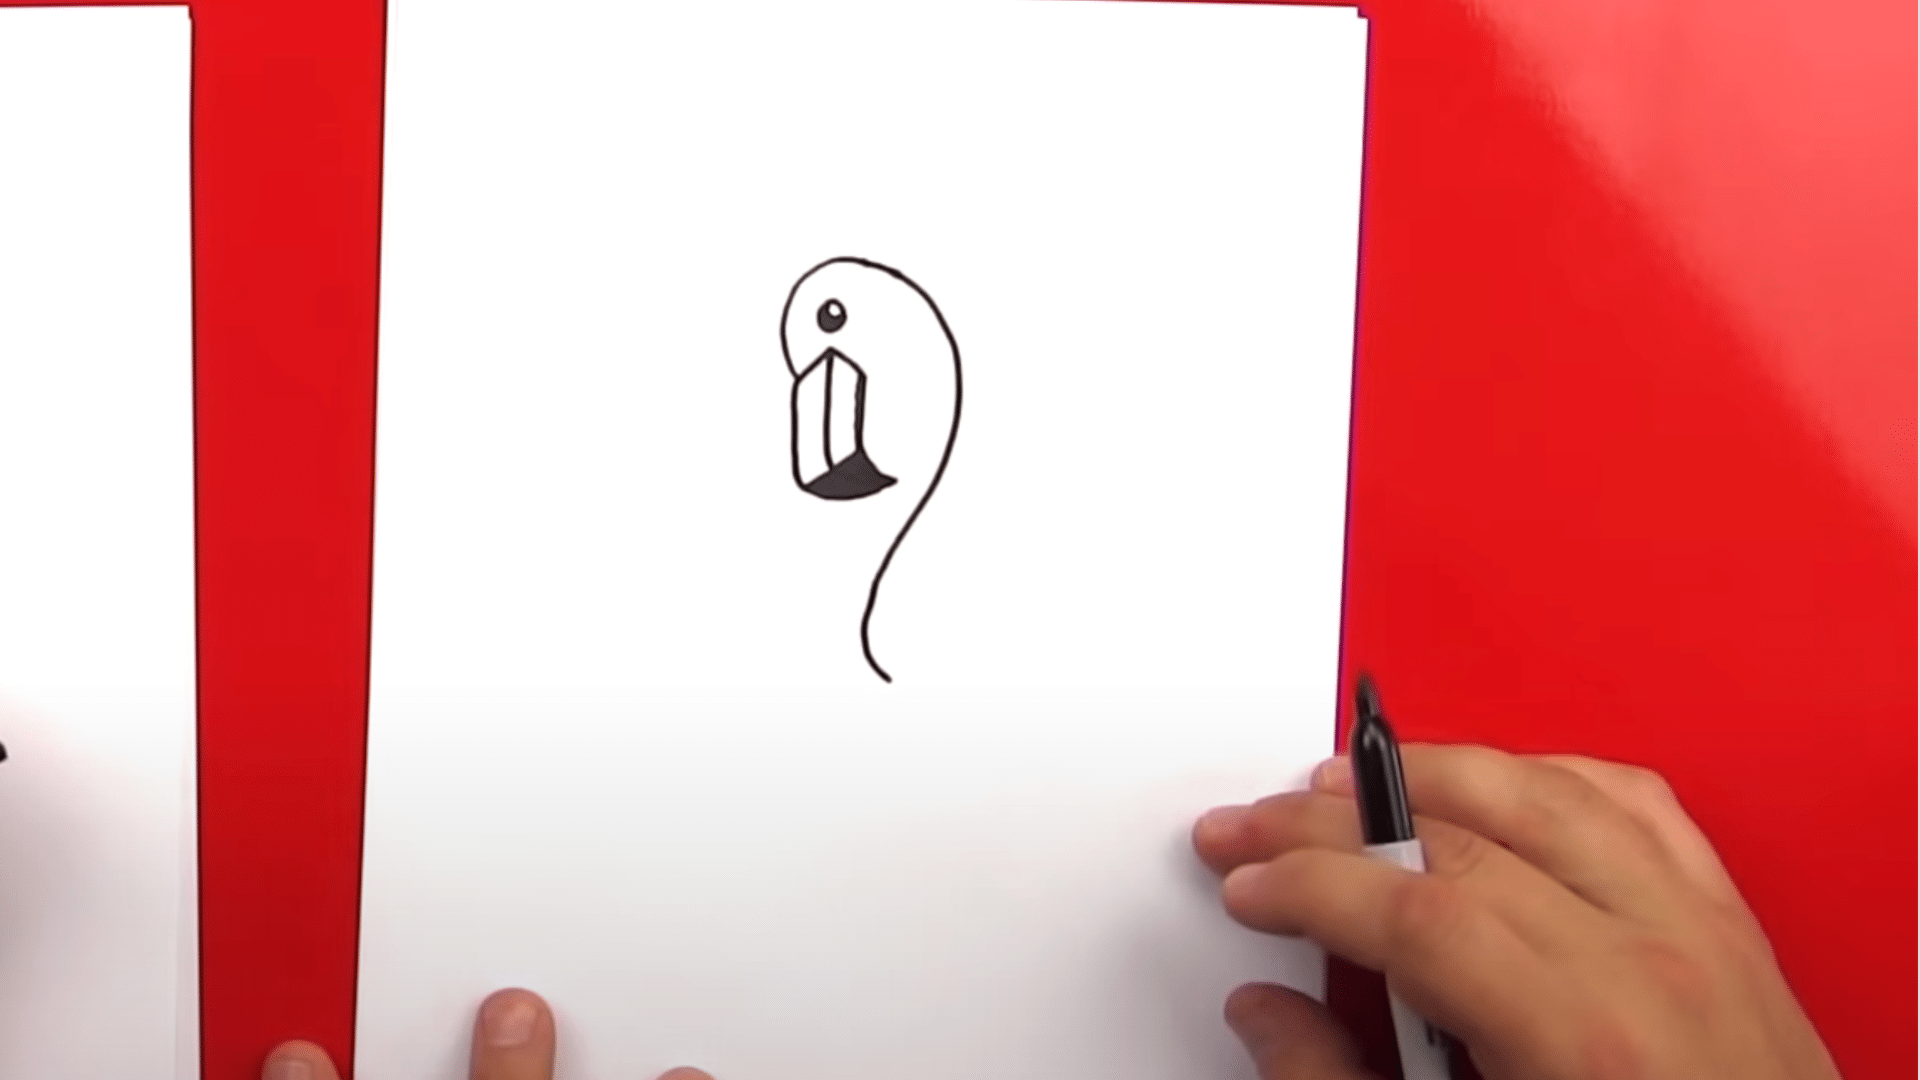
Start from the beak and draw a large curve that arches over the eye to form the head. Then create a big “S” shape that loops outward and downward to sketch the flamingo’s elegant neck. This line gives your drawing that tall and graceful flamingo neck shape, so take your time curving smoothly across the page.
Step 4: Complete the Neck and Connect
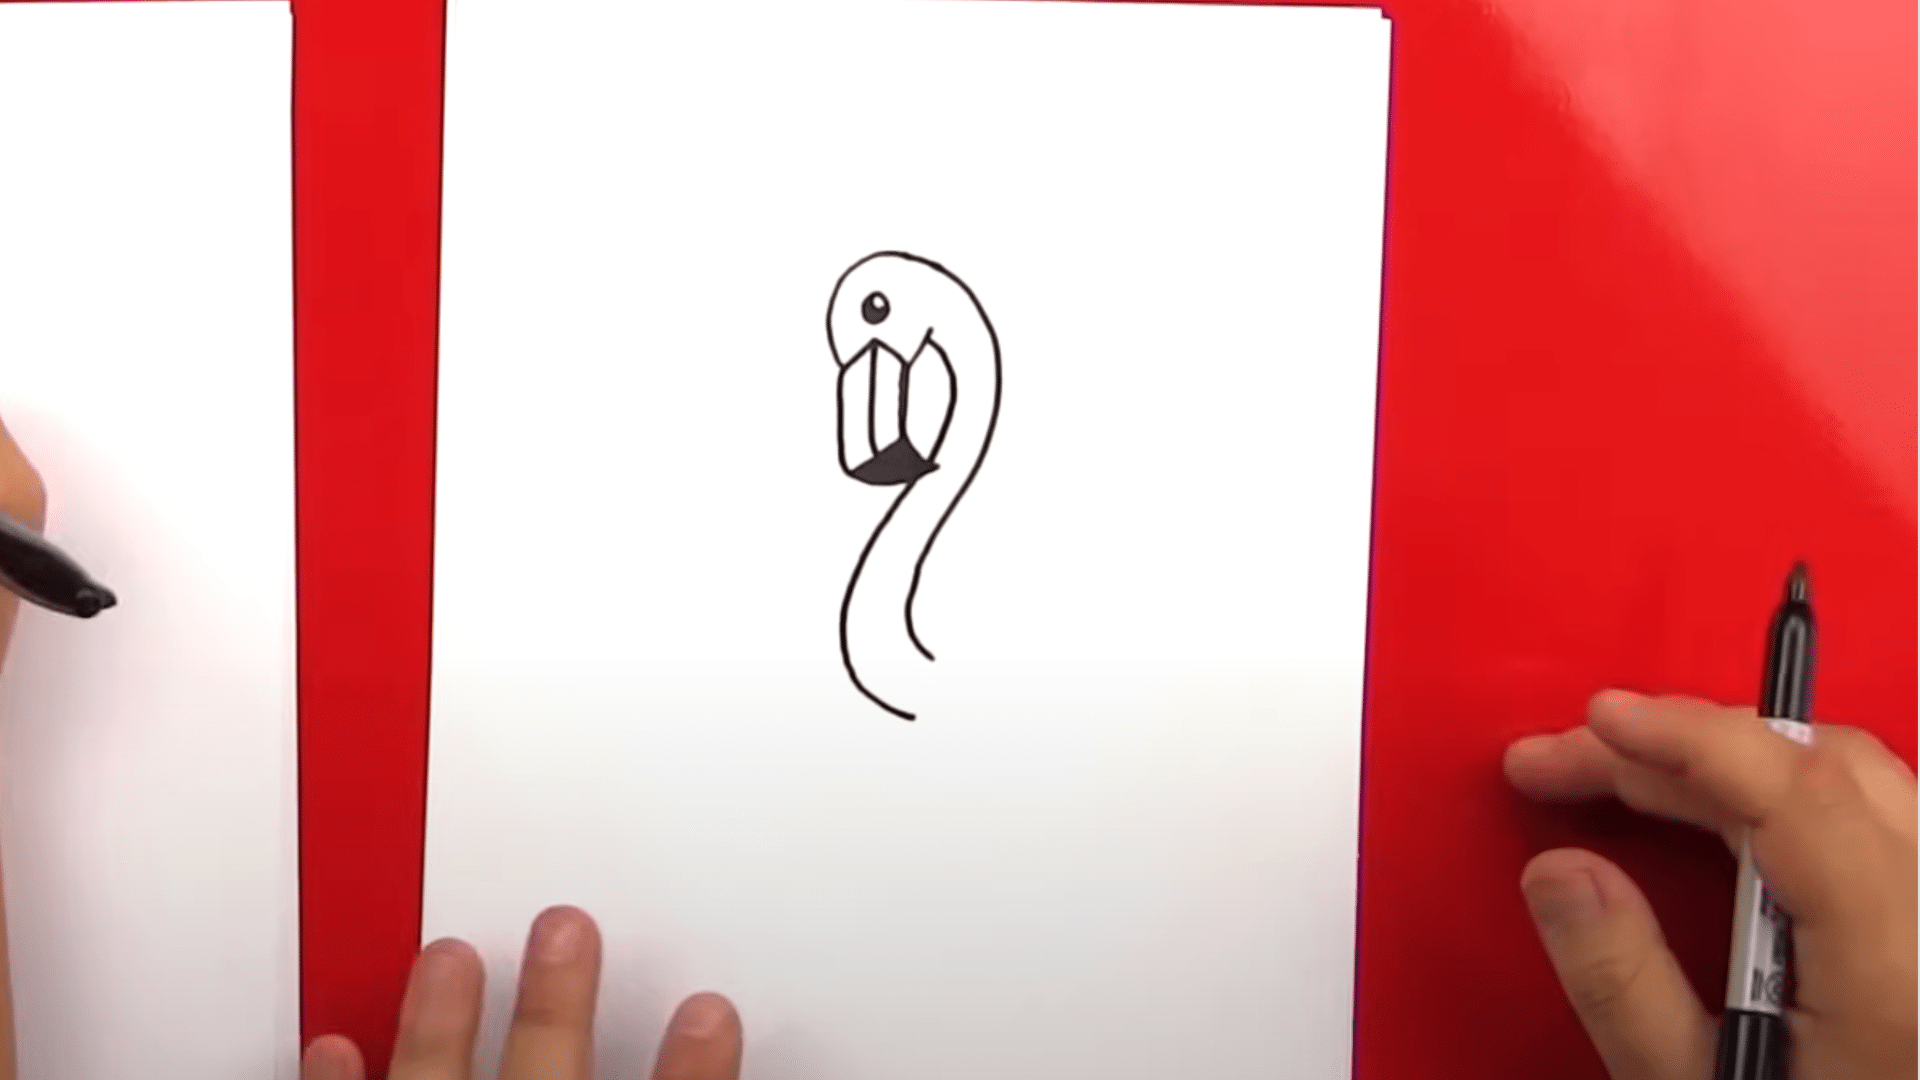
Now, draw the opposite side of the neck starting from the base of the head. Follow the same curve as the first “S” line to make the neck look even. This second line should parallel the first one down, making sure it reconnects near the same point to give the neck a 3D feel.
Step 5: Create the Body

From the bottom of the neck, draw a big upside-down U shape or rainbow line to form the flamingo’s body. End the arc with a small outward flick for the tail. Then add a zigzag line, like little Ws, for the tail feathers. Finally, connect the tail and the base of the neck with a short curved line.
Step 6: Add the Wing
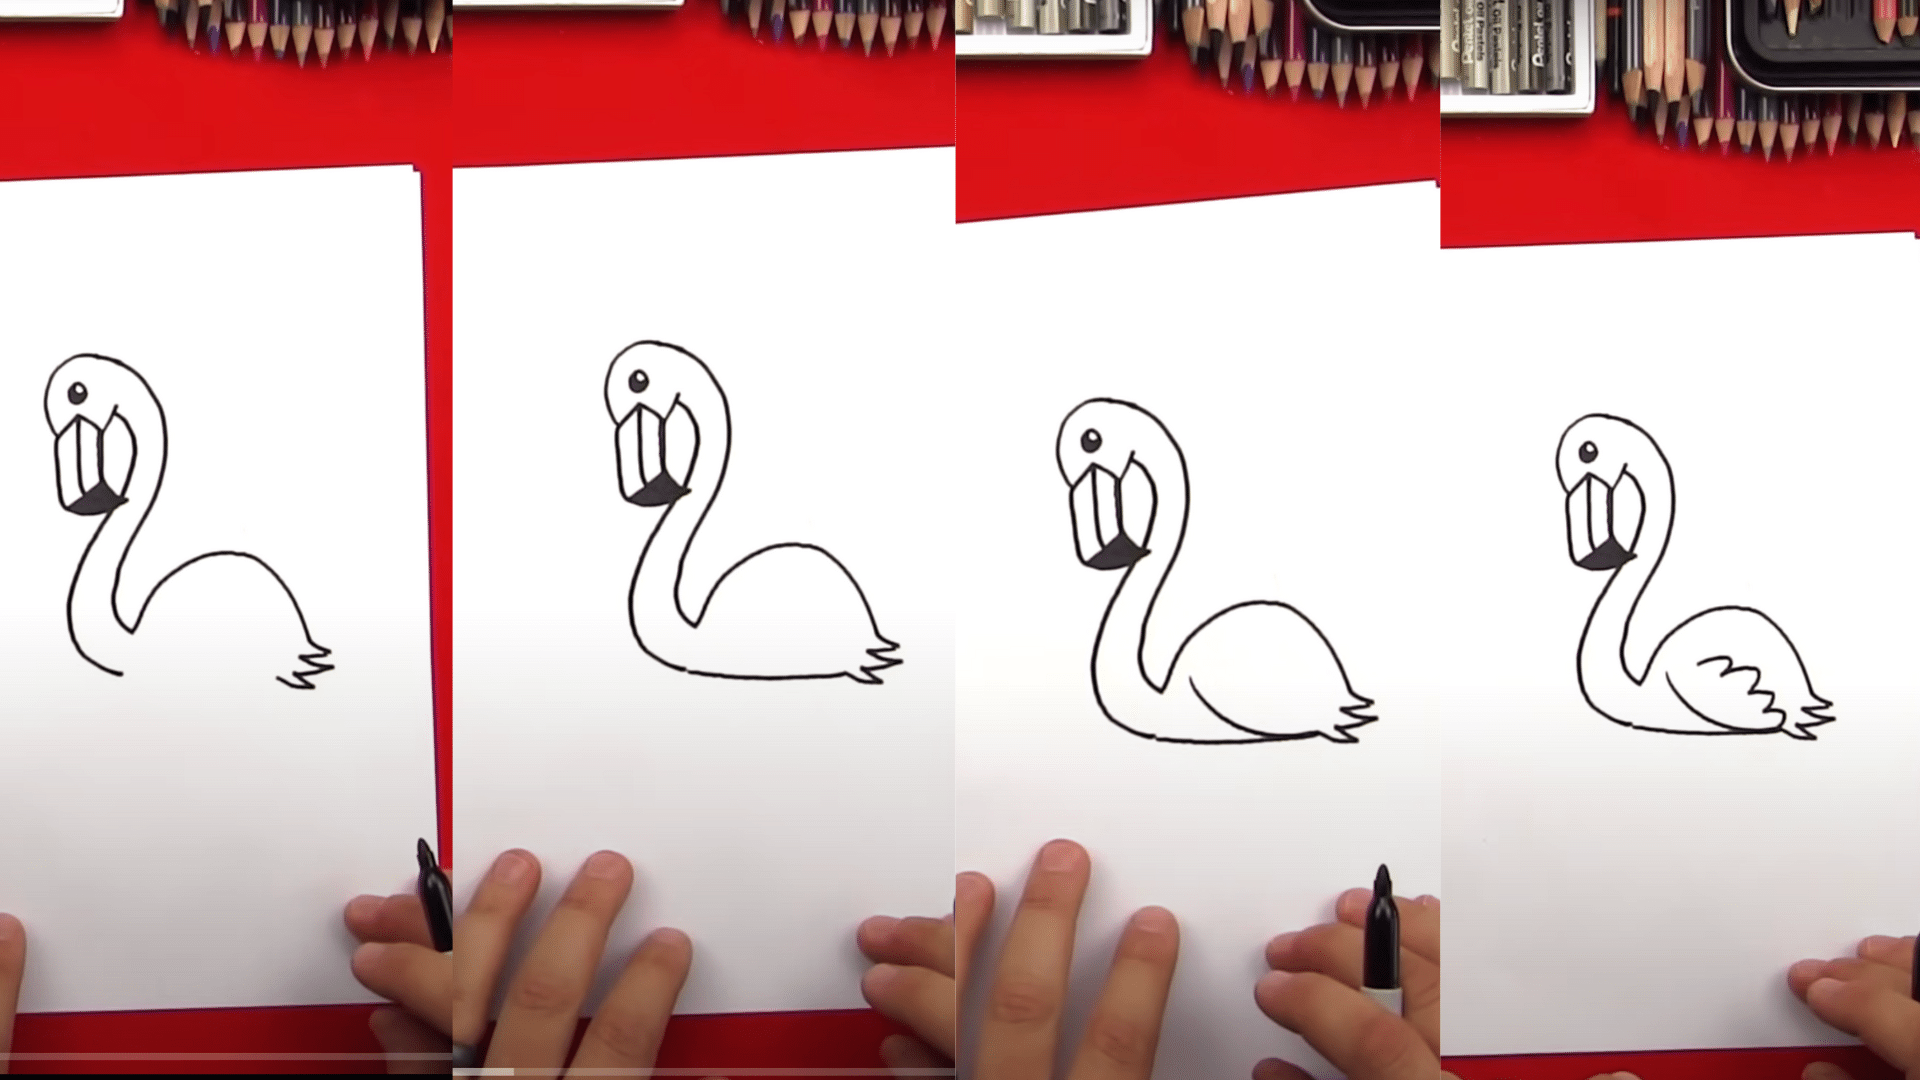
Inside the body, draw a large curved line starting near the top for the wing outline. Then add a series of small connected U-shapes (around four) under this curve to represent feathers. These repeating scallop lines help give the wing texture and dimension, making it stand out as part of the flamingo’s overall graceful shape.
Step 7: Draw the Standing Leg
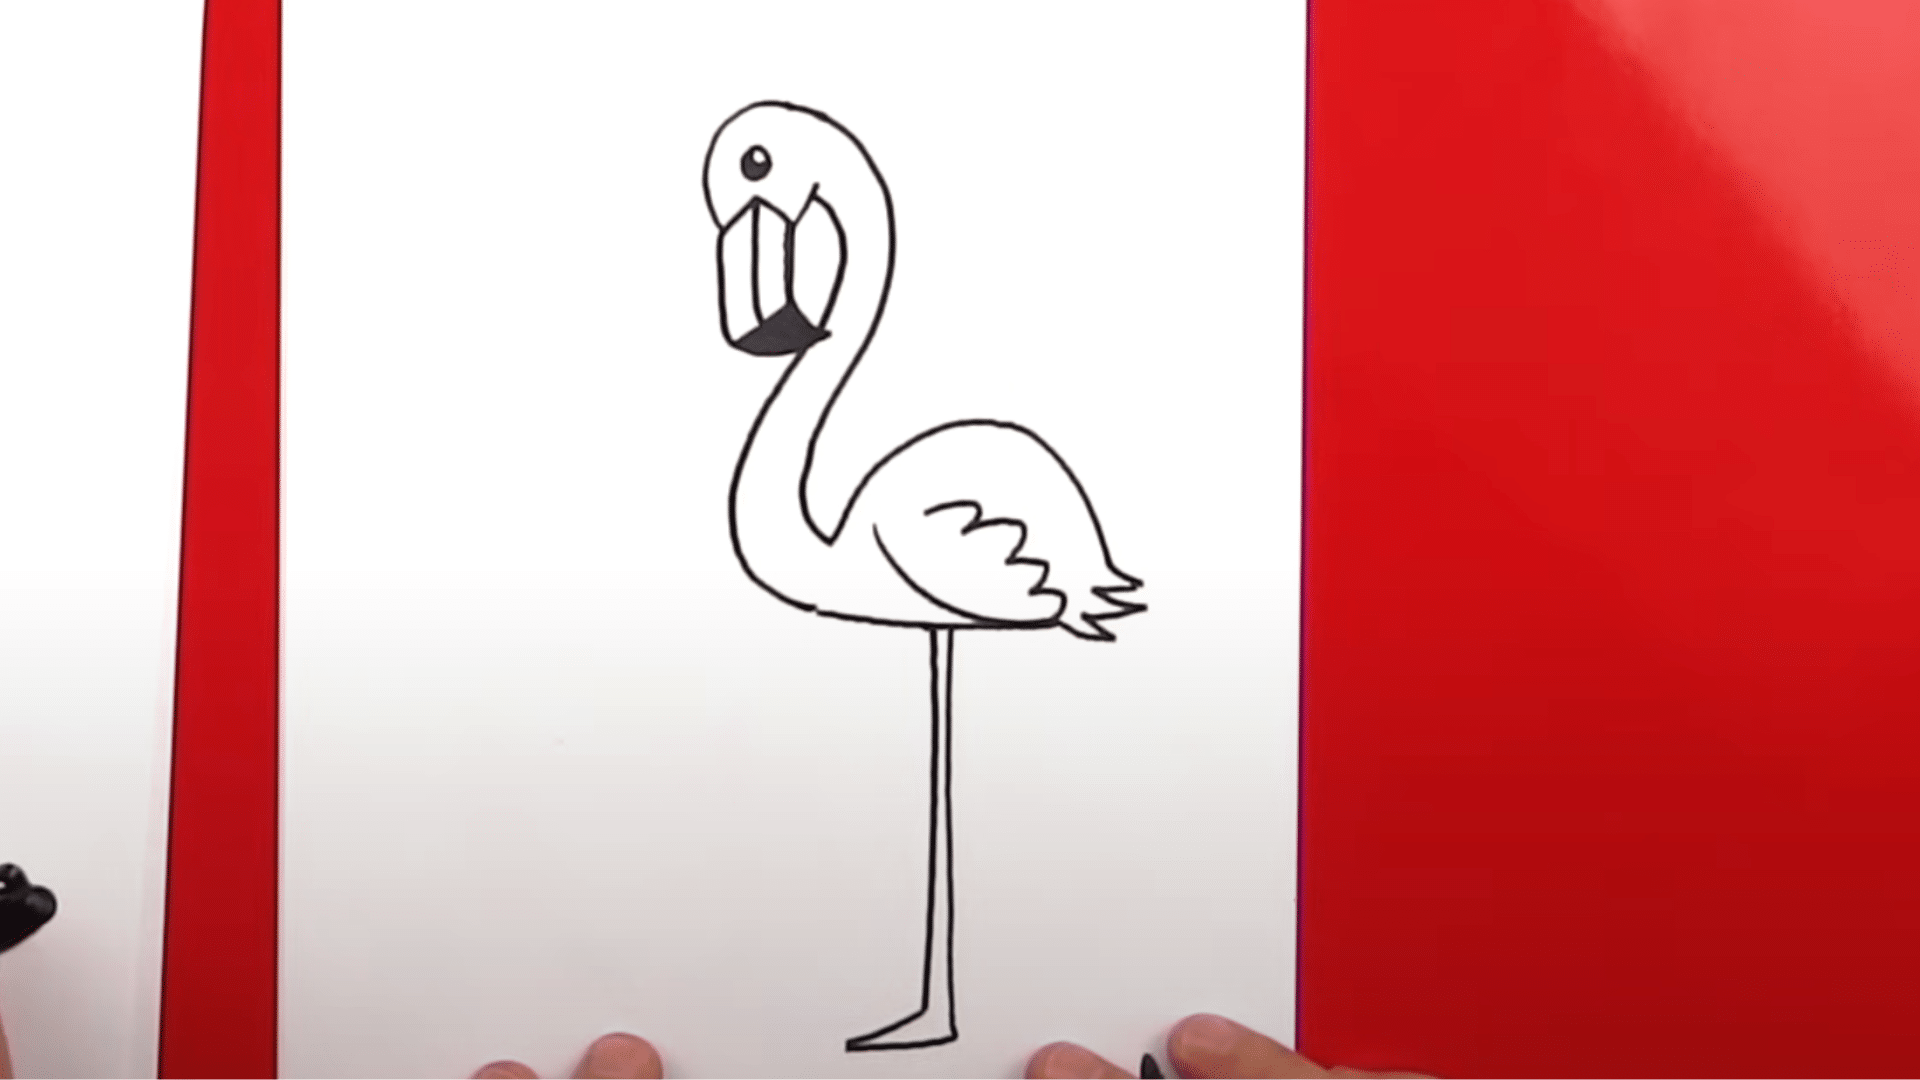
Underneath the flamingo’s body, draw a long straight line downward for one leg. Right beside it, draw another parallel line for thickness. Add a small horizontal line at the bottom for the foot, and then connect the leg and foot with a straight horizontal base. Add a small vertical line in the foot to show one toe.
Step 8: Add the Bent Leg
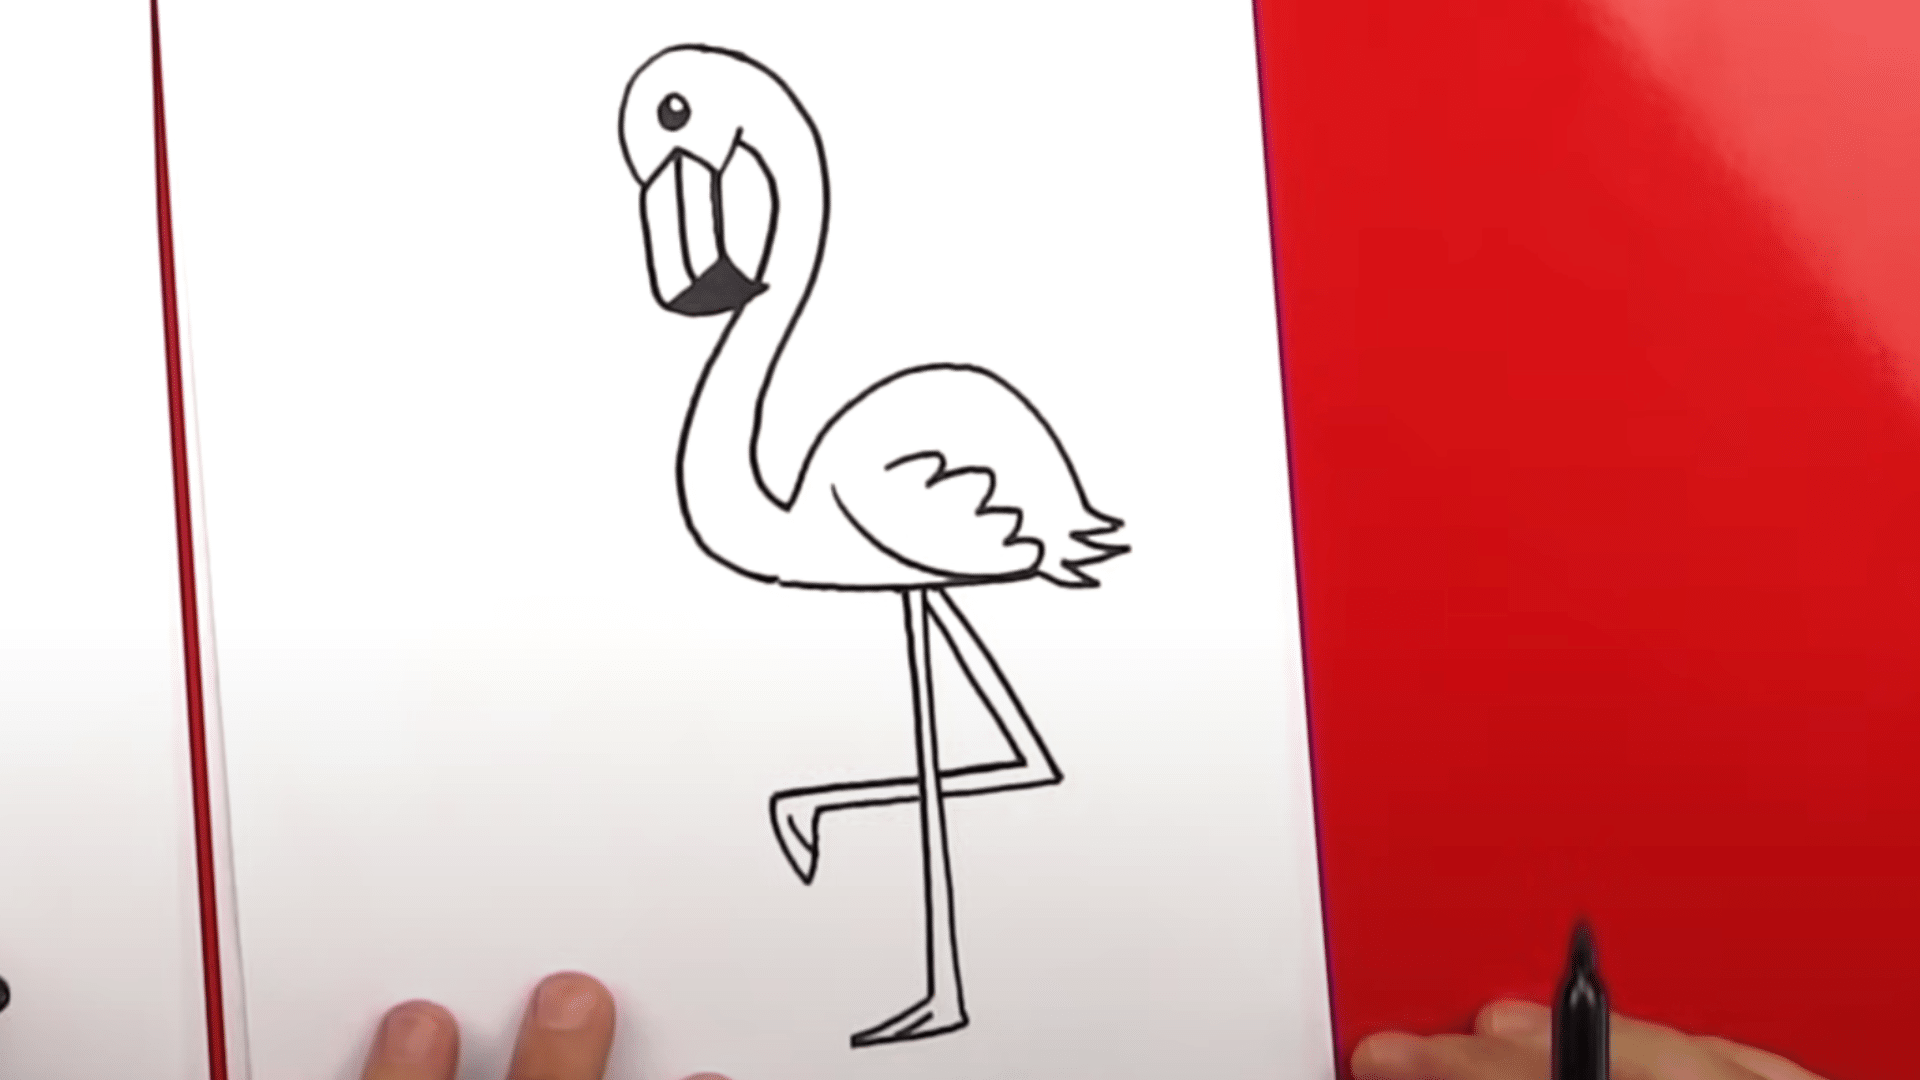
Begin with a diagonal line coming down to mimic a bent leg. Then draw a short horizontal line across and connect it with another diagonal going upward, forming a backward “4.” Add a second line alongside the first to thicken it. Close the shape with a V-shape at the bottom to show the lifted foot and toe.
Step 9: Color Your Flamingo
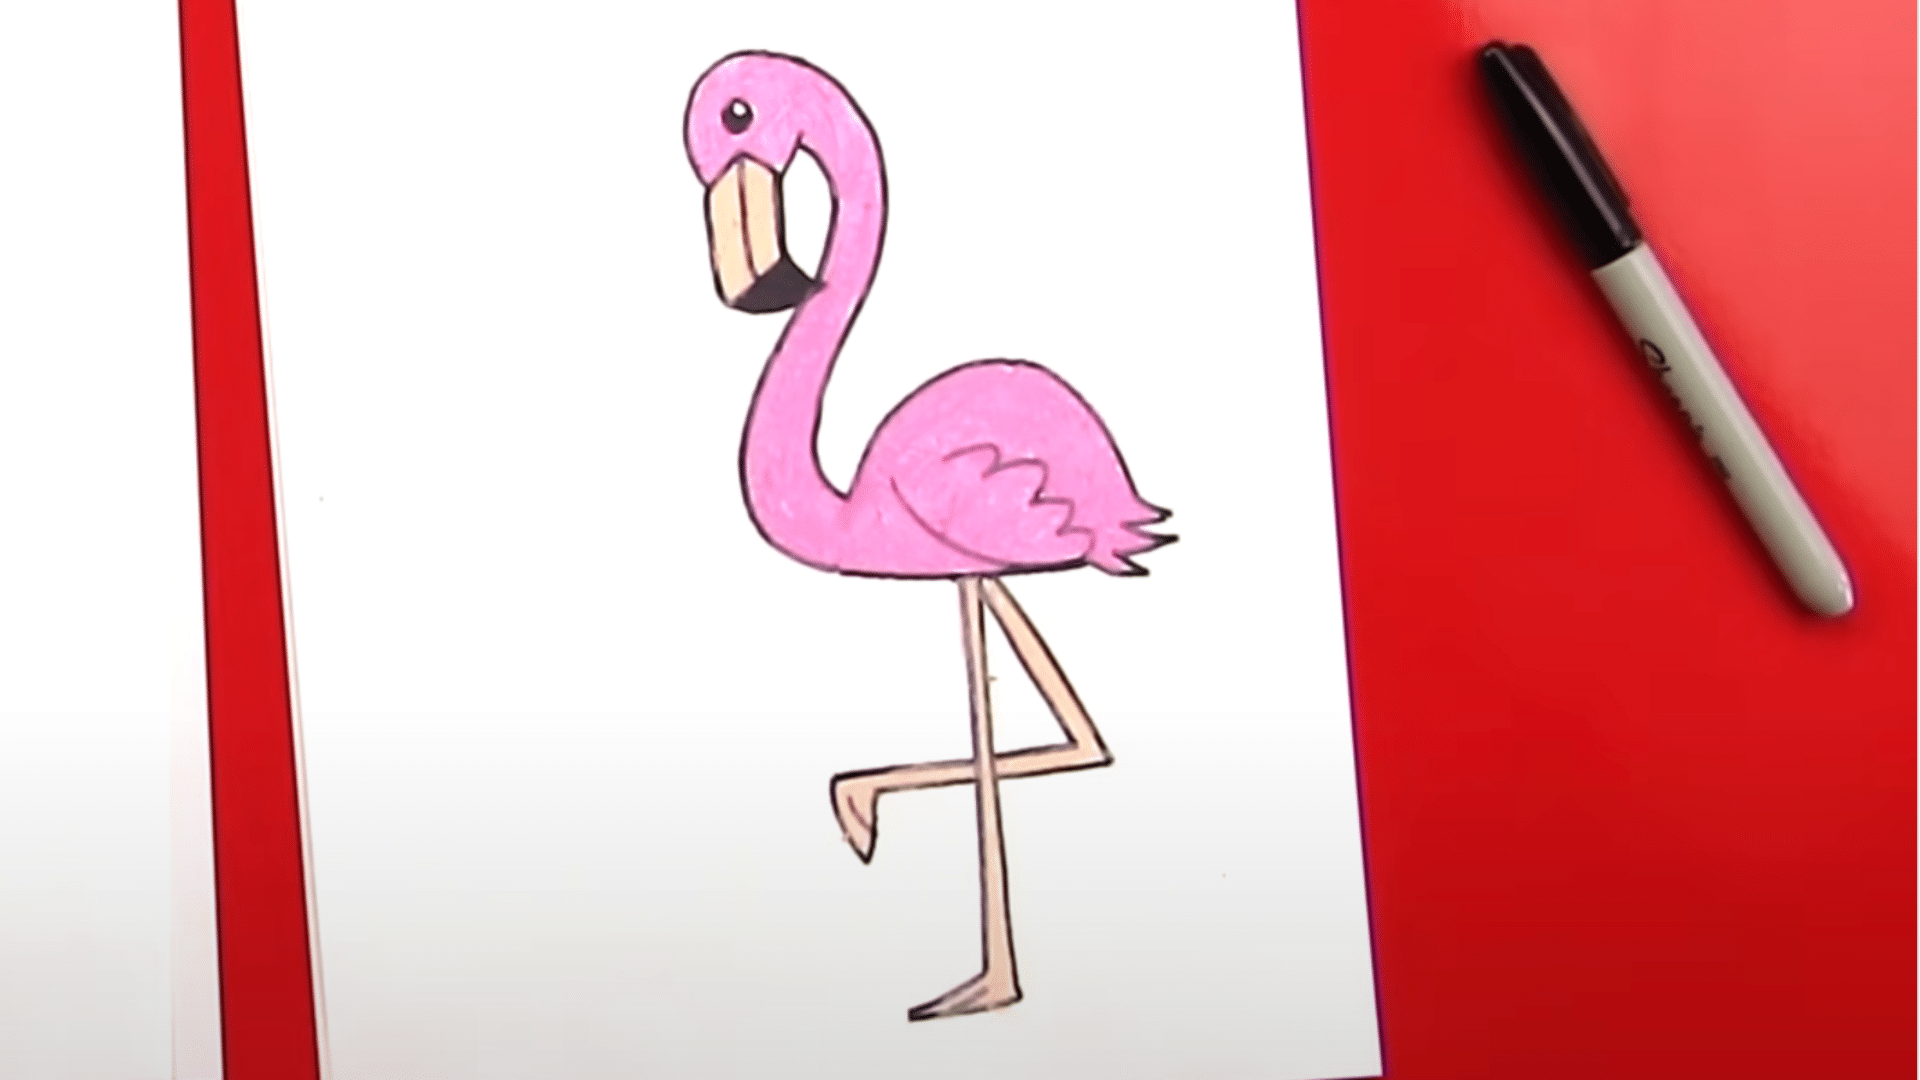
Choose a bright pink marker for the body and pale orange or light pink for shading or highlights. Carefully fill in the flamingo’s entire body, wings, and head.
Leave the beak’s tip black and the eye white spot uncolored. You can blend the colors slightly where needed to make the bird look soft, fluffy, and fun to finish.
Interested in learning how to draw other animals? Check out How to Draw a Panda and How to Draw Fish.
Interesting Fun Facts about Flamingos
Flamingos are some of the most fascinating and recognizable birds in the world, known for their bright pink feathers and long, slender legs. But there’s much more to these unique creatures than meets the eye. Here are some fun and surprising facts about flamingos:
1. Flamingos aren’t born pink; they hatch with gray or white feathers and turn pink because of their diet rich in carotenoids
2. There are six different species of flamingos found across the Americas, Africa, and Eurasia
3. Flamingos get their signature pink color from eating algae and shrimp that contain natural pigments called carotenoids
4. Flamingos are filter feeders and often eat with their heads upside down in the water
5. A group of flamingos is called a “flamboyance” when they’re dancing and a “stand” when they’re just standing around
6. Flamingos are masters of balance and can stand on one leg for hours at a time
7. Both male and female flamingos participate in synchronized group dances as part of their courtship rituals
8. Flamingos build their nests out of mud, forming a little mound to keep their eggs safe
9. They are very social birds and can live in colonies of thousands of individuals
10. Flamingos live in some of the saltiest and harshest habitats on Earth, like lagoons and salt flats, where few other animals can survive
11. The Andean flamingo is the only species with yellow legs, making it easy to identify among its relatives
Wrapping It Up
You’ve just completed your flamingo drawing!
Take a moment to look at what you’ve created. From those first simple circles to the final details, you’ve turned basic shapes into a recognizable bird.
Drawing doesn’t have to be perfect to be satisfying. Your flamingo might look different from the examples, and that’s completely fine. Each artist brings their style to their work.
Try sketching other birds using similar techniques. Swans, herons, and cranes all use comparable basic shapes. Keep practicing, and most importantly, have fun with your art!