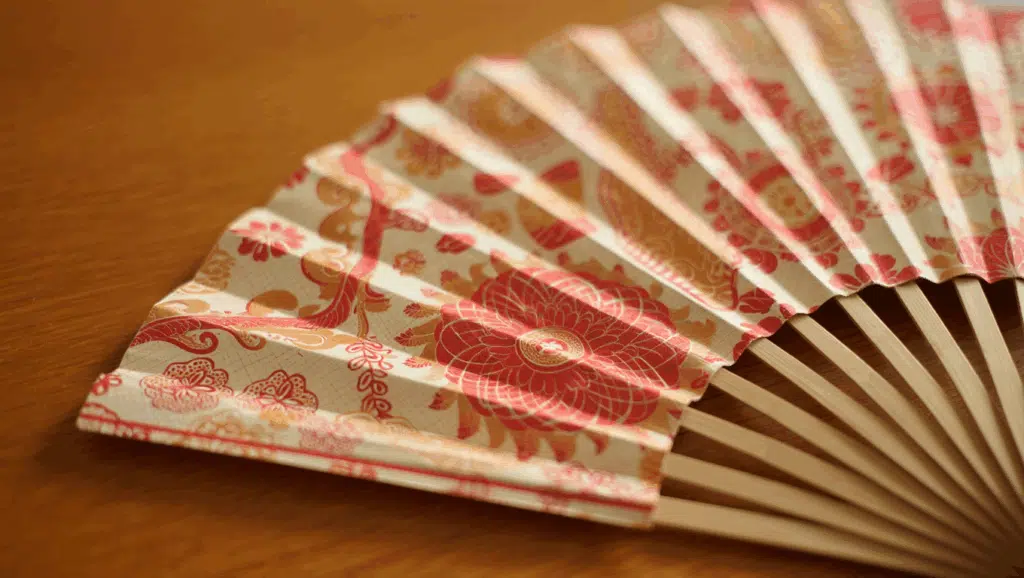
Hot summer days call for creative solutions. Paper fans offer the perfect answer – and anyone can make one in minutes.
This simple craft requires just basic materials that most people already have at home. Kids love the hands-on activity, while adults appreciate the quick results.
Whether someone needs cooling relief or wants a fun project, paper fans deliver both. Plus, they make great decorations too!
This blog breaks down the entire process into five straightforward steps. No special skills needed, just a few minutes and some creativity.
Supplies You’ll Need to Make a Paper Fan
| Material | Purpose |
|---|---|
| Wallpaper/Paper | Main structure of the fan |
| Scissors/Scalpel | Cutting paper into rectangles |
| Ruler and Pencil | Measuring and marking fold lines |
| Glue Gun | Attaching paper segments and sealing the center |
| Paper Clips | Holding the fan edges together (optional) |
| String | Creating a hanging loop for the fan |
Step-by-Step To Make a Paper Fan in Simple Moves
Check out a simple guide to crafting your very own paper fan in just five easy steps. Perfect for a fun and creative DIY project that anyone can follow!
Step 1: Cut and Measure Your Paper
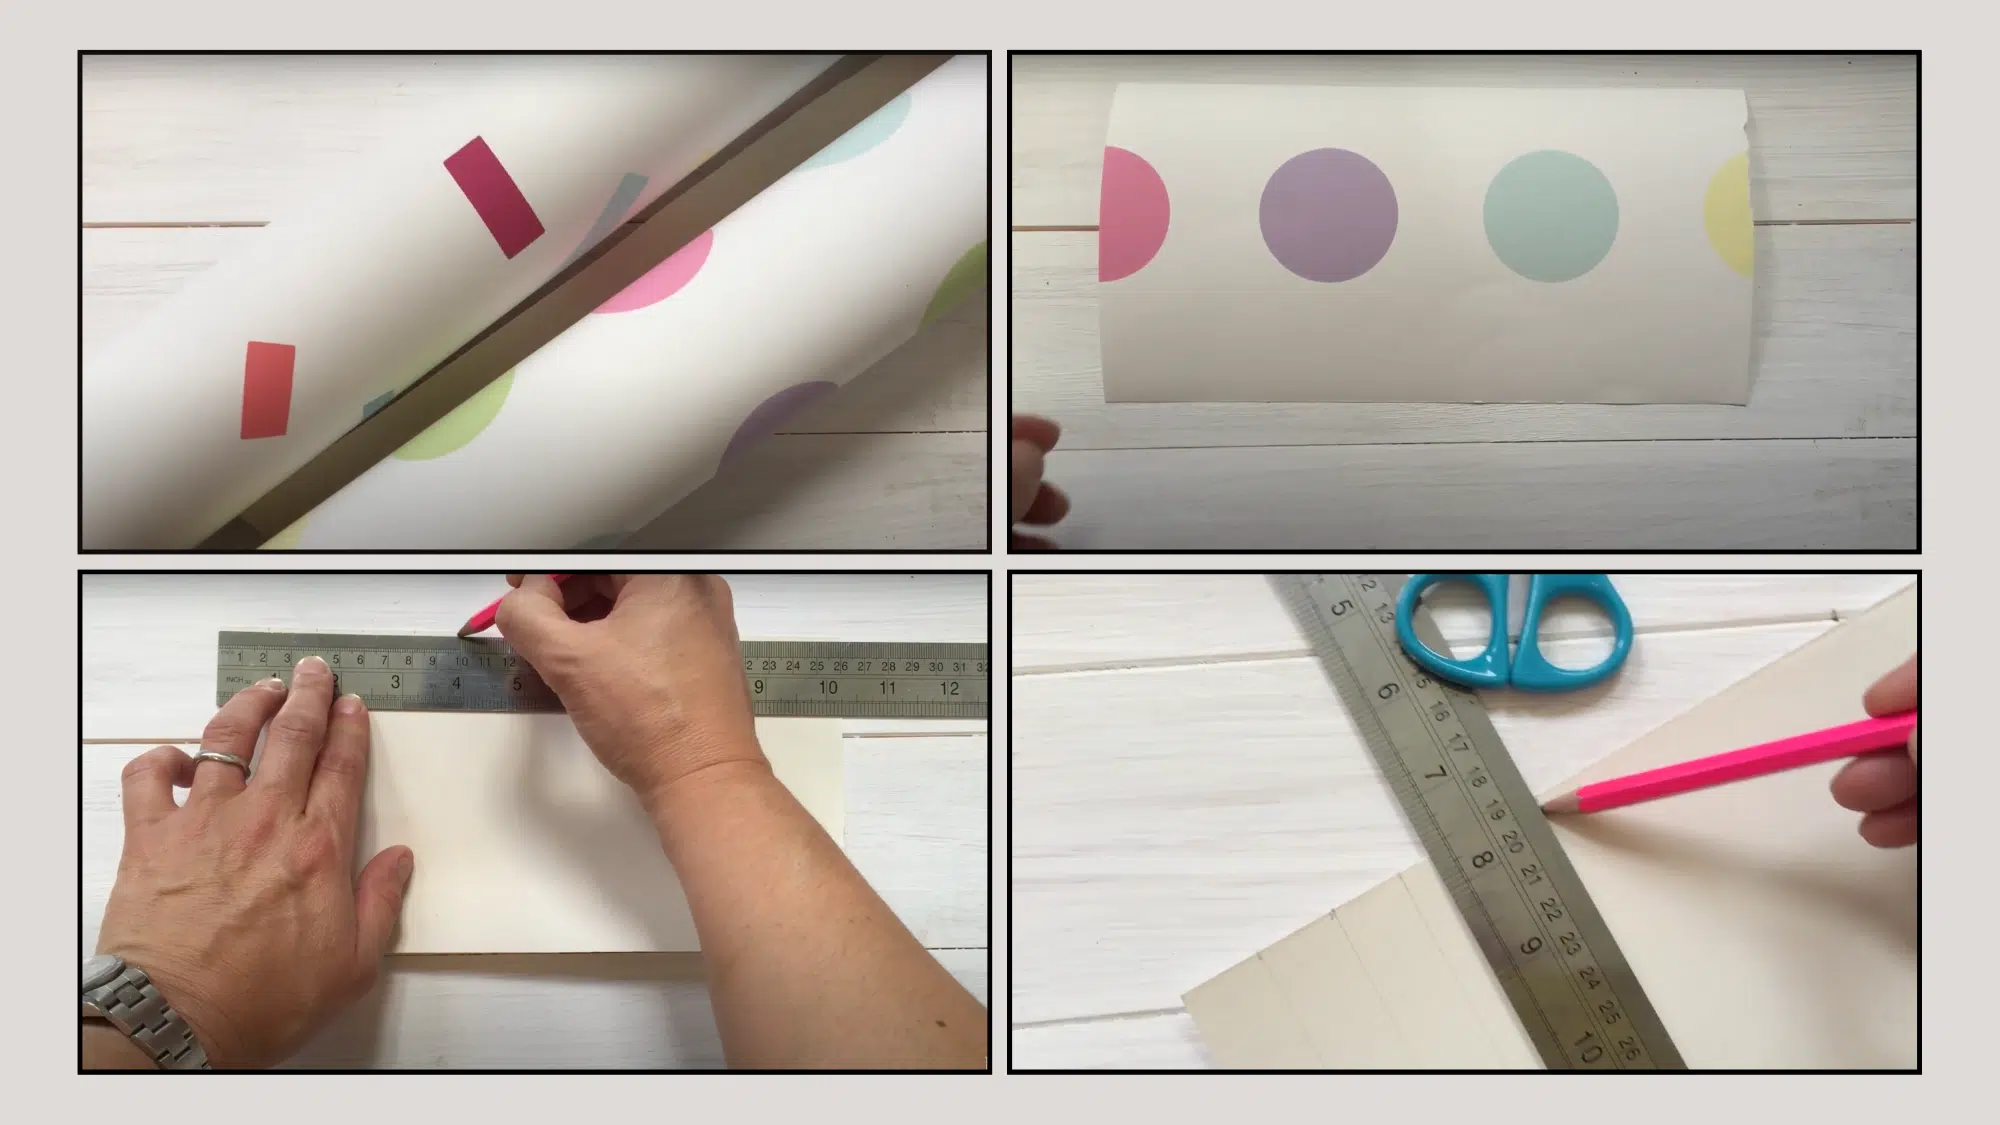
Use any kind of paper, wallpaper, wrapping paper, or craft paper. Cut four equal rectangles.
For a balanced fan, each piece should be about 26 cm wide and of equal height (height = radius of fan). Using a ruler and pencil, mark folding lines 2 cm apart along the width.
Kid-Friendly Tip: Pre-draw the lines or use dotted-line printables for easier folding.
Step 2: Fold Each Piece Accordion-Style
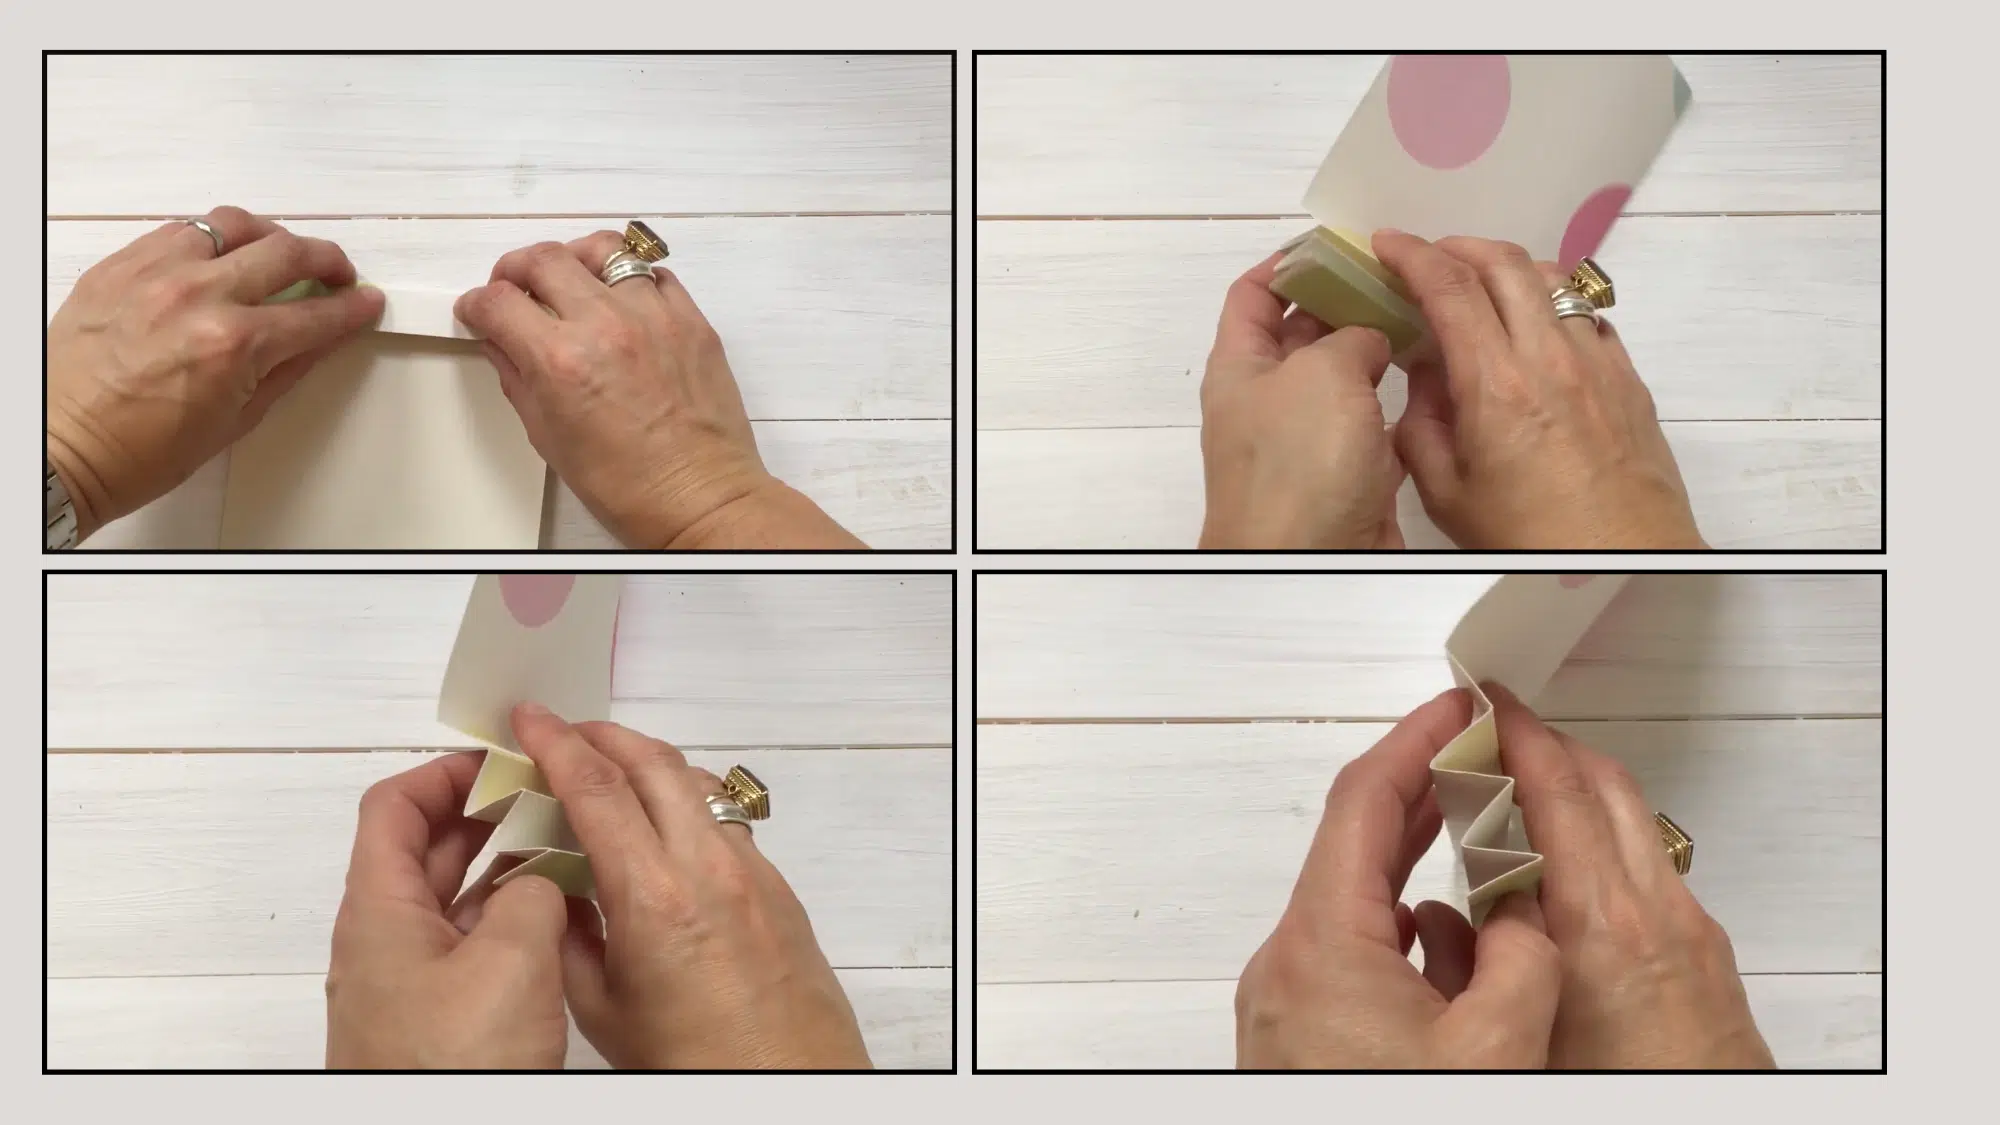
Fold each rectangle back and forth in a concertina (accordion) style along the pencil marks. Ensure crisp folds to maintain shape later on.
Smoother Folds: Use a ruler edge or a craft stick to press down each fold, especially helpful for little hands.
Step 3: Glue the Folds Together
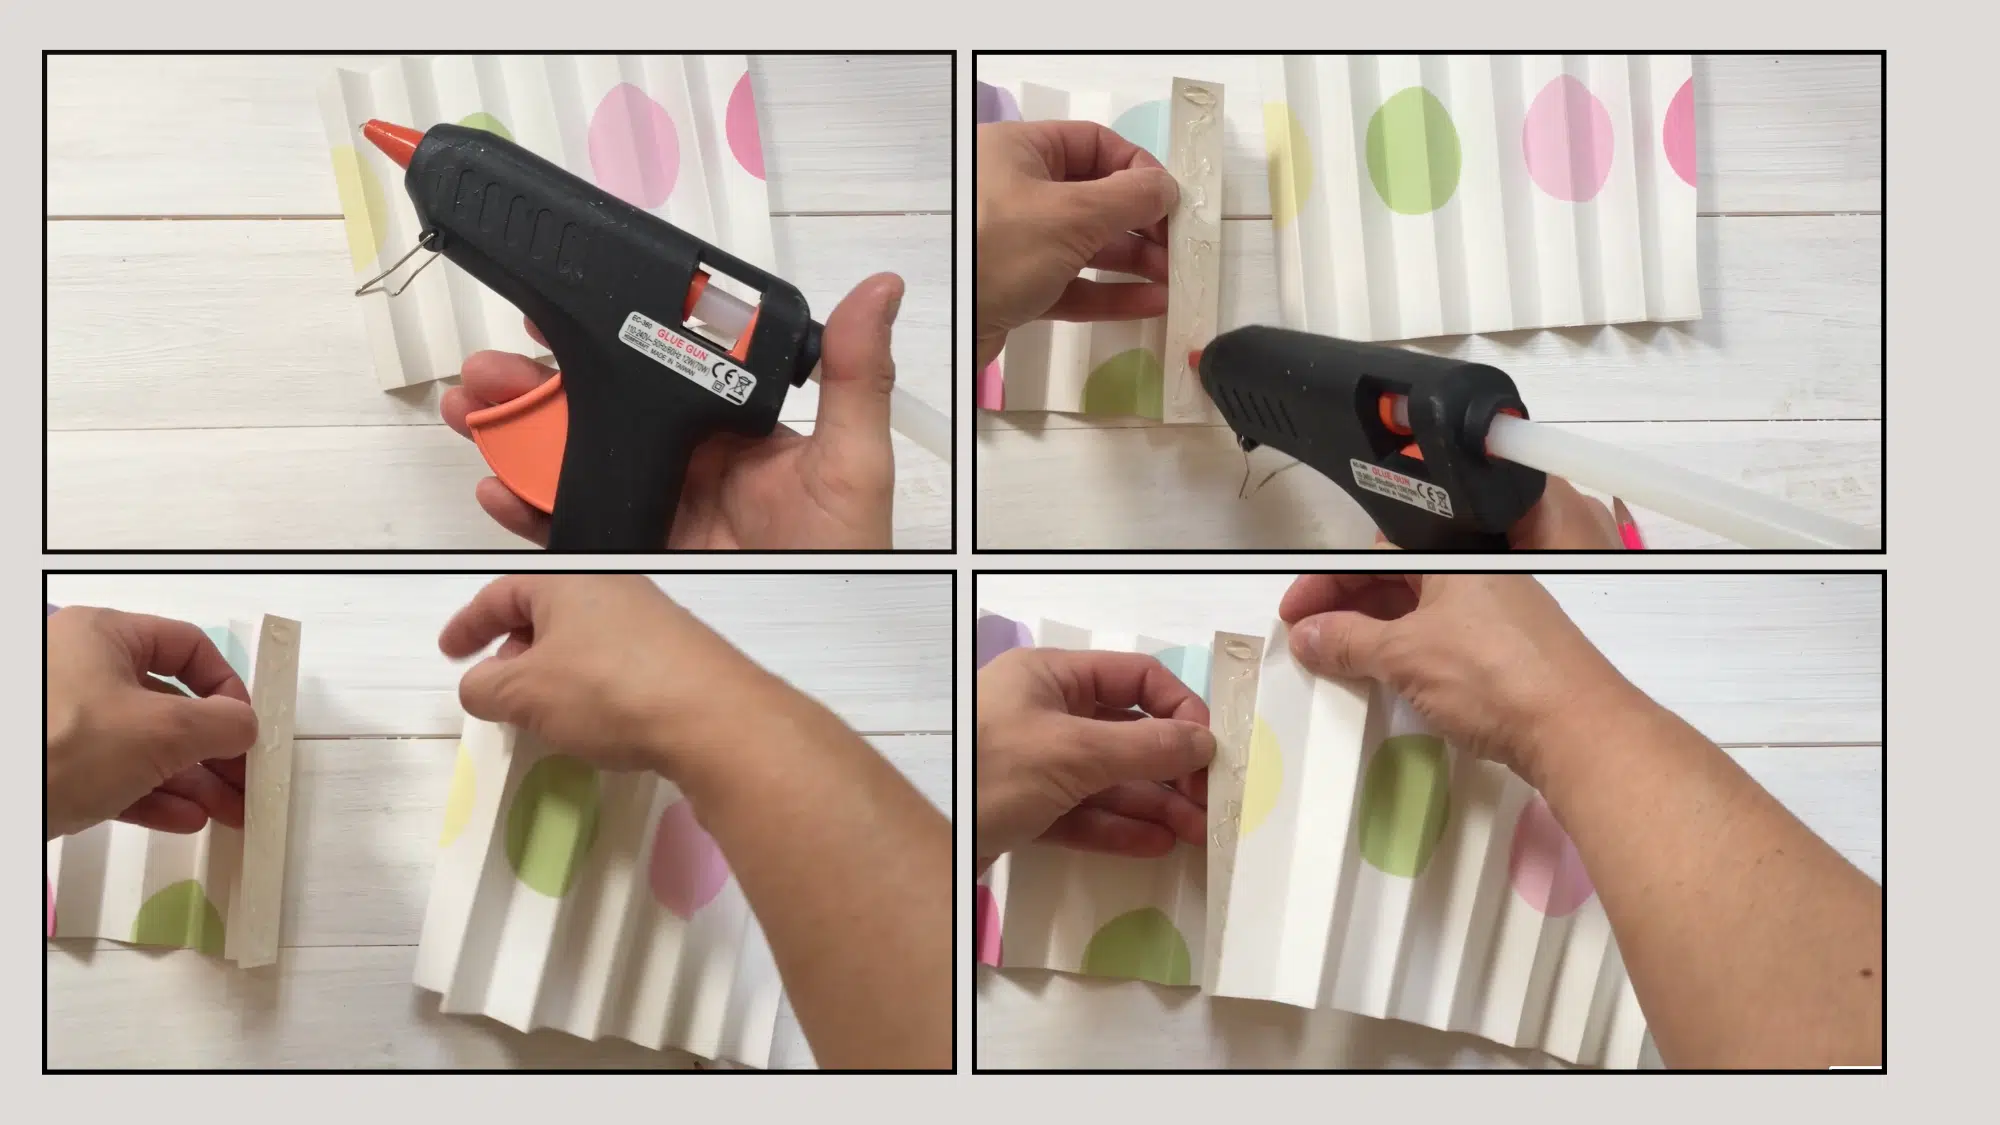
Using a glue gun (or craft glue with adult help), glue the last fold of one piece to the first fold of the next. Repeat until all four pieces are joined into one long strip.
Safety Note: For young children, opt for double-sided tape or adult-supervised glue use to avoid burns.
Step 4: Seal the Center for Shape
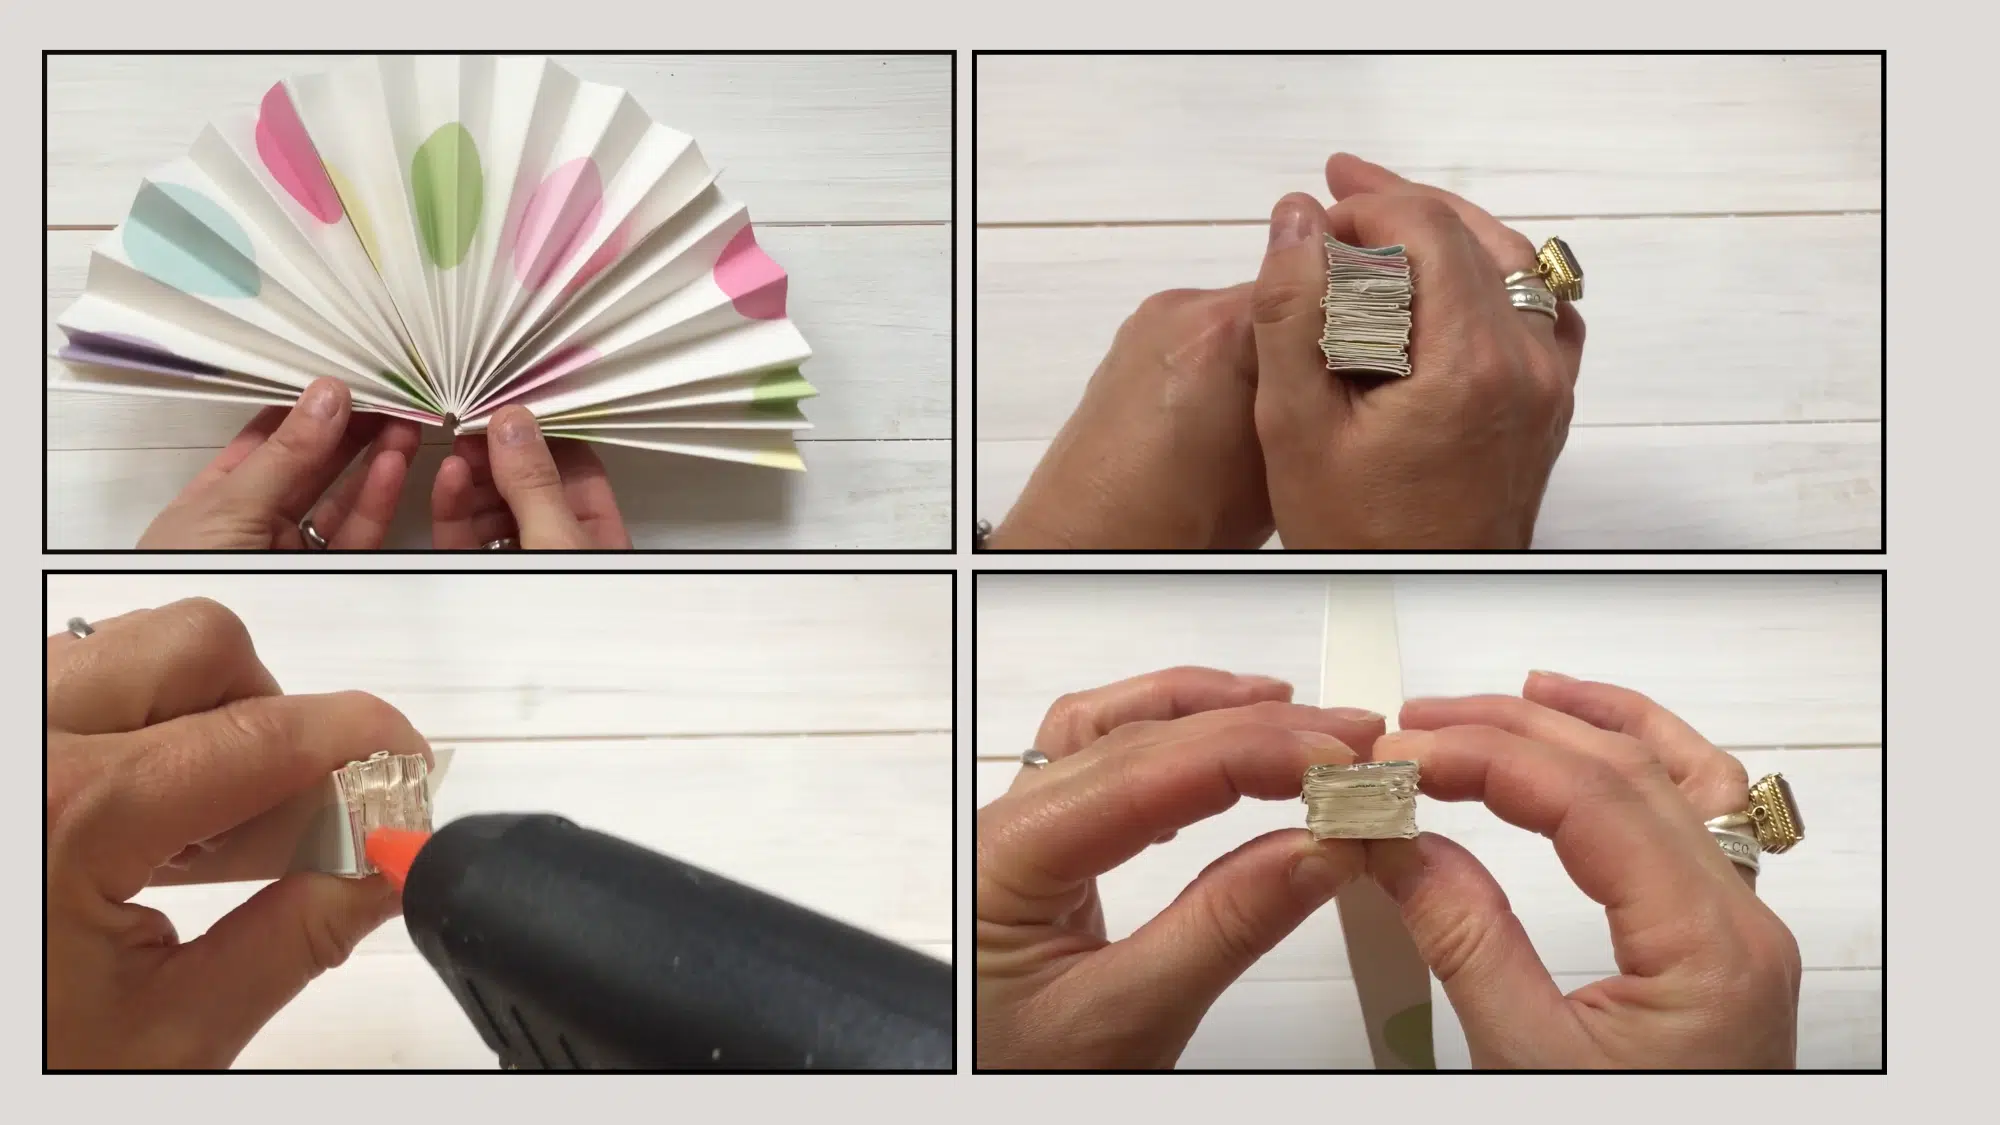
Fold the entire strip back into a concertina. While pinching the folded strip tightly at one end, use a glue gun to glue the tips of the folds together. Hold until the glue is tacky and set. This forms the circular center of the fan.
Quick Tip: Check tackiness by gently tapping; if it feels like sticky tack, it’s ready to hold.
Step 5: Secure and Hang Your Fan
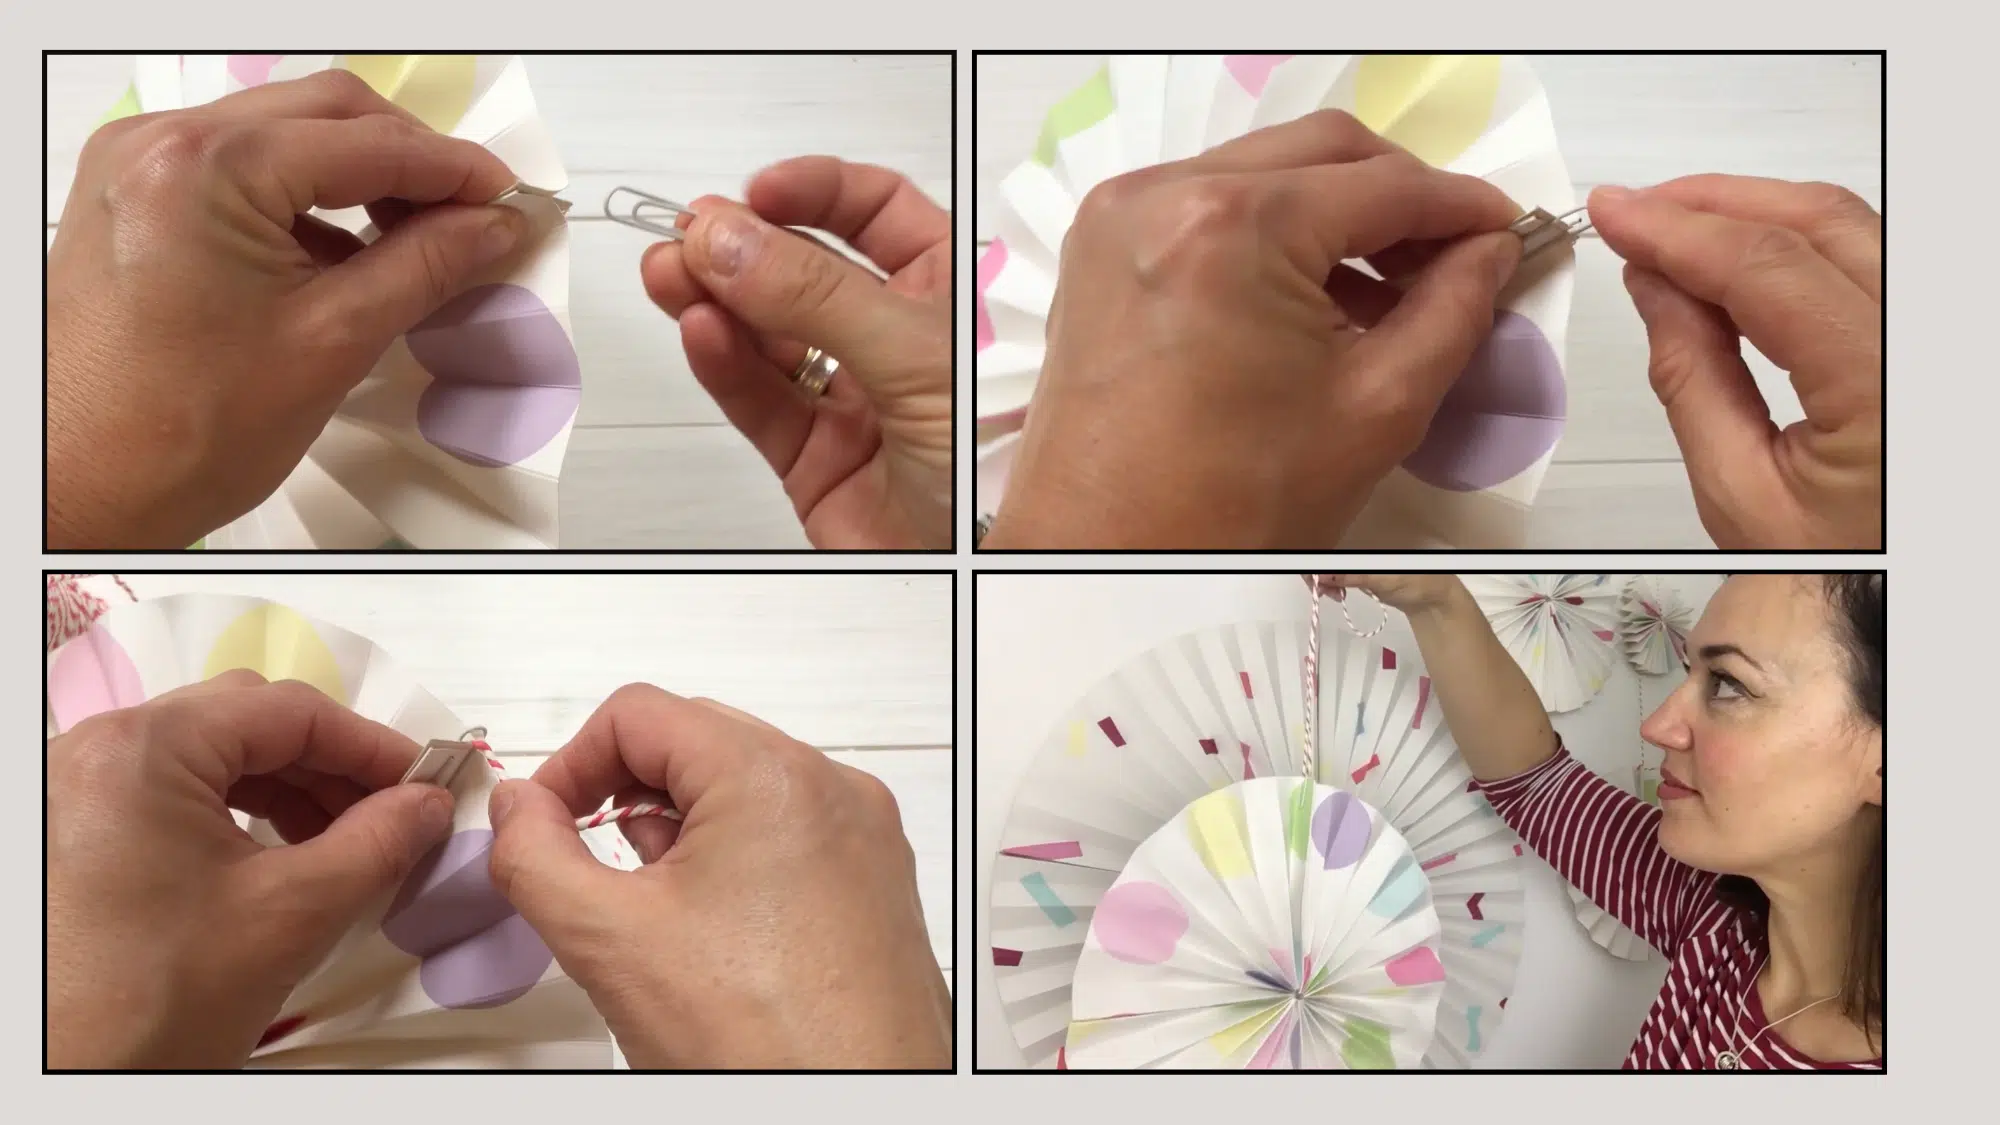
To finish, either glue the two ends of the fan to form a full circle or use a paper clip to hold them in place. Add a loop of string through the clip for hanging.
Group Activity Bonus: Create multiple fans in varying sizes for stunning wall decor at parties or weddings.
For a more detailed tutorial on how to make a paper fan, check out the video below:
Quick Fixes to Common Paper Fan Mistakes
1. Uneven folds
Fix: If your folds look messy or off-center, unfold the entire fan and start over. This time, fold slowly and carefully, aiming for consistent spacing between each crease.
2. Paper tears easily
Fix: Thin or poor-quality paper often rips when folded repeatedly. Try using thicker paper like cardstock or construction paper to avoid tearing during the process.
3. Handle falls off
Fix: If the handle detaches, apply more tape around its base and give any glue time to fully dry. Reinforce the connection by wrapping tape in more than one direction for added hold.
4. Fan won’t stay open
Fix: Loose folds or stiff paper can prevent the fan from staying spread out. Go over each fold and press it firmly with your fingernail or a tool like a bone folder to strengthen the creases.
5. Crooked final shape
Fix: If your fan looks lopsided, check that your paper edges were even. Trim any uneven sides with scissors before folding to ensure a more balanced final shape.
Creative Twists and Decorative Ideas
Basic paper fans work great, but adding personal touches makes them special. People can turn simple fans into works of art with just a few extra supplies. Here are some fun ways to make each fan unique:
Paint and Color Options
Watercolor paints create beautiful, soft effects on paper fans. The colors blend naturally and dry quickly. Markers work well too, especially for bold designs or patterns.
Some crafters prefer colored pencils for more control over details.
Add Some Sparkle
Stickers bring instant personality to any fan. Star stickers, flower shapes, or alphabet letters all work perfectly.
Glitter adds glamour – just brush on some glue first, then sprinkle the glitter on top. Washi tape creates clean lines and geometric patterns.
Paper Choices Make a Difference
Themed paper takes fans to the next level. Floral patterns suit garden parties perfectly.
Comic book pages create fun, colorful fans that kids love. Origami paper comes in beautiful designs and folds easily. Wrapping paper works too and often has seasonal themes.
Double-Sided Designs
Making fans with different patterns on each side gives two looks in one.
People can flip between designs based on their mood. This technique works especially well with contrasting colors or themes.
Seasonal and Special Occasion Ideas
- Summer: Beach themes with shells, waves, or tropical colors
- Fall: Autumn leaves, pumpkins, or warm orange and red tones
- Winter: Snowflakes, silver accents, or cool blue shades
- Spring: Pastel colors, butterflies, or fresh green patterns
- Parties: Match the fan colors to party themes or decorations
- Gifts: Add the recipient’s name or favorite colors for a personal touch
The best part about decorating fans is that there are no wrong choices. Each person’s style shines through, making every fan one of a kind.
Wrap Up
Paper fans prove that simple crafts can bring big rewards. Anyone can master this skill in just minutes, then customize their creations however they like.
The best part? This project opens doors to countless other DIY possibilities.
Crafters often find that success with paper fans builds confidence for bigger projects. Why not share photos of finished fans with friends and family? They’ll be impressed by the creativity!
Try different papers, colors, or decorations next time. Each fan becomes a chance to experiment and learn something new. So grab some paper and start folding, summer heat doesn’t stand a chance!