
Like gentle whispers on a canvas, the art of drawing lilies captures the quiet beauty of nature. The blank page waits, much like morning fog before the sun breaks through. A person with a pencil in hand can bring these flowers to life, not just as shapes on paper, but as stories told through petals and stems.
Drawing lilies is both a skill and a form of expression. The curved lines mimic the way these flowers stand tall yet bow with grace. The small details that make each lily unique become clear when carefully captured on paper.
This guide walks you through creating realistic lily drawing that feel so real you might catch yourself reaching out to touch them.
Tools and Materials You’ll Need

The following are the study supplies one will need for a realistic lily drawing:
- Pencil (preferably HB or 2B for sketching)
- Good quality drawing paper
- Eraser
- Fine-tip black pen or marker (optional for outlining)
- Colored pencils, markers, or watercolors for coloring
- Ruler (optional for light guidelines)
Step-by-Step Tutorial for a Realistic Lily Drawing
Everyone loves drawing flowers, and lilies are my favorite. Their simple shapes hide small details that make them come alive on paper.
In this guide, I’ll share my method for creating a lily that looks real enough to touch. You only need a few listed supplies to start.
1. Sketch the Central Petal

Begin by finding the center of your page. This is where your lily will bloom lightly sketch a long leaf. Like a shape extending upward from this center point.
The top of the petal should be softly rounded, not pointed. Curve both sides smoothly back down into the center. Keep your pencil pressure light; it’s easier to adjust if needed. This petal forms the heart of your flower and will help you create a realistic lily drawing.
2. Add Two Side Petals
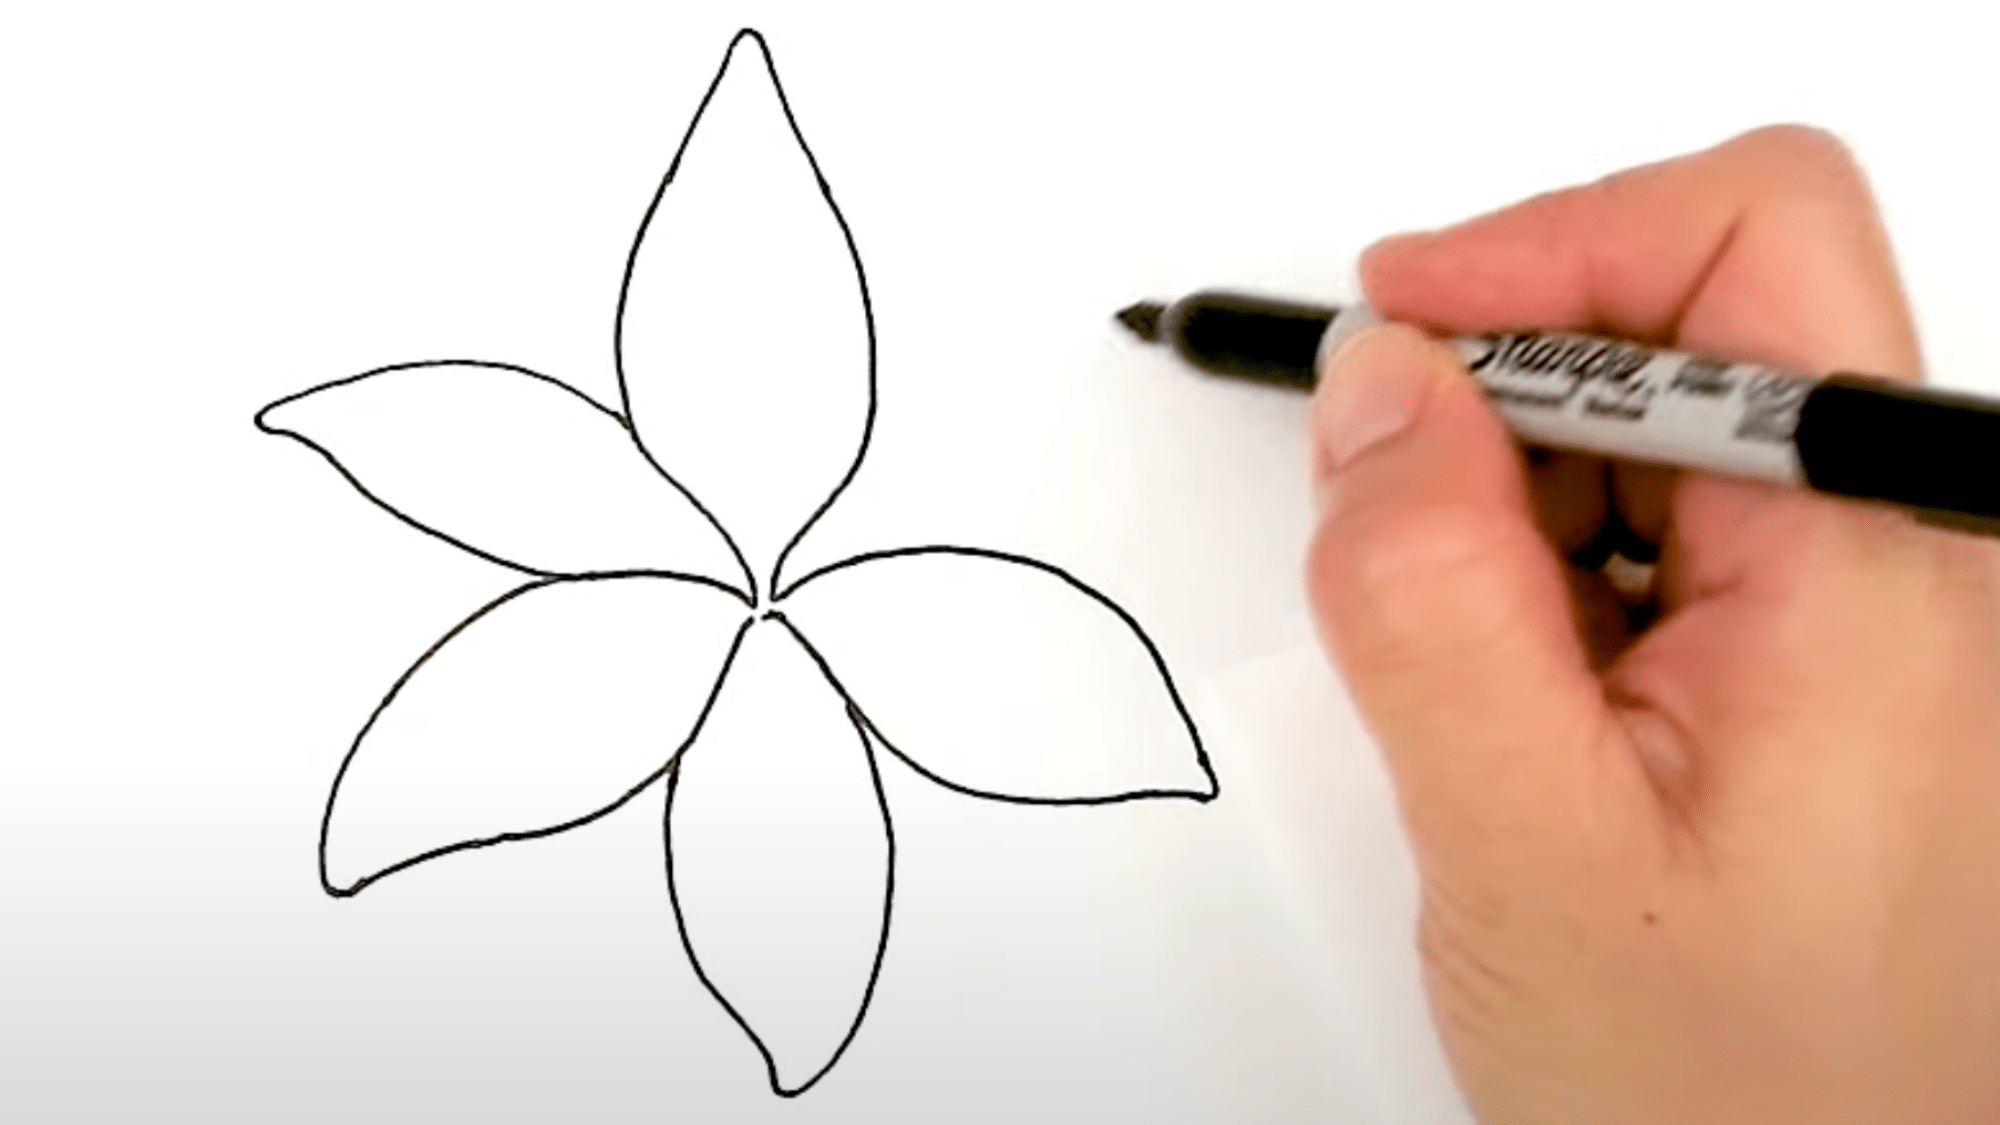
Now, draw two more petals extending outward from just beneath the first one, one to the left and one to the right.
Each petal should mirror the first but can slightly curve outward for a more natural look. Consider creating a soft, triangular layout. Again, keep your lines flowing and natural, imagining the gentle unfolding of a real lily’s petals.
3. Tuck in the Back Petals
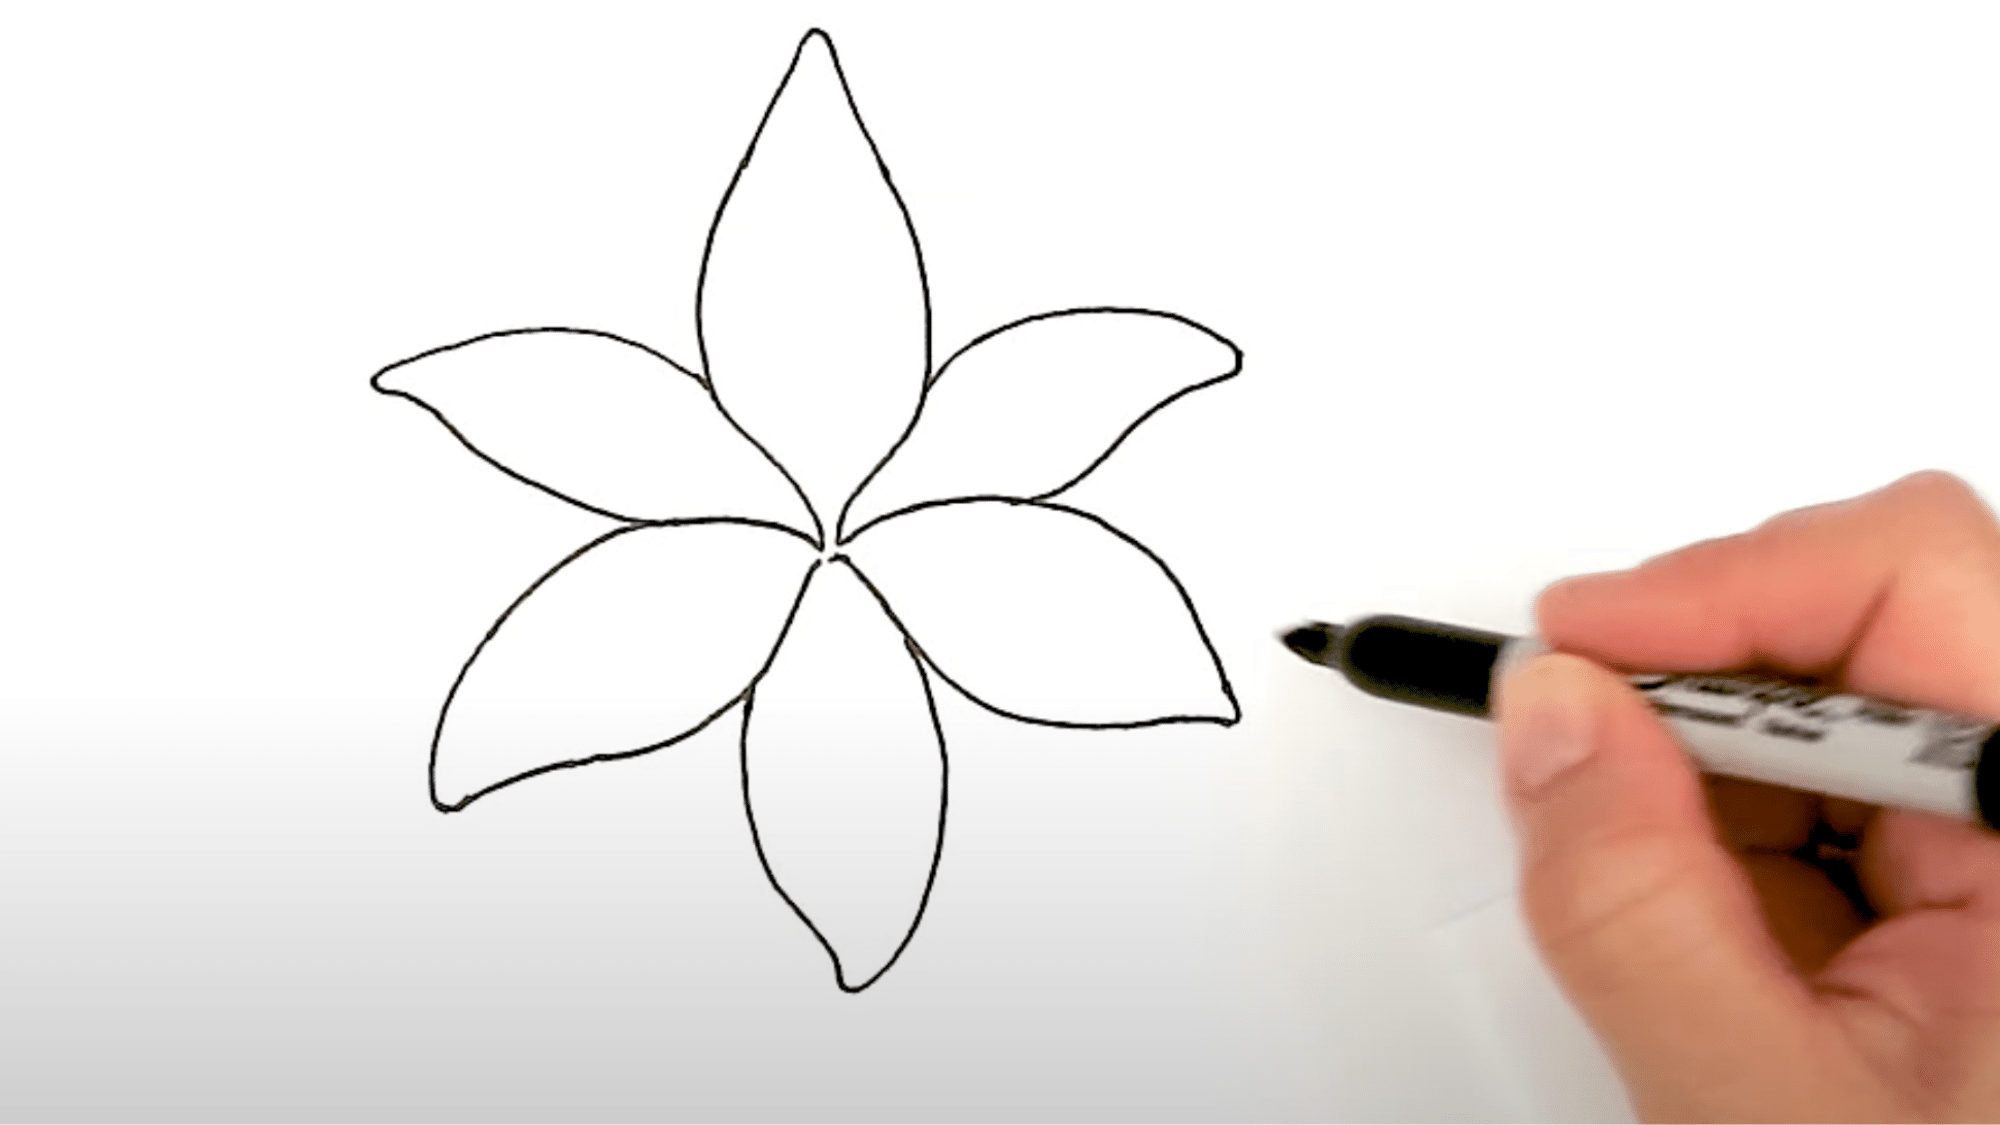
Between each of the front petals, sketch three smaller petals peeking from behind. These can be a little narrower and don’t need to be as tall.
Position them so they fill in the gaps, but still allow the front petals to remain dominant. Remember, these back petals give your lily fullness and depth, picture how a real bloom layers upon itself.
4. Create Lily’s Center Details
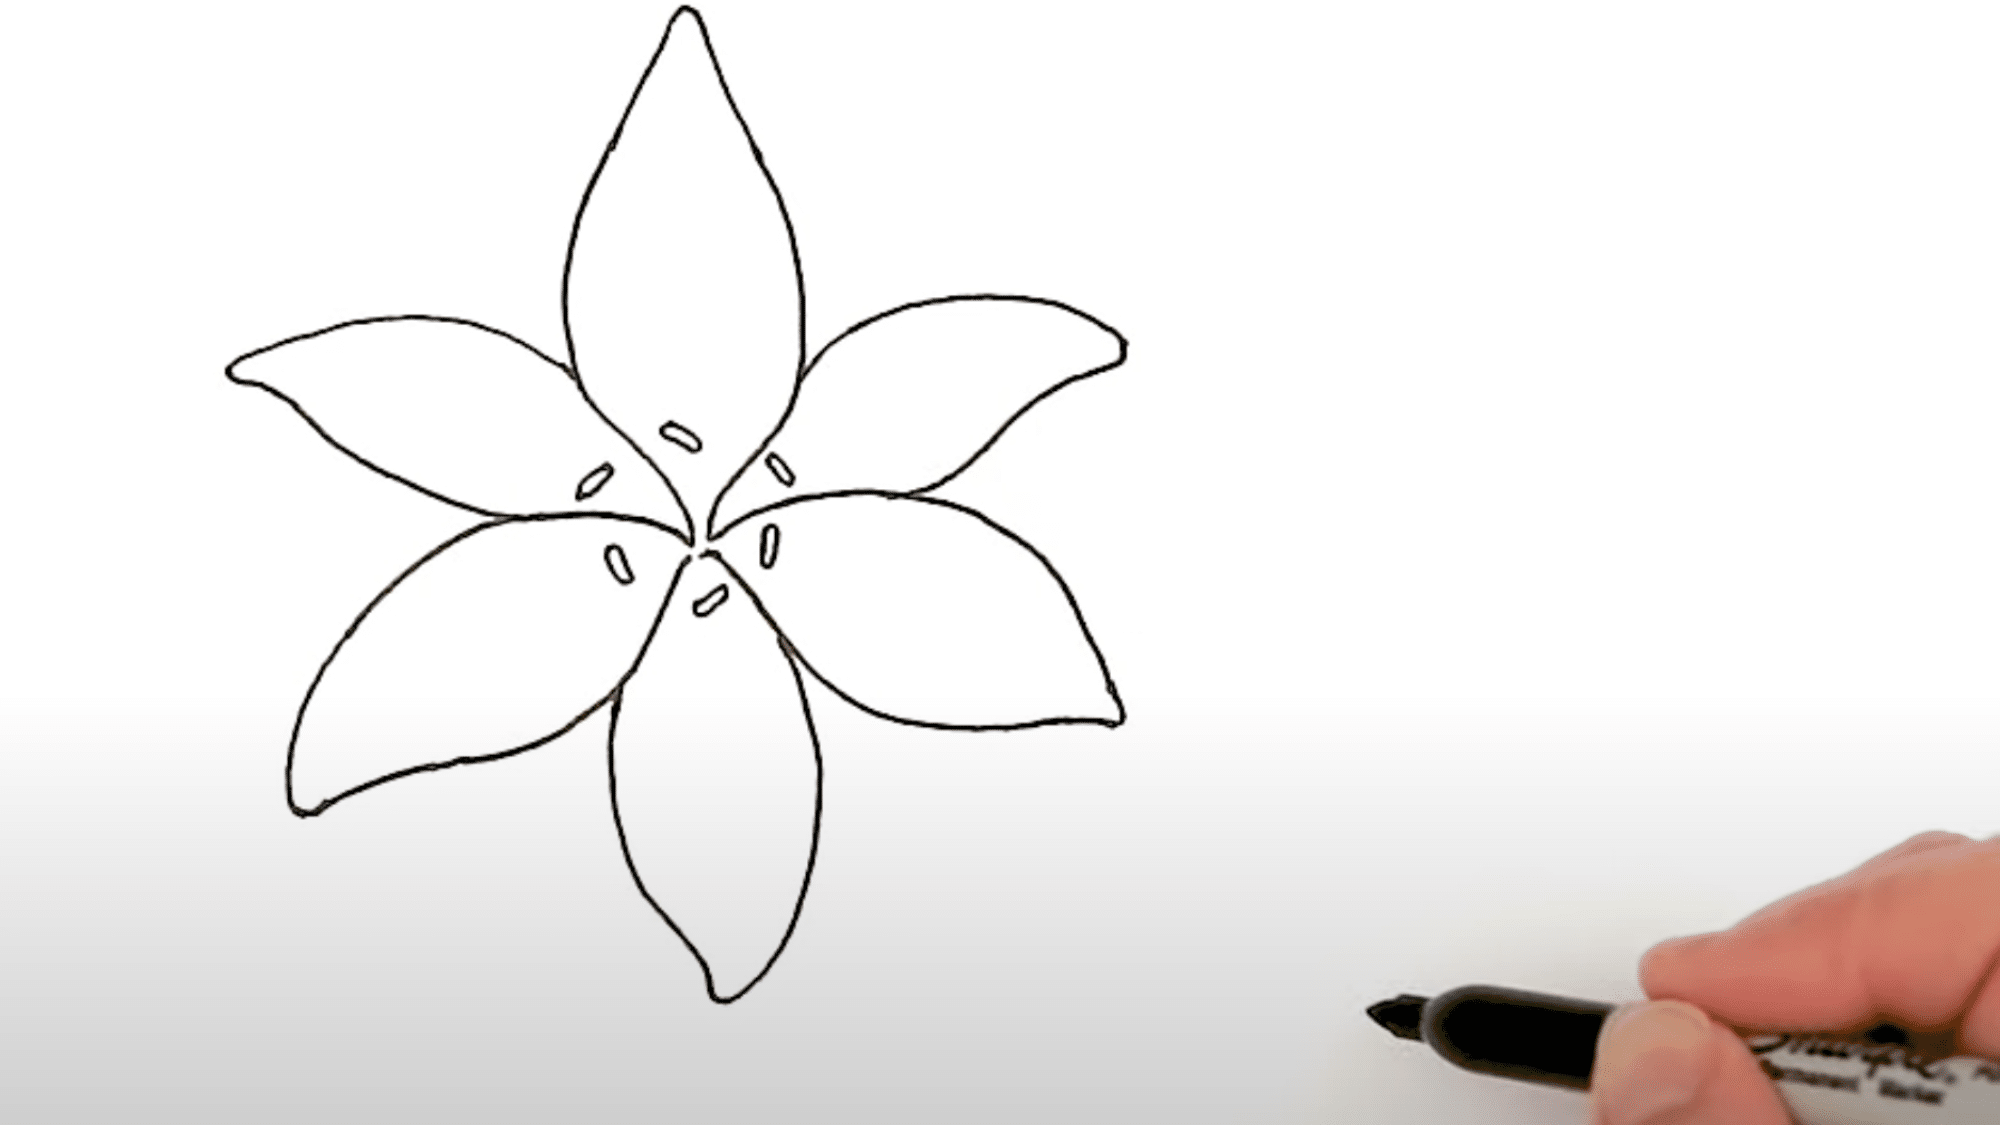
At the very center where all petals meet, draw six tiny oval shapes for the anthers; these are the pollen-carrying parts. Space them evenly in a small circular layout.
Add a round shape for the stigma (the main part of the pistil) right in the center. Once you’re satisfied with their placement, lightly ink these parts with a fine-tipped pen to make them stand out more sharply.
5. Connect the Stamen
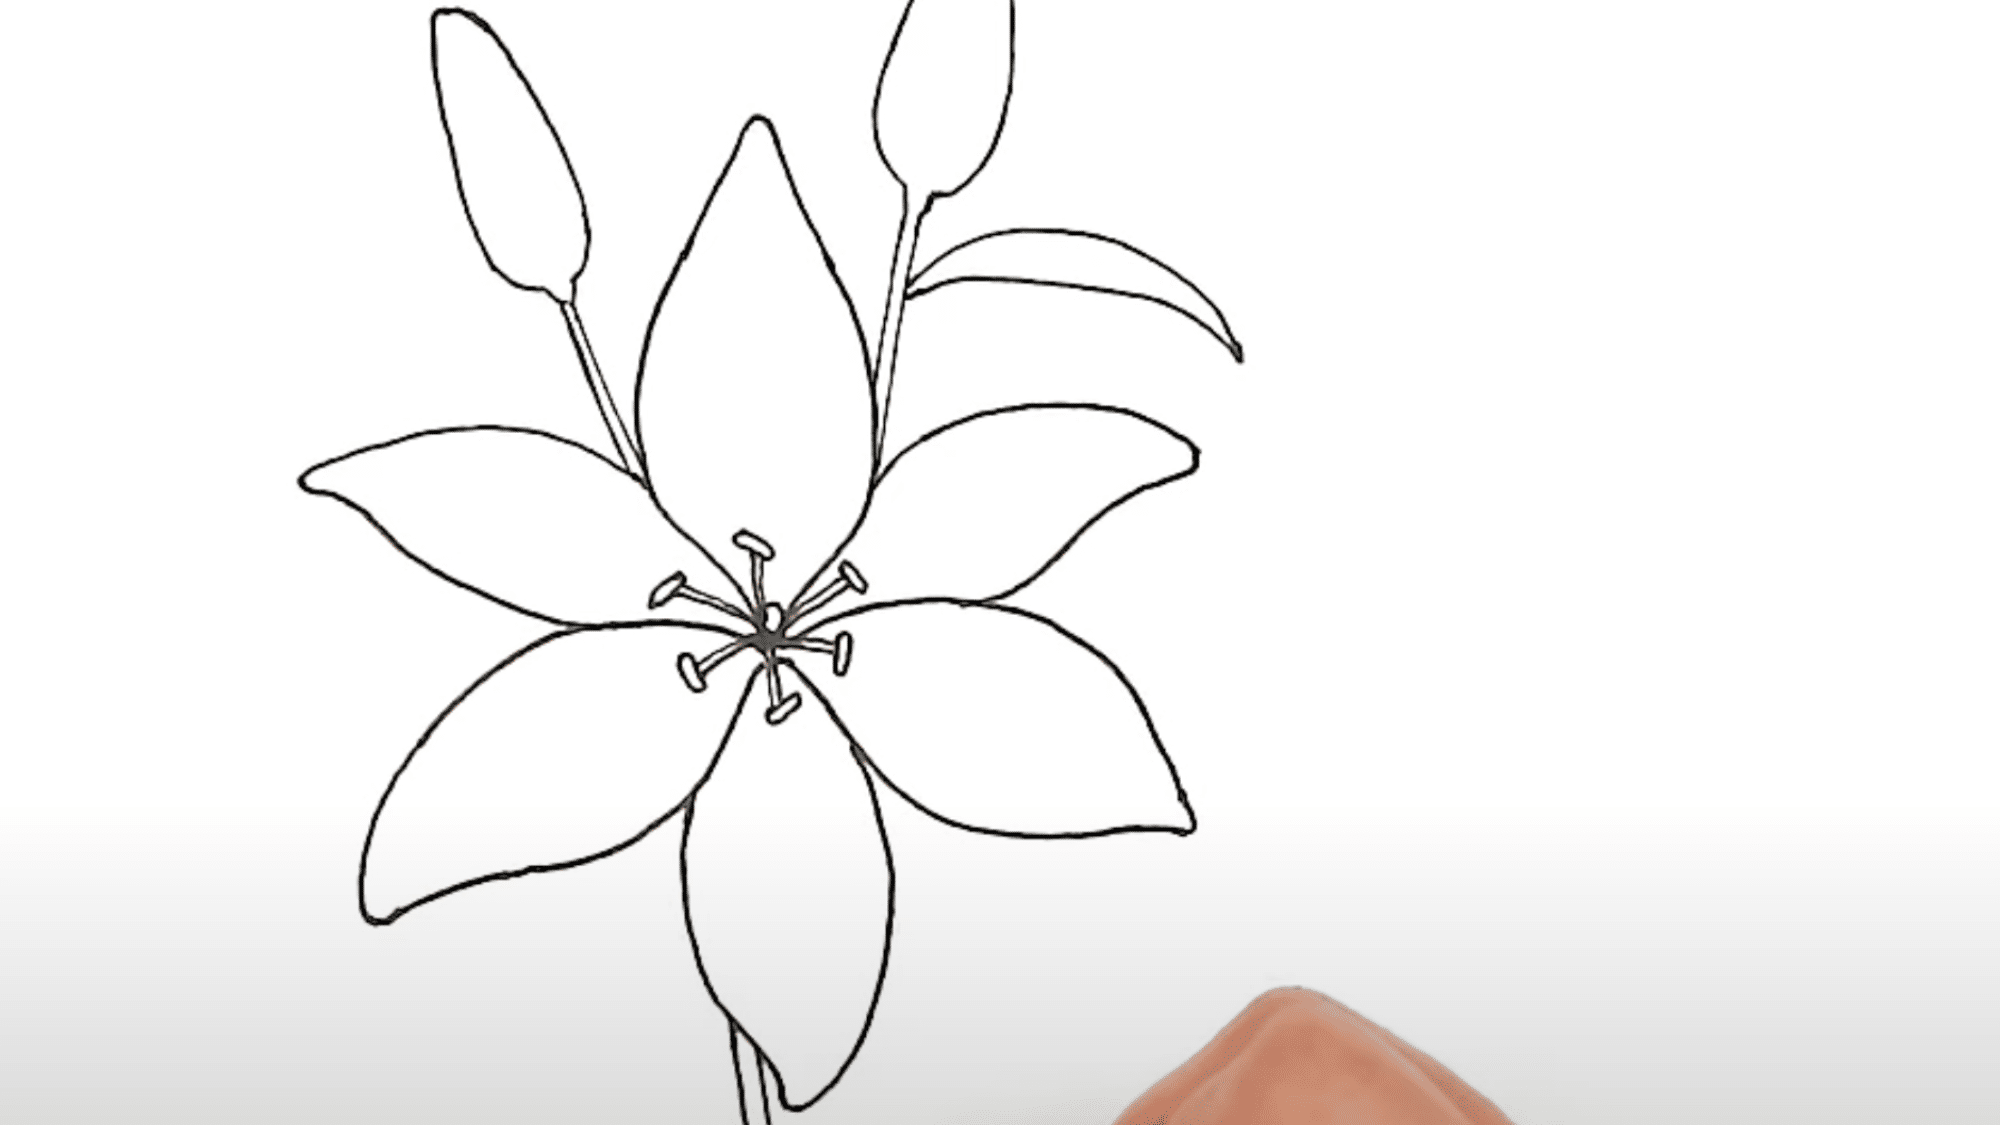
From each other, gently draw a thin, slightly curved line connecting it back to the central stigma. These lines represent the filament’s delicate structures that hold up the anthers.
If you want your realistic lily drawing to feel more dimensional, lightly thicken these lines toward the center.
6. Draw the Stem, Buds, and Leaves
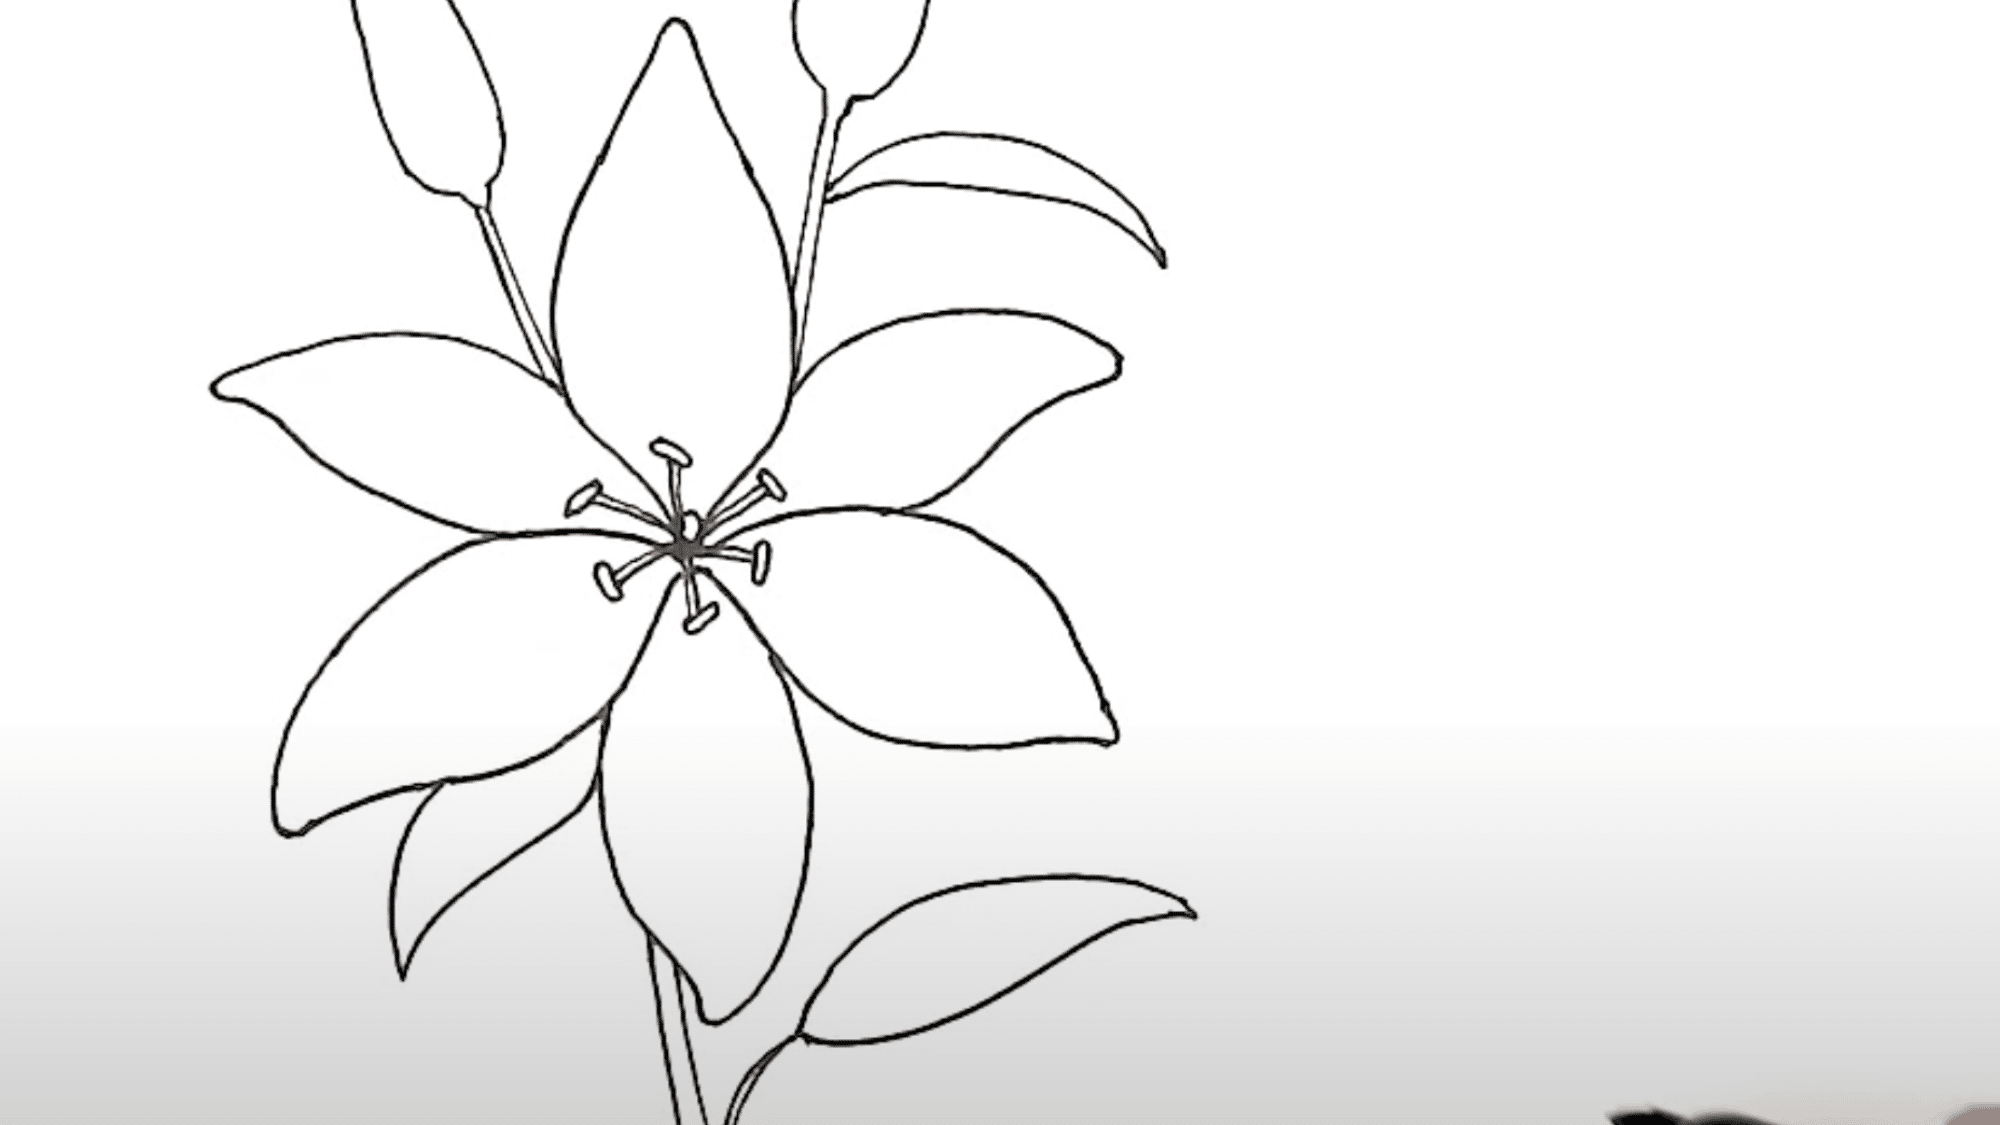
Extend a thicker curved line downward from the bottom of your flower to form the main stem. From the stem, sketch a few charming leaves, thinking of them as long, soft ‘S’ shapes that taper to a point.
You can also add one or two flower buds: just above the leaves, draw narrow, upward-pointing ovals with a gentle curve, encasing them with thin leaves, like petals. This gives your lily a sense of life and natural growth.
7. Bring Your Lily to Life with Color
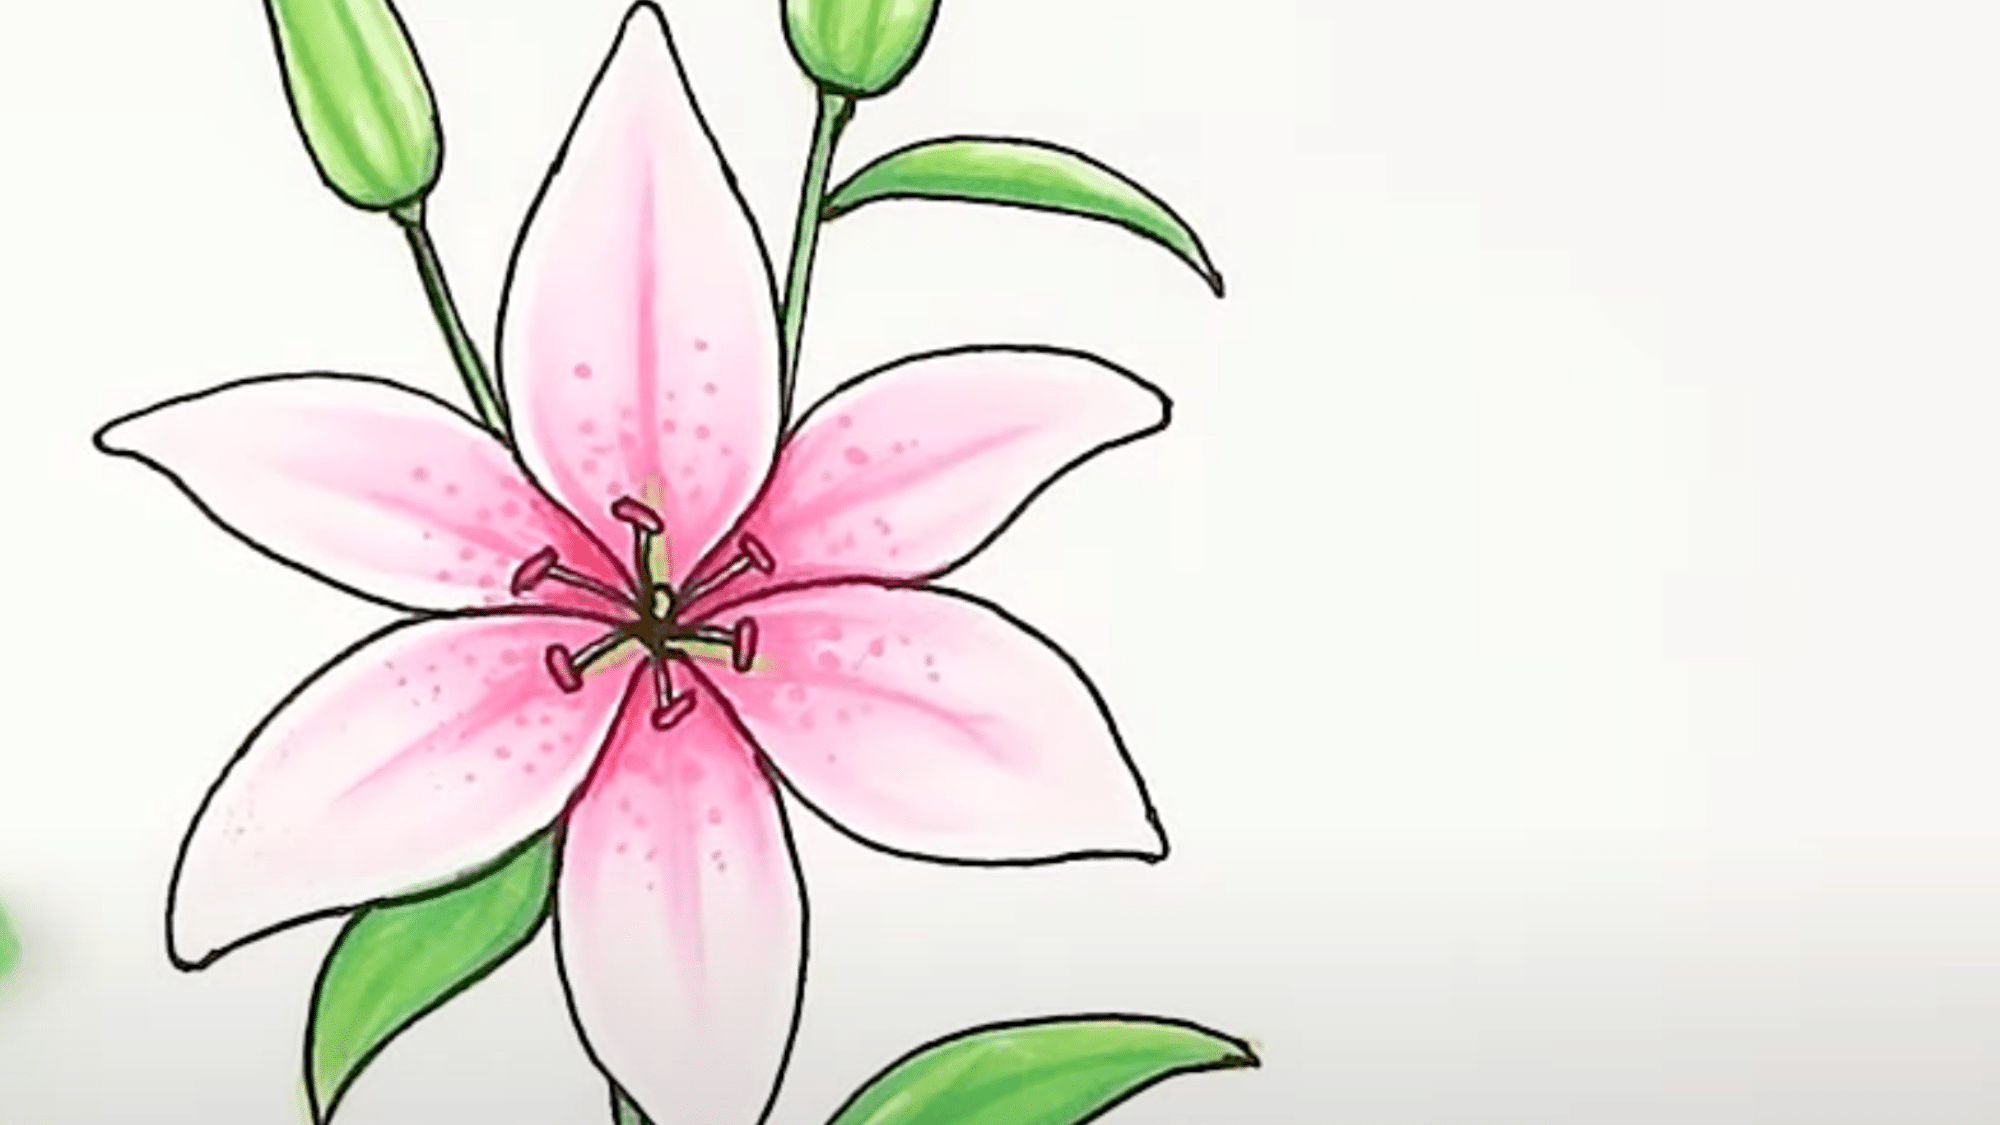
Now for the most magical part!
Choose your favorite lily colors: classic white with pink tips, bold orange, or even a sunny yellow. Carefully color in each petal, adding a bit more depth near the petal bases for a realistic lily drawing look.
Use green shades for the leaves and stems. Feel free to blend softly to capture that fresh, delicate beauty that lilies are famous for.
Key Techniques for Lifelike Lily Art
The art of drawing lilies calls for careful attention to detail and form. Artists who master these flowers create works that seem to breathe on paper.
With their distinctive trumpet shaped blooms and graceful stems, lilies offer a perfect subject for practicing realistic drawing techniques.
- Study real lilies before starting. Nothing beats looking at the real thing. Take time to notice how light hits the petals and creates shadows. If you can, keep a real lily nearby as you draw.
- Start with basic shapes first. Begin with simple outlines and forms. Lilies have a trumpet-like shape with curved petals that open outward. Getting these basic forms right will set up your whole drawing for success.
- Pay attention to petal textures. Lily petals have a smooth, waxy look with subtle veins. Use light touches and small strokes to show these tiny details without making them too heavy.
- Focus on light and shadow. The way light falls across lily petals creates depth. Look for the brightest spots and the darkest shadows, then fill in the middle tones to build a 3D feel.
- Take your time with the stamen. The center parts of lilies are complex. The long stamen, with its dusty pollen tips, is often what makes a lily look authentic. Draw these with care and detail.
- Use light pressure for petal edges. Lily petals thin out at the edges. Press lighter with your pencil as you reach the tips and edges to show this thinning effect in your drawing.
Common Mistakes You Can Make in Flower Illustration
Even skilled artists can stumble when drawing flowers like lilies. These errors often stand between a good drawing and a truly lifelike one. The small details that make flowers special can be easily overlooked or misrepresented.
Recognizing common mistakes helps artists avoid them, leading to more realistic lily drawings and more satisfying results in their work.
Making all petals identical.
Real lilies have petals that vary slightly in size and shape. When each petal looks the same, your drawing will feel stiff and artificial. Allow for small differences to add life to your work.
Rushing the center details.
The stigma, stamen, and anthers give lilies their distinct look. Many artists hurry through these parts, but they’re vital for a realistic lily drawing. Take time to draw each element with care.
Using hard outlines around petals.
Lilies don’t have dark lines defining their edges in nature. Instead of heavy outlines, use shading to show where one petal ends and another begins. This creates a softer, more true-to-life effect.
Forgetting about the stem structure.
The way a lily connects to its stem matters. Many beginners draw stems as straight lines, but real stems have subtle curves and variations in thickness. This detail helps ground your flower in reality.
Overlooking leaf veins and texture.
Lily leaves have distinctive veins that run parallel along their length. When these details are missing, the leaves look flat and unconvincing. Adding this texture improves your overall drawing.
Placing the flower in space.
A lily without context can look like it’s floating. Even a simple shadow or hint of the environment helps viewers understand the flower’s scale and position, making your illustration more complete.
Final Thoughts
Creating realistic lily drawings takes both skill and patience. This guide covered the key techniques that help artists bring these flowers to life on paper.
By focusing on true-to-life details and avoiding common mistakes, anyone can improve their Lily art.
Remember that real lilies don’t have perfect symmetry or hard outlines. The small variations and gentle transitions between petals make them look natural.
Taking the time to work with the center structures and paying attention to how light affects the flower will make a significant difference.
For those looking to develop their artistic skills, lily drawing offers valuable practice in capturing organic forms and delicate details.
Pick up a pencil and try these tips. With each attempt, the results will improve, bringing more satisfaction to the creative process.