Most people’s first attempt at drawing a skull resembles a lopsided egg with random holes poked in it. The proportions are off, the eye sockets look distorted, and the whole thing ends up in the trash.
This skull drawing step by step guide breaks down the intimidating anatomy into simple shapes anyone can master. No art school required, no fancy supplies needed.
With clear instructions and practical tips, even complete beginners can create impressive and three-dimensional skull drawings.
Materials Needed for Skull Drawing
Before you begin your skull and crossbones drawing, gather the following supplies:
| Item | Purpose / Notes |
|---|---|
| Marker | For bold, dark outlines. |
| Pencil (Optional) | Great for beginners who want to sketch and erase easily. |
| Paper | Any drawing or sketch paper will work. |
| Prismacolor Colored Pencil – Ginger Root | Used for base coloring of the skull and bones. |
| Prismacolor Colored Pencil – Black | Used for adding shading and depth. |
Step-by-Step Drawing Instructions
Follow along as we break down the realistic skull and crossbones into simple, easy-to-follow steps:
Step 1: Draw the Eyes

Let’s start by sketching the eye sockets at the top center of the page. They help set the position for the rest of the skull.
- Draw two curved lines near the top center of the page, leaving a small gap between them.
- Make sure the curves are symmetrical, but don’t worry if they’re slightly different.
- Inside each curve, draw a diagonal line coming down and then curve it around to meet the outer edge of the curve, forming an eye socket.
Step 2: Draw the Nose
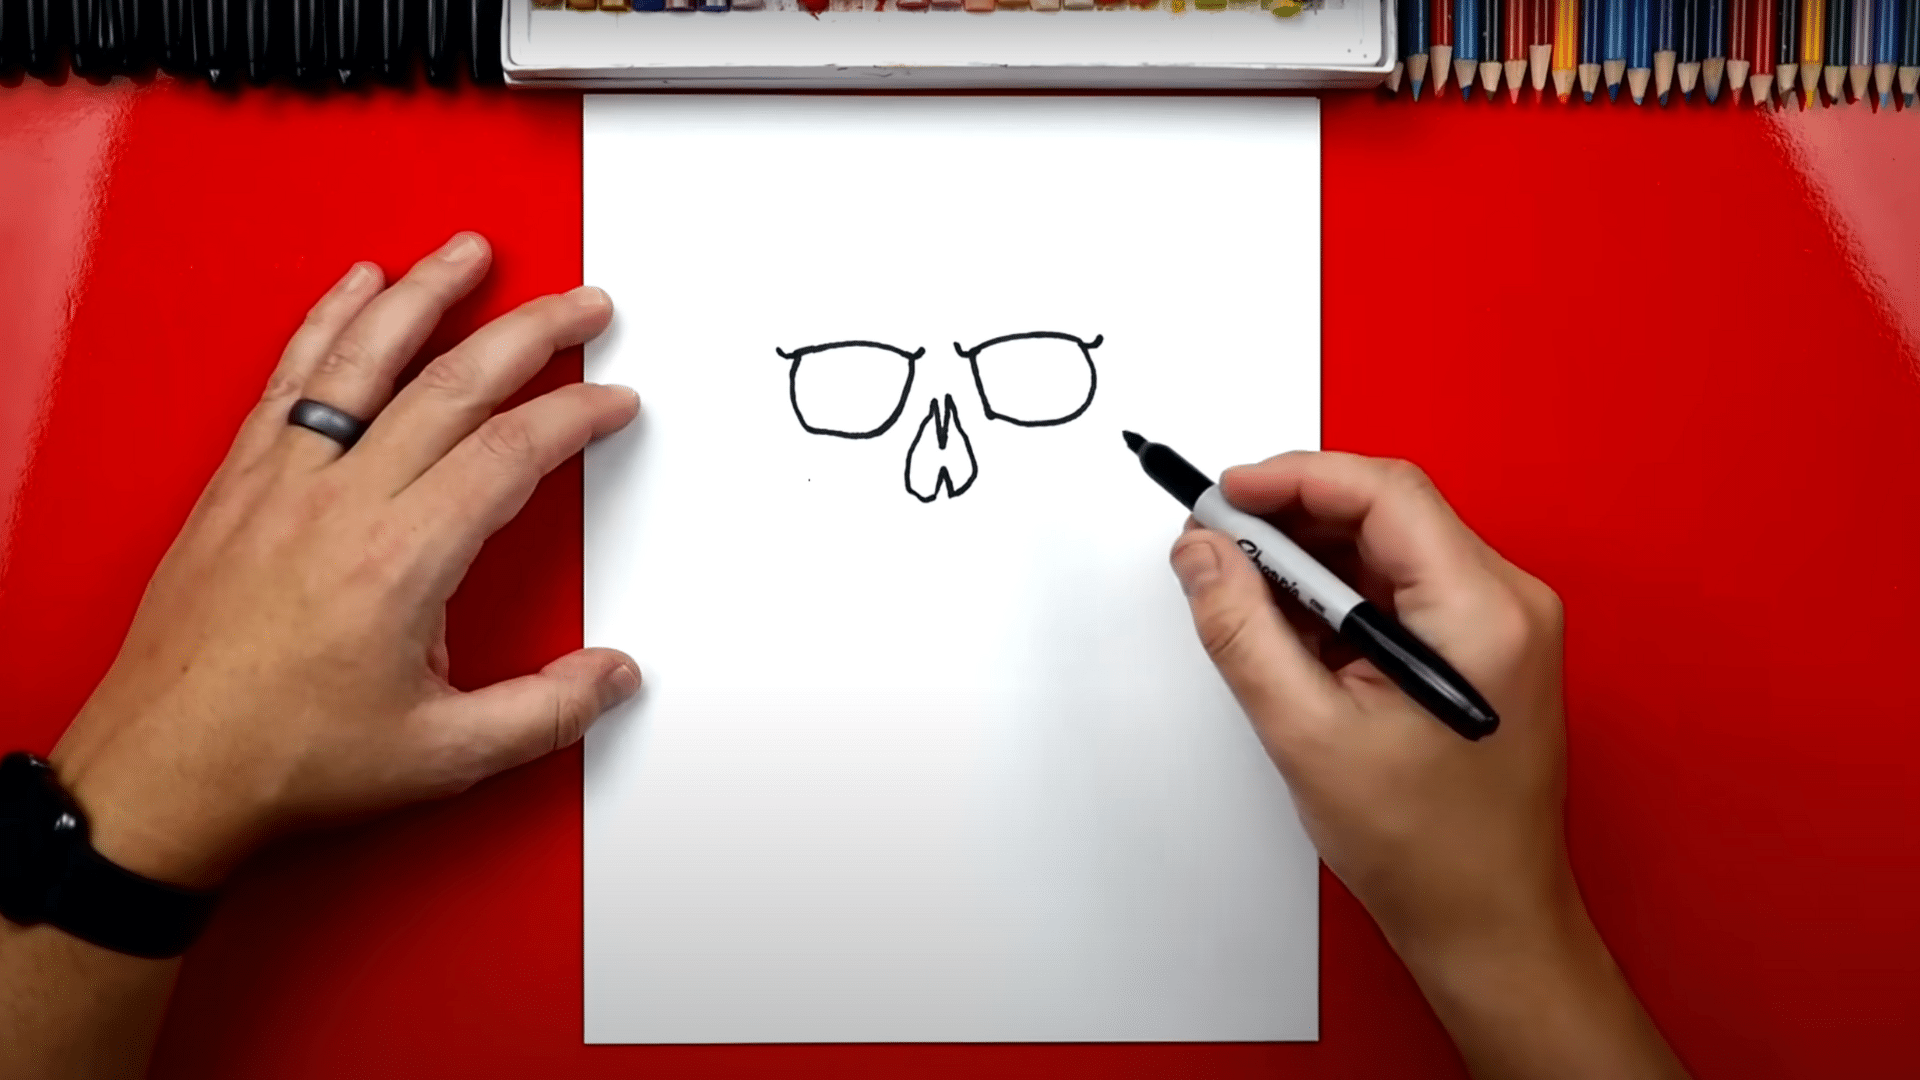
The nose is made of a few simple shapes that sit right between the eyes. It gives the skull that classic hollow look.
- Start by drawing a V shape pointing down between the eyes.
- Below that, draw an A shape to begin forming the lower part of the nose.
- Outline the sides of the nose with wobbly, uneven lines to keep it natural-looking.
Step 3: Add Facial Details
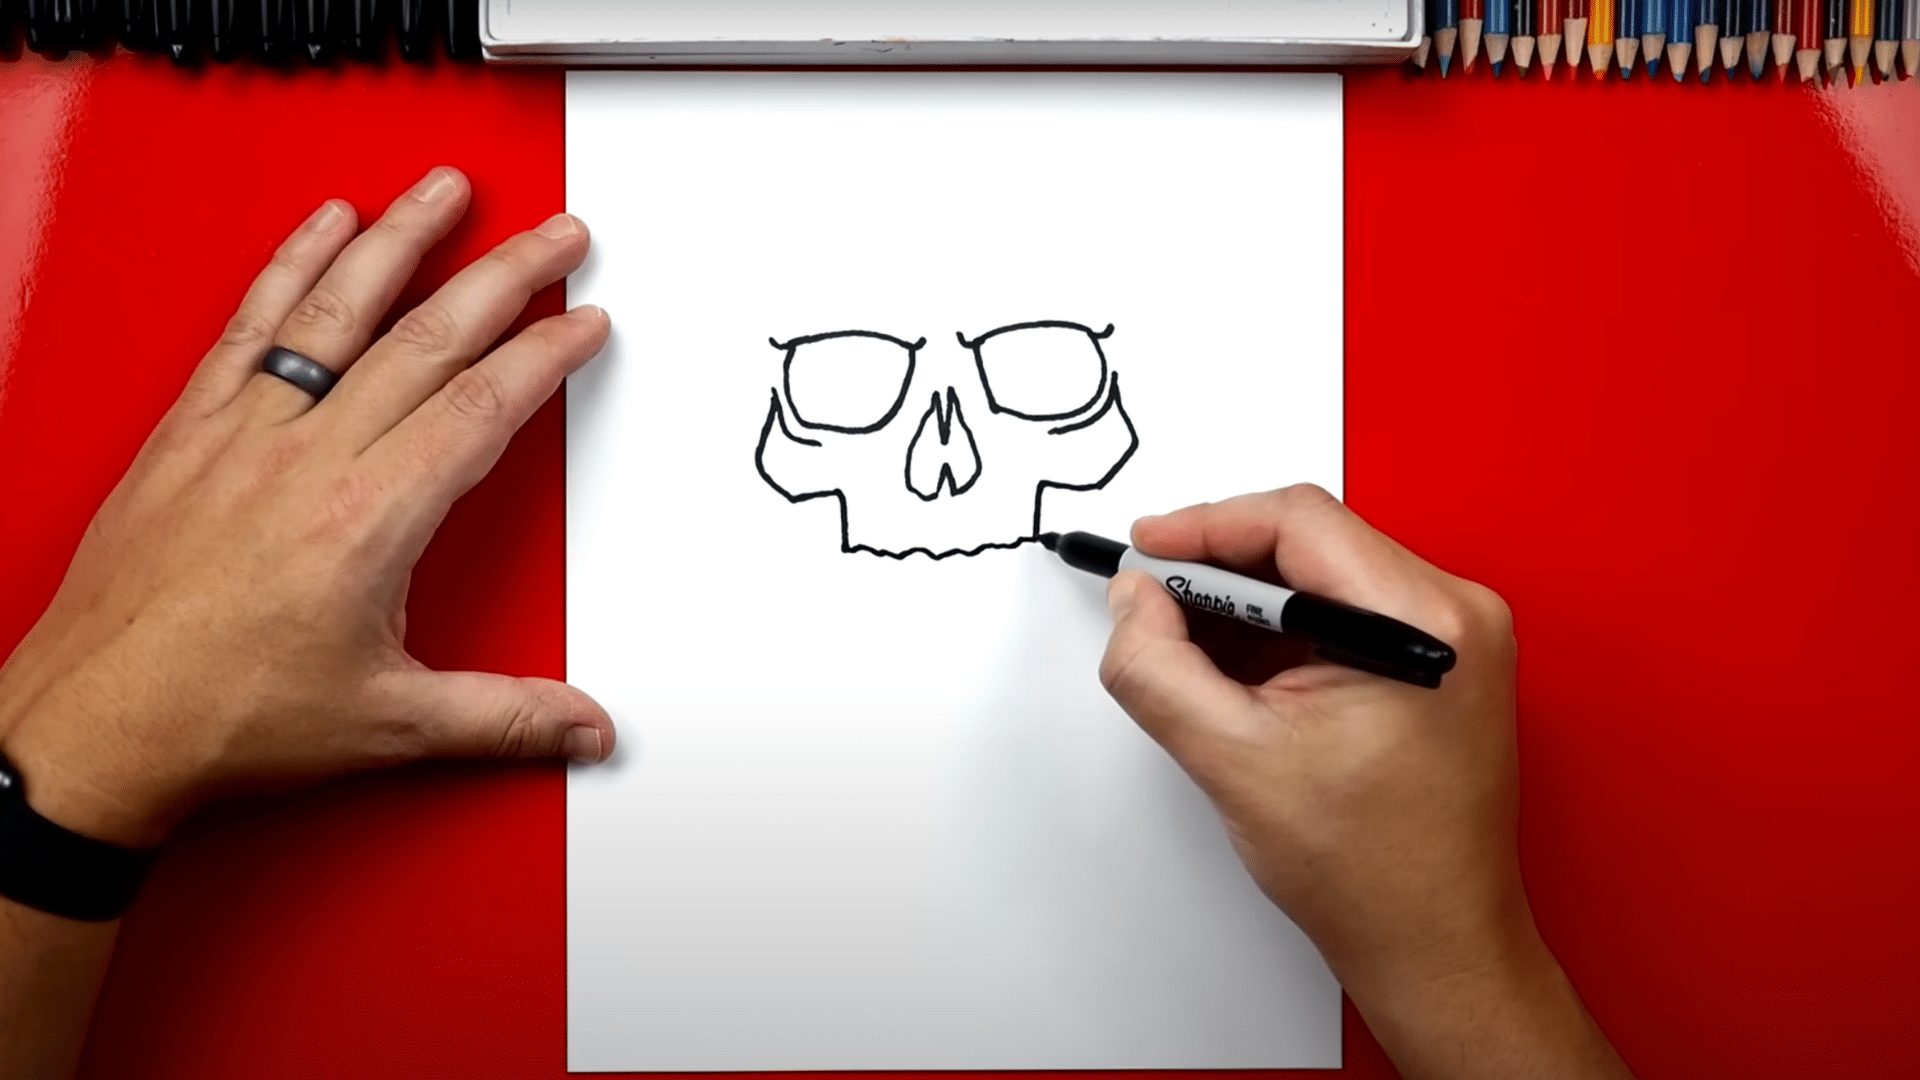
Time to give your skull some personality! We’ll add cheekbones and eyebrow lines to make it expressive.
- Draw small, short lines above the eyes to create an angry eyebrow shape.
- Add short vertical lines at the bottom outer corners of the eye sockets.
- From those lines, draw sideways V shapes on both sides; these form the cheekbones.
- Continue with curved lines inward and downward from the cheekbones to form the top of the jaw.
Step 4: Outline the Skull
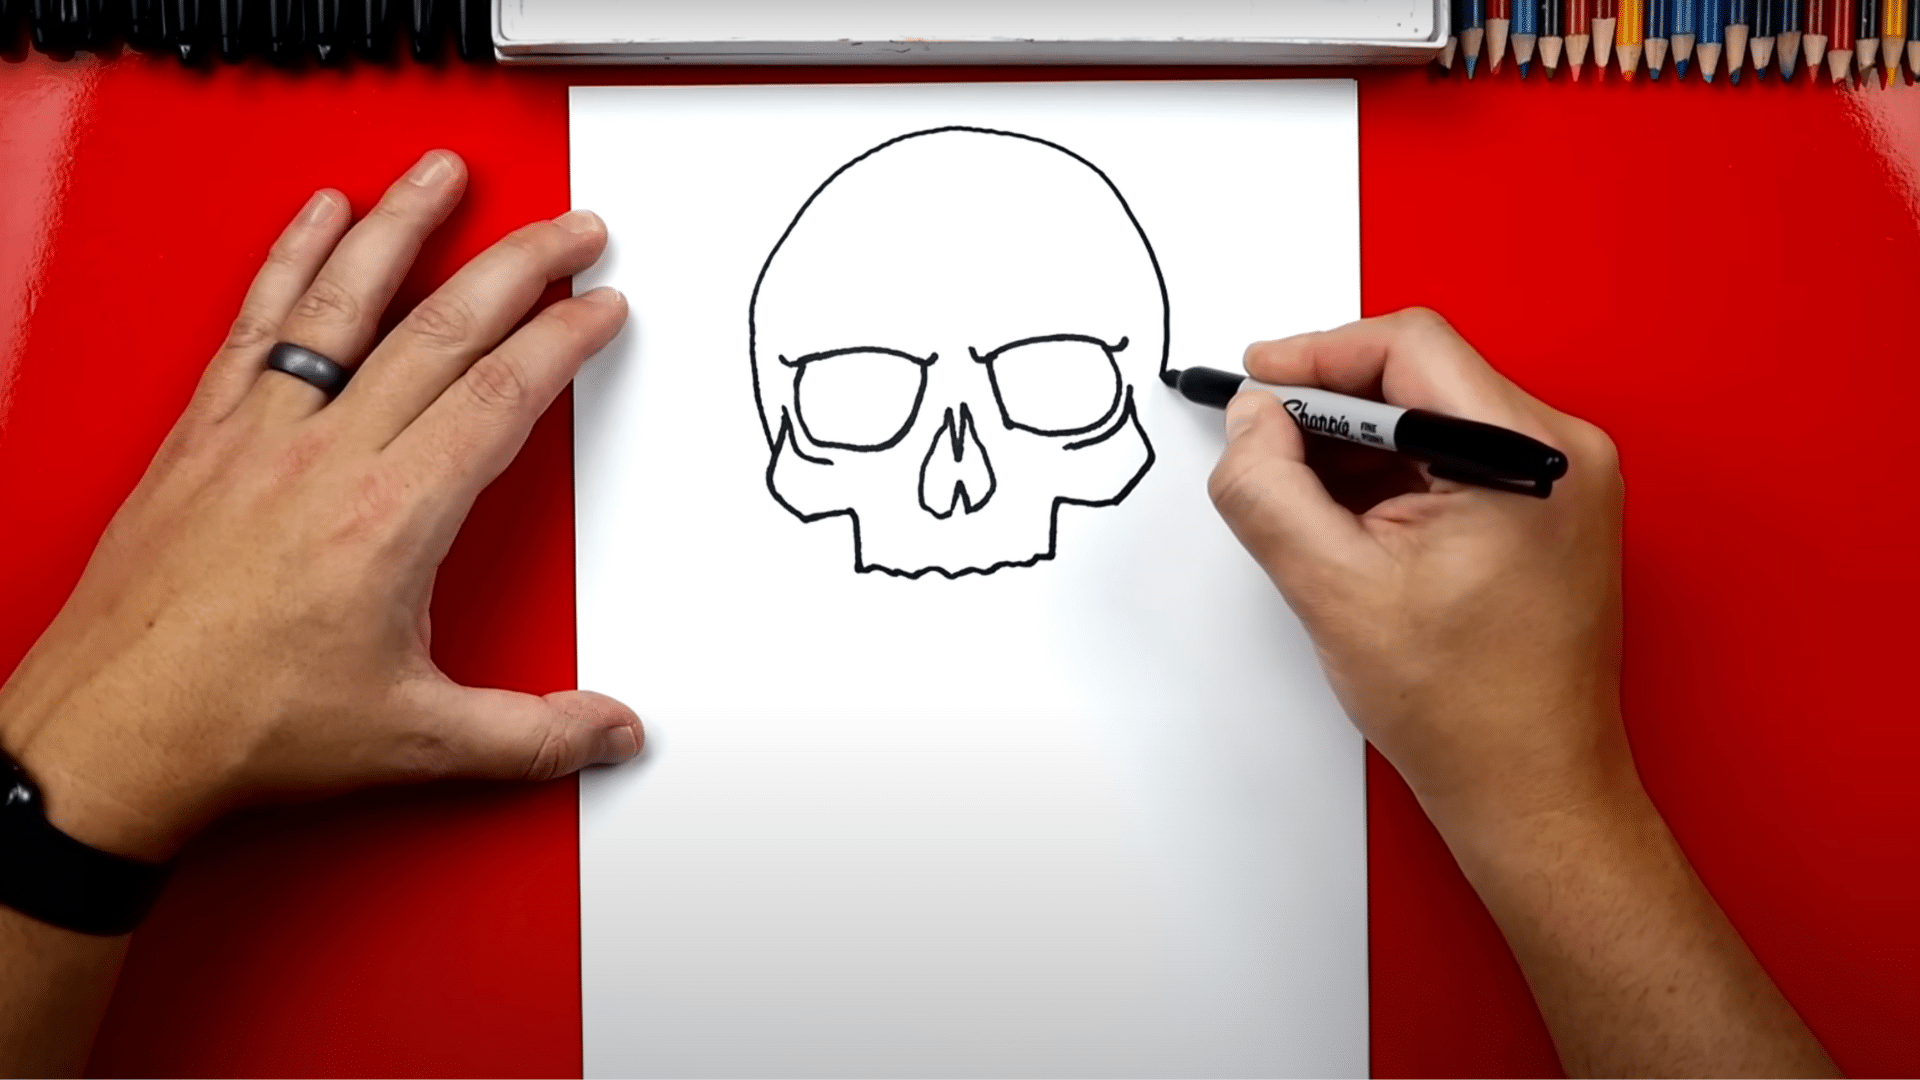
Let’s complete the shape of the head by drawing the top and sides of the skull. Keep it bumpy to look more natural.
- Start from one cheekbone and draw a bumpy, curved line up and over the top of the head to the other side.
- Add two wavy forehead lines, one on each side, connecting down into the eyebrow ridge.
- You can add small bumps above the eyes to create a rough eyebrow ridge.
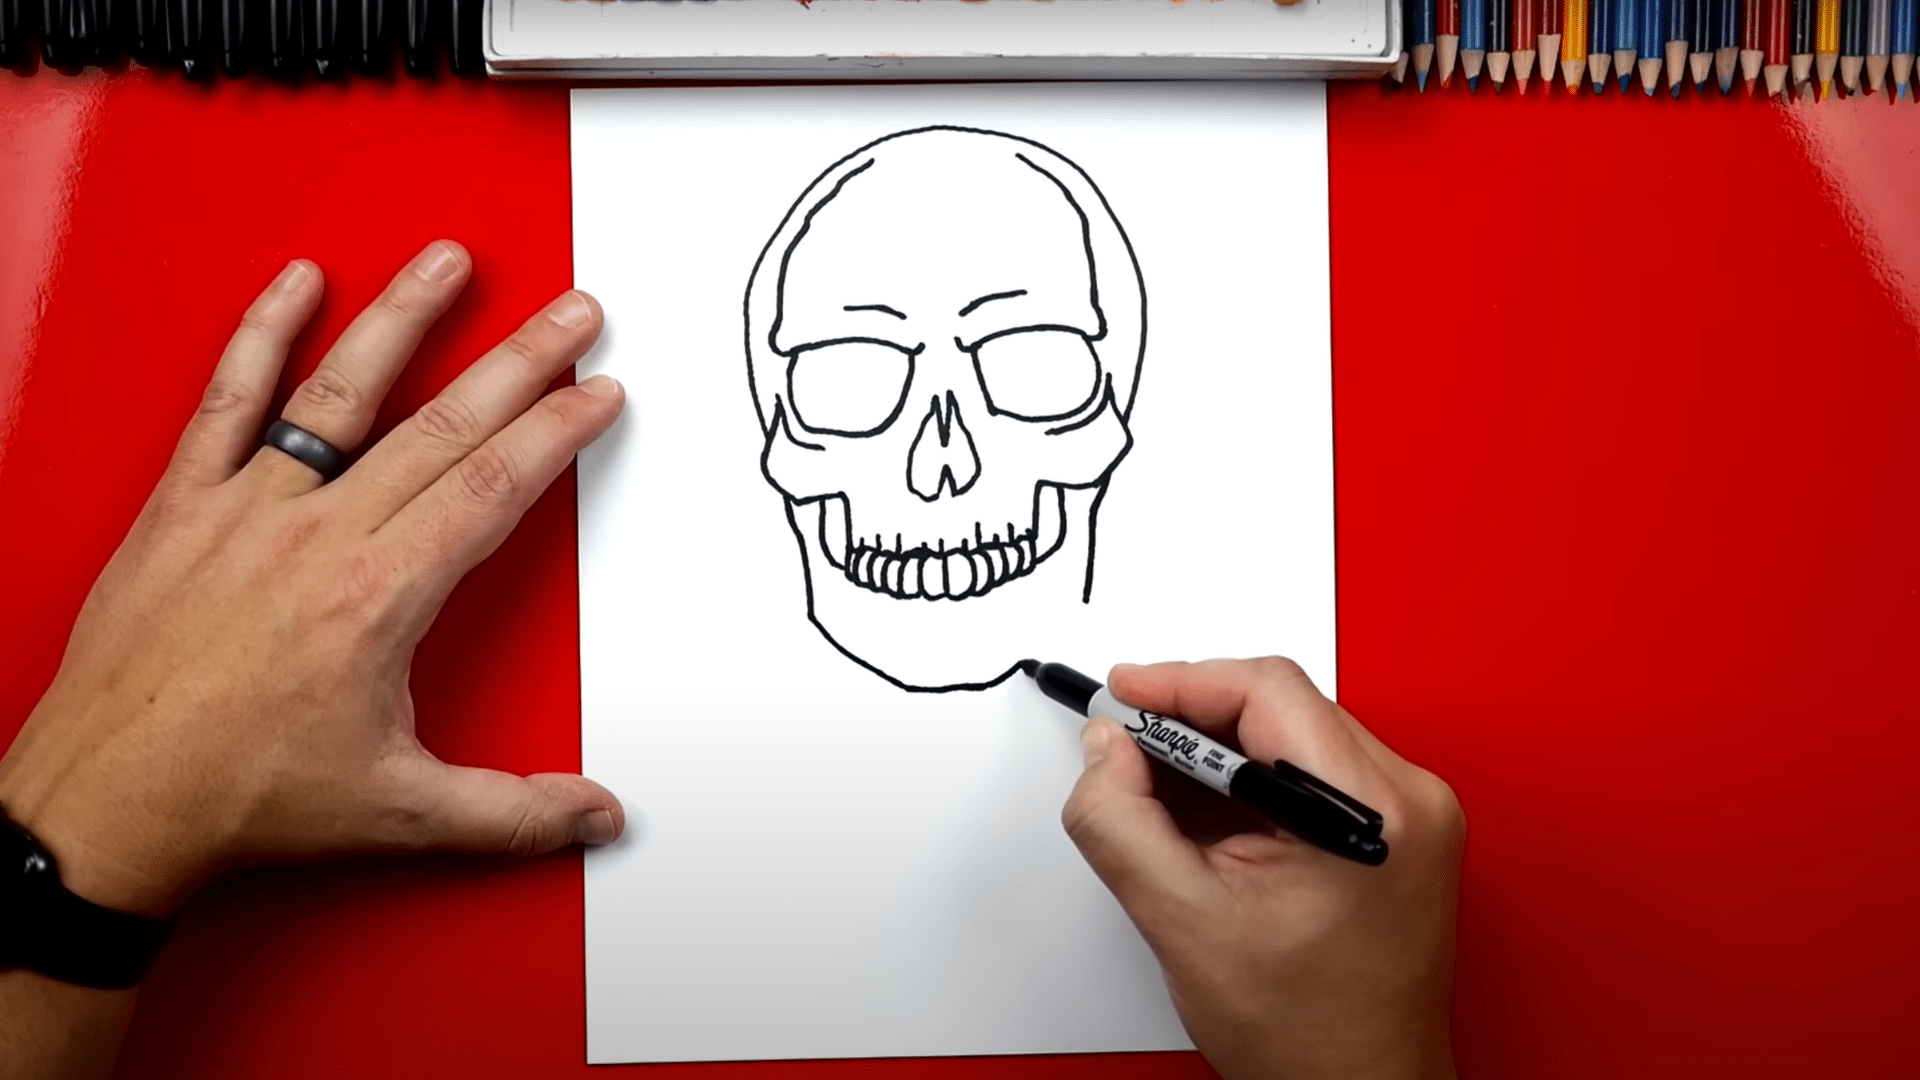
Step 5: Draw the Teeth (Top Row)
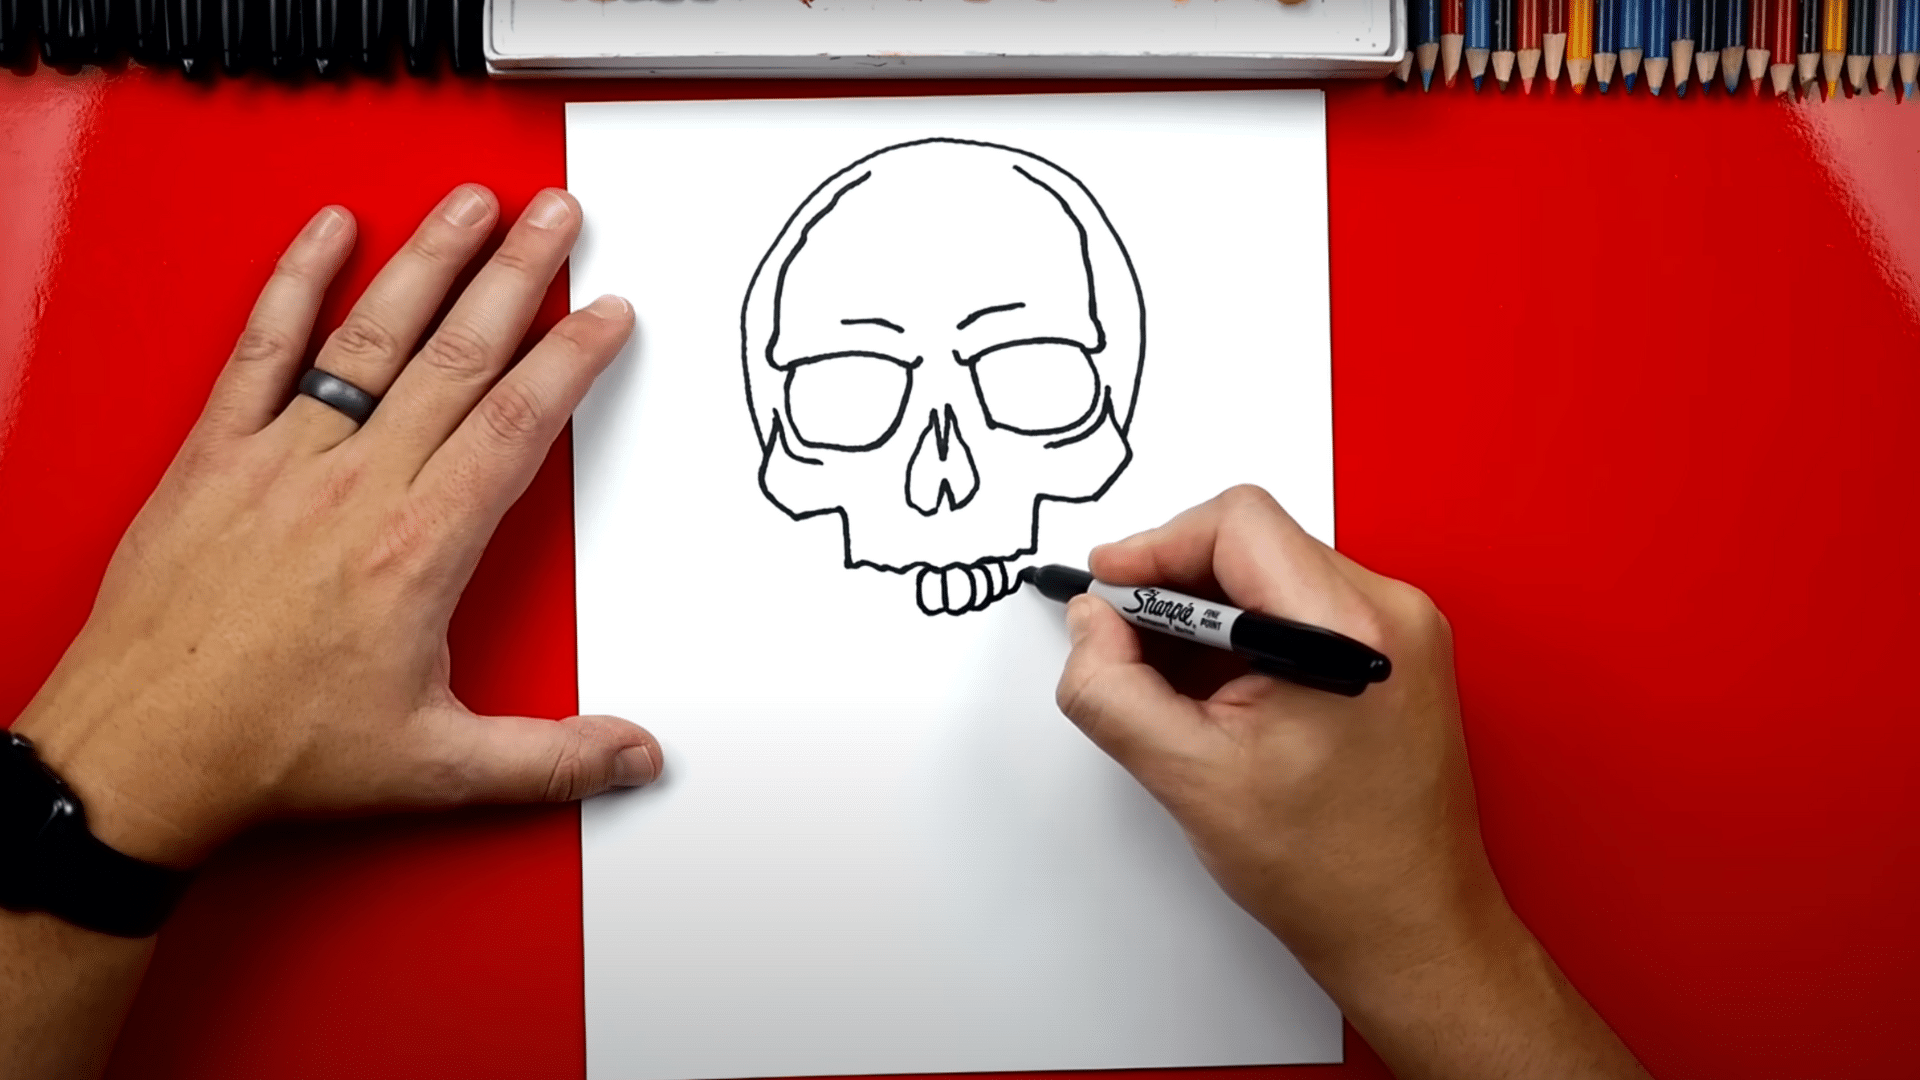
Skulls aren’t complete without teeth! We’ll use C-shapes to form a 3D row of upper teeth.
- Draw a vertical line down from the center of the mouth area.
- On either side of that line, draw curved C shapes (and backward C’s) to form the front teeth.
- As you approach the edges, make the teeth smaller and overlap them slightly for depth.
- Add vertical lines above the teeth to show gum ridges.
Step 6: Draw the Jaw
Let’s shape the lower jaw to give the skull structure and strength. This part wraps around the bottom of the teeth.
- Draw a line from underneath each cheekbone to the bottom row of teeth.
- From near each cheek, draw lines inward and downward to form the sides of the jaw.
- Connect the bottom of the jaw using two diagonal lines and a straight horizontal line for the chin.
Step 7: Draw the Bottom Teeth
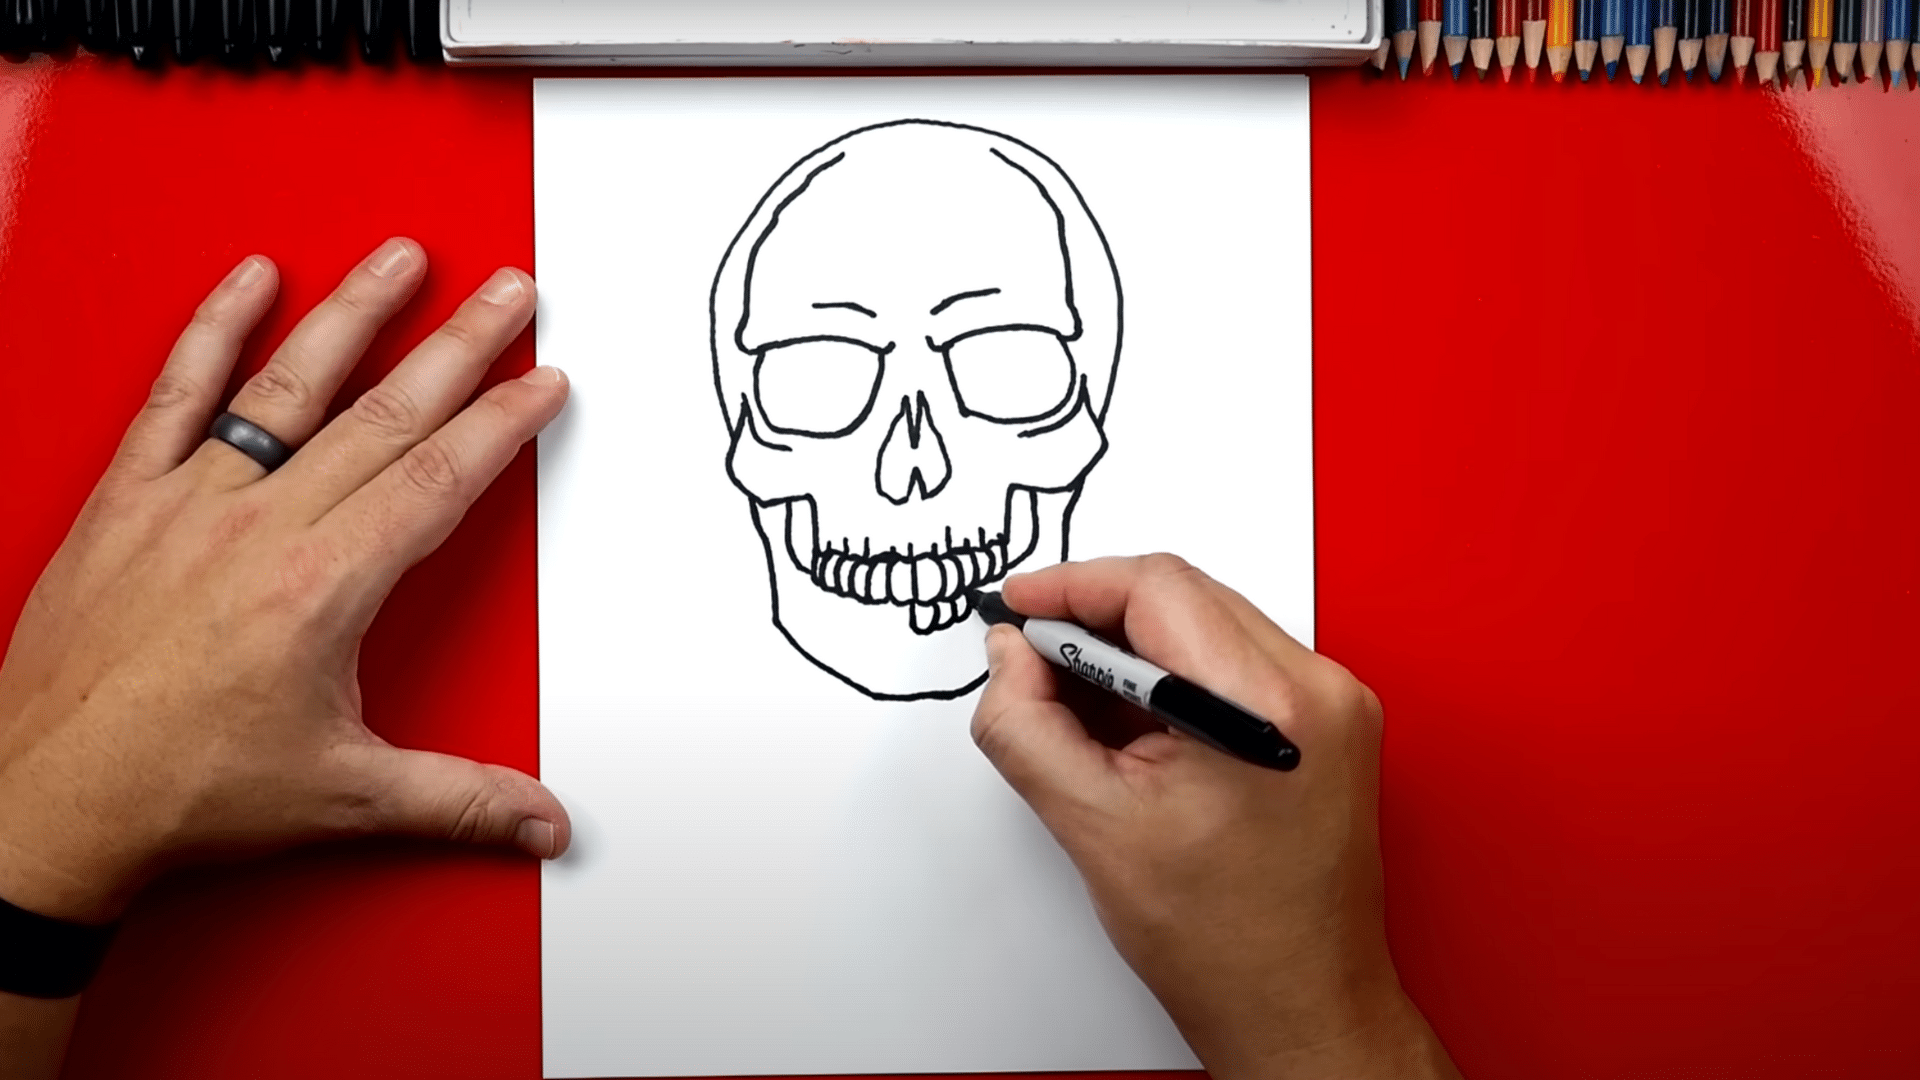
We’ll finish the mouth by adding the lower row of teeth, similar to the top row but a bit shorter.
- Start with a short vertical line in the center under the top teeth.
- Add smaller C-shapes and backward C’s on both sides that shrink as they go back.
- Draw short vertical lines above the bottom teeth to mimic ridges or root lines.
Step 8: Add Cracks and Texture

To make your skull more realistic, let’s add cracks and small texture lines around key areas.
- Add cracks around the eyes, nose, forehead, and jaw using wavy, jagged lines.
- You can also draw fine lines on the jaw, cheek, and forehead to show bone texture.
- Be creative! Every skull can have a unique pattern of cracks.
For detailed steps, click on the video below:
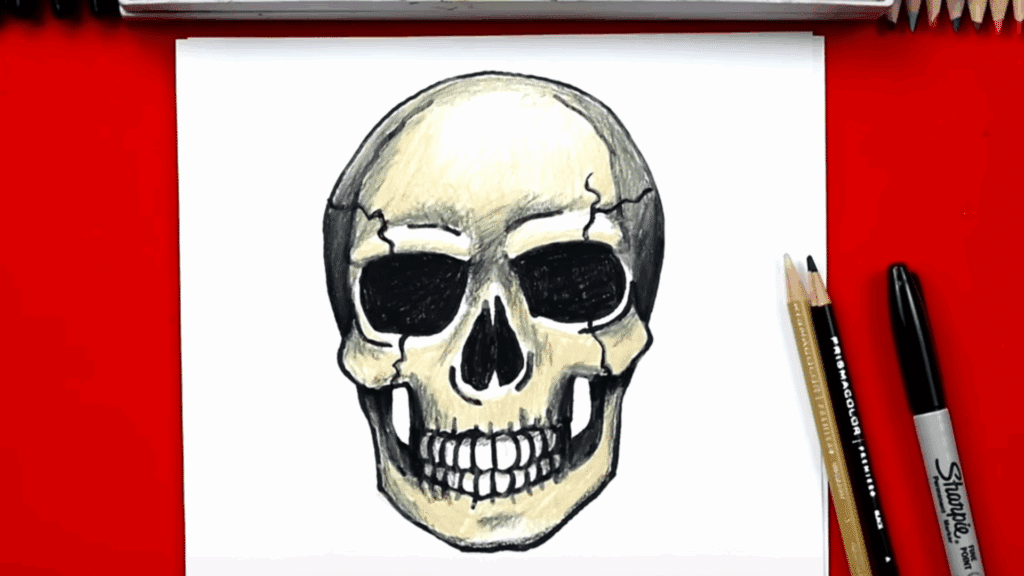
Shading Secrets: Creative Tips to Bring Your Art to Life
Adding color and shading brings your skull and crossbones to life, making it look more realistic and 3D.
1. Use “Ginger Root” as your base color: Lightly color the entire skull and bones with this soft, tan shade to give them a natural bone-like tone.
2. Leave white areas for highlights: Avoid coloring the tops of the skull, bones, and around the eyes to create natural highlights where light would hit.
3. Add shadows with black: Use a black colored pencil to shade around the outer edges of the skull, inside the eye sockets, under the jaw, and along the lower sides of the bones.
4. Blend the two colors softly: Where ginger root meets black, blend gently to create smooth transitions from light to dark for a more realistic effect.
5. Add a cast shadow under the bones: Draw a small, soft black shadow below one bone to make it look like it’s overlapping and floating in front of the other.
Bottom Line
Drawing a cool skull and crossbones is easier than you think! With this skull drawing step by step, you can create something that looks awesome and realistic, no erasing needed.
Just follow each part, have fun, and add your creative touch. Whether you’re using a pencil or a marker, the fun is in watching your drawing come to life.
Add some color and shading, and boom, you’ve got a bold piece of art! Keep practicing, and you’ll get even better each time.
We’d love to hear what you think, drop your feedback, or share your drawing with us!