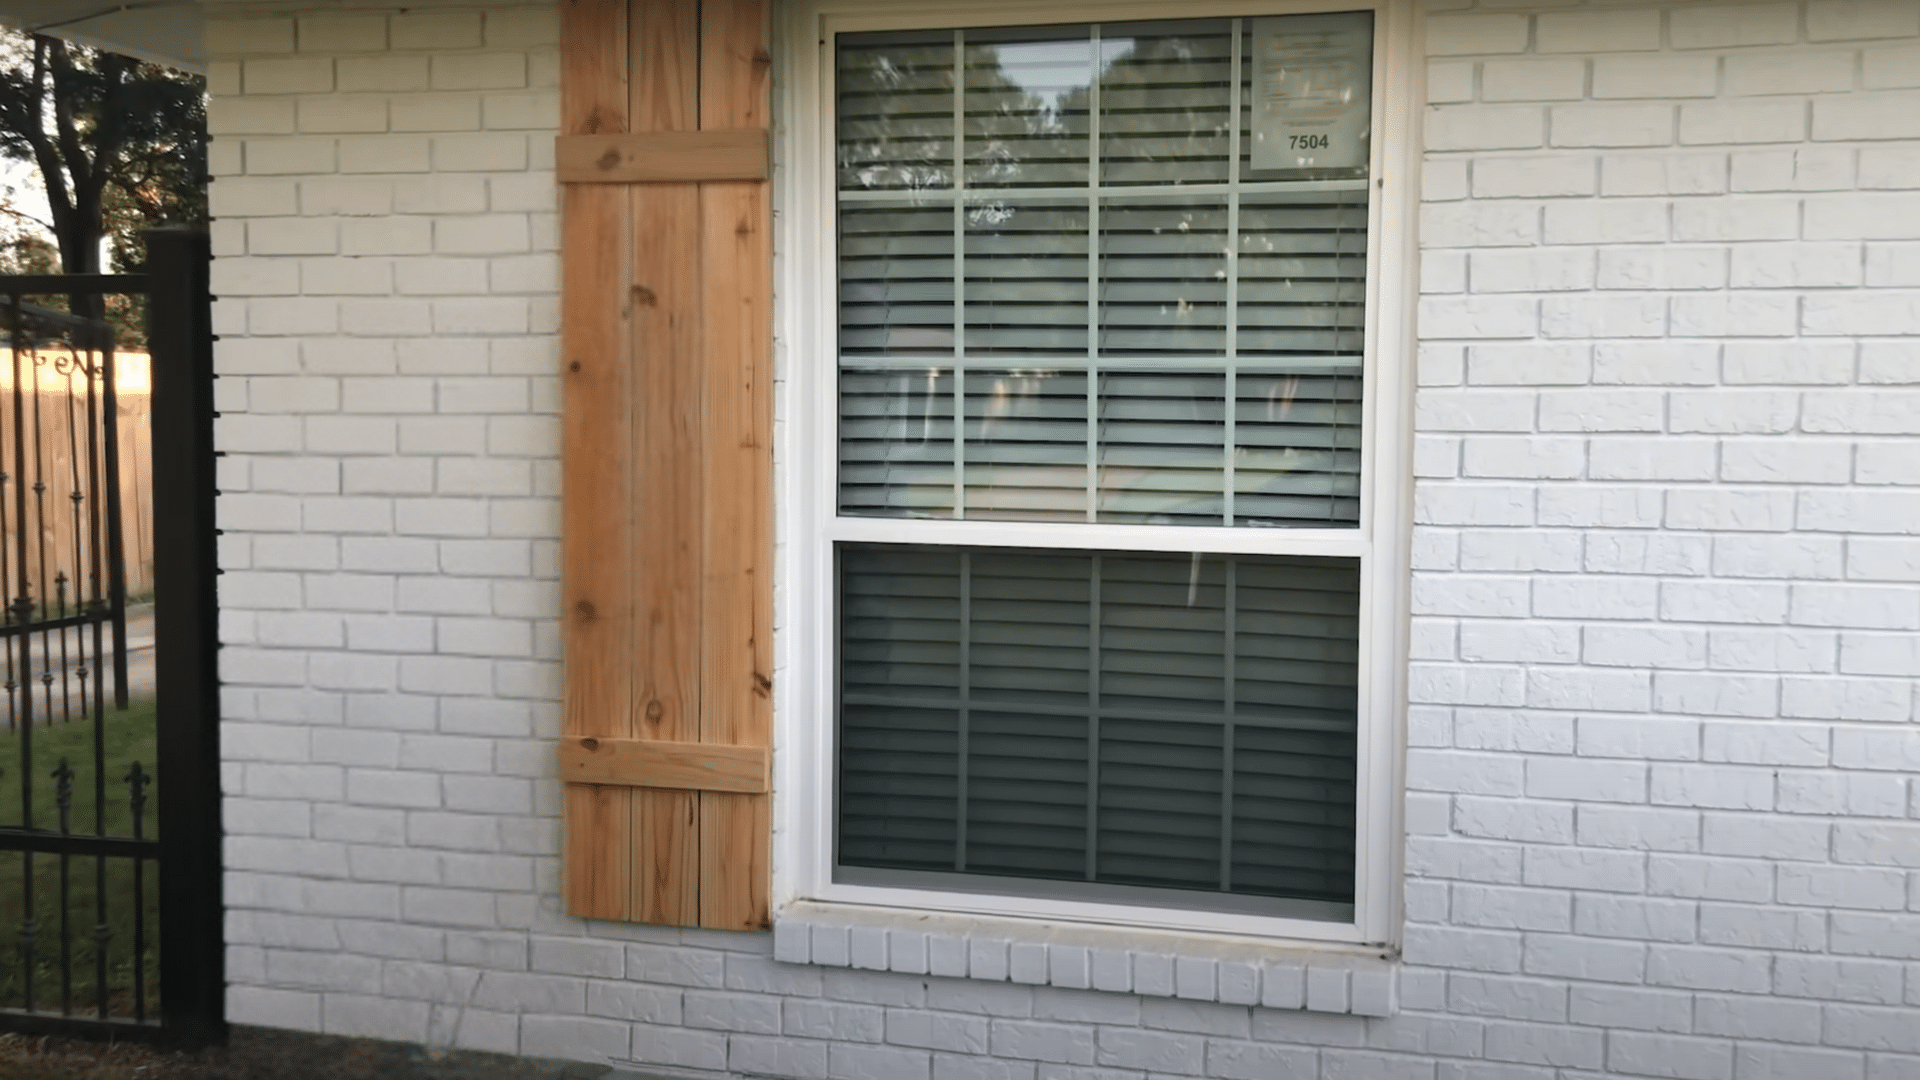
Homeowners looking to brighten their windows without breaking the bank have found a perfect weekend project. DIY wood shutters offer that perfect blend of functionality and charm while adding significant value to any home.
The change they bring to both exterior curb appeal and interior ambiance is remarkable, often becoming the focal point that visitors notice first.
As seasons change, these wooden additions continue working silently, regulating light and temperature while standing as testaments to personal craftsmanship.
Why Choose DIY Wood Shutters for Your Windows?
Homeowners gravitate toward wood shutters for compelling reasons. These customizable window treatments offer unmatched versatility in design, allowing for personalized touches that match existing décor perfectly.
Unlike mass-produced alternatives, wooden shutters can be tailored to fit unique window dimensions, solving problems that standard sizes simply cannot address.
The natural insulation properties of wood help regulate indoor temperatures year-round, potentially reducing energy bills.
Beyond practicality, there’s something deeply satisfying about pointing to beautiful window treatments and saying, “I made those.” The process itself becomes as rewarding as the finished product.
Supplies Required for DIY Wood Shutters
The wood shutters can instantly uplift the charm and character of your windows. If you’re going for a rustic farmhouse look or something more polished, gathering the right materials and tools is your first crucial step.
Here’s a handy table that outlines everything you’ll need to get started:
| Category | Item | Purpose/Use |
|---|---|---|
| Wood | Pine or cedar boards | Main material for building the shutters |
| Tools | Saw, drill, and sander | Cutting, assembling, and smoothing wood |
| Fasteners | Wood screws | Securely join the shutter parts |
| Finishing | Paint or wood stain + brushes | Add color and protect the surface |
How to Build DIY Wood Shutters: Step-By-Step Process
Creating your wood shutters is a satisfying project that adds charm and curb appeal to your home. This simple DIY build uses treated lumber and some basic tools to assemble and mount the shutters in just a few hours.
Here’s how to get it done step-by-step, condensed into 7 efficient, easy-to-follow steps.
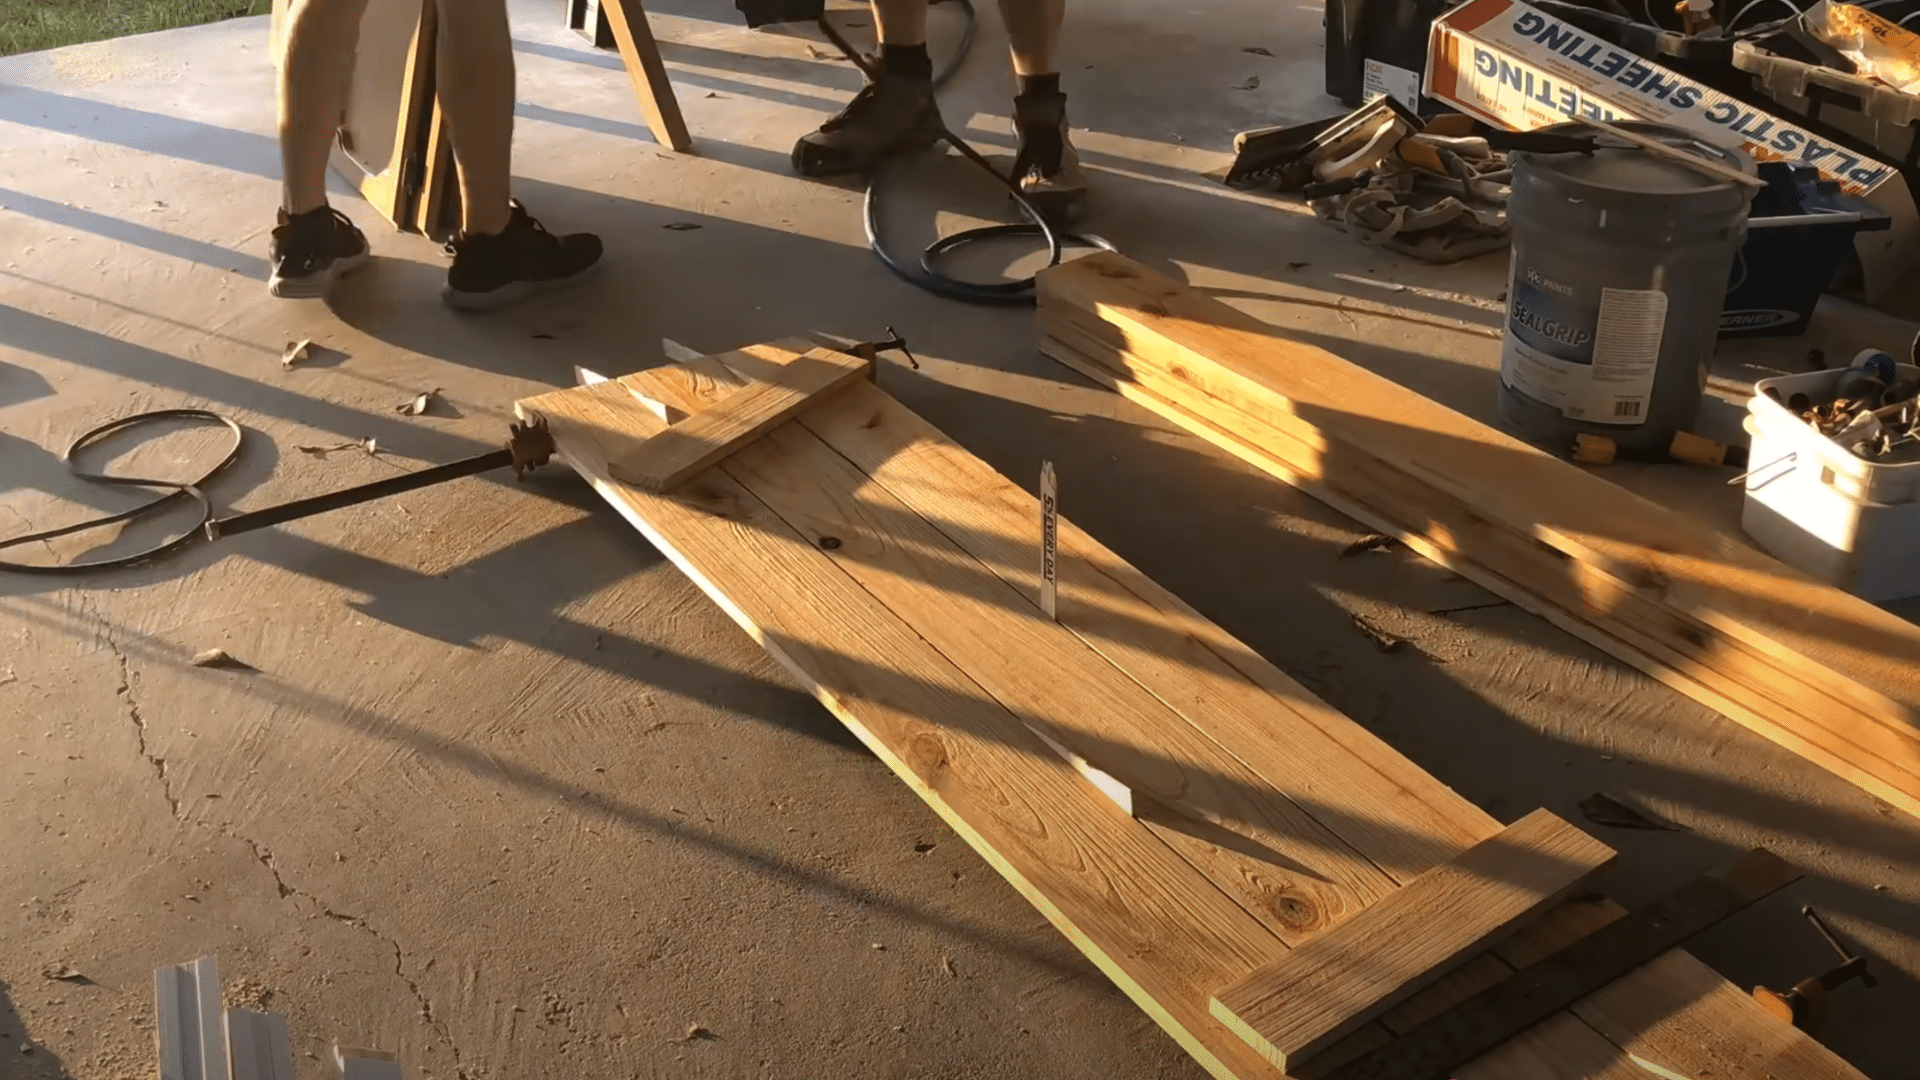
1. Measure and Cut the Boards
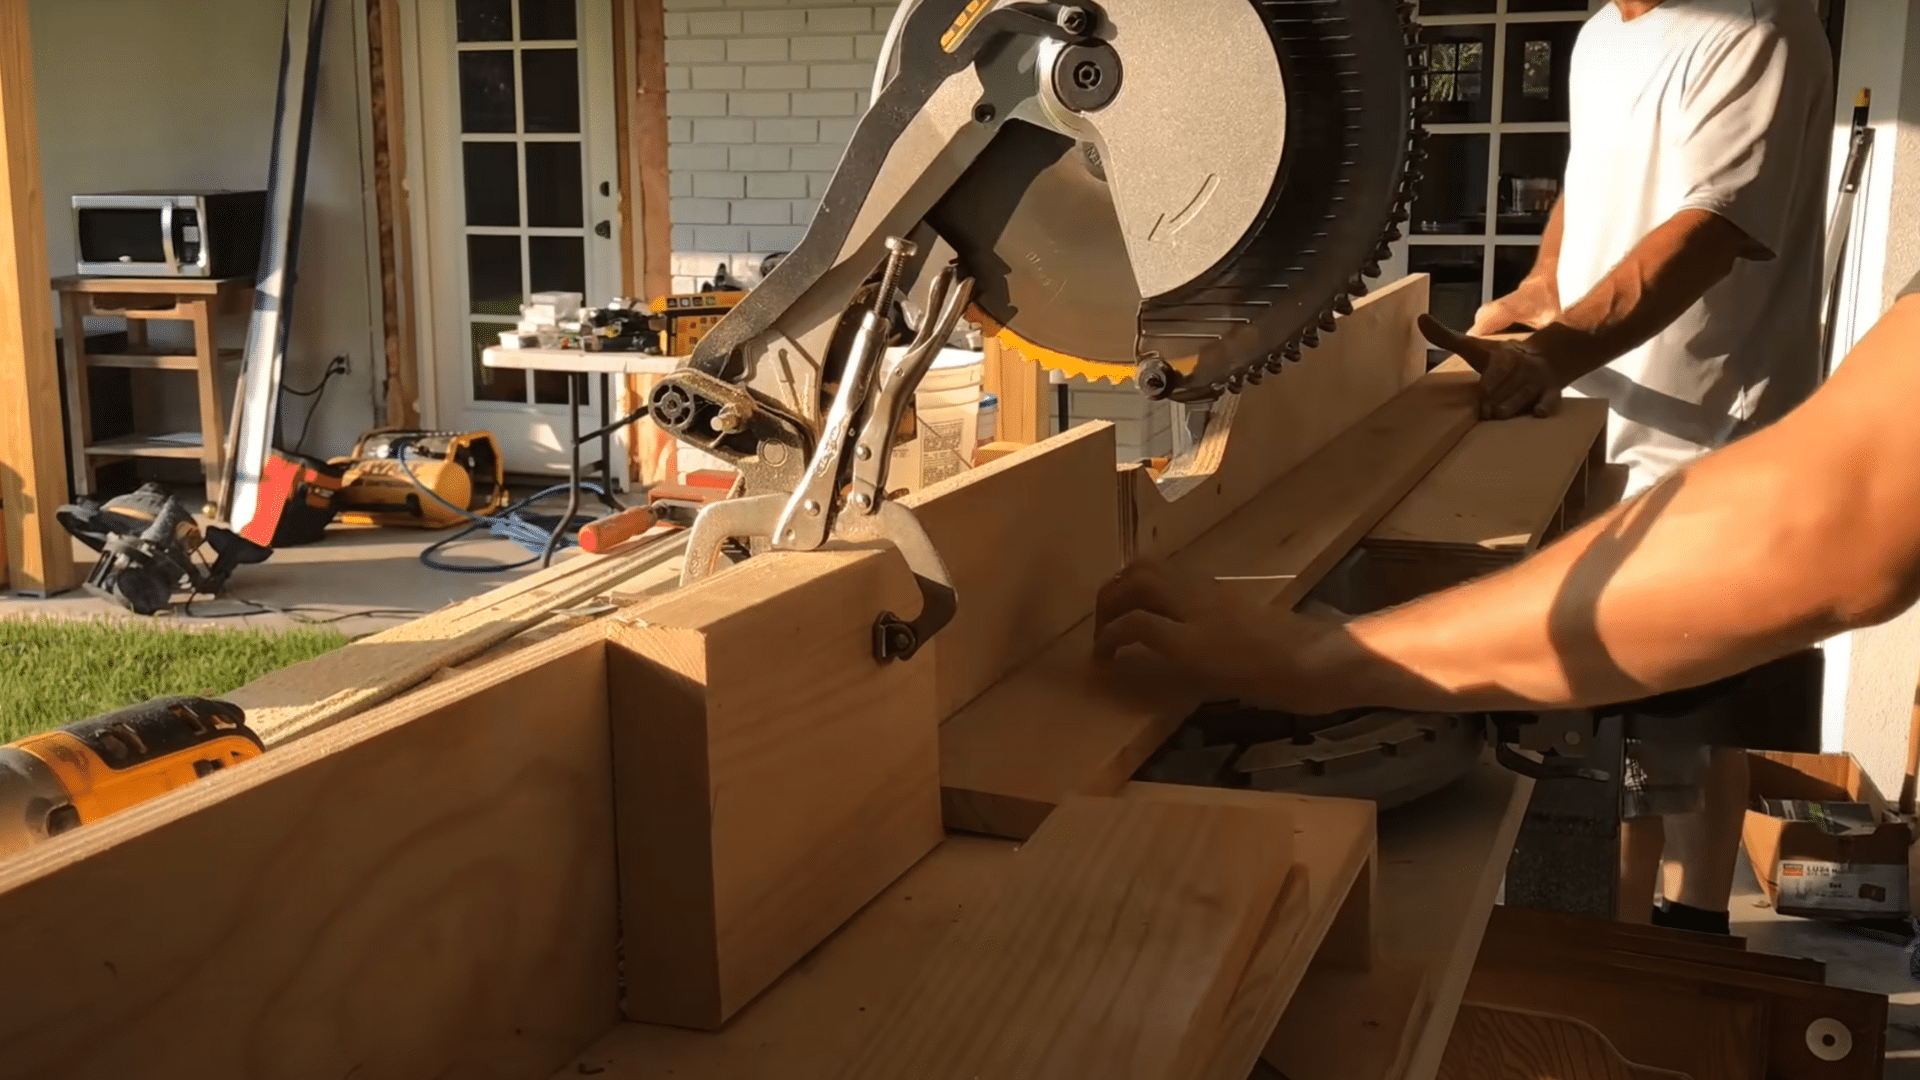
Start by selecting treated 1×6 boards from your local home center. Cut off the factory edge and then trim each piece to an exact 6-foot length using a miter saw.
These will be the vertical boards for your shutters. A stop block can be handy to ensure uniformity in length. Stack and label your freshly cut boards to avoid confusion during the assembly stage.
Essential Tip: Use a fine-tooth blade on your miter saw for cleaner cuts and less splintering on treated wood.
2. Assemble the Shutter Panels
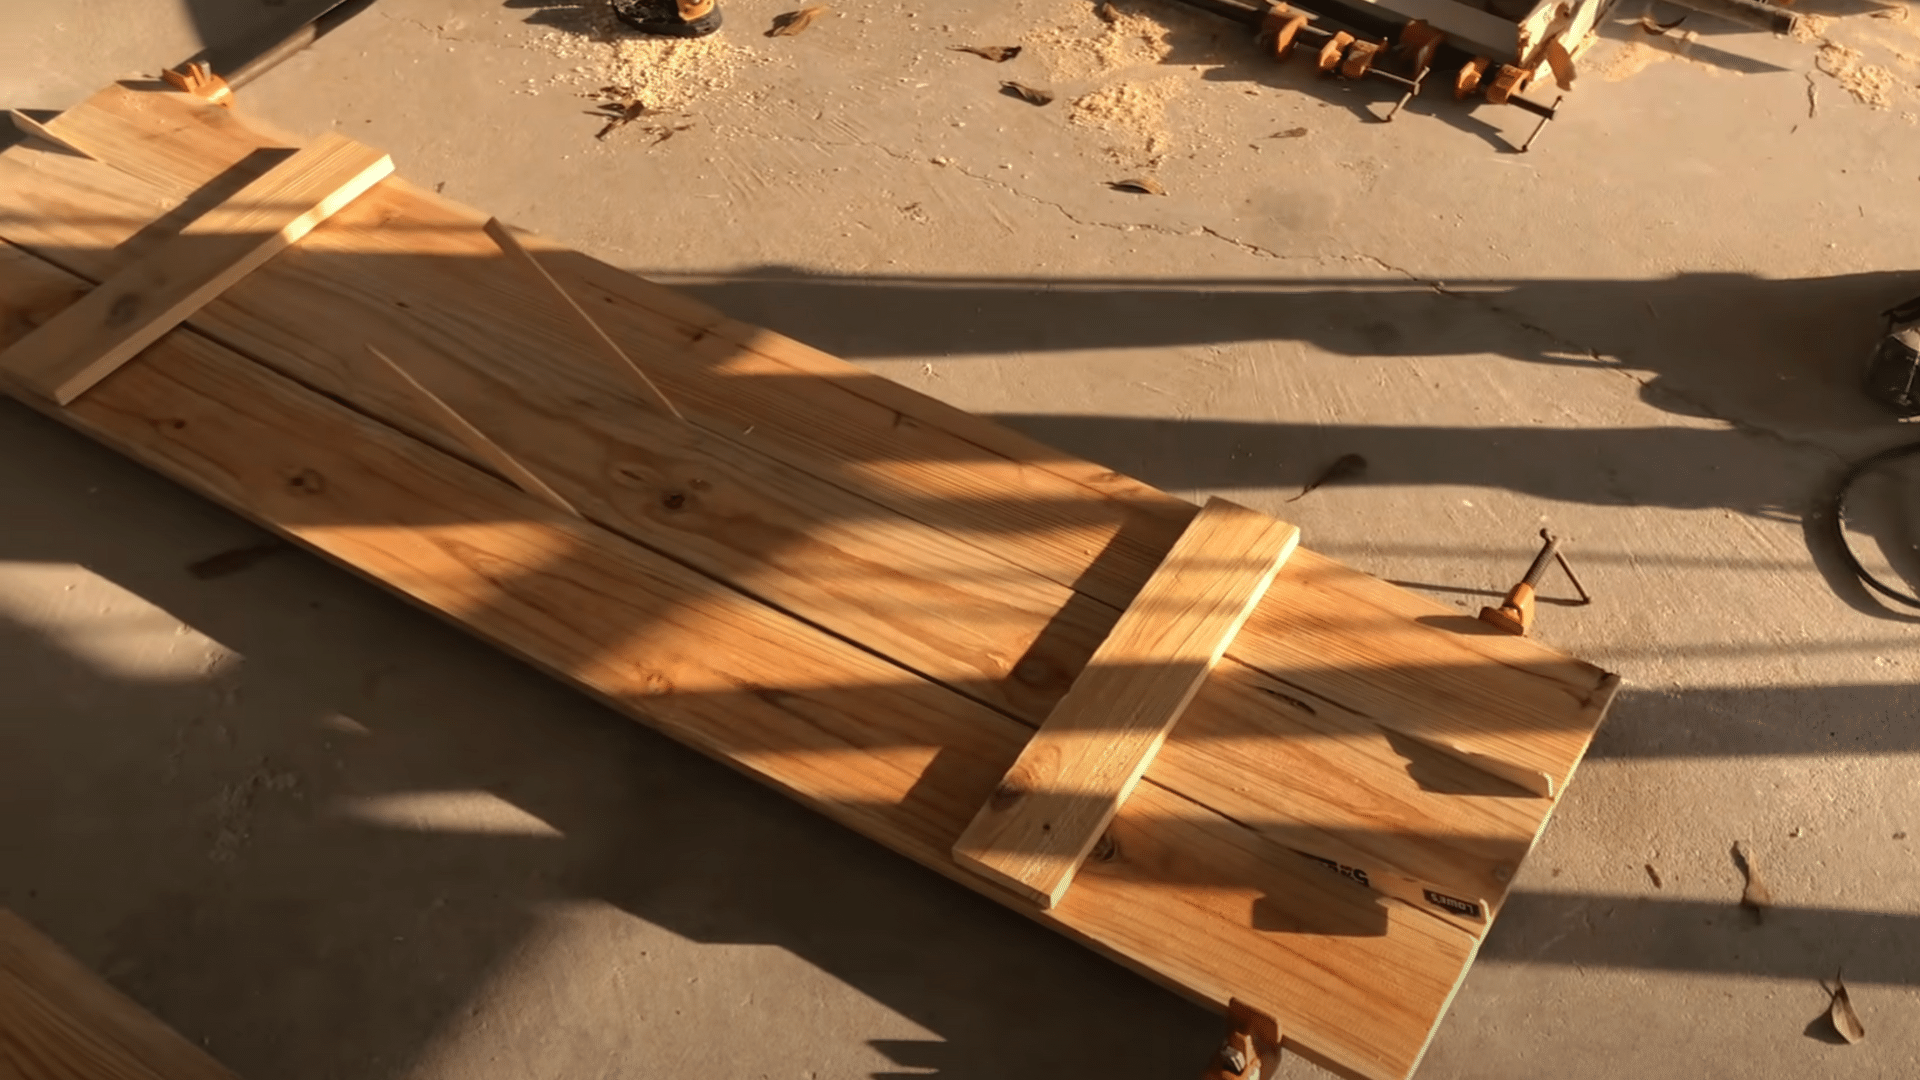
Lay three boards flat on the ground side by side to form one shutter panel. Use paint sticks as spacers between each board. These spacers help allow for wood expansion and contraction.
Clamp the boards together using bar clamps to keep them aligned. Once they’re secure, you’re ready to attach the crosspieces or cleats.
3. Attach the Cleats
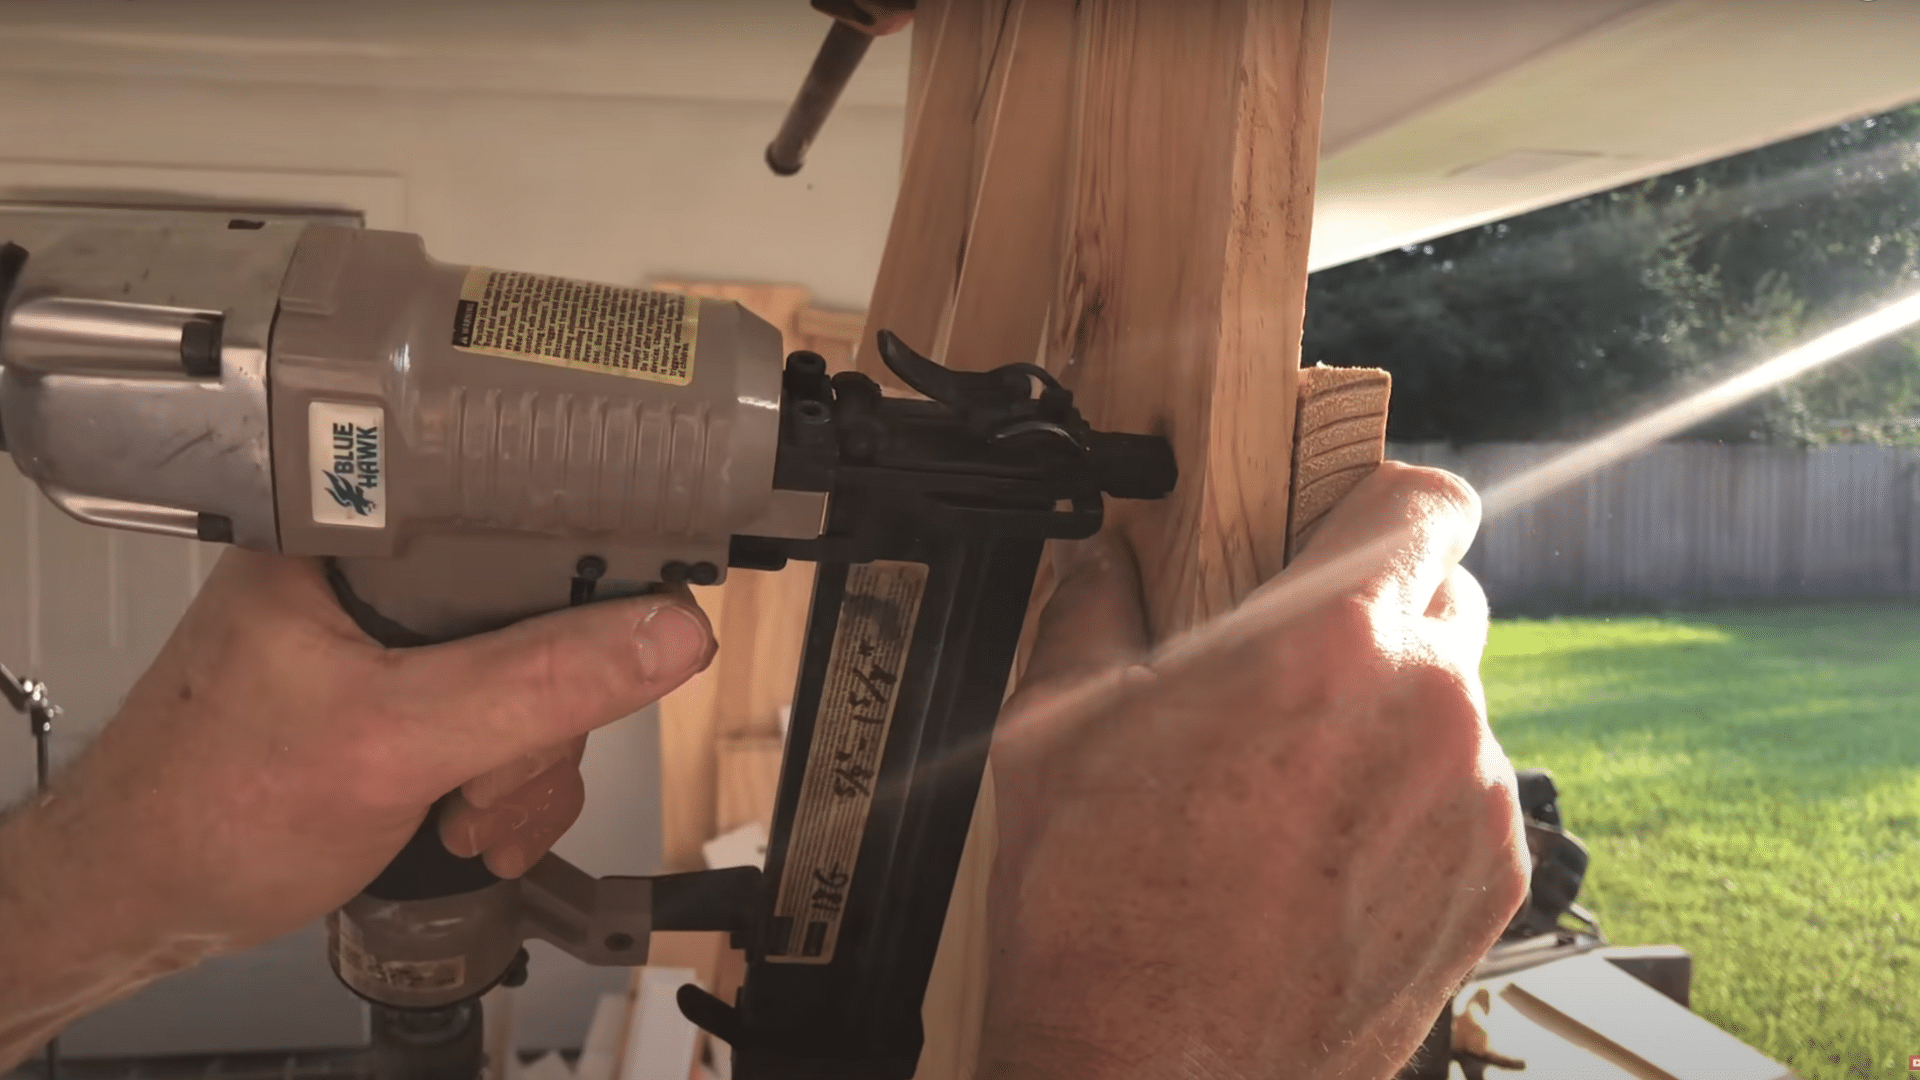
Cut two cleats (crosspieces) for each shutter. Position one at the top and one at the bottom, perpendicular to the vertical boards.
Secure the cleats using long screws, making sure not to overtighten and split the wood. The cleats serve to keep the boards joined firmly and give the shutter its final rectangular frame.
Predrill your holes in the cleats to prevent the wood from cracking when driving screws through.
4. Decide on Shutter Placement
Measure the window height and plan your shutter placement accordingly. In the above project, a six-foot shutter with an 11-inch offset from the top and bottom is used.
This maintained symmetry while ensuring visual balance. Check the alignment by holding the shutter up to the wall and adjusting the position visually.
5. Prep and Test Screws for Mounting
Select appropriate masonry screws to attach the shutters to your house, especially if mounting on brick. Check the packaging to ensure the screws can thread into masonry. Test one screw in a discreet spot to confirm it anchors securely before proceeding with the rest of the shutters.
6. Mount the Shutters
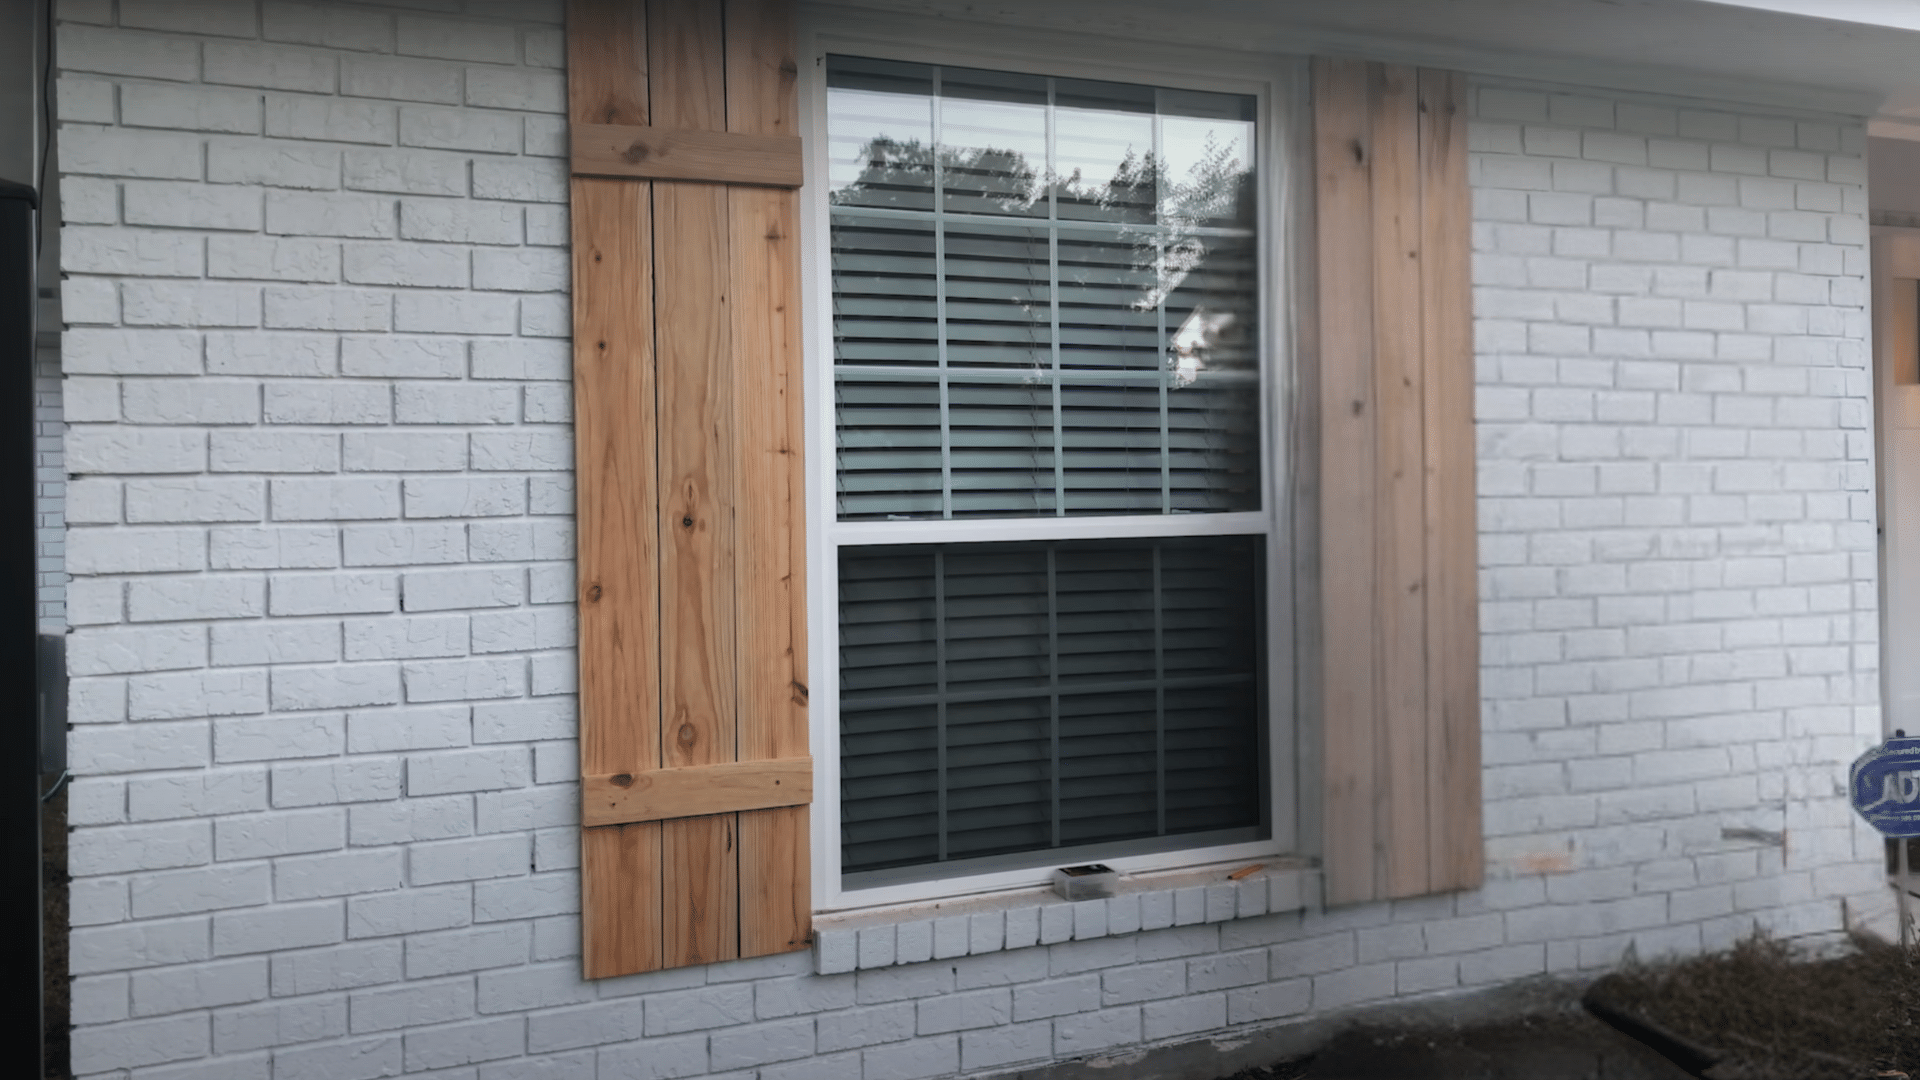
With your shutters fully assembled and screw type verified, hold each shutter in position against the wall. Begin securing the screws through the cleats into the building.
Make sure the shutters are level and evenly spaced from the window edge. Create a jig or use a template for screw placement to keep mounting consistent across all shutters.
7. Final Adjustments and Review
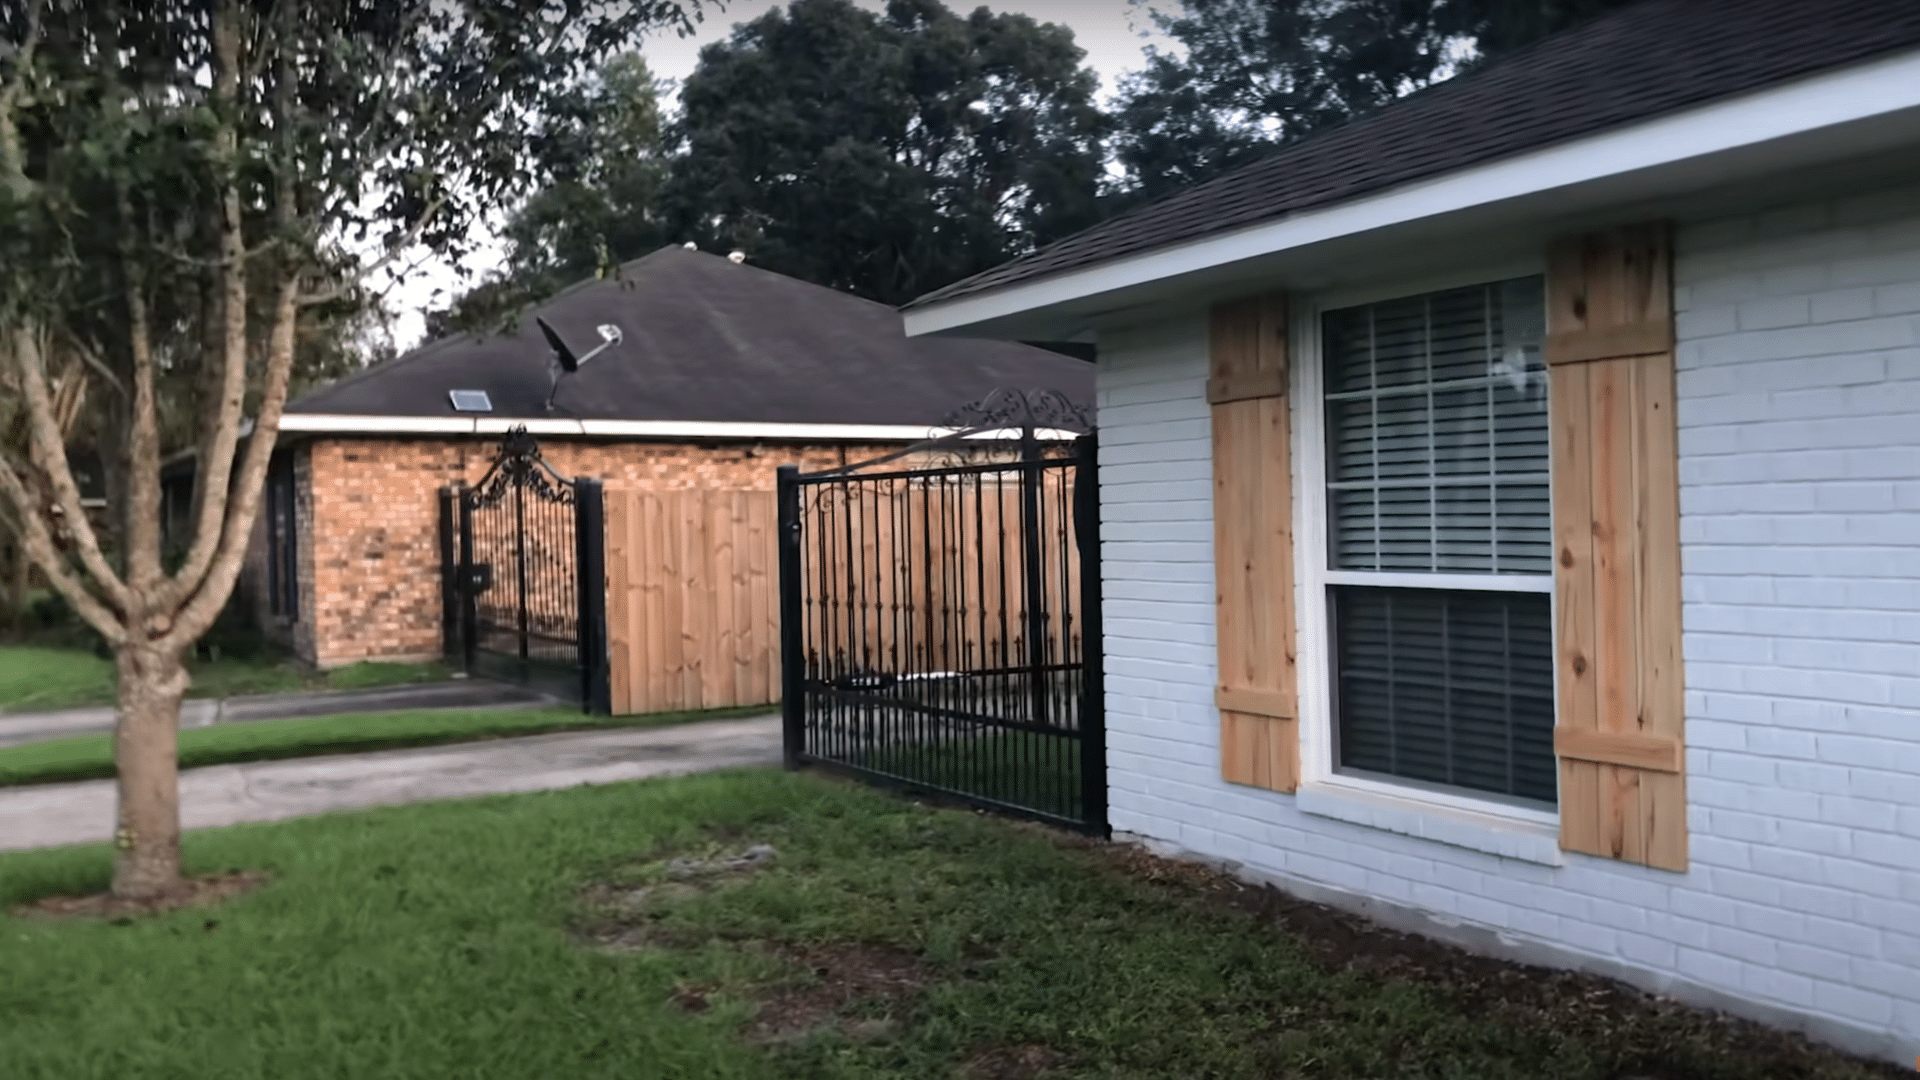
Once all shutters are mounted, do a walk-around to inspect for alignment, gaps, or loose screws. From the street view, evaluate if spacing looks consistent and adjust if needed. The final look should complement your house’s color and landscaping, adding immediate curb appeal.
Maintenance Tips for Long-Lasting Wood Shutters
Wood shutters add evergreen charm to any home, but they require proper care to maintain their beauty and functionality.
With the right maintenance routine, these custom window treatments can last for decades. Weather exposure, particularly moisture and direct sunlight, presents the biggest challenge to wooden shutters’ longevity.
- Regular cleaning: Dust weekly with a microfiber cloth and deep clean with mild soap and water quarterly, avoiding excessive moisture that could warp the wood
- Inspect for damage: Check hinges, slats, and frames twice yearly for signs of wear, loose components, or wood deterioration.
- Refinish as needed: Apply fresh paint or stain every 2-3 years for exterior shutters and 5-7 years for interior ones to protect against moisture and UV damage.
- Protect from elements: Consider weatherstripping for exterior shutters and UV-protective finishes for those facing direct sunlight.
- Proper operation: Open and close gently to prevent strain on hinges and frames, lubricating moving parts annually
- Address issues promptly: Repair small damages immediately before they lead to more extensive problems.
- Seasonal adjustments: Tighten hardware before winter and check for expansion issues during humid summers
The Bottom Line
The way to flawless, functional wood shutters doesn’t end with installation.
With proper maintenance and care, these handcrafted window adjustments become lasting investments in home value and character.
Many DIY enthusiasts report their shutters still looking pristine years later testament to both quality materials and ongoing attention.
If your motivation is practical, financial, or creative, DIY wood shutters deliver satisfaction that mass-produced alternatives simply cannot match.