The most expensive gift Mom got last year probably didn’t make her cry. The handmade one did.
Kids have this rare ability to give gifts that actually mean something, and all they need is a little paint, some paper, and someone to sit with them.
This list has mothers day crafts sorted into five clear categories. Each one is easy to follow, uses materials most families already have, and works for kids of different ages.
Start with what fits your child, and go from there.
Why Homemade Mothers Day Gifts Hit Different
There is something about a gift made by small hands that store shelves can never replicate.
When a child picks the color, scrawls their name, or presses their hand into clay, the result is something Mom will keep long after the store wrapping is in the bin.
Research from early childhood education consistently shows that craft activities also build fine motor skills, boost confidence, and help kids put feelings into words through art.
So these mothers day crafts for kids are not just gifts. They are a good use of an afternoon.
Mother’s Day Handprint and Footprint Crafts
Few things stop a mom cold like seeing how small her child’s hand used to be. These crafts are perfect for toddlers and babies. The messier the better.
1. Handprint Butterfly Card Trace two handprints side by side, cut them out, and add a body in the center. Write “I love you” on the wings.
2. Footprint Butterfly Wall Art Press both feet onto canvas paper in two colors. The feet become the wings. Add antennae with a marker.
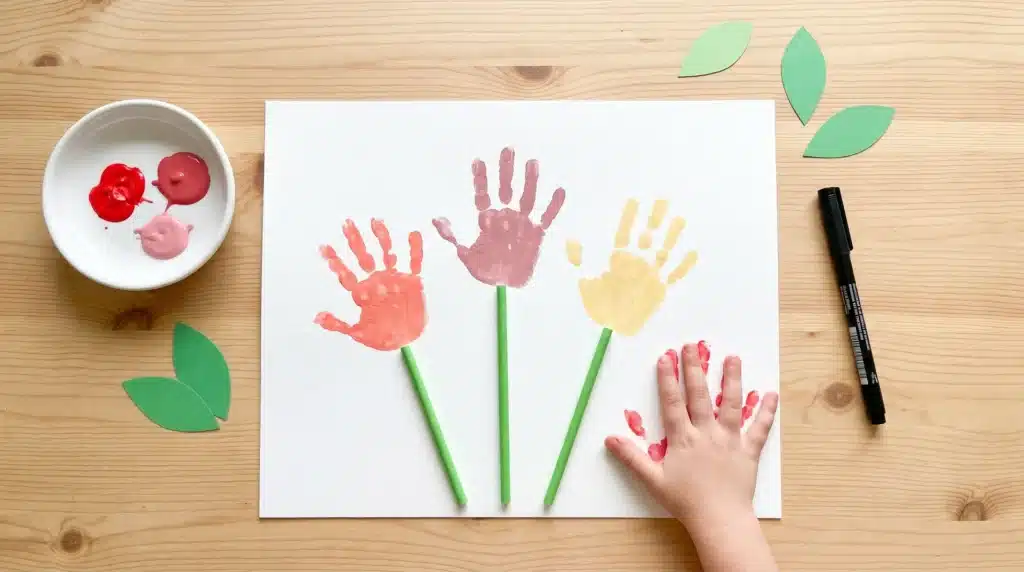
3. Handprint Flower Bouquet Dip hands in paint and press onto white paper. Attach green paper straws as stems. Group several together for a full bouquet.
4. Thumbprint Robin Mug Use oven-safe paint to press thumbprints onto a plain mug in the shape of a small robin. Bake as directed to make it dishwasher safe.
5. Tissue Paper Handprint Card Print or trace the child’s hand on paper, then tear small tissue paper pieces to fill it in. Write “I love you to pieces” inside.
6. Footprint Keepsake Frame Press the child’s foot in paint onto card stock. Trim, frame, and add the date and age underneath.
7. Handprint Lily Flowers Cut around a painted handprint. Roll and curl the fingers to form lily petals. Attach to a green pipe cleaner stem.
8. Handprint Ladybug Card Paint a hand red and press it onto white card. Add black dots and googly eyes to the thumb to create a ladybug body.
9. Handprint Unicorn Card Press a painted hand onto paper with fingers pointing up. Draw a horn on the middle finger and a mane on the side. Add glitter.
10. Salt Dough Handprint Keyring Mix salt, flour, and water to make dough. Press the child’s hand in, cut around it, poke a hole at the top, and bake. Paint once dry and thread a keyring through.
11. Heart Footprint Canvas Press two small feet together on canvas so the heels touch and the toes point outward. It forms a heart shape. Write the child’s name below.
12. 3D Handprint Tulip Card Cut out three to five identical tulip shapes from cardstock. Fold each in half and glue them back to back. Mount on card. Cut a hand from green paper for the stem.
13. Painted Handprint Apron Lay a plain cloth apron flat. Press the child’s painted hand all over it in a pattern of their choice. Mom can actually wear it.
14. Family Handprint Tree Draw a tree trunk in brown paint. Each family member presses their hand in a different color for the leaves. Label each one with a name.
15. Footprint Stepping Stone Press the child’s foot into air-dry clay or a stepping stone kit. Let it dry fully. Paint and seal it for the garden.
16. Handprint Cactus Card Paint the hand green and press it onto paper with fingers spread wide. Add small pink dots for flowers. Write “Mom, you’re lookin’ sharp!” inside.
Mother’s Day Paper and Card Crafts
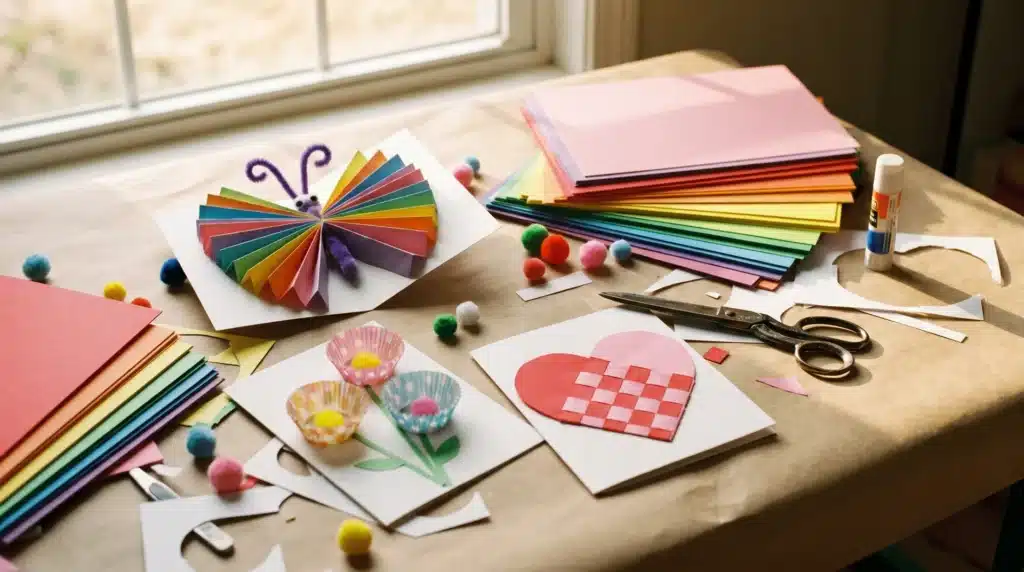
Paper crafts are easy on the budget and kind to younger kids. Most of what you need is already in the house. Cardstock, scissors, markers, and a glue stick go a long way.
17. 3D Pop-Up Tulip Card Fold a piece of cardstock in half. Cut a heart shape out of the front panel. Cut three to five tulip shapes, fold each in half, and glue them back to back. Mount them inside the card so they pop up when opened.
18. Cupcake Liner Flower Bouquet Card Glue colorful cupcake liners to a sheet of paper to form flowers. Add paper straws as stems and green paper leaves. Write a message at the bottom.
19. Fork Painted Flower Card Dip the tines of a fork into paint and press it onto card stock in a circular motion to form flower petals. Add a small dot in the center and green stem lines.
20. Origami Heart Bookmark Fold a small square of paper into a heart shape following a basic origami tutorial. Write “I love you” on the inside. Mom can use it in whatever book she is reading.
21. Paper Crown for Mom Cut a crown shape from gold or yellow cardstock. Let kids decorate it with glitter, foam stickers, and gems. Write “Best Mom” across the front.
22. DIY Pocket Fan Have the child draw a picture on a piece of paper. Fold it accordion style, pinch the bottom, and secure it with a rubber band. A simple, practical gift.
23. Paper Plate Sun Art Paint a paper plate yellow. Cut triangles from orange and red cardstock and glue them around the edge as sun rays. Write Mom’s name in the center.
24. Accordion Fold Butterfly Card Fold two strips of paper accordion style. Pinch each in the center and attach them together to form wings. Add a clothespin body and pipe cleaner antennae.
25. Paper Bag Gift Bag Give kids a plain kraft paper bag and let them draw all over it. Write “For Mom” on the front. Use it to hold any other gift on this list.
26. Heart Paper Weaving Placemat Cut a heart shape from red cardstock. Cut horizontal slits across the heart, leaving a border. Weave strips of pink paper through the slits. Laminate it for a placemat Mom can use at breakfast.
27. Toilet Paper Roll Flower Stamp Card Pinch the end of an empty toilet paper roll into a petal shape. Dip it in pink or red paint and stamp it onto paper in a circle to form a flower head. Add a green stem.
28. Finger Painted Rainbow Cloud Card Draw a cloud at the top of white card stock. Use fingers to paint rainbow stripes beneath it. Write “You make my world brighter” along the bottom.
29. Printable Coloring Card Print a free coloring page online in a flower or heart design. Let younger kids color it in with crayons. Fold it into a card and write a message inside.
30. Paper Floral Garland Cut out flower shapes in different colors from cardstock. String them onto yarn with a hole punch. Hang it in Mom’s kitchen or bedroom as a decoration she can leave up.
31. Celery Stamp Rose Card Cut the base off a celery stalk. Dip it in red paint and stamp it onto card stock. The layers of celery create a rose shape. Add green leaves with a leaf-shaped sponge.
32. Button Flower Card Arrange buttons in a circle on card stock to form flower shapes. Glue them down. Add green ribbon or pipe cleaner stems. Simple and satisfying for small hands.
Mother’s Day Flower Crafts
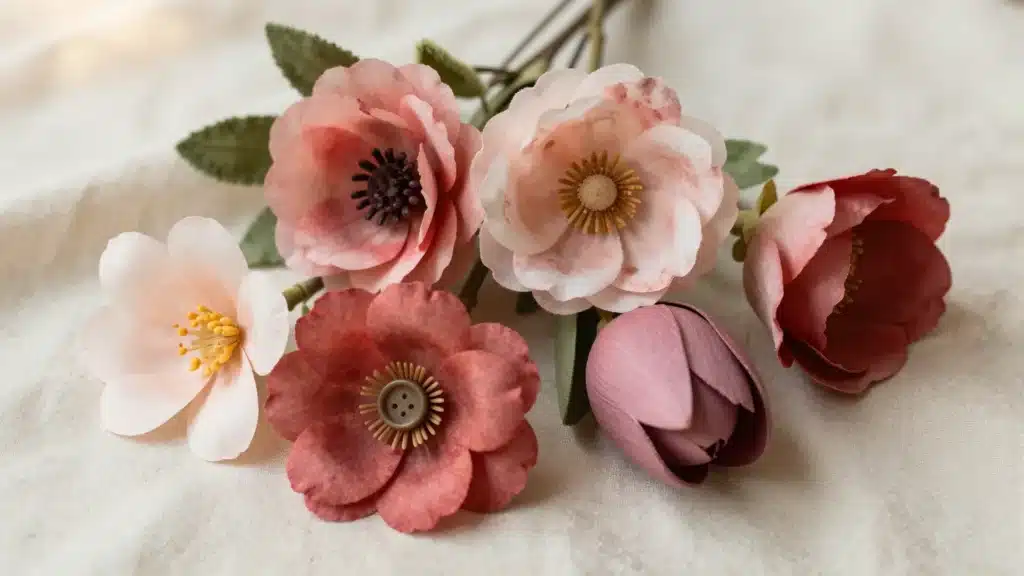
Real flowers last about a week. These ones last as long as Mom keeps them, which for most moms means forever. Many of these also double as home decorations she will actually want on display.
33. Felt Flowers Cut petal shapes from felt sheets and layer them together with a button in the center. Hot glue holds everything. No stems needed, these stand well in a jar. Best for ages 6 and up.
34. Pom Pom Flower Magnets Make small pom poms with yarn. Glue them to a round card base with green paper leaves. Attach a magnet strip to the back. Great for the fridge.
35. Tissue Paper Flower Bouquet Stack four to six sheets of tissue paper and fold them accordion style. Twist a pipe cleaner around the center. Fan out each layer to form petals. Group several together for a full bouquet.
36. Coffee Filter Flowers Draw designs on a flat white coffee filter with washable marker. Use a dropper to add water. The colors spread and blend as the water moves. Let dry and twist a pipe cleaner through the center.
37. Color Diffusing Paper Flowers Draw a flower outline on a color-diffusing paper sheet with permanent marker. Drip liquid watercolor into the petals. The marker holds while the color fills in around it.
38. Clay Flower Garden Use air-dry clay and small cookie cutters to cut flower shapes. Press a green paperclip into the base of each as a stem. Roll a small clay ball as a base. Let dry overnight and paint.
39. Seed Bombs Mix wildflower seeds, air-dry clay, and a little water into small balls. Let them dry. Mom can scatter them in the garden and wildflowers will grow. A gift that keeps giving.
40. Paper Heart Flower Cut four heart shapes from cardstock. Fold each heart in half and glue the backs together to form a bloom. Add a button or bead in the center and a paper straw stem.
41. Egg Carton Tulips Cut individual cups from an egg carton. Paint them red, pink, or purple. Poke a green pipe cleaner through the bottom as a stem. Arrange several in a small vase.
42. Pipe Cleaner and Pom Pom Flower Card Twist a pipe cleaner into a flower shape on card stock. Glue a pom pom in the center. Add a small paper leaf to the stem.
43. Sunflower Paper Plate Craft Paint a paper plate yellow. Glue brown tissue paper or seeds in the center. Cut yellow construction paper into petal shapes and glue around the edge.
44. Recycled Tin Can Flower Planter Wrap a cleaned tin can in craft paper. Let kids paint or draw on it. Plant a small spring flower inside. Mom gets a vase and a plant in one.
45. Pressed Flower Suncatcher Place real flowers or leaves between two pieces of clear contact paper. Trim into a shape. Hang it in a window. The sun brings out the color of every petal.
46. Fork Stamped Flower Wreath Stamp fork-shaped flowers in a circle on paper to form a wreath. Color the center of each stamp a darker shade. Write “Happy Mother’s Day” in the middle.
47. Popsicle Stick Flower Pot Decoration Glue popsicle sticks side by side to cover a small terracotta pot. Paint them in stripes or patterns. Let dry and pot a small plant inside.
48. Cupcake Liner Flower Wreath Flatten cupcake liners and arrange them in a circle on a paper plate with the center cut out. Layer different sizes for a full, dimensional look. Hang on a door or wall.
Keepsake and Memory Mother’s Day Crafts
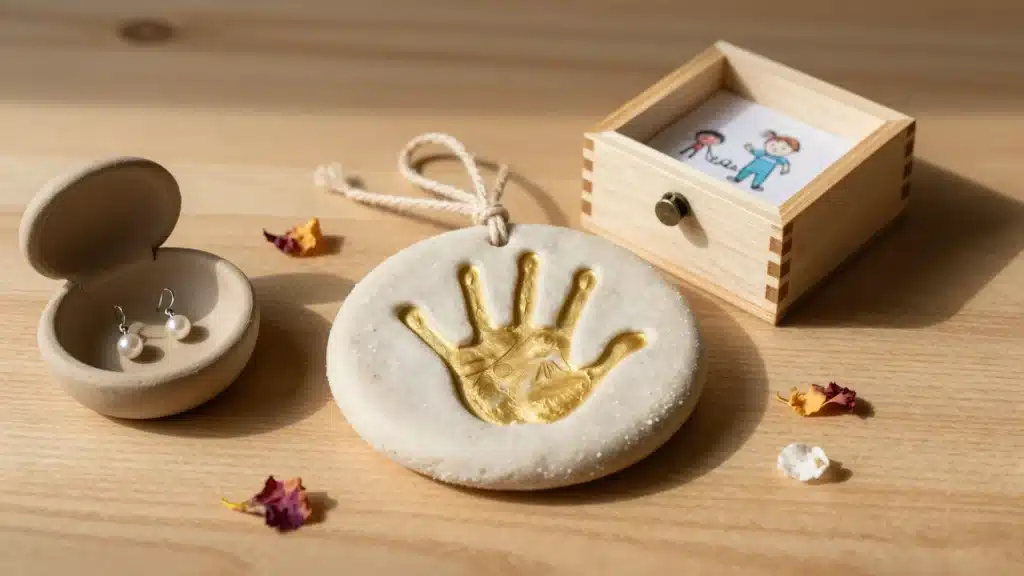
Some crafts are cute. Keepsake crafts are the ones that go in the box and come back out 20 years later. They capture a specific age, a specific size, a specific moment. That is what makes them worth making.
49. Salt Dough Heart with Handprint Mix one cup flour, half cup salt, and half cup water. Roll out and press the child’s hand into the center. Cut a heart around it. Bake at 200 degrees for three hours. Paint once cool.
50. Salt Dough Flower Magnets Roll salt dough flat and cut flower shapes with cookie cutters. Bake, paint, and attach a small magnet strip to the back. A set of three or four makes a sweet little gift.
51. Photo Coasters Print a photo on regular paper at a size slightly smaller than a plain tile. Brush the back of the photo with Mod Podge, press it onto the tile, and seal the top with two more coats. Let dry fully.
52. Memory Box Get a plain wooden box from a craft store. Let the child paint it and decorate the outside with their name and drawings. Mom keeps it for notes, photos, or anything she wants to save.
53. Shrinky Dink Footprint Keychain Trace the child’s foot onto a shrink plastic sheet. Color it in. Cut it out and bake it per the instructions. The sheet shrinks and hardens. Punch a hole and add a keyring.
54. All About Mom Fill-In Survey Print or write a list of questions such as “Mom is good at…” and “Mom’s favorite thing to do is…” Have the child answer in their own words. The answers are the gift.
55. Painted River Rocks Wash and dry smooth rocks. Paint a solid white base coat. Once dry, paint hearts, flowers, or the child’s name in bright colors. Seal with clear Mod Podge.
56. Perler Bead Trinket Dish Create a design with perler beads on a peg board, iron with parchment paper to fuse them, and shape the warm piece around a small bowl to form a curved dish. Mom can keep jewelry or small items in it.
57. Clay Pinch Pot Jewelry Holder Have the child roll air-dry clay into a ball and press their thumbs into the center to form a small bowl. Curve the edges. Let dry overnight. Paint and seal. It sits on a nightstand for rings and earrings.
58. Photo Flower Bouquet Cut circles from cardstock and glue the child’s photo in the center of each. Cut petal shapes and glue them around each photo. Attach green paper straw stems and arrange in a small jar.
59. Fingerprint Name Art Write Mom’s name in large block letters on white paper. Have the child fill in each letter with thumbprints in different colors. Frame it when done.
60. Clay Earring Holder Roll a larger piece of air-dry clay into a flat oval. Fold the edges up slightly. Poke small holes along the top edge for earrings to hang through. Dry, paint, and seal.
61. Handwriting Keepsake Have the child trace their own hand on a piece of thick card stock. Write their name, age, and a short message inside the traced outline. Frame it.
62. Baby Footprint Ornament Press a baby or toddler’s foot into air-dry clay. Cut around the shape. Poke a small hole at the top before it dries. Once baked or fully dry, paint and hang it with ribbon.
63. Clothespin Photo Display Board Paint a small piece of wood in any color. Glue painted clothespins across it. String lights or ribbon between the pins. Thread in family photos. Mom can swap photos whenever she likes.
64. Toilet Paper Roll Memory Display Flatten and paint several toilet paper rolls. Stack and glue them in a honeycomb pattern. Each cell holds a small rolled photo or note from the child.
Homemade Gift Mother’s Day Crafts
These are the crafts that cross into gift territory. Mom gets something she can wear, use, display, or enjoy. When a child makes something with a purpose behind it, the effort shows twice as much.
65. DIY Sugar Scrub Cubes Mix half cup sugar, two tablespoons coconut oil, and a few drops of lavender essential oil. Press into an ice cube tray and freeze for two hours. Pop out and place in a small jar. Adults should handle the oils.
66. Tie-Dye Butter Mints Mix softened butter, powdered sugar, and a drop of peppermint extract into a soft dough. Divide into sections, add food coloring to each, and swirl together. Shape into small rounds and let harden. Package in a small tin.
67. Foot Soak Packet Scoop Epsom salt and dried lavender into the center of a coffee filter. Fold and tie it with ribbon. Drop into warm water for a simple foot soak. Adults should add any essential oils.
68. Nail Polish Swirl Mug Fill a deep bowl with room-temperature water. Drop two or three nail polish colors onto the surface. Dip a plain white mug briefly into the polish layer. Pull out and let dry fully before use.
69. Bottle Cap Photo Magnets Print small photos to fit inside bottle caps. Mod Podge the photo inside the cap and seal the top. Attach magnetic dots to the back. Make a set of three or four different photos.
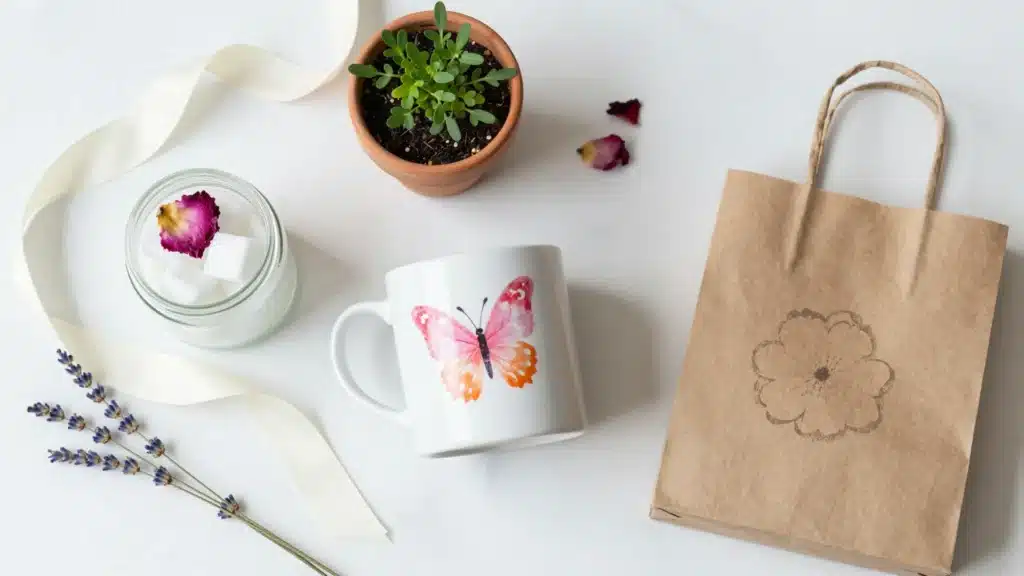
70. Thumbprint Butterfly Mug Use oven-safe ceramic paint to press thumbprints in pairs onto a plain mug, forming butterfly wings. Add antennae with a fine brush. Bake according to the paint instructions to set it permanently.
71. Painted Clay Flower Pot Paint a small terracotta pot in Mom’s favorite colors. Let the child draw patterns or write words. Seal with a clear coat once dry. Plant a small herb like basil or mint inside.
72. Dip-Dyed Woven Basket Mix fabric dye in a bowl. Dip the top third of a plain woven basket into the dye and hold it still for a few minutes. Pull out and let it dry flat. Simple and looks like something from a shop.
73. Decoupage Wood Plaque Paint a plain wood plaque white. Print a photo or a short quote in a font the child picks. Brush Mod Podge over the surface, lay the paper down, and smooth it out. Seal with two more coats.
74. DIY Candle Wrap a plain glass candle in colored tissue paper using Mod Podge to seal each layer. Let dry fully. The tissue paper creates a soft, colored glow when the candle is lit. Adult supervision required.
75. Tie-Dye Dish Towel Lay a plain white dish towel flat. Press the child’s painted hand onto it in a repeating pattern. Heat set with an iron once dry. Mom gets a usable, personal kitchen gift.
76. Push Pin Initial Art Draw Mom’s first name initial in large letters on a foam board. Let an older child or teen press colored push pins along the outline to fill it in completely. Frame it.
77. Sharpie Art Ceramic Plate Draw patterns directly onto a plain white ceramic plate using Sharpie markers. Place in a cold oven, heat to 350 degrees, and bake for 30 minutes. Let cool in the oven. The design sets permanently.
78. Mini Chalkboard Frame Paint a plain wood frame with chalkboard paint. Let kids press buttons around the border while the paint is still tacky. Once dry, write a message on the chalkboard center in chalk.
79. Resin Geode Coasters (for Teens) Use two-part resin mixed with alcohol ink in pink and gold tones. Pour into coaster molds and swirl with a toothpick to create a geode look. Let cure for 24 hours. Best for teens with adult help and proper ventilation.
80. Pressed Flower Clay Dish Roll air-dry clay into a small flat circle. Press dried flowers and leaves into the surface. Curve the edges up slightly to form a dish shape. Once fully dry, paint the trim gold and seal with Mod Podge.
Tips to Make Your Mothers Day Crafts Turn Out Great
Pick the craft before you pick the supplies. Match the project to the child’s age, not the other way around. Toddlers do well with anything involving stamps, glue sticks, and their own hands.
Kids aged six to ten can manage scissors, clay, and simple paint techniques. Teens can take on resin, wire work, and more detailed projects with minimal help.
Lay down a plastic tablecloth before you start, pre-cut any tricky shapes for younger kids, and pour paint into shallow dishes so small hands can reach easily.
The biggest mistake most people make is rushing the drying. Salt dough needs at least 24 hours. Air-dry clay can take longer depending on thickness. Give it time and the finished piece will hold together.
One last thing: ask the child what color Mom likes before they start. That small detail makes the whole gift feel more personal, and Mom will notice.
Conclusion
There are mothers day crafts on this list and every single one was made to be doable. Not just Pinterest-possible, actually doable, with real kids, real mess, and a real deadline.
The best homemade mothers day gifts are not the most complicated ones. They are the ones that show Mom someone sat down, paid attention, and made something just for her.
Pick one that fits your child’s age, clear the kitchen table, and get started. Which craft are you planning to try first? Drop it in the comments.