Winter’s here, and your walls look bare. Store-bought decorations cost too much and lack personality.
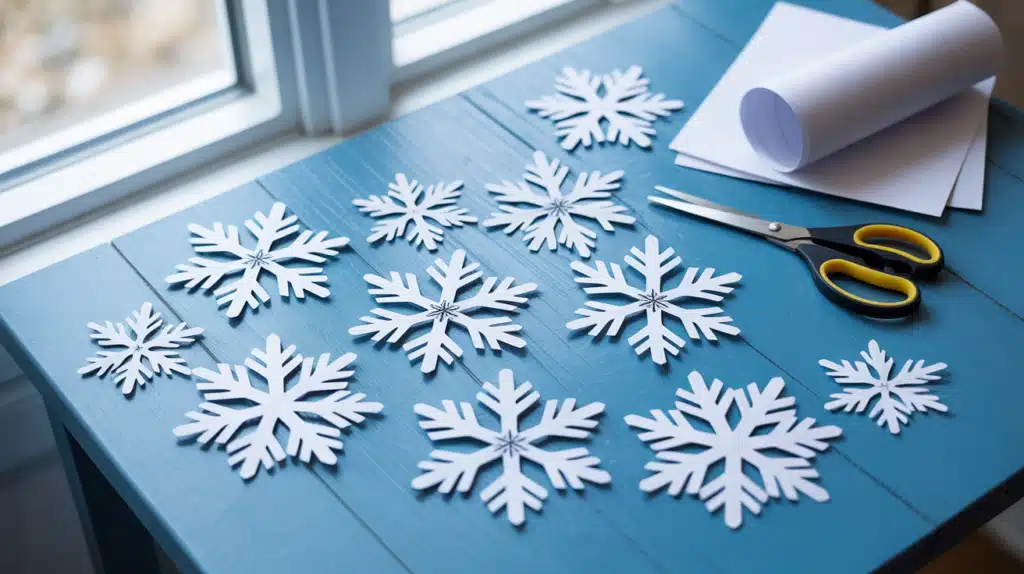
But what if you could fill your home with beautiful winter decor using just paper and scissors? DIY snowflakes are the answer. They’re free, fun to make, and completely customizable.
No two snowflakes look the same, just like the real ones outside. In this guide, you’ll learn different ways to create paper snowflakes, from simple six-pointed classics to fancy 3D designs.
We’ll cover the materials you need, step-by-step cutting techniques, and creative display ideas that’ll convert any room into a winter wonderland.
Why DIY Snowflakes Are Perfect for Winter Decor?
Paper snowflakes never go out of style. They’re cheap, easy to make, and work in any room of your house. You can hang them on windows, walls, or even from the ceiling.
You control how they look. Cut them big or small, simple or detailed, it’s up to you. These snowflakes aren’t just for Christmas either.
Use them for winter birthdays, New Year’s parties, or just to brighten up a cold January day. With just paper and scissors, you can change your space without spending much money.
They bring that cozy winter feeling indoors while letting your creativity shine through.
What You’ll Need: Materials for Your Paper Snowflakes
You don’t need much to start making DIY snowflakes. Here’s everything you’ll need, plus a few optional extras for special effects.
| Material | Purpose | Tips |
|---|---|---|
| White paper | Base for cutting | Printer paper works best. Thin and easy to fold. |
| Scissors | Cutting designs | Sharp scissors give cleaner cuts. Small ones help with details. |
| Pencil | Drawing guidelines | Use light marks that won’t show later. |
| Colored paper (optional) | Adding variety | Blue, silver, or pastels look great for winter themes. |
| Glitter (optional) | Sparkle effect | Apply glue first, then sprinkle. Shake off the extra. |
| String (optional) | Hanging snowflakes | Clear fishing line or white thread works well. |
Paper Selection: Thin paper folds more easily and cuts smoothly. Thick paper holds shape better, but is harder to cut through layers. Standard printer paper is perfect for most DIY snowflakes.
Step-by-Step Tutorials: 11 Unique DIY Snowflakes to Try
Ready to make your own paper snowflakes? These tutorials range from simple to advanced. Pick one that matches your skill level and start creating.
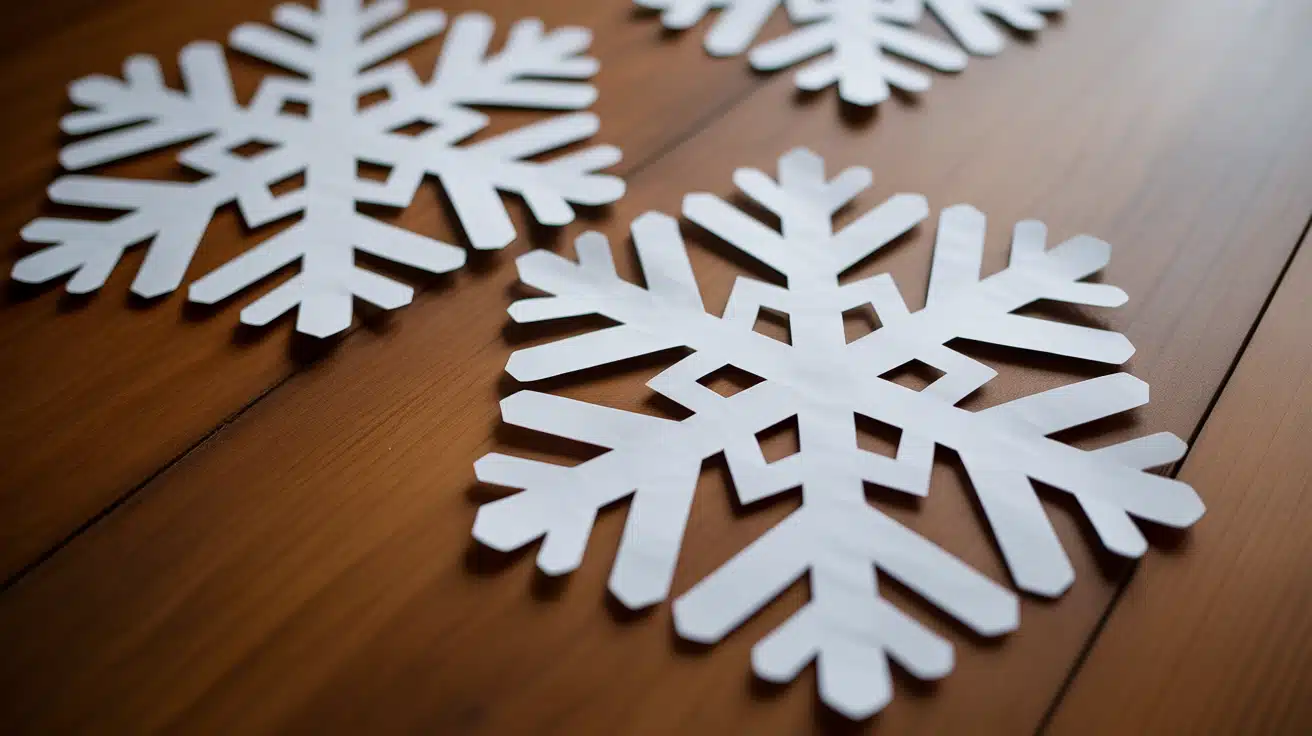
1. Classic 6-Sided Paper Snowflake
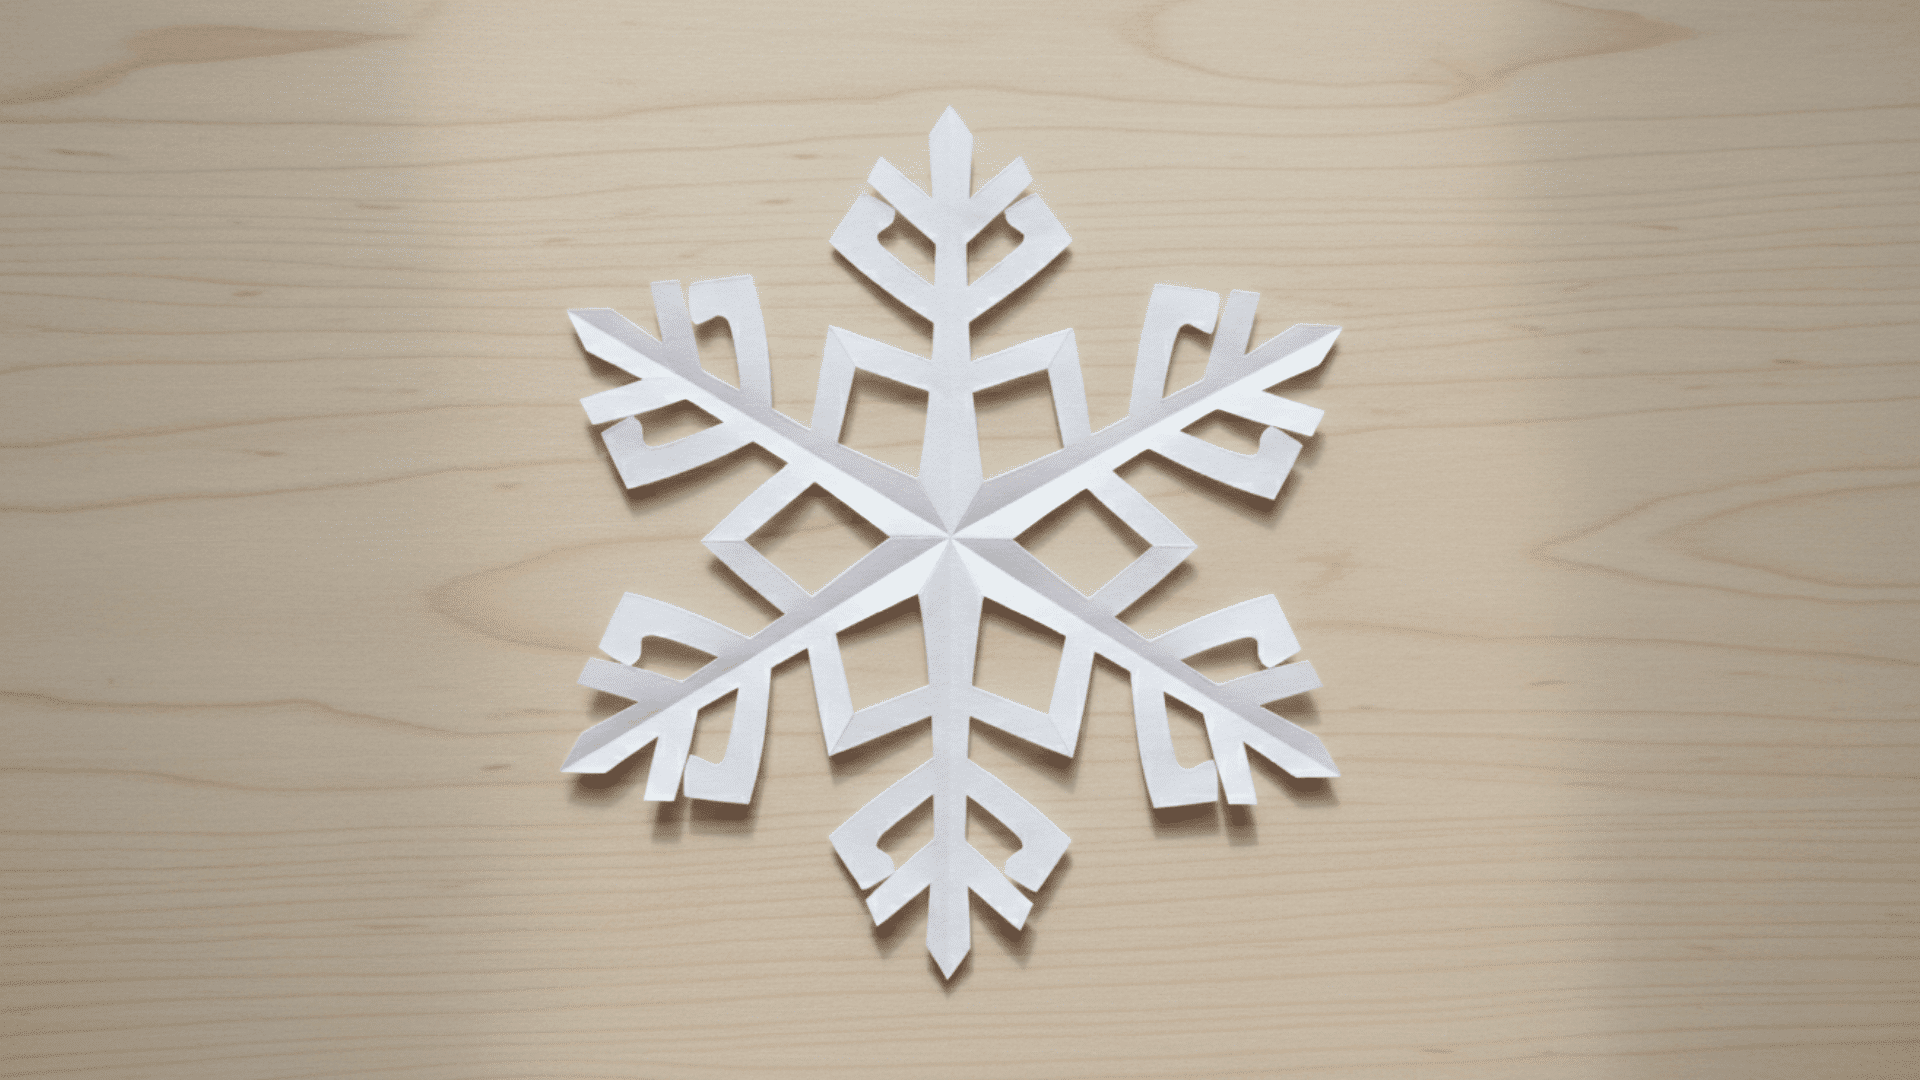
The traditional snowflake design is perfect for beginners. This method creates the six-pointed pattern you see in nature.
Steps:
- Start with a square – Cut your paper into a perfect square (8.5 x 8.5 inches works well).
- Fold diagonally – Bring one corner to the opposite corner to form a triangle.
- Fold in half again – Take the triangle and fold it once more to make a smaller triangle.
- Create three sections – Fold the triangle into thirds (this takes practice; aim for three equal parts).
- Trim the bottom – Cut straight across the bottom to remove excess paper.
- Cut your design – Snip triangles, curves, and shapes along the folded edges.
- Unfold carefully – Open your snowflake slowly to avoid tears.
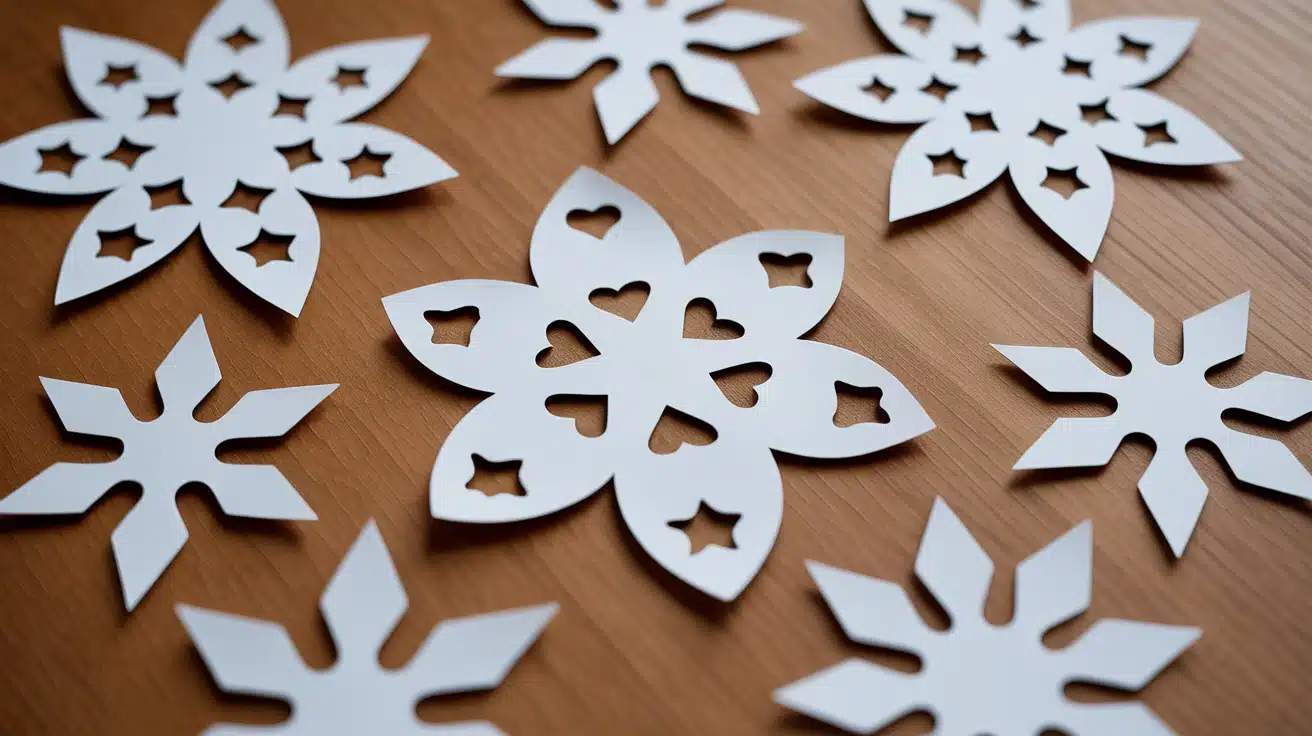
2. Intricate Snowflakes

Detailed snowflakes require more cuts and patience. The result is a lacy, complex pattern that looks professional.
Steps:
- Follow the classic fold – Use the same folding method as the basic 6-sided snowflake.
- Draw your design first – Sketch small shapes with a pencil before cutting.
- Make tiny cuts – Use the tip of your scissors for small triangles and diamonds.
- Add curves – Cut gentle curves between the angular shapes for contrast.
- Layer your patterns – Alternate between large cuts near the edge and small cuts toward the center.
- Cut notches – Small V-shaped notches add texture without removing too much paper.
- Test unfold – Peek inside one fold to check your progress before finishing.
3. Giant Paper Snowflakes for Decorating
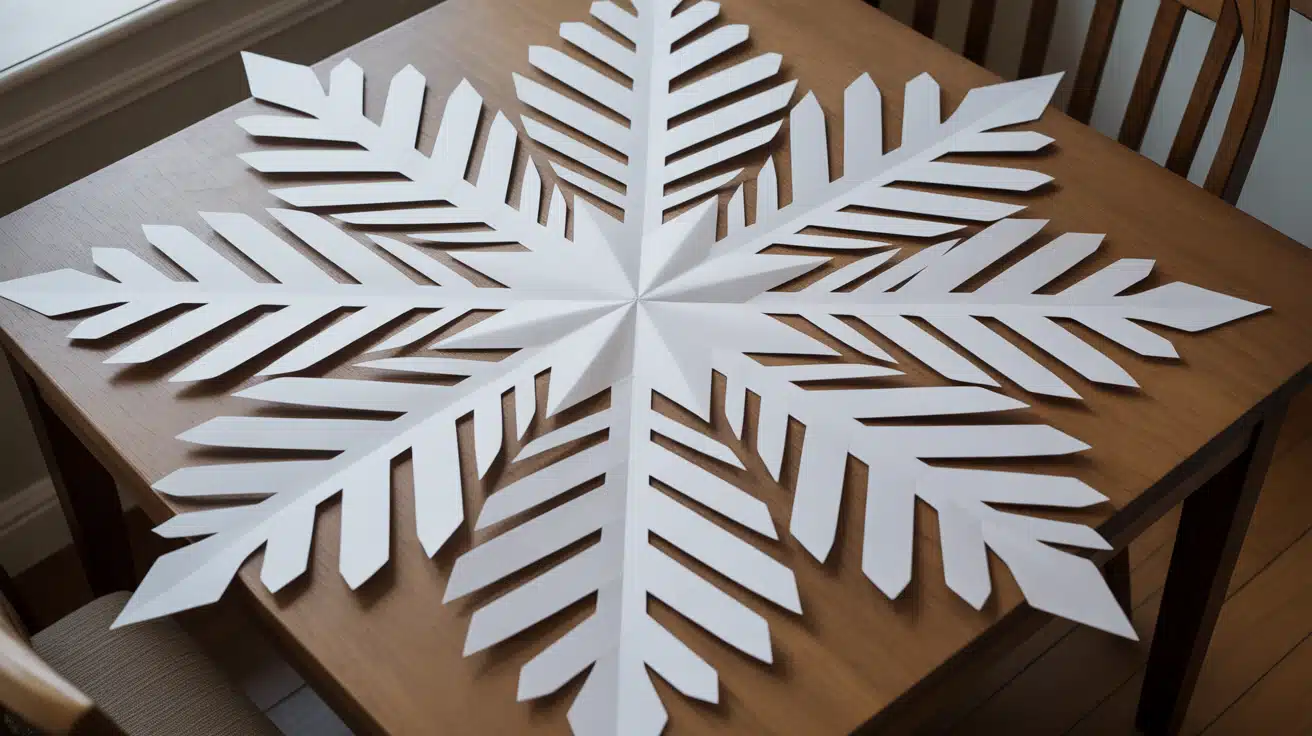
Big snowflakes make a bold statement on walls and windows. They’re easier than you think to create.
Steps:
- Use larger paper – Start with 12 x 12 inch or bigger paper (poster board works great).
- Fold as usual – Follow the same folding technique as smaller snowflakes.
- Draw your design – Sketch with a pencil since mistakes are harder to hide at this size.
- Cut with strong scissors – Thicker paper needs sharp, sturdy scissors or craft knives.
- Make bold cuts – Larger snowflakes need bigger cut-outs to show patterns from far away.
- Flatten before displaying – Press under books overnight to remove fold creases.
- Hang securely – Use double-sided tape or clear adhesive hooks for heavier snowflakes.
4. Colored Paper Snowflakes
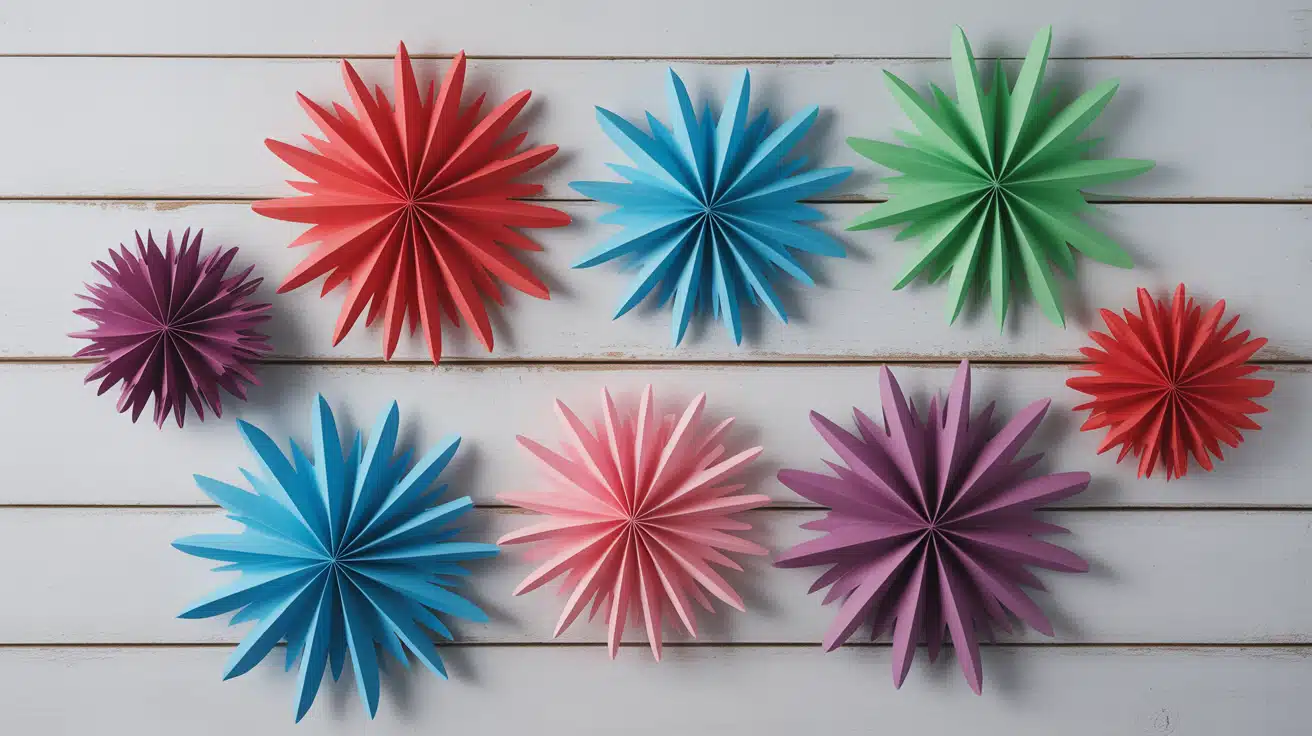
Colored paper brings personality to your winter decor. Mix and match colors for different moods and holidays.
Steps:
- Choose your color scheme – Pick 2-3 colors that work well together.
- Cut colored squares – Prepare squares from each color of paper.
- Fold and cut – Create snowflakes using the classic method with each color.
- Mix sizes – Make some large, some small for visual interest.
- Layer colors – Glue a small colored snowflake on top of a larger white one.
- Create ombre effects – Use different shades of the same color together.
- Display together – Group colors by theme or scatter randomly.
5. Double-Sided Snowflakes
These snowflakes look good from every angle. They’re perfect for hanging in windows or from the ceiling.
Steps:
- Make two identical snowflakes – Cut two using the same pattern and size.
- Check for symmetry – Both should match as closely as possible.
- Add string first – Place a piece of thread between the two snowflakes at the top.
- Apply glue – Put glue on the back of one snowflake, avoiding the very center.
- Press together – Sandwich the string between both snowflakes and press firmly.
- Weight it down – Place under a book for 10 minutes to set.
- Hang and enjoy – Your snowflake now looks complete from both sides.
6. Snowflakes with Glitter

Glitter makes snowflakes catch the light beautifully. A little sparkle goes a long way.
Steps:
- Cut your snowflake – Complete a basic or detailed snowflake first.
- Choose glitter type – Fine glitter looks more natural; chunky glitter makes a bold statement.
- Apply glue strategically – Use a glue stick or brush-on glue on specific areas only.
- Sprinkle glitter – Hold the snowflake over the newspaper and shake glitter on the glued areas.
- Tap off excess – Gently tap the snowflake to remove loose glitter.
- Let dry completely – Wait 20-30 minutes before handling.
- Seal it (optional) – Light hairspray keeps glitter from shedding.
7. Paper Snowflakes with Decorative Borders
Borders add a finished look to your snowflakes. They frame the inner design nicely.
Steps:
- Plan your border – Decide on scallops, zigzags, or points before cutting.
- Fold paper as usual – Use the standard 6-fold method.
- Cut the outer edge – Shape the border first with curves or points.
- Add inner cuts – Now cut your regular snowflake pattern inside the border.
- Keep border thick – Don’t cut too close to the edge, or it will look weak.
- Make it consistent – Repeat the same border pattern on multiple snowflakes.
- Unfold gently – Borders can be delicate, so open slowly.
8. Snowflakes with Punches
Craft punches create uniform shapes every time. They’re great for adding consistent details.
Steps:
- Fold your snowflake – Complete all folds before using punches.
- Choose small punches – Mini heart, star, or circle punches work best.
- Punch through all layers – Insert the folded edge into the punch and press firmly.
- Vary placement – Punch holes at different distances from the center.
- Mix punch shapes – Use 2-3 different punch designs in one snowflake.
- Add scissor cuts – Combine punched holes with traditional cuts for variety.
- Unfold to reveal – The punched shapes create repeated patterns.
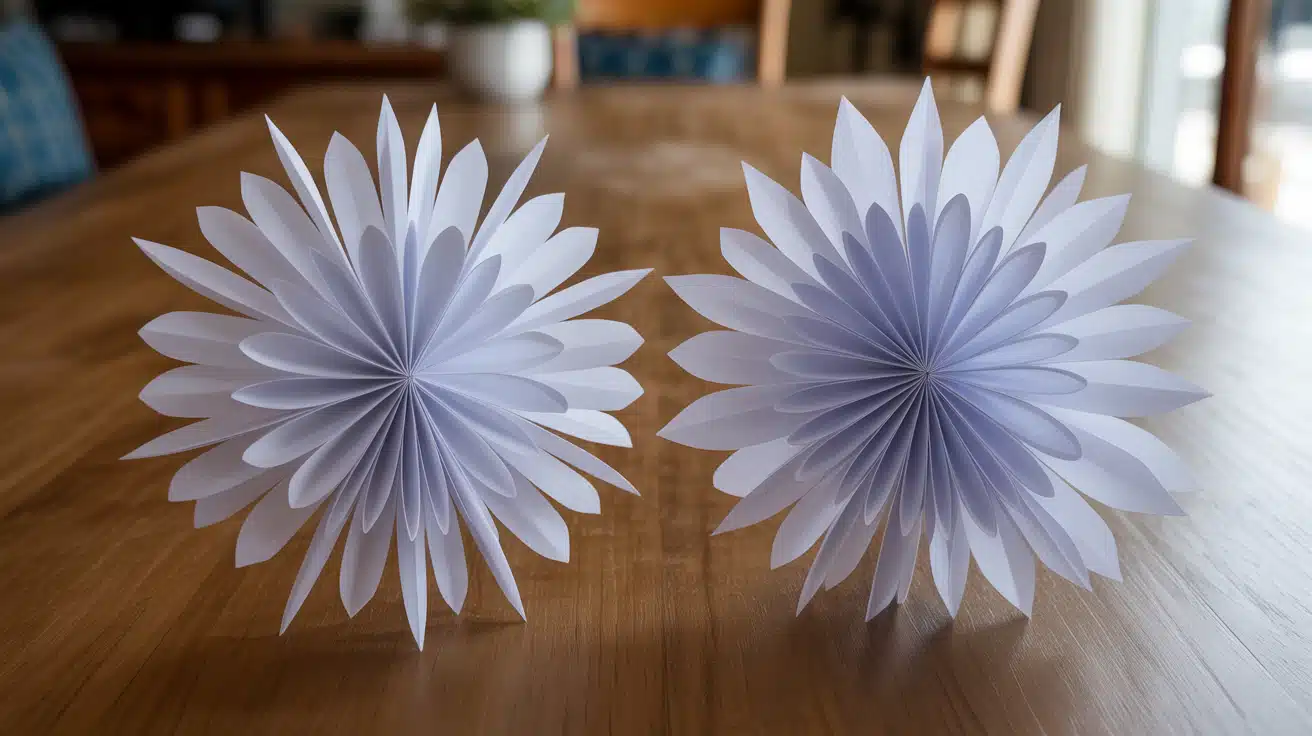
9. 3D Paper Snowflakes
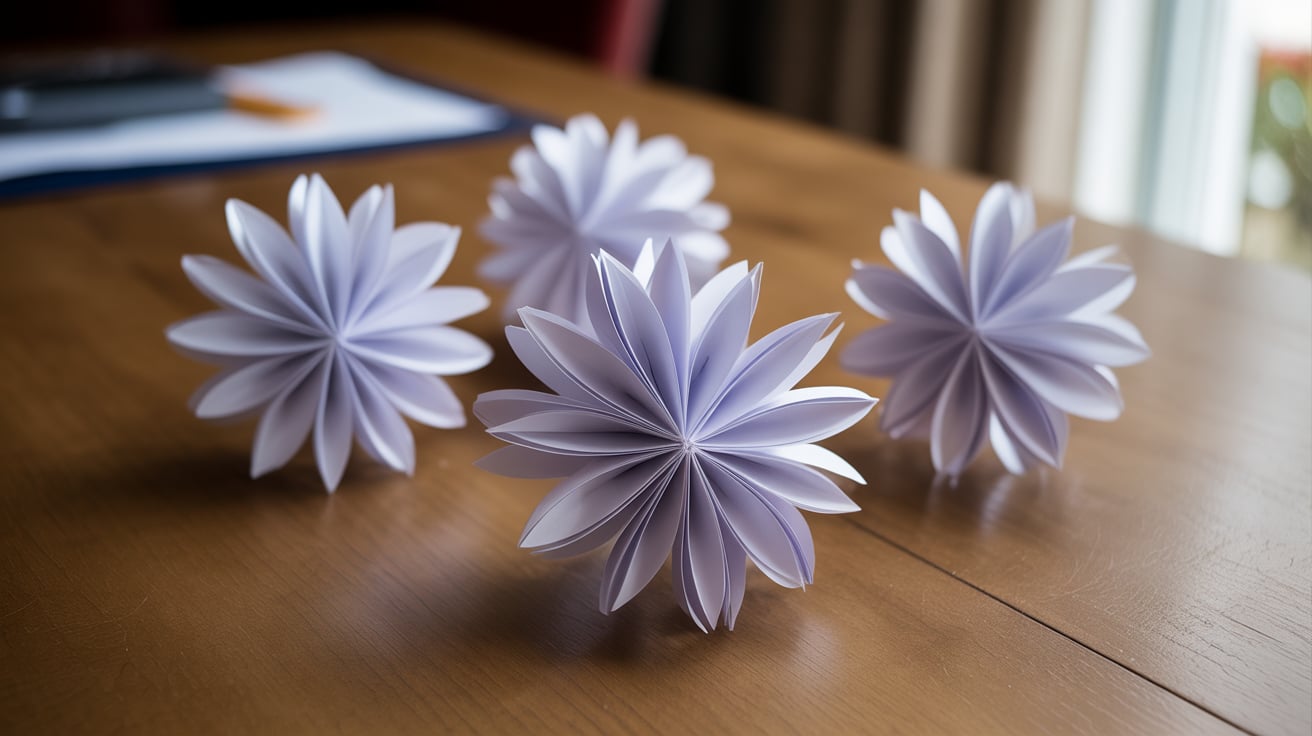
Three-dimensional snowflakes stand out from flat designs. They add a real wow factor to your decor.
Steps:
- Cut six identical snowflakes – Use the same pattern for all six pieces.
- Fold each in half – Create a crease down the center of each snowflake.
- Apply glue to one side – Put glue on half of one snowflake.
- Attach the next piece – Press the half of another snowflake onto the glued section.
- Continue around – Glue all six pieces together, alternating sides.
- Form a sphere – The last piece connects back to the first, creating a 3D shape.
- Add hanging string – Attach thread to the top before the glue fully dries.
10. Snowflakes for Kids
This simplified version helps children create their own DIY snowflakes. The focus is on fun, not perfection.
Steps:
- Use regular printer paper – It’s thin and easy for small hands to cut.
- Fold in half twice – Make two simple folds to create a small triangle.
- Draw lines – Let kids draw their own cutting lines with markers.
- Make big cuts – Encourage larger shapes that are easier to cut.
- Cut together – Adults can help guide scissors for safety.
- Unfold and celebrate – Every snowflake is unique and special.
- Display proudly – Tape to windows or create a snowflake gallery wall.
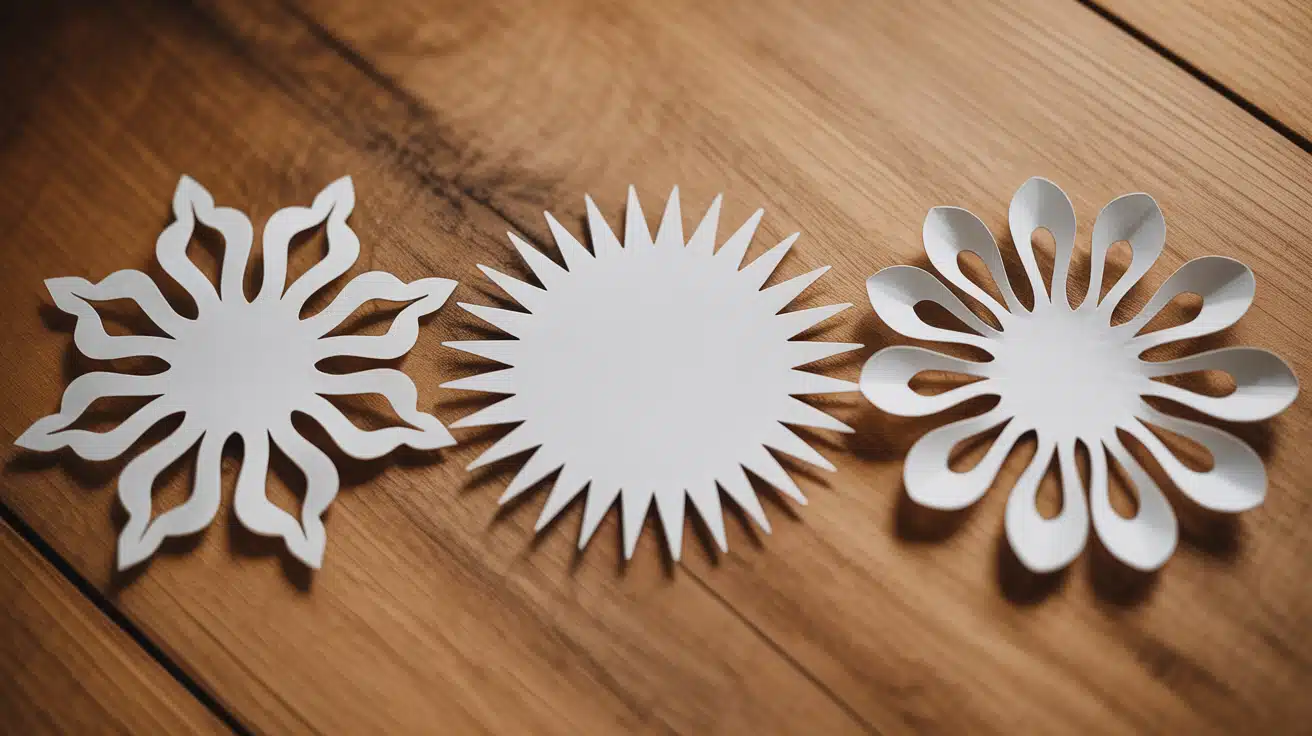
11. Snowflakes with Unique Shapes
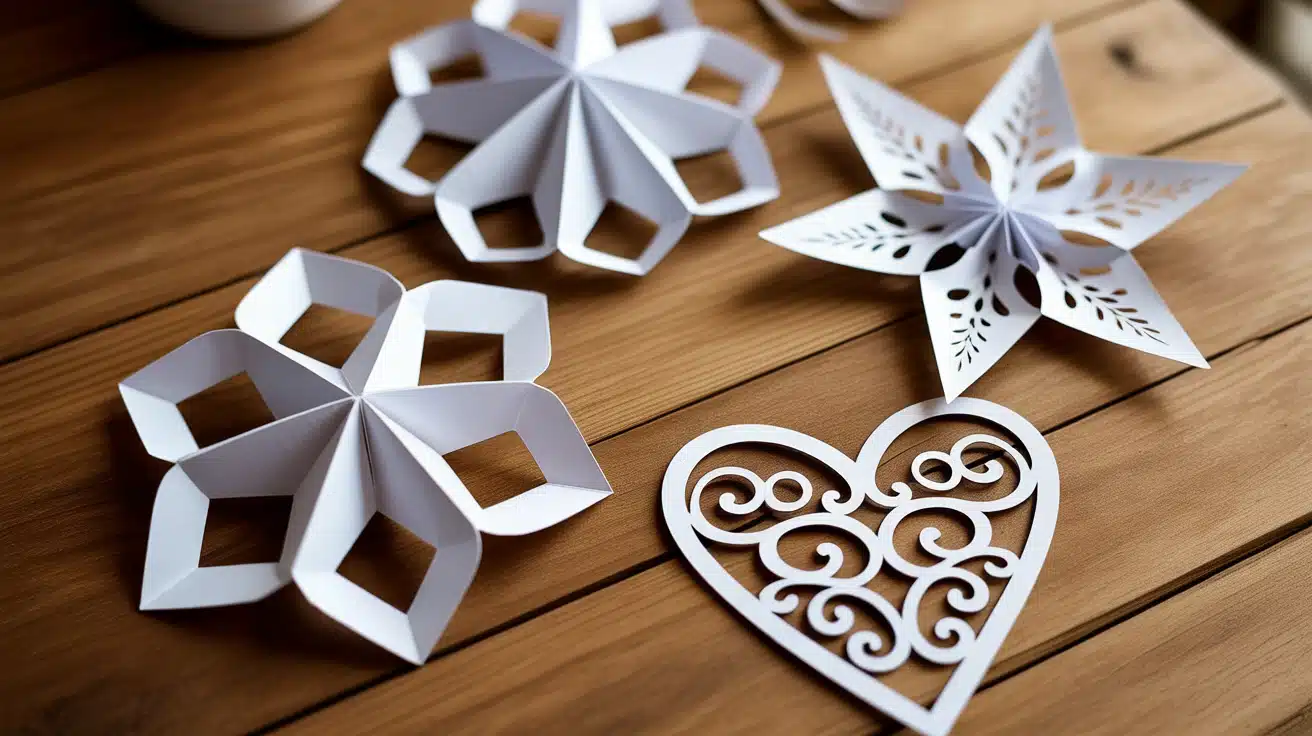
Not all snowflakes need six sides. Experiment with different shapes for creative results.
Steps:
- Choose your shape – Decide on an octagon, a star, or a heart before starting.
- Fold differently – Hearts need one fold, octagons need four equal sections.
- Sketch your outline – Draw the base shape before cutting details.
- Cut the outer shape – Form your octagon, star, or heart edge first.
- Add interior cuts – Cut patterns inside just like regular snowflakes.
- Keep it balanced – Symmetry still matters, even with unusual shapes.
- Display mixed shapes – Combine traditional and unique shapes together.
Tips and Tricks for Perfect Snowflakes
Want your DIY snowflakes to look professional? These simple tips will help you avoid mistakes and create beautiful results every time.
- Use Sharp Scissors: Dull blades crush paper instead of cutting cleanly, which creates jagged edges and makes your DIY snowflakes look messy.
- Fold Paper Tightly: Loose folds shift while you cut, causing uneven patterns. Press each fold firmly with your fingernail or a ruler edge.
- Experiment with Different Paper Types: Try tissue paper for delicate snowflakes, cardstock for sturdy ones, or wax paper for translucent window decorations.
- Cut Away from Folds: Never cut along the main fold lines, or your snowflake will fall apart into separate pieces instead of staying connected.
- Start Simple, Then Add Detail: Make a few basic cuts first, unfold to check your pattern, then refold and add more intricate designs if needed.
How to Display Your DIY Snowflakes?
Once you’ve made your snowflakes, it’s time to show them off. Tape them to windows where sunlight makes them glow.
Hang them from the ceiling at different heights using clear fishing line for a floating effect. Create a garland by stringing multiple snowflakes together with thread or ribbon, and drape it across mantels, doorways, or along walls.
Group several snowflakes of different sizes on one wall to form a winter gallery. You can also attach them to gift boxes, greeting cards, or use them as placemats for holiday dinners.
For a full winter theme, combine your snowflakes with fairy lights, white fabric, and silver ornaments.
The key is layering, mixing large and small snowflakes, varying the heights, and don’t be afraid to cover entire windows or walls. Your handmade DIY snowflakes deserve to be the star of your winter decor.
Final Thoughts
You now have eleven different techniques to create stunning DIY snowflakes. Start with the basic six-sided design if you’re new to this.
Once you feel comfortable, try the 3D versions or add glitter for extra sparkle. The best part? You probably have everything you need at home right now.
Grab some paper and scissors, then spend an afternoon crafting. Your windows, walls, and ceilings will thank you. These handmade decorations cost nothing but bring so much charm to your space.
Ready to get started? Pick your favorite style from this guide and make your first snowflake today. Share your creations with us in the comments below!