Ever wonder why tulips are among the most beloved flowers to sketch? These graceful blooms have long attracted artists with their simplicity.
The beauty of easy tulip drawing lies in its forgiving nature; those slightly imperfect petals and gentle curves actually make your artwork look more natural and genuine.
With just a few basic shapes and some simple techniques, anyone can create stunning tulip illustrations that capture the essence of these springtime favorites.
Ready to find out how surprisingly accessible flower drawing can be?
What You Need to Know Before You Begin
Tulips stand out as the ideal flower for novice artists because of their naturally smooth curves and balanced proportions.
Unlike complex blooms with intricate details, tulips feature a straightforward cup-like shape that’s surprisingly forgiving when sketched.
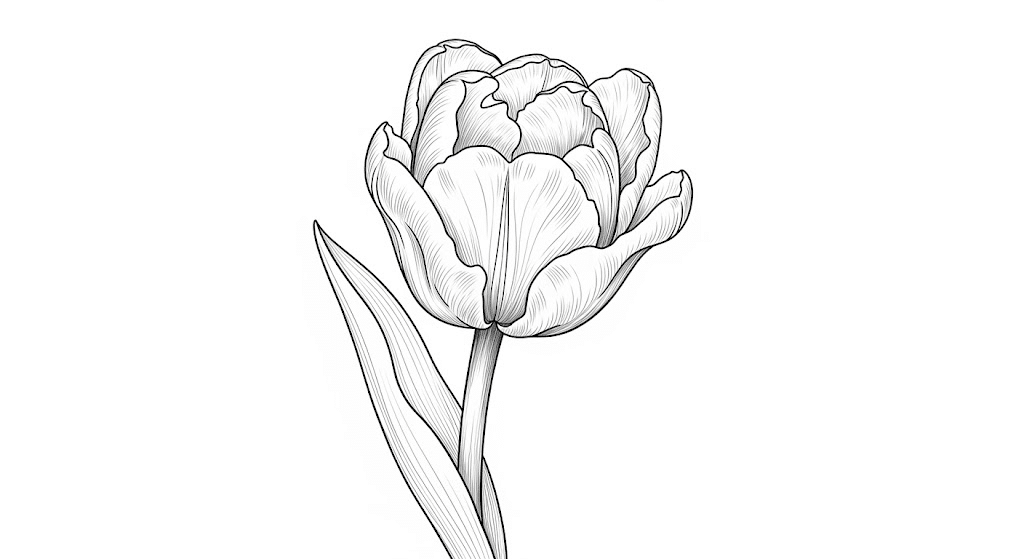
When visualizing the final sketch, artists should picture three main components: a simple straight stem, several overlapping petals forming a gentle cup shape, and optional leaves.
The beauty lies in embracing imperfections. Real tulips have natural irregularities that make hand-drawn versions look more organic and charming than rigid, perfect renditions. ‘
For details on learning how to make an easy tulip drawing using watercolors, check out our blog: Nail a Watercolor Tulip as A Total Beginner.
Materials Required for Tulip Sketch
|
Basic Art Tools |
Optional Enhancements |
|
Pencils |
Colored pencils |
|
Erasers |
Watercolor paints |
|
Fine liners |
Brushes |
|
Paper |
Fixative spray |
|
Blending stump |
Blending tools |
Easy Tulip Drawing Instructions
Learn how to create a beautiful tulip drawing with these easy, step-by-step instructions.
This beginner-friendly guide breaks the process into simple stages, helping you build confidence and achieve natural, graceful results with every sketch
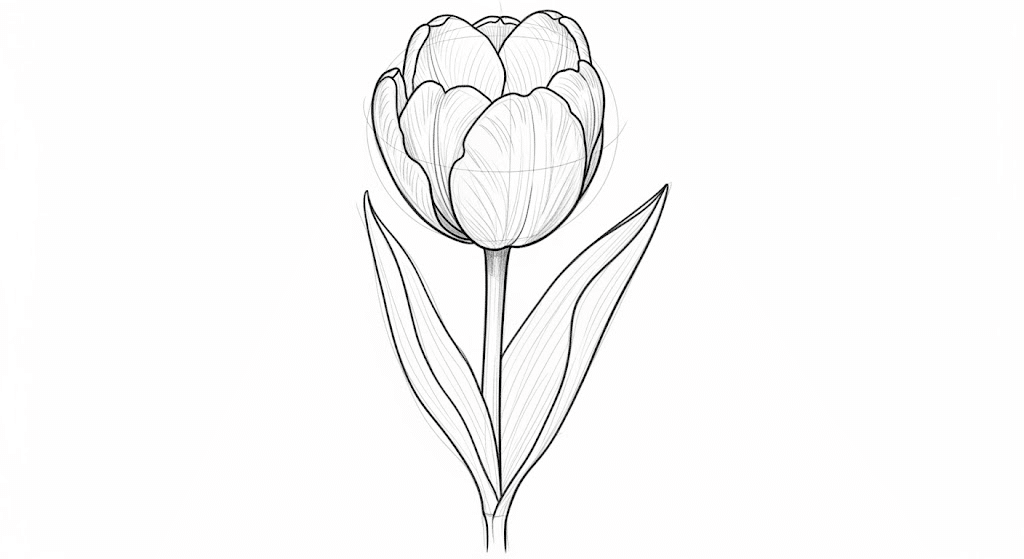
Step 1: Start with the Stem and Guideline
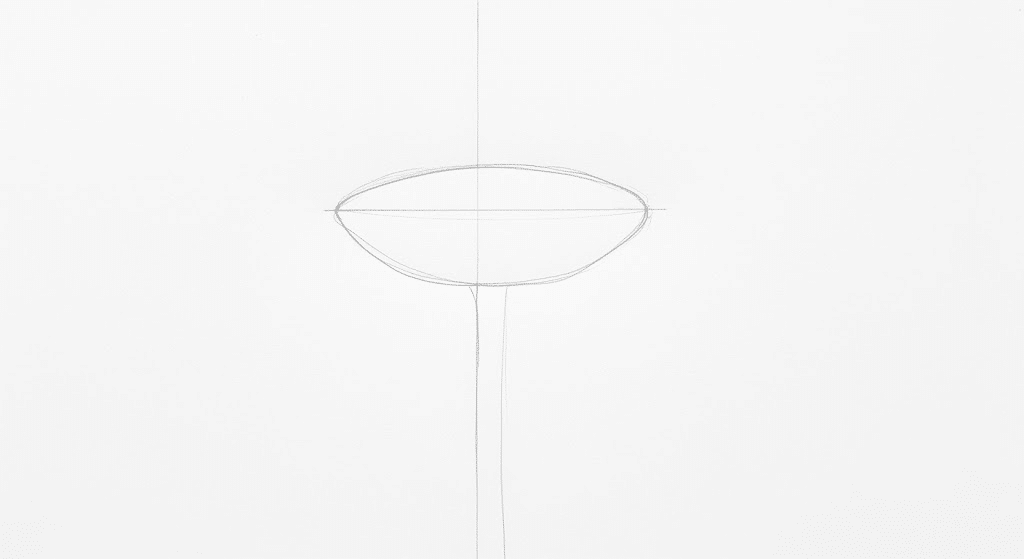
Artists begin by drawing a light, straight vertical line that serves as the tulip’s backbone. This simple guideline helps maintain proper proportions and ensures the flower stays centered.
The stem should be roughly twice the height of the planned flower head for balanced composition.
Step 2: Sketch the Petal Outline
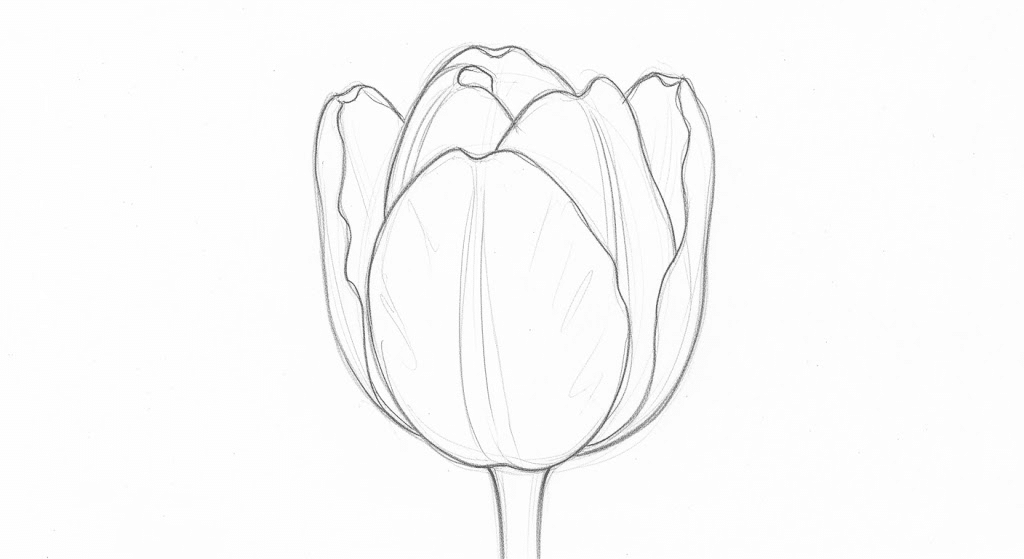
Next, sketchers create a teardrop or oval shape at the top of the stem for the first petal. They then add two to three overlapping petals on either side, making each slightly different in size and angle to create natural depth and dimension within the bloom.
Step 3: Add the Leaves
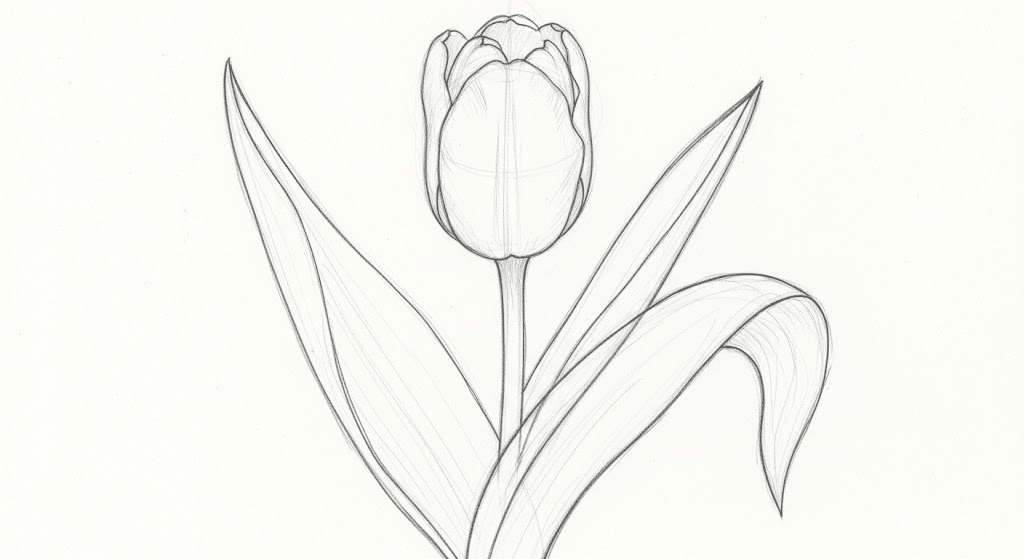
Long, curved leaf shapes emerge from the base of the stem, typically two per tulip. These leaves should flow gracefully outward, creating visual balance.
Artists vary the leaf lengths and curves to add movement and prevent the drawing from appearing too rigid or static.
Step 4: Refine Petals and Leaf Details
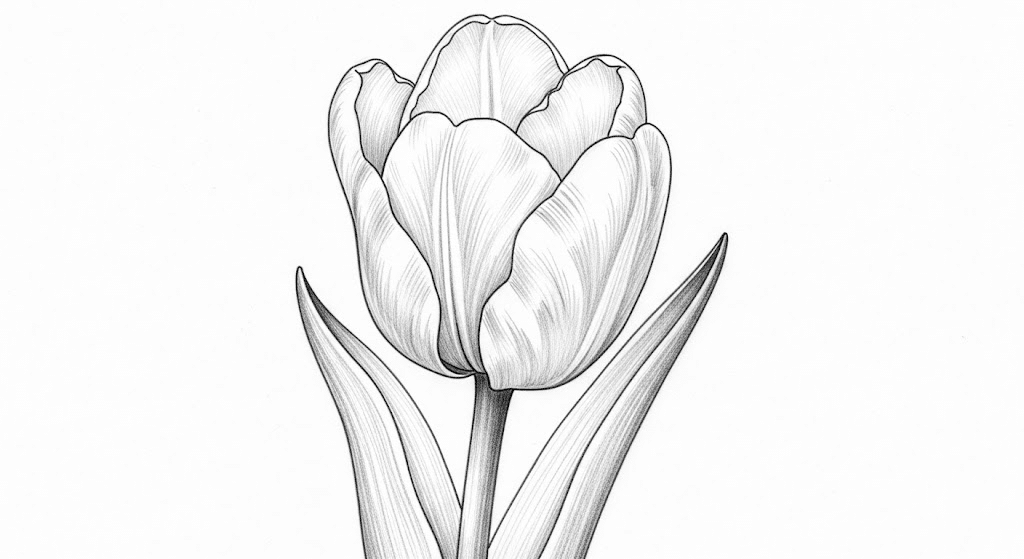
Gentle curved lines are added within each petal to suggest natural texture and form. Light shading where petals overlap creates depth, while subtle veining in leaves adds realism.
The focus remains on maintaining the flower’s overall symmetry and graceful flow throughout these refinements.
Step 5: Final Touches
All construction guidelines are carefully erased, leaving only the finished tulip outline.
Artists can then choose to ink the drawing with fine-tip pens for definition, add watercolor washes, or leave it as a clean pencil sketch, depending on their preferred style and medium.
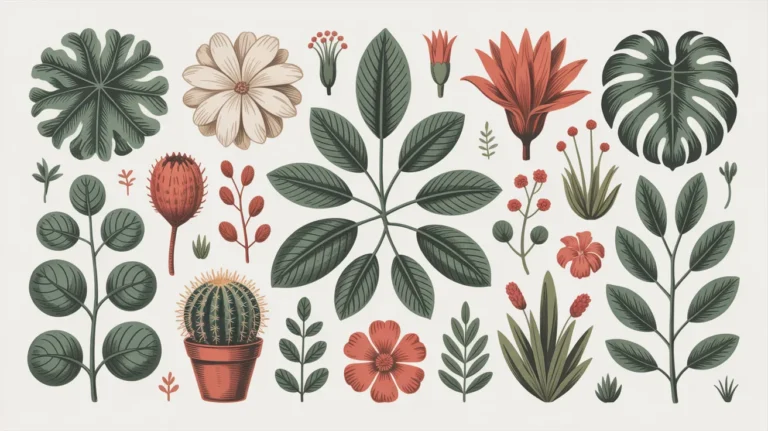
Inspiring Easy Tulip Drawing Ideas
From arranging bouquets and experimenting with backgrounds to playing with color, perspective, and still life compositions, these approaches inspire creativity and bring fresh energy to your tulip artwork
1. Draw a Tulip Bouquet
2. Find Colored Tulip Varieties
3. Create Tulip Field Landscapes
4. Design Tulip Still Life Compositions
Tips to Make Your Tulips Stand Out
Refine your tulip drawings by mastering light and shadow, varying petal shapes and angles, and adding subtle textures.
Capture natural imperfections and depict tulips at different bloom stages to create lively, realistic, and visually engaging floral artwork.
- Master light and shadow by picking a clear light direction, highlighting petal edges, and deepening shadows where petals overlap for strong dimension.
- Vary petal angles and positions, bend, tilt, or rotate each petal slightly to avoid stiff, symmetrical arrangements and create a natural look.
- Don’t make all petals identical, change their size and shape, and show petal thickness at the edges for realism.
- Add fine texture lines that follow the curve of each petal, mimicking natural ridges.
- Draw tulips at different bloom stages, from tight buds to fully open flowers, for lively variety.
- Include small imperfections, irregular edges, subtle creases, and gentle curves to capture the authentic character of real tulips.
To Conclude
Drawing tulips opens doors to a world of artistic possibilities that many never thought accessible. Through these simple steps, artists have found how forgiving and rewarding flower sketching can be.
Each petal drawn builds confidence, and every stem sketched strengthens fundamental drawing skills that transfer to countless other subjects.
Regular practice with these techniques turns simple sketches into cherished artwork.
Whether pursuing realistic botanical illustrations or colorful garden scenes, the foundation is now solid. Pick up that pencil again tomorrow and watch artistic abilities continue blooming.