Picture this: a bright orange pumpkin sitting on the kitchen counter suddenly starts bubbling and foaming like a mini volcano. Kids’ eyes light up, and even adults can’t help but smile.
Traditional experiments often require fancy equipment or complicated instructions that leave parents feeling overwhelmed and kids feeling bored.
The pumpkin volcano experiment changes all that. This simple activity uses everyday ingredients that most families already have at home.
This experiment proves the best science lessons happen when learning feels like play.
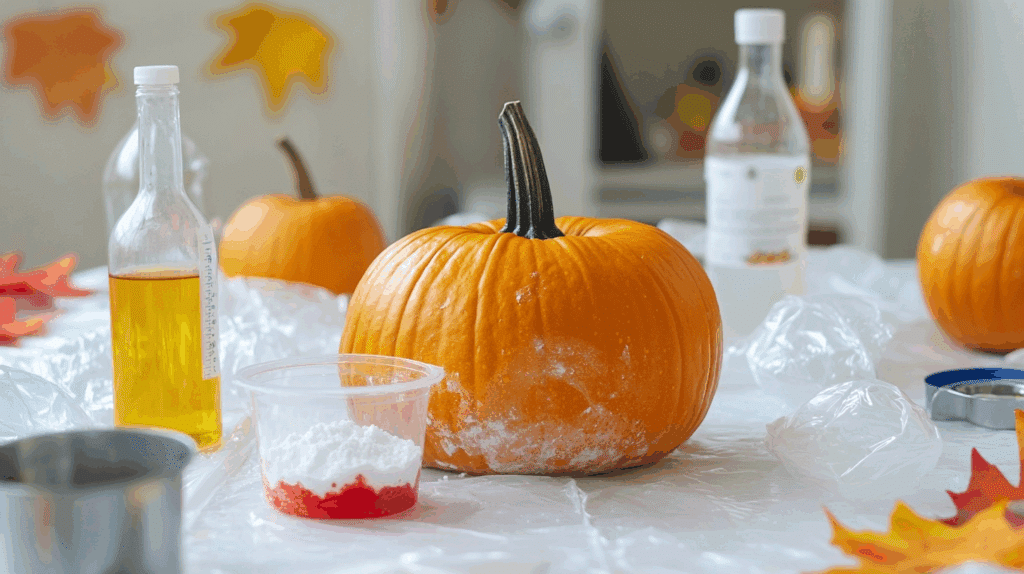
Objective and Item List for the Pumpkin Volcano Experiment
This activity helps young children learn about basic science using safe materials they know.
This hands-on experience builds curiosity and observation skills. Children also practice fine motor skills through measuring, pouring, and mixing. Decorating the pumpkin adds a fun, seasonal touch that keeps kids interested.
The activity works well because it mixes creativity, sensory play, and science learning.
| Item | Purpose |
|---|---|
| Pumpkin | Main container for the reaction; carve a face for foam to ooze through |
| Baking Soda | The base ingredient that reacts with vinegar |
| White Vinegar | Acid that reacts with baking soda to produce carbon dioxide gas |
| Dish Soap | Traps gas to form bubbles and foam |
| Warm Water | Helps dissolve and mix ingredients evenly |
| Food Coloring | Adds color to make the foam more engaging |
| Measuring Tools | Used to measure baking soda, vinegar, water, and soap |
| Mixing Bowl or Cup | For mixing the warm water, food coloring, soap, and baking soda |
| Stir Stick or Spoon | Used to stir the solution until it is smooth |
| Tray or Pan | Placed under the pumpkin to catch any foam overflow |
| Towel or Wipes | For easy and quick cleanup after the activity |
Pumpkin Volcano Instructions for Kids
These simple, step-by-step directions make it easy for children to create their safe pumpkin volcano experiment.
Each instruction uses kid-friendly language with clear actions that young scientists can follow independently or with minimal assistance from an adult.
Step 1: Choose and Prepare Your Pumpkin
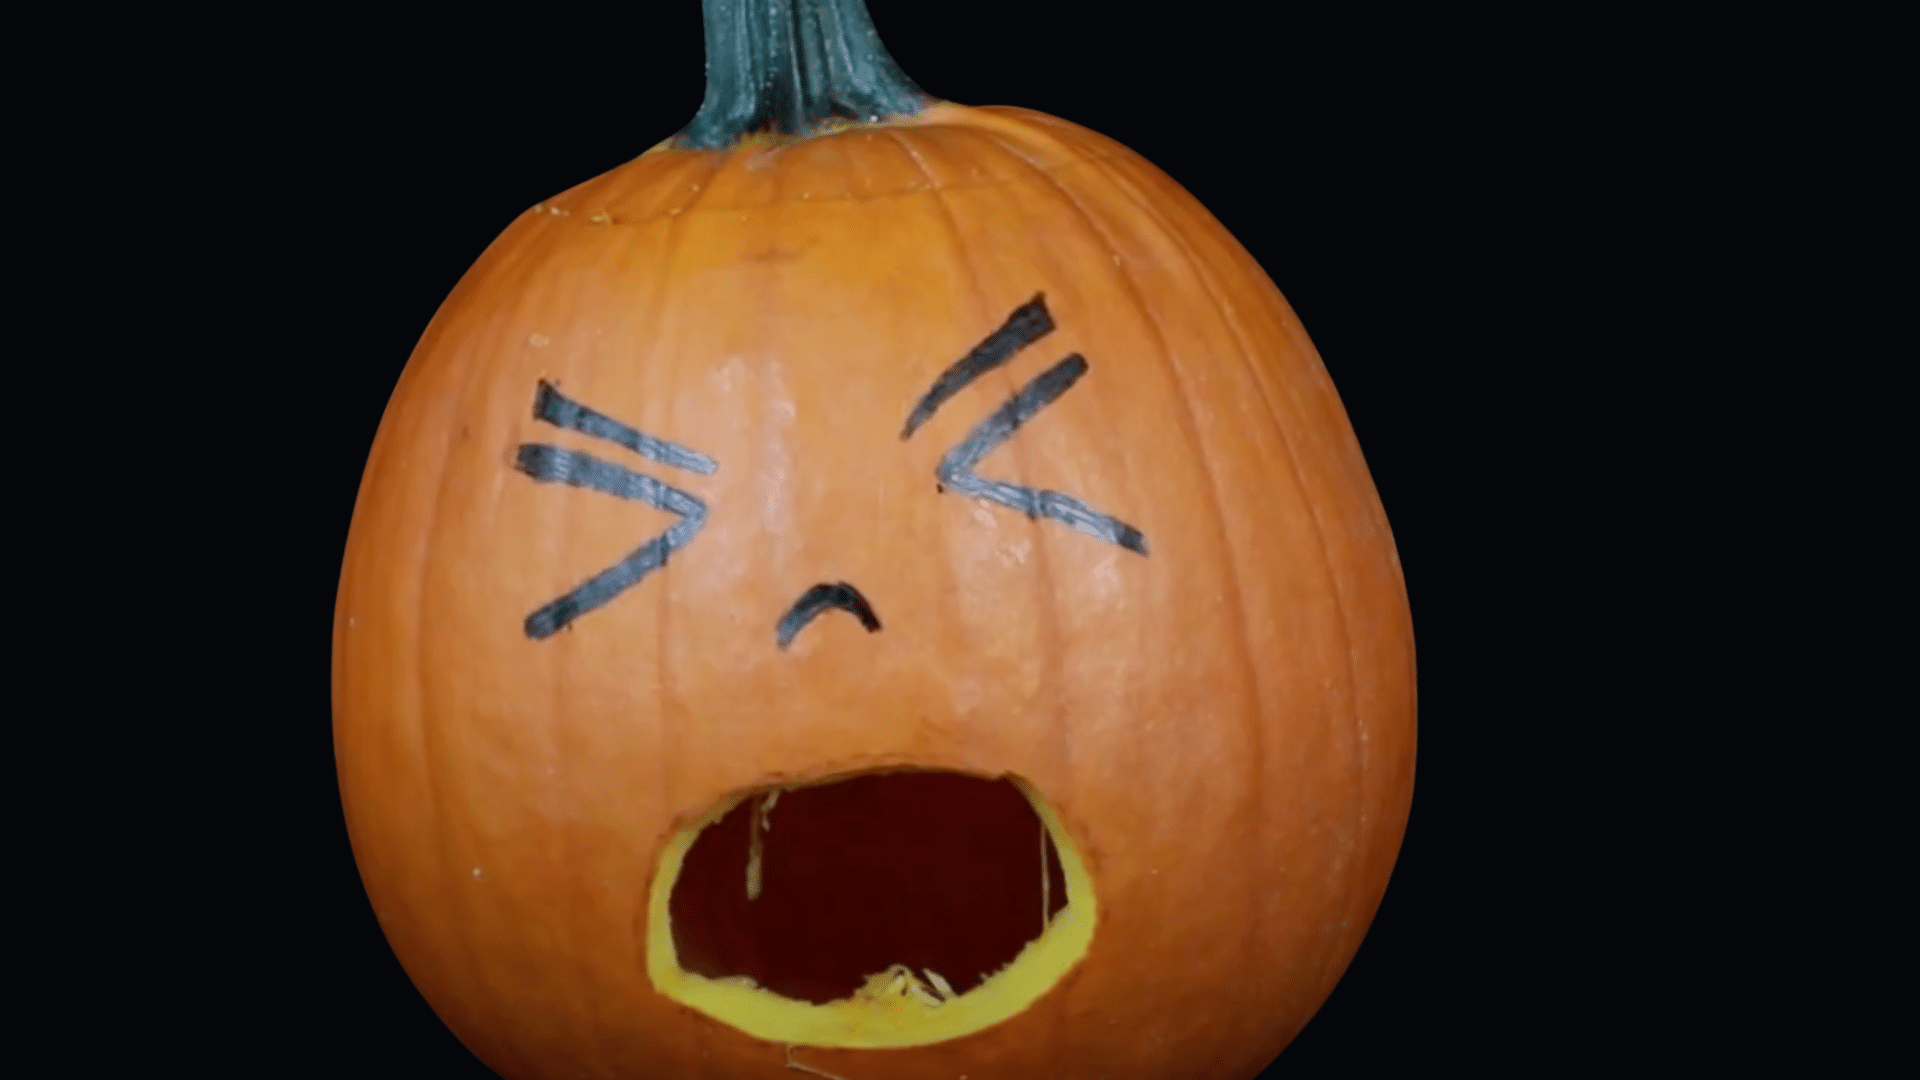
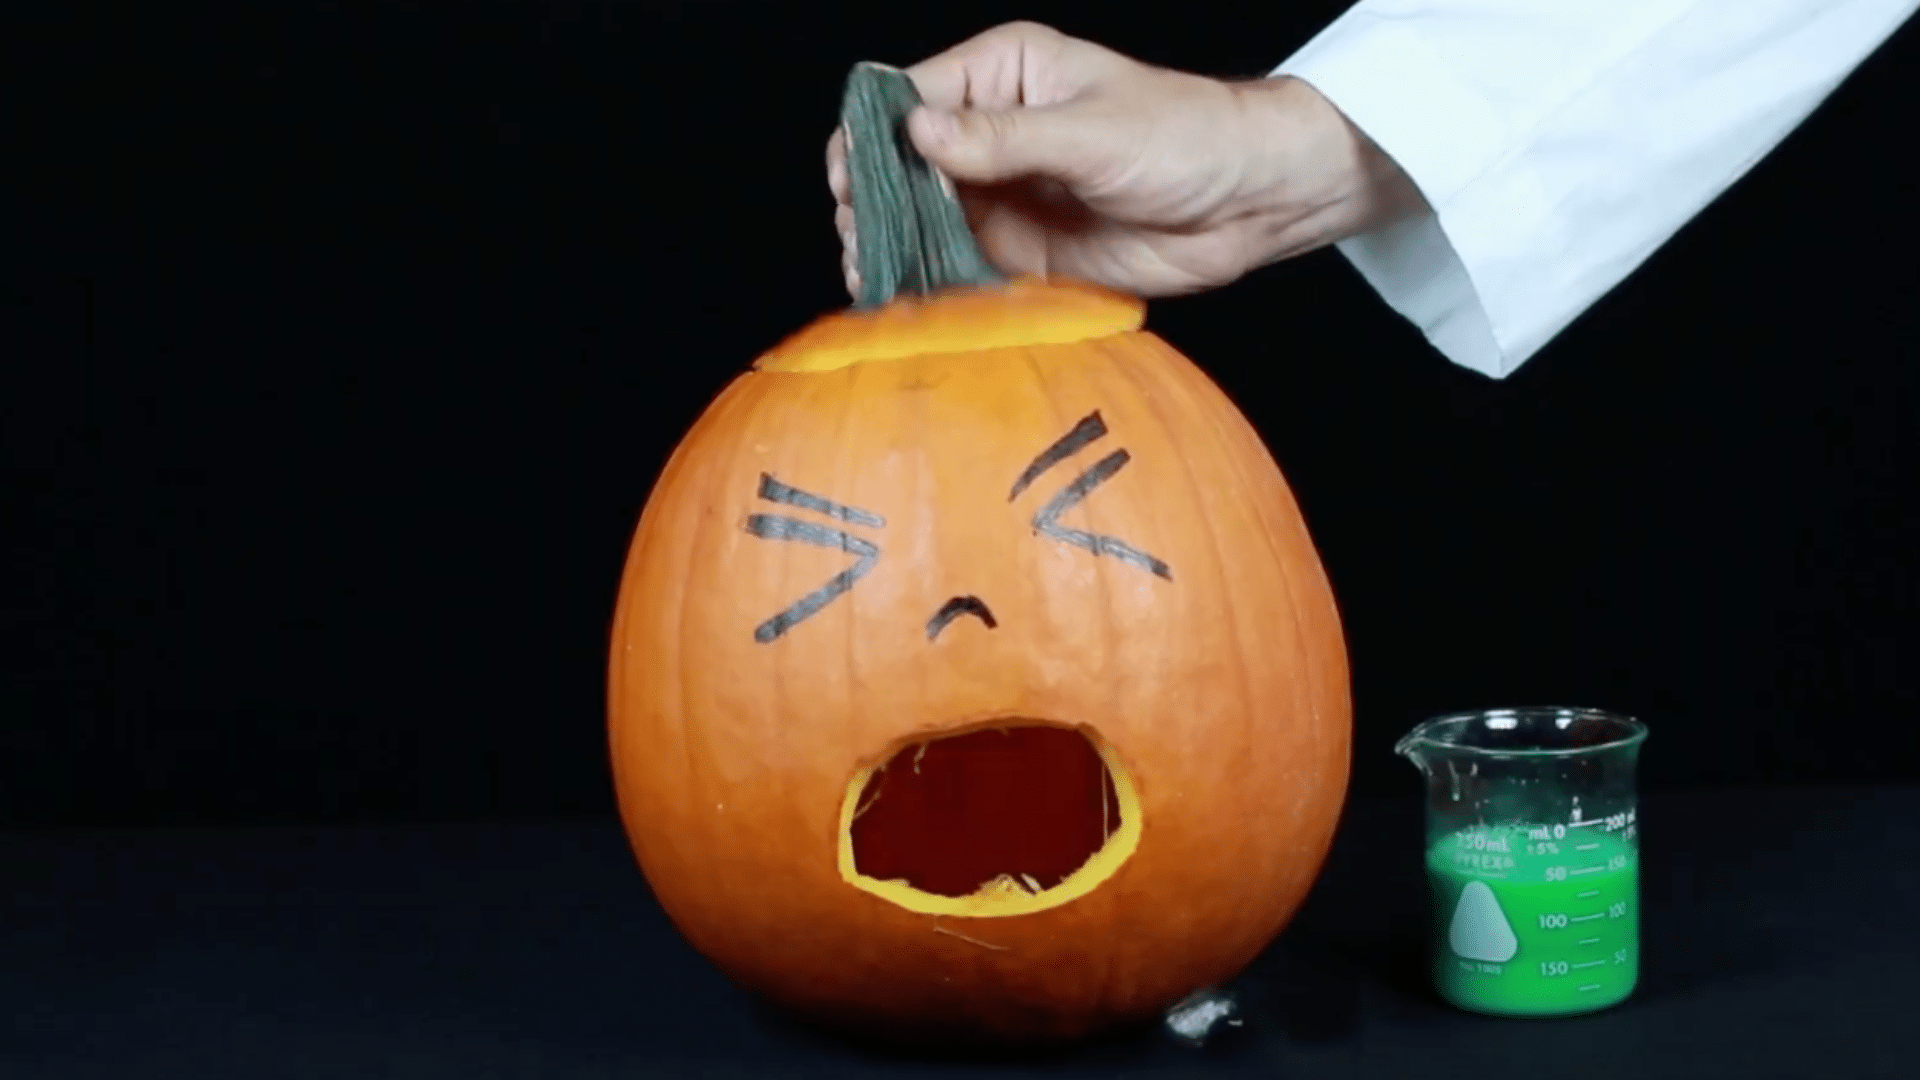
Pick a small to medium pumpkin. Draw a face on it. Try making a silly or sick face, especially one that looks like it’s throwing up (you’ll see why soon).
Use a safe knife (adult help needed) to cut out the face. The ooze will emerge from the lowest part first, so ensure the mouth is positioned near the bottom.
Step 2: Make Your Color Mix
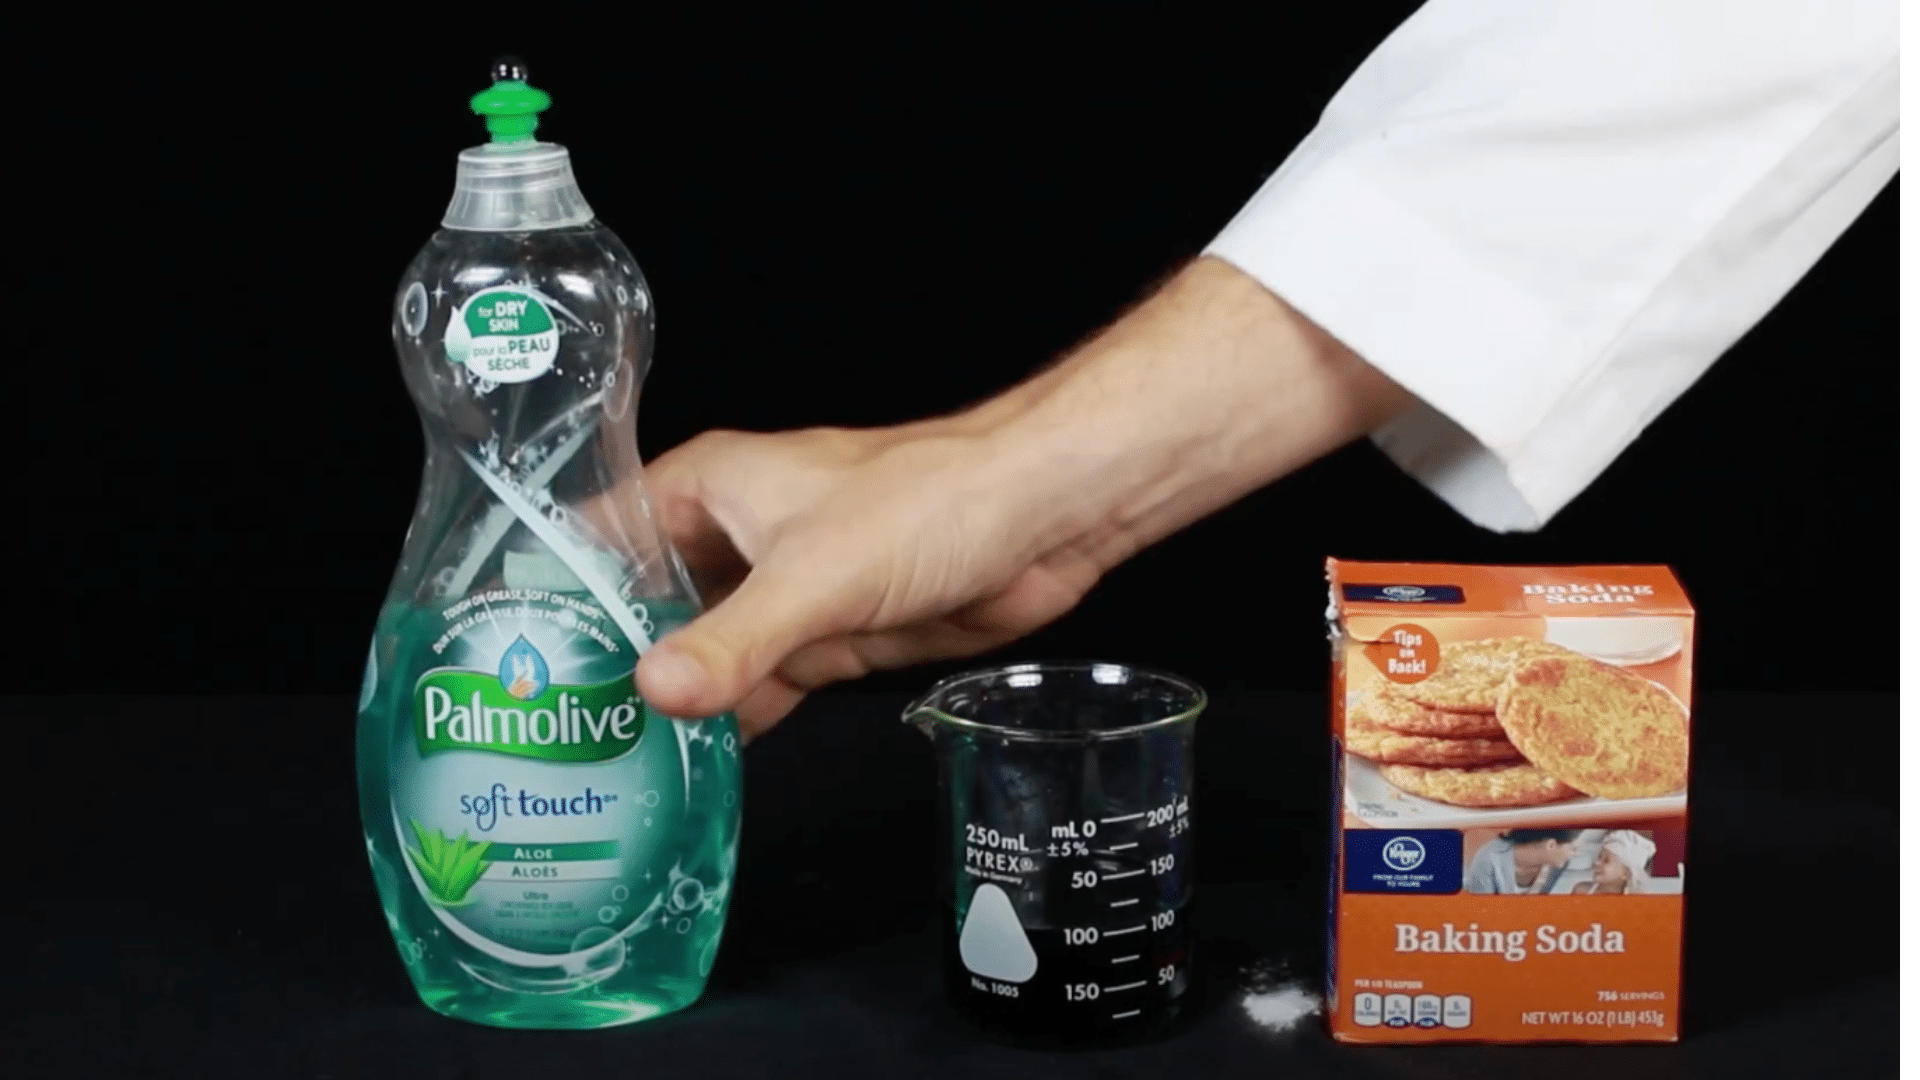
In a cup or bowl, pour 100 mL of warm water. Add 20–30 drops of food coloring (any color you like). Now add 1 tablespoon of dish soap. Add 2 tablespoons of baking soda. Mix it well until it looks smooth and even.
Step 3: Pour the Mix into the Pumpkin
Take your colorful liquid mix and pour it into the bottom of the pumpkin.
This is where the magic of the pumpkin volcano begins. Make sure to pour slowly and steadily so none of the special mixture spills outside the pumpkin walls.
Now your pumpkin volcano is almost ready for the exciting eruption that’s about to happen.
Step 4: Get Ready for the Reaction
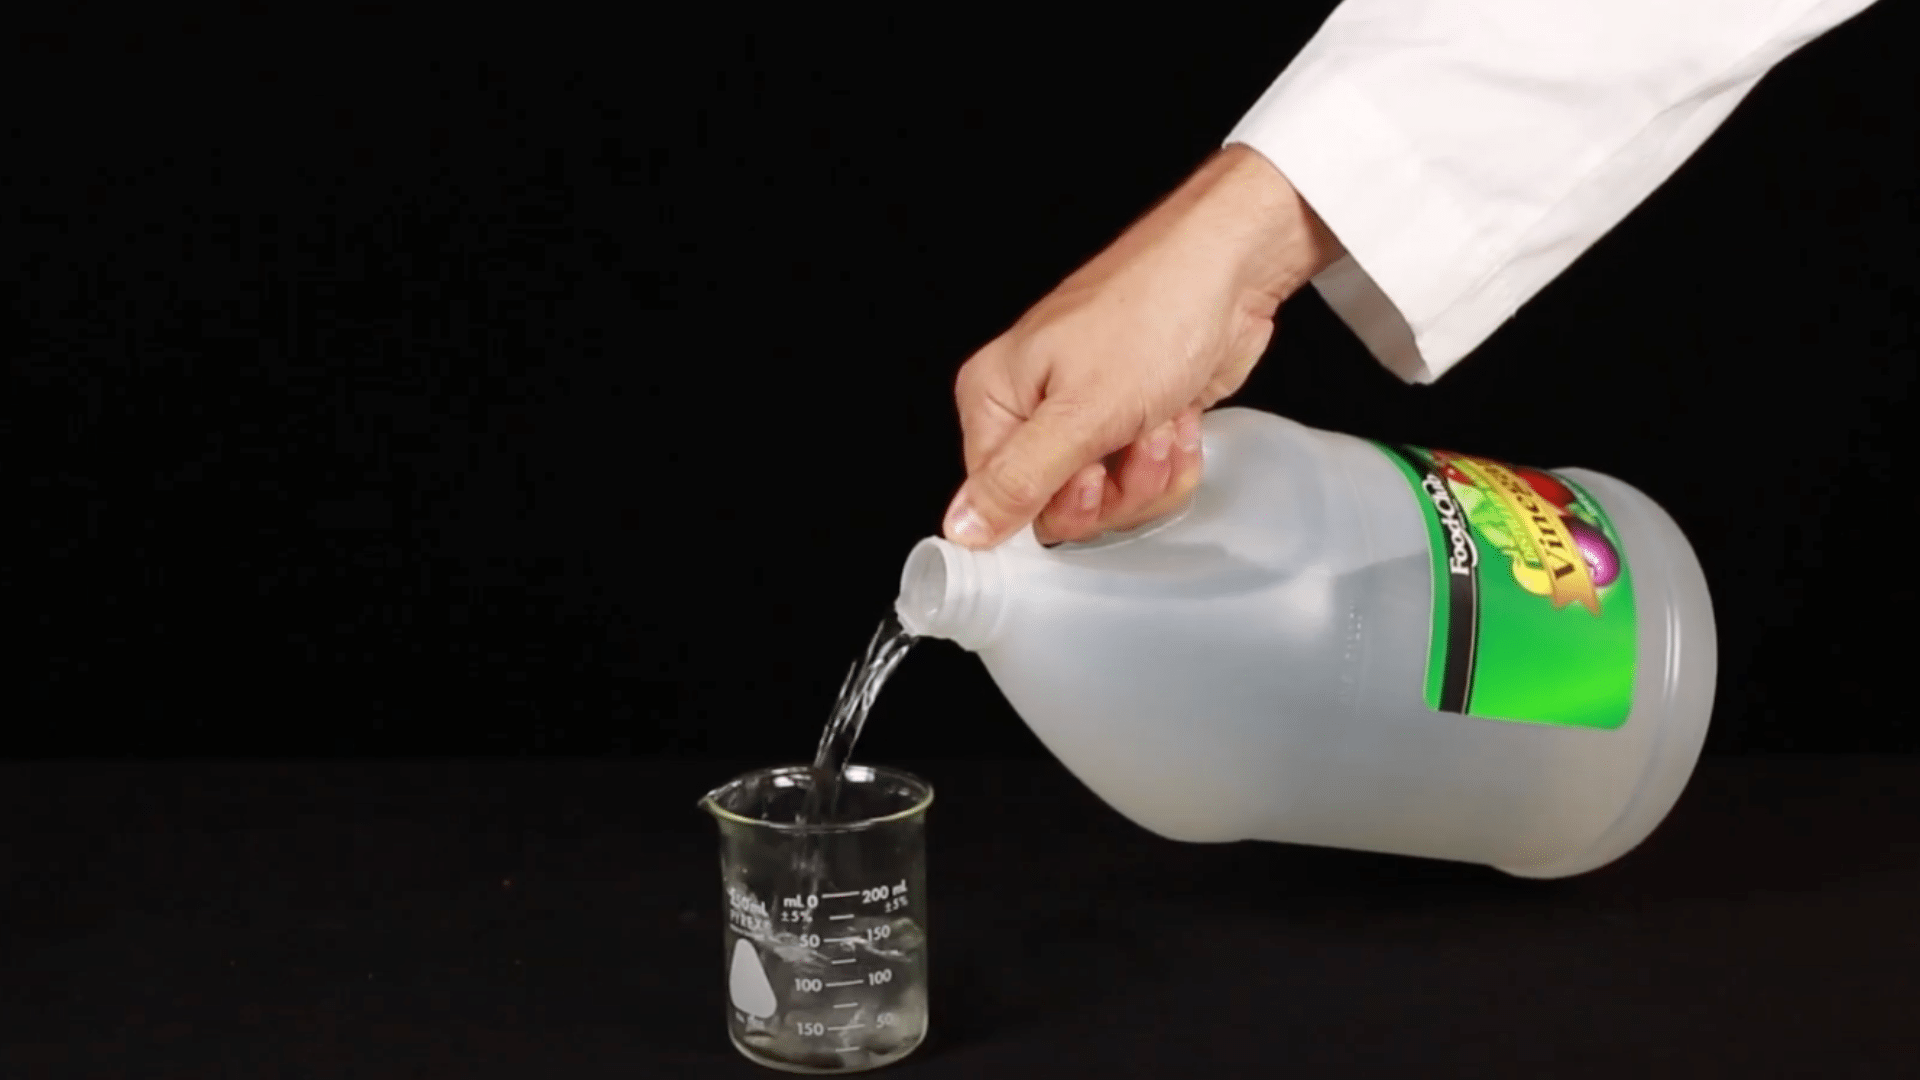
Measure 200 mL of white vinegar in a separate cup.
This will be the special liquid that brings the pumpkin volcano to life. Kids can practice their measuring skills while preparing this vital ingredient for the pumpkin volcano that creates all the fizzing action.
Keep the vinegar cup nearby but separate until it’s time to pour it into the pumpkin volcano for the big eruption.
Step 5: Pour in the Vinegar and Watch!
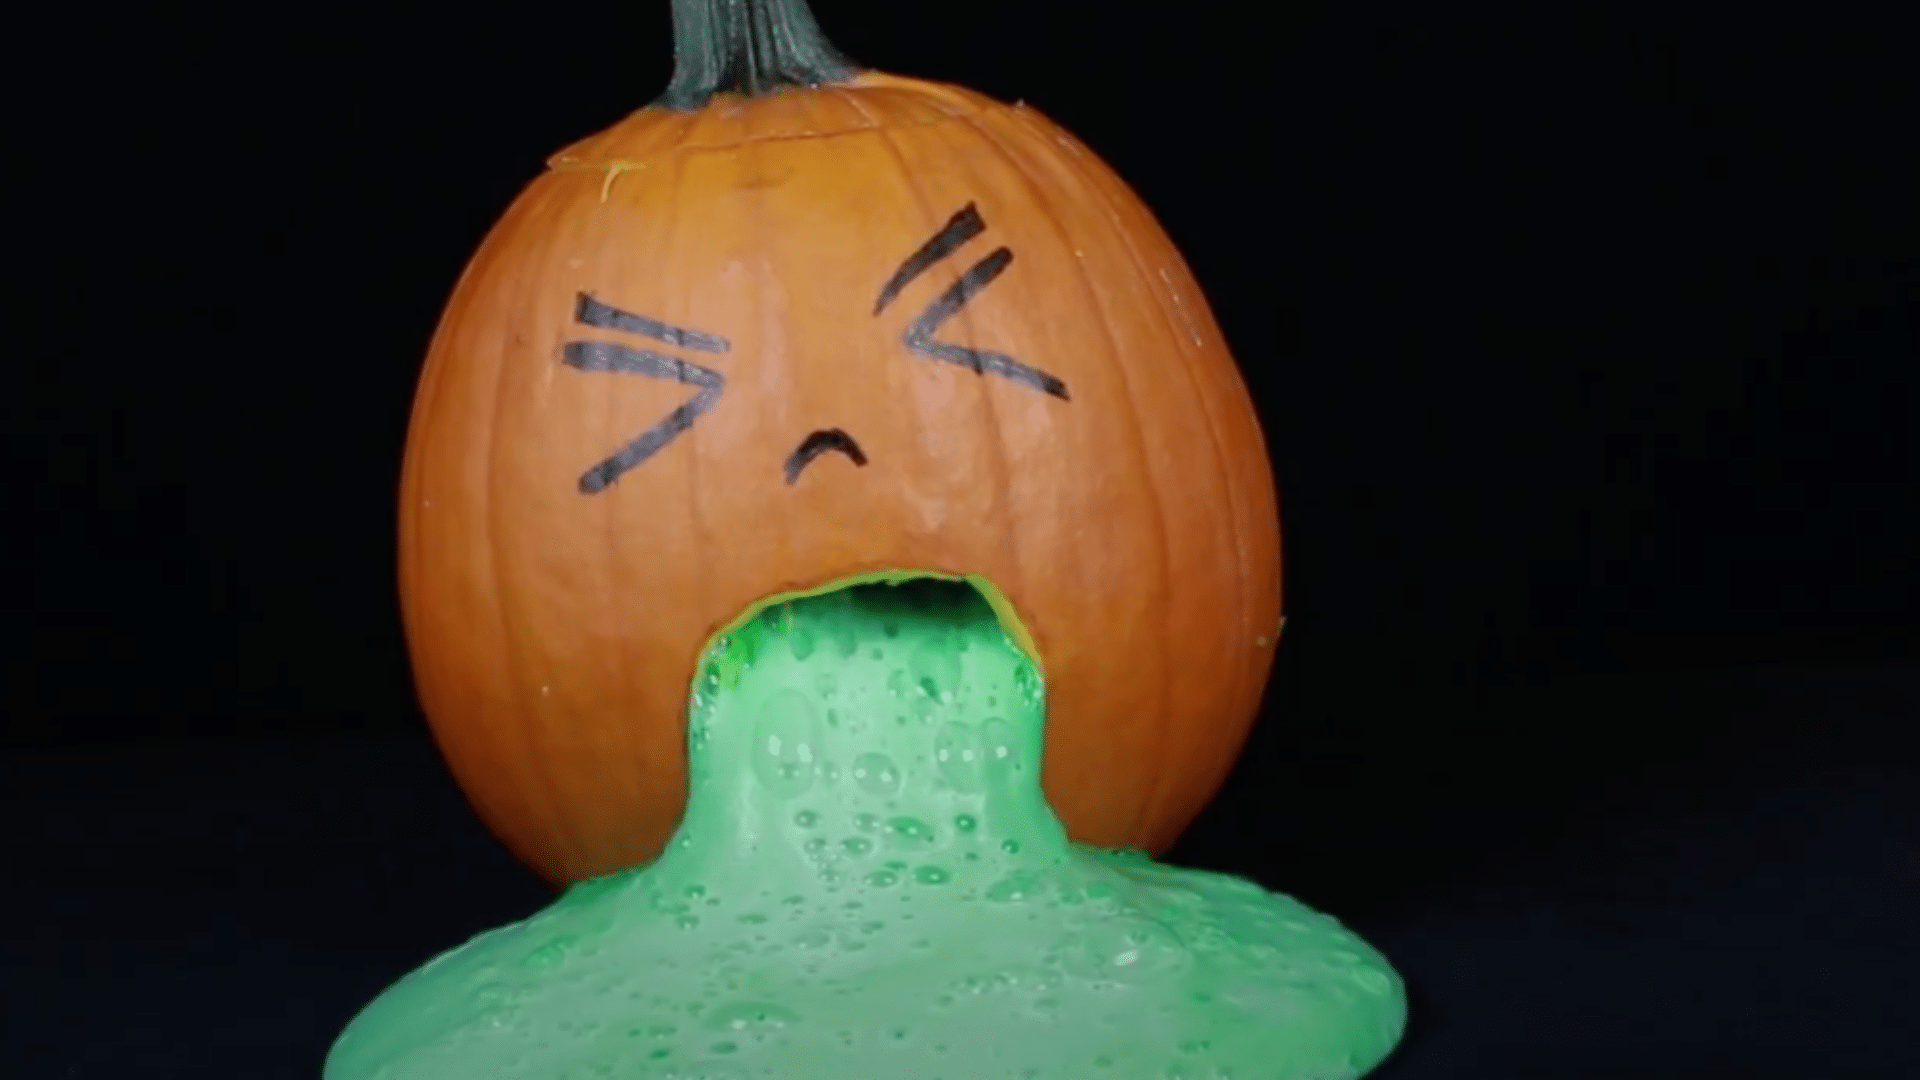
Pour the vinegar into the pumpkin on top of the baking soda mixture. Stand back and enjoy the fizzy, bubbly ooze!
For a more detailed explanation, watch this video.
The Science Inside the Oozing Pumpkin
The pumpkin volcano experiment creates a bubbling, fizzing spectacle as the mixture inside rapidly expands and overflows.
Steam and colorful foam shoot up from the pumpkin’s carved opening, mimicking a real volcanic eruption in miniature form.
The Chemical Reaction
Inside the pumpkin, you mixed baking soda (a base) with vinegar (a mild acid). When these two touch, they create a chemical reaction. This reaction forms a gas called carbon dioxide.
Carbon dioxide is the same gas that makes soda fizzy. In this activity, it quickly builds up and needs a way to escape.
The Role of Soap
You also added dish soap to your mix. The soap doesn’t take part in the reaction, but it helps in another way: it traps the gas. This creates numerous bubbles, which we observe as foam.
The more gas that forms, the more bubbles the soap makes. The foam gets bigger and begins to spill out of the pumpkin’s face, just like it’s oozing!
Why It Oozes from the Mouth
The gas pushes the foam upward, causing it to emerge from the lowest openings in the pumpkin. That’s why the mouth or nose is the first place it flows from.
What Kids Learn
- Cause and effect: Mixing two things makes something new
- Observation: Watching a reaction happen in real time
- Fun science words: Reaction, gas, bubbles, foam
Bottom Line
There is a pumpkin that just erupted like a tiny volcano, leaving kids with huge grins and parents feeling like science superstars.
Pumpkin volcano experiment proves that science doesn’t need to be complicated or expensive to be effective. No fancy lab equipment, no confusing instructions, just a pumpkin, some basic household items, and a willingness to get a little messy.
Science becomes memorable when it feels like play, and this pumpkin volcano delivers exactly that magic combination.
Ready to try it with the family? Drop a comment below about how the experiment went! And be sure to check out more fun science activities that turn any kitchen into a learning laboratory.