Your furnace runs all day. Your floors stay cold. You check the windows. You check the attic. Everything looks fine. But the heat keeps leaving.
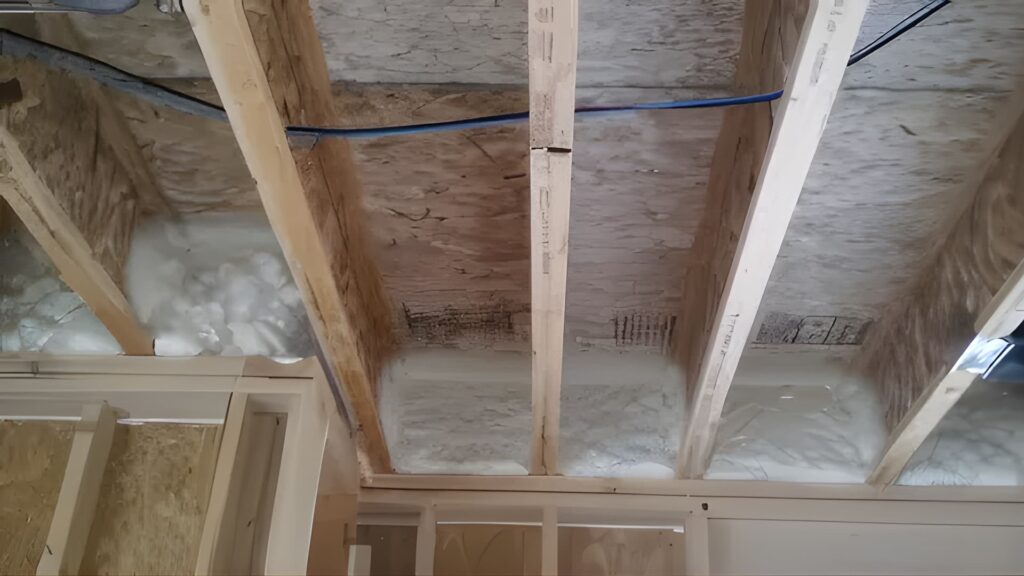
Here is the spot most homeowners miss: the rim joist. It sits right where your floor meets the foundation wall. And in most homes, it has little to no insulation.
That small gap can be responsible for up to 25% of all heat loss in a house.
This guide covers everything you need to know about rim joist insulation. You will learn what it is, which materials work best, how to do it yourself, and what it costs. Let us get started.
What Is Rim Joist Insulation?
A rim joist, also called a band joist, is the board that runs along the outer edge of your floor frame. It sits on top of the foundation wall and caps the ends of your floor joists.
In most homes, only thin sheathing and siding stand between this board and outdoor air.
Rim joist insulation means adding foam or rigid board in this area to prevent heat from escaping, block cold air from entering, and keep moisture out.
Key Benefits of Rim Joist Insulation
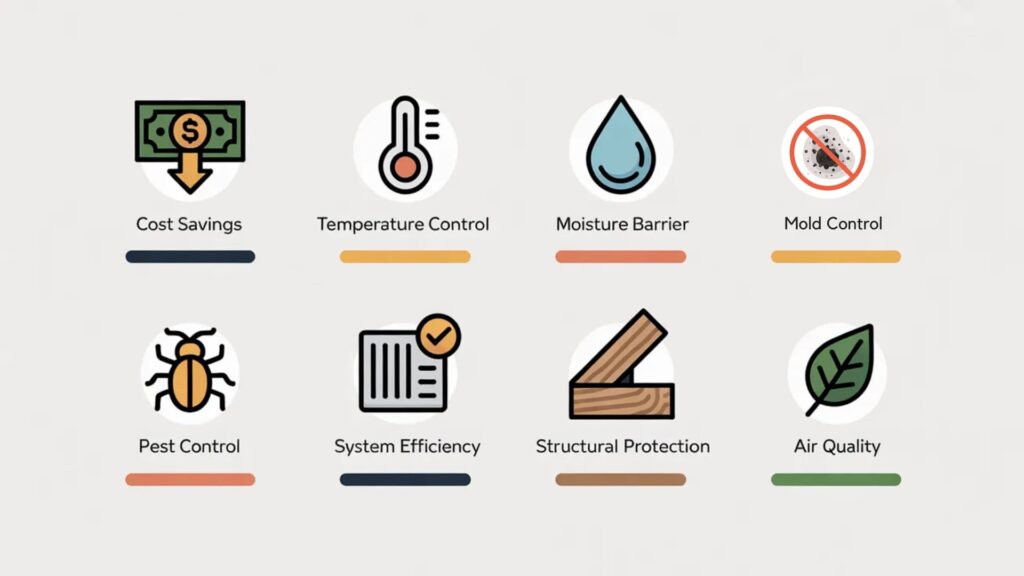
Most people insulate the attic first. That makes sense. But the rim joist is doing just as much damage to your comfort and your energy bills every single month.
- Lower Energy Bills: Many homeowners report a 10 to 20% drop in heating and cooling costs after sealing this area.
- Warmer First-Floor Rooms: Cold floors above basements get noticeably warmer when the rim joist is properly sealed and insulated.
- Moisture and Mold Control: Sealing this area prevents humid air from condensing on cold wood, reducing the risk of rot and mold.
- Pest Protection: Foam insulation seals the small gaps near the foundation that rodents and insects use to enter the home.
- Less Work for Your HVAC: When cold air stops entering through the rim joist, your furnace and air conditioner run shorter cycles.
- Structural Protection: Keeping moisture away from the rim joist wood prevents early rot and preserves the structural frame.
- Better Indoor Air Quality: Less outdoor air coming in through the basement means fewer allergens and pollutants inside the home.
How to Check if Your Rim Joists Need Insulation
Go to your unfinished basement and look along the top of the foundation wall. The board sitting on the mudsill is your rim joist.
Check if it has any insulation. If it is bare wood or if you see old fiberglass batts without caulk or foam around them, the area is not properly sealed.
Other signs include cold floors above, drafts near the base of first-floor walls, moisture staining on the upper portion of basement walls, and musty smells.
If you spot any of these, rim joist insulation is likely overdue.
Best Insulation Materials for Rim Joists
Not every insulation material works the same way for rim joists. The right choice depends on your climate, your budget, and how much of the work you plan to do yourself.
| Material | R-Value Per Inch | Creates Air Seal | DIY Friendly | Recommendation |
|---|---|---|---|---|
| Closed-Cell Spray Foam | R-6 to R-7 | Yes, fully airtight | Moderate | Best overall for cold climates |
| Open-Cell Spray Foam | R-3.5 to R-4 | Yes | Moderate | Suitable for warmer climates |
| XPS Rigid Foam Board | R-5 | Only with caulk and tape | Yes | Best DIY option for standard bays |
| EPS Foam Board | R-3.8 to R-4.4 | Only with caulk and tape | Yes | Not recommended for rim joists |
| Fiberglass Batt | R-3 to R-4 | No | Yes | Not recommended — no air seal |
Rim Joist Insulation R-Value: What Does Your Climate Zone Need?
The R-value you need depends on where you live. For Climate Zones 1 through 4, the minimum is R-13.
For Climate Zones 5 through 8, which cover cold to very cold regions, the minimum is R-20. The 2018 IRC lists these requirements in Table N1102.4.1.1.
Two inches of closed-cell spray foam gives roughly R-12 to R-14, and two inches of XPS rigid foam board gives about R-10. In colder zones, a second layer of foam board helps reach the required level.
Always confirm with your local building department, since some areas set stricter requirements than the baseline code.
How to Insulate Rim Joists Yourself: Step-by-Step Guide
This project takes two to three hours in an unfinished basement. You do not need special training or expensive tools, just the right materials and a careful approach to get a solid result.
Tools and Materials You Will Need
| Item | Purpose |
|---|---|
| 2-inch XPS Rigid Foam Board | Main insulation material |
| Box Cutter or Utility Knife (long blade) | Cutting foam panels to size |
| Circular Saw or Table Saw | Making long strip cuts |
| Tape Measure and Marker | Measuring each joist bay |
| Acrylic Latex Caulk and Caulk Gun | Sealing all panel edges |
| Expanding Foam Sealant | Filling gaps larger than ¼ inch |
| Foam Board Tape | Sealing board seams |
| Safety Glasses, Gloves, Dust Mask | Personal protection |
| Drop Cloths or Plastic Sheeting | Protecting floors from debris |
Step 1: Inspect and Prep the Area
Pull out any old fiberglass insulation from the rim joist bays. Look closely at the wood for soft spots, dark staining, or any signs of rot.
If you find moisture damage, fix it before adding any new insulation; covering a wet or damaged rim joist will only make the problem worse over time.
Step 2: Air Seal First
Run a steady bead of caulk along the line where the sill plate meets the concrete foundation wall.
For homes with concrete block foundations, press a small wad of fiberglass into each open block cavity at the top, then fill it with expanding foam.
The fiberglass gives the foam something to grip as it expands and hardens.
Step 3: Measure and Cut the Foam Board
Measure the height and width of each joist bay carefully. Cut each foam panel about ⅛ inch shorter and narrower than the actual opening so it fits snugly without forcing.
Use a box cutter for short cuts and a circular saw for long strips running parallel to the floor joists.
Step 4: Install and Seal All the Edges
Press each foam piece firmly against the rim joist until it sits flush. Run a full bead of acrylic caulk around all four edges of every panel. Fill any gaps larger than ¼ inch with expanding foam sealant.
Do not leave open seams between panels or at the corners; those gaps let air sneak through.
Step 5: Final Check and Finish
Walk the full perimeter of the basement and press each panel firmly to confirm it has not shifted. Re-caulk any spots you find.
If your local building code requires a fire barrier, fasten ½-inch drywall over the foam panels after all sealing is complete.
Building Code Requirements for Rim Joist Insulation in the USA
Before starting any insulation project, know what your local building code requires. Getting this wrong can lead to failed inspections and added repair costs later.
- IRC Table N1102.4.1.1: The 2018 IRC requires rim joist insulation in new construction and major renovations across the USA.
- Spray Foam Under 3 Inches: The IRC allows spray foam on rim joists without a drywall fire barrier, provided the thickness stays under 3 inches (Section R314.5.11).
- Closed-Cell Foam Approval: Closed-cell (2 PCF) spray foam was approved in the 2003 IRC; open-cell (0.5 PCF) was approved in the 2009 IRC.
- Termite Inspection Gap: In high-termite-pressure areas, maintain a 3-inch gap between the top of insulation and the bottom of any wood framing to allow pest inspection access.
- Climate Zone R-Value Rules: Zones 1 through 4 require a minimum of R-13; Zones 5 through 8 require a minimum of R-20.
- State or Local Additions: Some states set stricter rules than the IRC; always confirm with your local building department before you begin.
- Permit Requirements: Some areas require a building permit and inspection for rim joist work, especially when drywall is added over foam insulation.
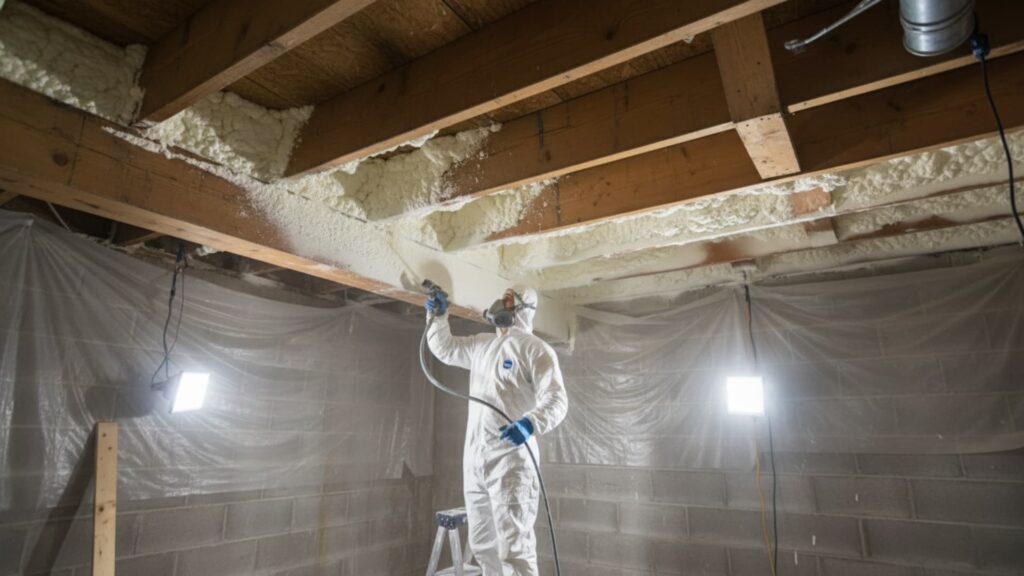
Rim Joist Insulation Cost: DIY vs. Professional Installation
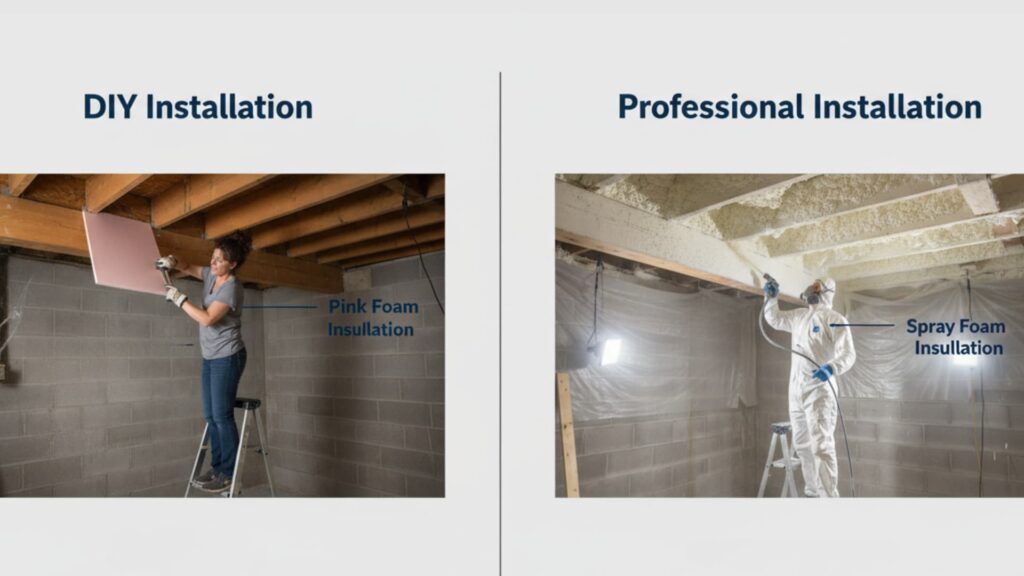
The cost of rim joist insulation depends on your home’s size, the material you choose, and who does the work. Here is a straightforward breakdown to help you plan your budget.
| Option | Material Used | Estimated Cost | Time to Complete |
|---|---|---|---|
| DIY Rigid Foam Board | XPS foam, caulk, tools | $100 to $400 (materials only) | 2 to 3 hours |
| DIY Spray Foam Kits | Two-component foam kits | $200 to $600 (materials only) | 3 to 5 hours |
| Professional Spray Foam | Closed or open-cell foam | $2,000 to $2,600 (full install) | Approximately 90 minutes |
| Professional Rigid Foam | Board with full air sealing | $500 to $1,500 (varies by home size) | 2 to 4 hours |
Pro Tip: Clear storage and furniture away from the basement walls before a professional crew arrives. This simple step can cut labor time and reduce your final bill.
Does Rim Joist Insulation Qualify for Rebates or Tax Credits?
Rim joist insulation may qualify for federal tax credits under the Inflation Reduction Act, which covers certain energy efficiency upgrades for existing homes.
Many state utility programs also offer rebates. Michigan homeowners, for example, can qualify for rebates ranging from $50 to $1,100 through utility programs.
Wisconsin’s Focus on Energy program offers rebates when rim joist insulation is completed as part of a broader home upgrade.
A home energy audit, which is often free or low-cost through your utility company, can confirm what qualifies in your area.
Keep all receipts and installation records ready to support any rebate or tax credit claim you file.
Final Thoughts
Rim joist insulation is not the most talked-about home upgrade. But it might be the most practical one you can do this year.
Cold floors, high bills, and moisture problems in the basement often trace right back to this one overlooked spot.
The fix is not complicated. Seal the gaps first. Then add rigid foam or spray foam. Do it right, and you will feel the difference by the next cold morning.
You can tackle it yourself or bring in a pro. Either way, the result is the same. A warmer home. Lower bills. And a basement that no longer feels like a cold cave.
Have questions about your setup? Drop them in the comments below.