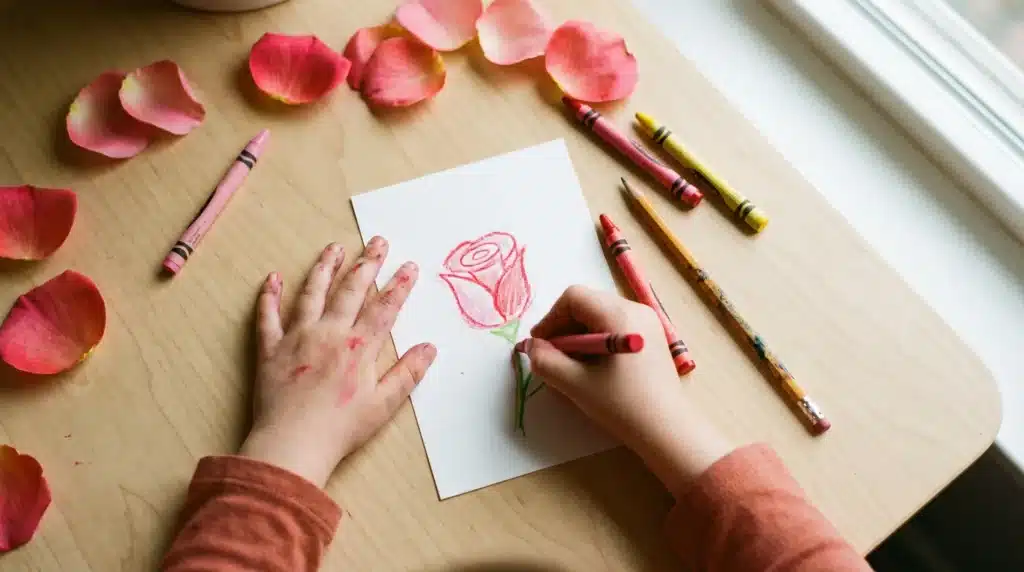
You do not need to be a trained artist to give mom something she keeps for years. A drawing made by hand says more than a store-bought card ever will.
That is a fact that holds up every single time.
Mother’s Day drawings have been a classroom tradition across the US for decades, and the reason is simple: kids want to make something real, and moms want to receive something real.
This guide gives you clear Mother’s Day drawing ideas, step-by-step instructions for each, and practical tips to help the final result look good. Pick one idea, grab a pencil, and start there.
What You Need Before You Start
Before you draw a single line, get your supplies ready. Having everything on the table from the start means fewer breaks mid-drawing, and kids stay focused longer when they are not hunting for a missing marker.
Here is what you need:
| Supply | Why You Need It |
|---|---|
| White cardstock or drawing paper | Holds color without tearing |
| Pencil | For sketching the outline first |
| Black marker or fine-tip pen | Makes lines clean after tracing |
| Crayons, colored pencils, or markers | Any of these works fine |
| Eraser | To clean up pencil lines before inking |
Always sketch in pencil first. Trace the lines with a black marker once you are happy with the shape. Then add color. That one habit alone makes a big difference in the final drawing.
12 Mother’s Day Drawing Ideas
These Mother’s Day drawing ideas go from the simplest shapes to slightly more detailed scenes. Each one works as a standalone drawing or as the front of a handmade card.
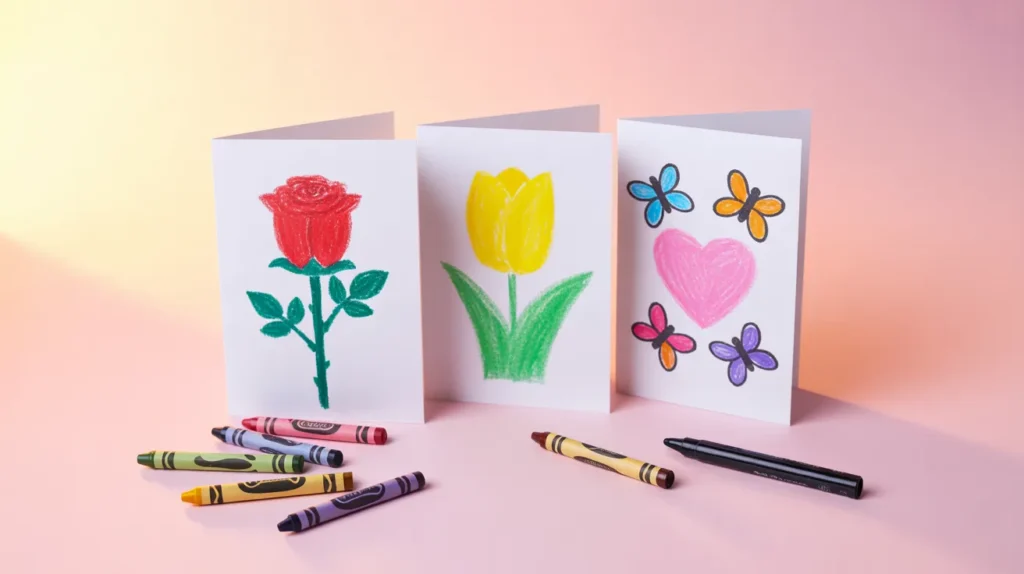
1. A Single Rose
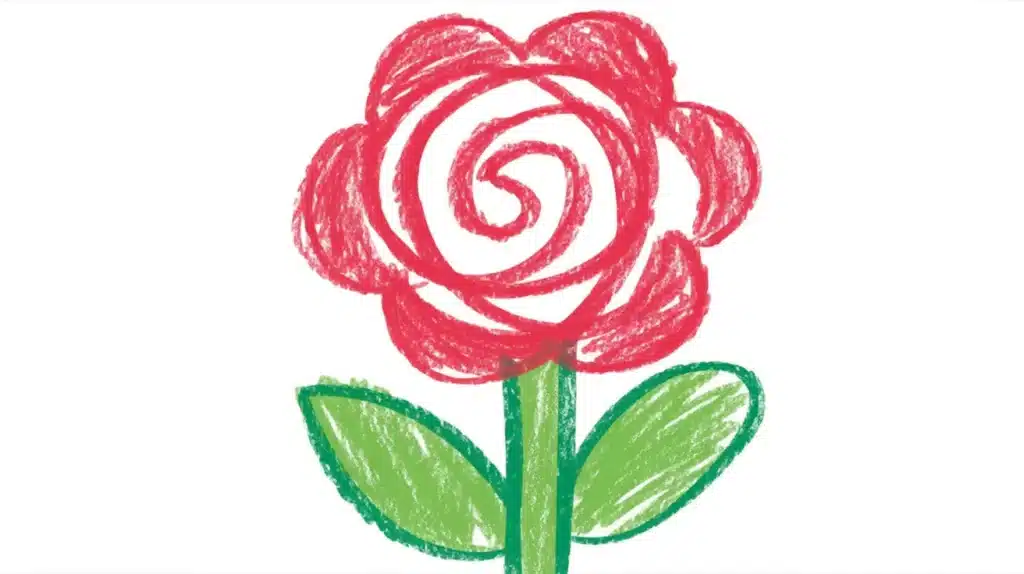
Skill Level: Easy to Medium | Best For: Ages 8 and up
A rose is one of the most recognized symbols of love. Red means love, pink means gratitude, and yellow means friendship. Any of those works well for Mother’s Day.
- Start with a small spiral in the center of your paper.
- Wrap a curved petal shape around the spiral like a loose “C.”
- Add 3 to 4 more petals around the outside, each one a bit larger than the last.
- Draw two pointed leaf shapes at the base, then add a straight stem.
Pro Tip: Shade the petals darker near the center and lighter at the edges. It takes ten extra seconds and makes the rose look much more complete.
2. A Flower Bouquet
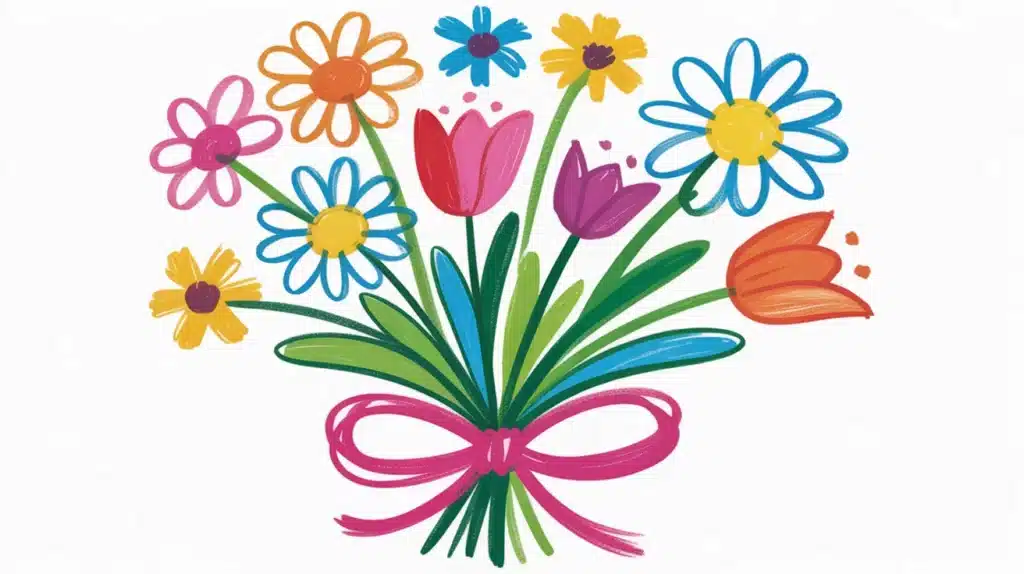
Skill Level: Easy | Best For: Ages 6 and up
A bouquet gives kids room to mix different flower types and colors. It always looks full and cheerful.
- Draw 3 to 5 circles of different sizes across the page. These are your flower centers.
- Add petals around each circle using small oval or teardrop shapes.
- Draw stems going down from each flower, crossing slightly at the base.
- Add a ribbon or bow where the stems meet at the bottom.
Pro Tip: Use a mix of flower shapes. One round daisy, one pointed tulip, one five-petal flower. That variety is what makes it look like a real bouquet.
3. A Tulip With “I Love You Mom”
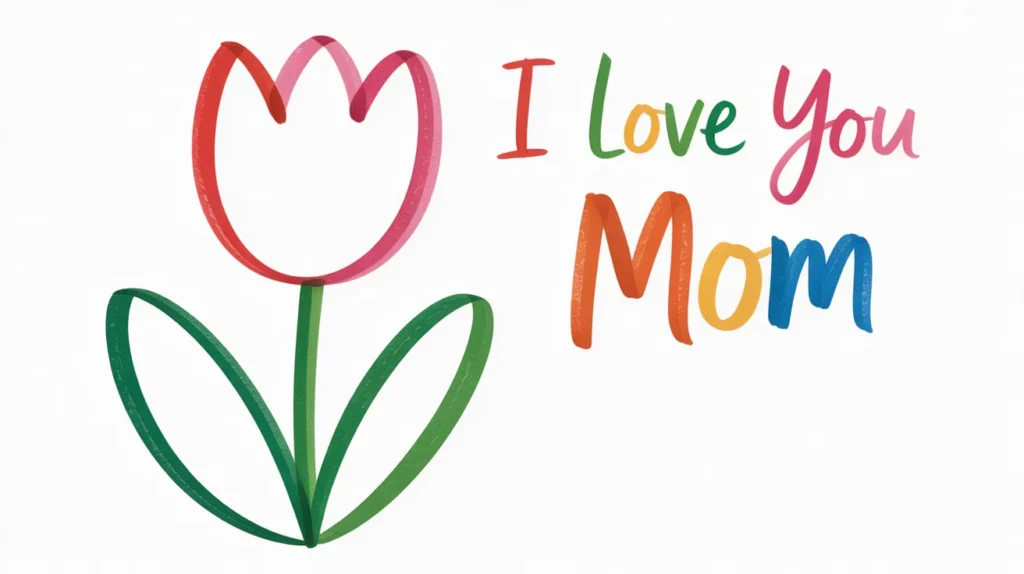
Skill Level: Very Easy | Best For: Ages 5 and up
This one is fast, cheerful, and works for kids who are just learning to draw.
- Draw a U-shape for the base of the tulip.
- Add two rounded bumps at the top to close the U into a tulip head.
- Draw a long vertical line below for the stem, then add two curved leaf shapes on each side.
- Write “Mom, I Love You” in simple block letters below the flower or inside a small banner shape.
Pro Tip: Let younger kids skip the ruler. A slightly wobbly stem drawn by a five-year-old has charm that a perfect line does not.
4. Mom and Child Portrait
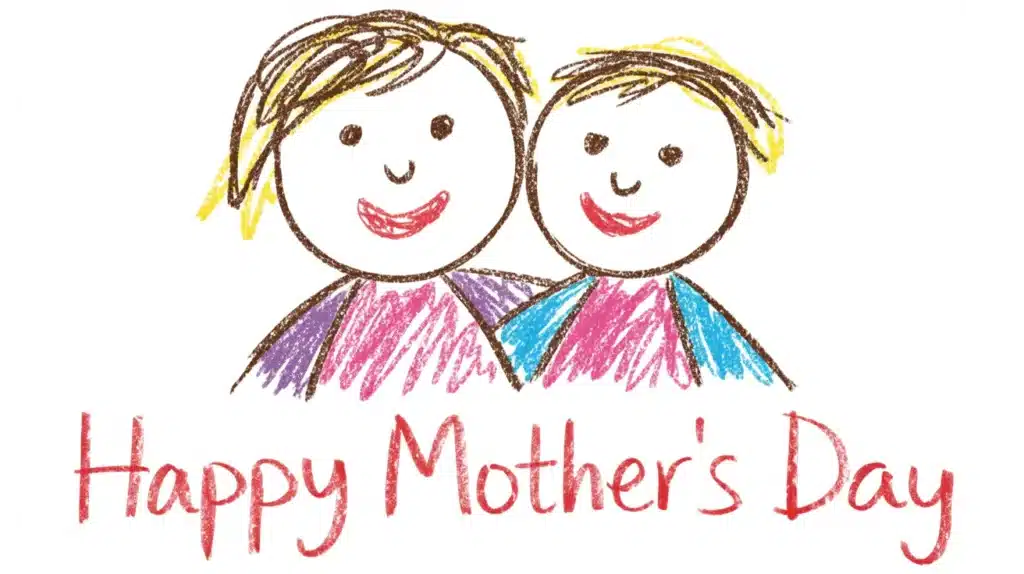
Skill Level: Easy to Medium | Best For: Ages 7 and up
This one feels the most personal because it shows real people. It does not need to be perfect to look right.
- Draw two oval head shapes side by side. Make one larger for mom, one smaller for the child.
- Add simple faces: two dots for eyes, a small curve for a nose, a smile for the mouth.
- Draw hair on each head using a few curved lines. Keep it loose and simple.
- Add mom’s arm curving around the child’s shoulder, then write “Happy Mother’s Day” at the bottom.
Pro Tip: Kids can match the hair color and length to their real mom. That small detail makes it recognizable and personal.
5. Mom and Baby Birds on a Branch
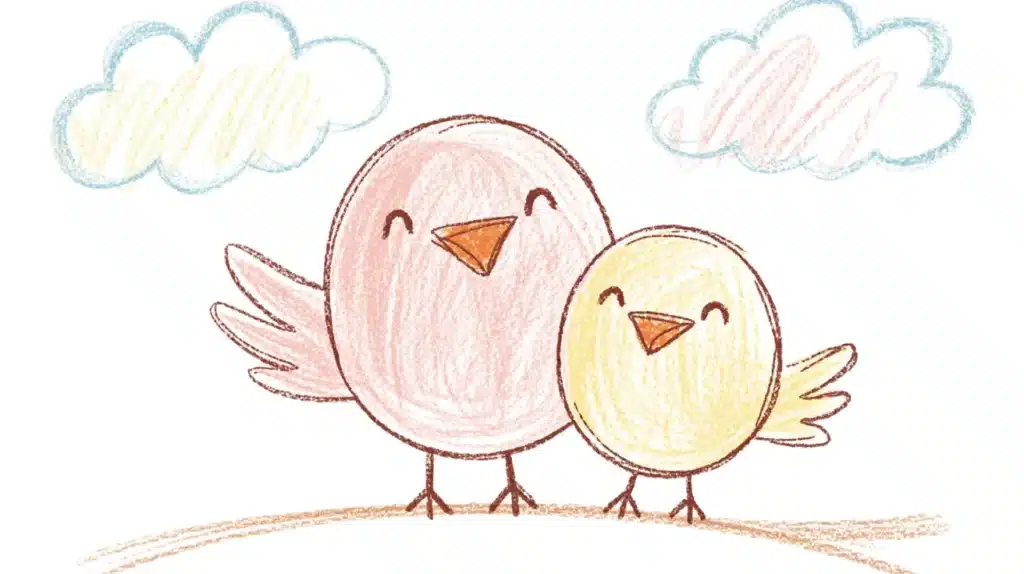
Skill Level: Easy | Best For: Ages 6 and up
This idea uses basic oval and triangle shapes. Even young kids can follow along with a little help.
- Draw a long horizontal branch using two gently curved lines.
- Place a large oval on the branch for the mom bird’s body, then a smaller oval next to it for the baby.
- Add small triangle beaks and dot eyes to each bird.
- Draw simple wing shapes and tiny stick feet gripping the branch, then add a cloud or two in the background.
Pro Tip: If a child has siblings, add more baby birds along the branch. One bird per sibling. It turns a generic drawing into a family portrait.
6. Floral “MOM” Lettering
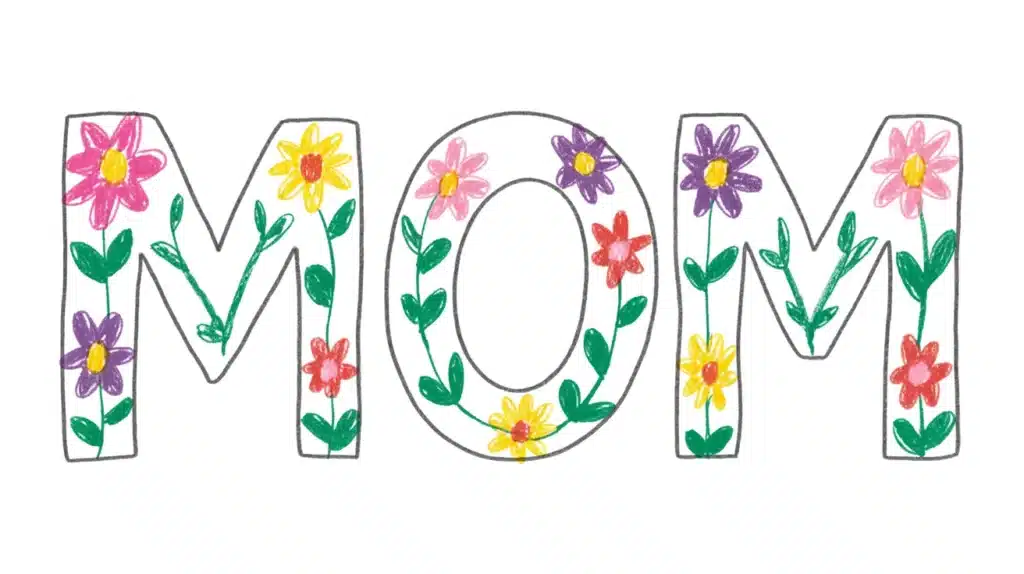
Skill Level: Medium | Best For: Ages 9 and up
This takes a bit more patience, but the result looks genuinely impressive.
- Lightly sketch the word “MOM” in large, wide block letters using a pencil.
- Instead of filling the letters with solid color, trace the outlines with small flowers and leaves.
- Draw tiny five-petal flowers along the edges of each letter, then fill gaps with small leaf shapes.
- Erase the pencil guidelines, trace everything with a black marker, and add color to the flowers.
Pro Tip: Use a different flower type for each letter. Roses for the first M, daisies for the O, tulips for the second M. The variety makes it look thought-out.
7. Heart Card With Butterflies
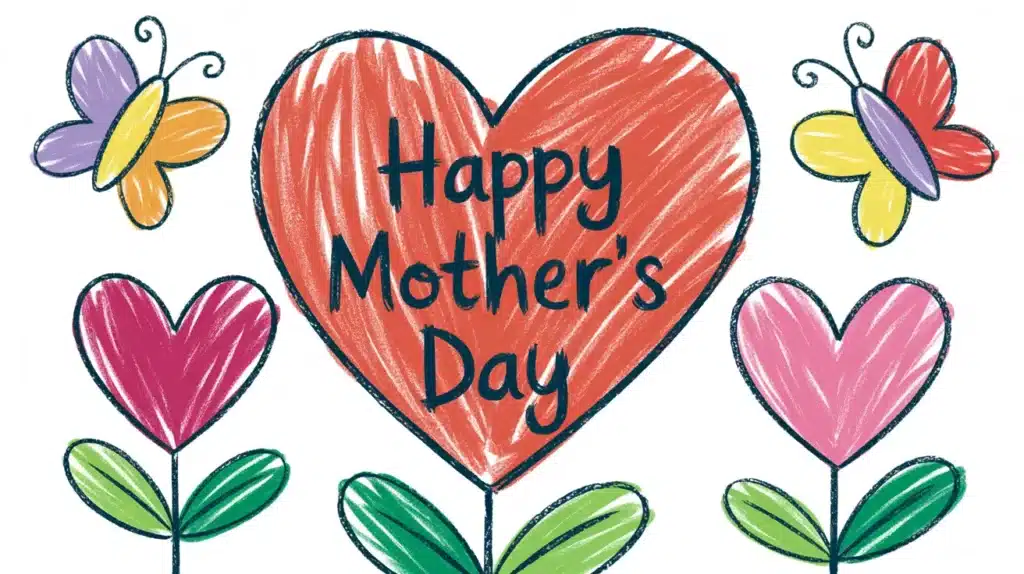
Skill Level: Easy | Best For: Ages 6 and up
This is one of the most popular Mother’s Day card drawing ideas. It is bright, warm, and quick to make.
- Draw one large heart in the center of the page.
- Add two smaller hearts overlapping on each side. These become flower shapes.
- Draw simple stems and leaves below them.
- Add two small butterflies near the top. Each butterfly is just two rounded wing shapes with a thin line for the body.
Pro Tip: Write “Happy Mother’s Day” inside the large heart. It ties the whole image together without needing a separate message area.
8. Sunflower in a Pot
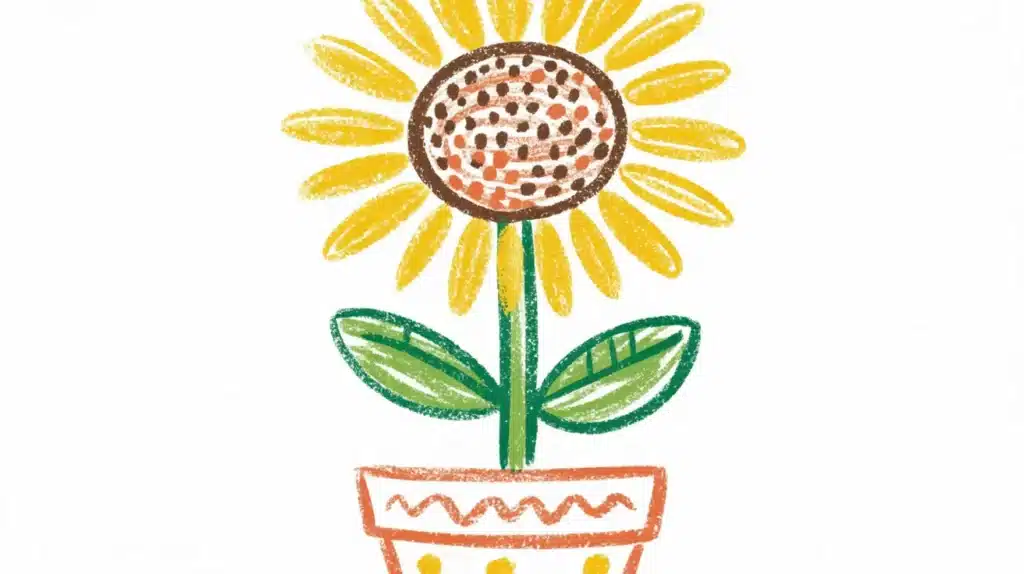
Skill Level: Easy | Best For: All ages, with some help for younger kids
Sunflowers are bright, simple to draw, and look cheerful on any card.
- Draw a half-circle at the bottom of the page for the pot, then add a small rectangle at the top for the rim.
- Draw a long straight stem rising from the pot, then a circle near the top for the flower center.
- Add long, thin oval petals all around the circle.
- Draw two leaf shapes on the stem and add a simple pattern or spots to the pot if you like.
Pro Tip: A small bee or butterfly drawn next to the sunflower adds life to the drawing without much extra effort.
9. Supermom Drawing
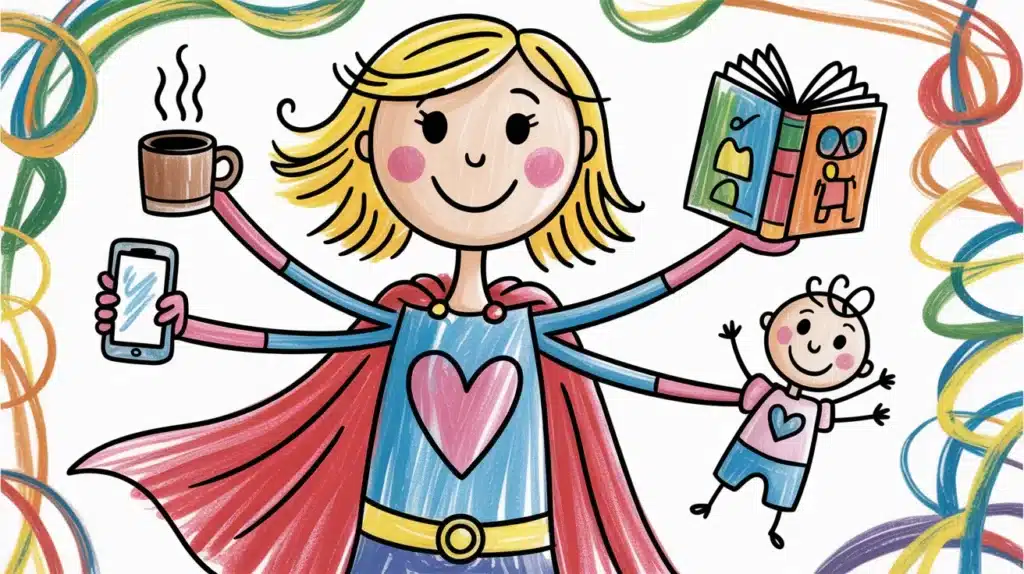
Skill Level: Medium | Best For: Ages 8 and up
This one is funny, creative, and something moms genuinely love to receive.
- Draw a simple front-facing figure: oval head, rectangular body, arms, legs.
- Add a cape flowing behind the figure using two curved lines from the shoulders down.
- Draw a heart or letter “S” on the chest as a symbol.
- Give the figure multiple arms, each holding something mom actually does: a phone, a coffee cup, a book, a baby.
Pro Tip: Let the child decide what goes in each hand based on their real mom’s daily life. A spatula, a laptop, a grocery bag. Those specific details are what make it funny and personal.
10. Mom and Baby Animal

Skill Level: Easy | Best For: Ages 5 to 10
Animal pairs are low-pressure to draw and always look adorable. Kids can pick the animal that feels right.
Panda version:
- Draw a large circle for the mom panda’s head and a smaller one for the baby, side by side.
- Add black oval patches around each eye, black round ears at the top, and a simple smile.
- Draw rounded body shapes below each head, then color the ears, patches, and arms black. Keep the rest white.
Giraffe version:
- Draw an oval body and a small head connected by a long neck for the mom. Repeat the same shapes, smaller, for the baby.
- Add ears, small horn shapes, eyes, and four stick legs.
- Draw irregular brown patch shapes across both bodies and color in yellows and browns.
Pro Tip: Add small hearts between the two animals. It reads as a clear symbol of the bond between them and makes the drawing feel complete.
11. Mother and Daughter Holding Hands

Skill Level: Medium | Best For: Ages 8 and up, works well for teens too
This drawing captures a specific kind of warmth that words sometimes cannot.
- Draw two figures side by side. The taller one is Mom, the shorter one is the daughter.
- Extend their arms toward each other with fingers touching or held together.
- Add hair and simple clothing details to make each figure feel like a real person.
- Draw a simple background like a sun, a few clouds, or a grass line at the bottom.
Pro Tip: Try drawing the scene from the back rather than the front. There are no facial details to worry about, and it often looks more artistic and peaceful.
12. “Best Mom” Trophy

Skill Level: Easy to Medium | Best For: Ages 7 and up
A trophy says, “You won.” It is playful, direct, and moms love being handed one, even on paper.
- Draw a wide U-shape in the center of the page. This is the cup of the trophy.
- Add curved handles on each side, then a small rectangular base below the cup.
- Draw a wider rectangular pedestal below the base.
- Write “#1 Mom” or “Best Mom” on the cup, and add a star or heart at the very top.
Pro Tip: Add a ribbon or banner across the base with something personal, like “Always wins the hard days” or “World Record holder for best hugs.” Short and specific is better than long and general.
How to Draw Mother’s Day Drawings
Every drawing in this list follows the same basic process. Get this order right, and the result will look far cleaner, no matter the skill level.
Step 1: Sketch the Outline in Pencil
Start with a light pencil sketch of the full drawing. Do not press hard. The goal here is to get the shapes and placement right before anything is permanent. Fix proportions now, because this is the only stage where mistakes cost nothing.
Step 2: Trace Over With a Black Marker
Once the pencil sketch looks right, go over every line with a black fine-tip marker or a Sharpie. Keep a steady hand and follow the pencil lines closely. Let the marker dry for at least thirty seconds before moving on.
Step 3: Erase All Pencil Lines
After the marker is fully dry, gently erase the pencil underneath. The drawing will look clean and intentional at this point. Skipping this step leaves the drawing looking smudged and unfinished, so do not rush past it.
Step 4: Add Color Last
Use short, light strokes when coloring rather than heavy scribbles. Build up the color gradually and leave some white areas untouched. Drawings with a little breathing room always look better than ones where every inch is filled in.
Tips to Make Your Mother’s Day Drawing Look Better
These small habits separate a drawing that looks rushed from one that looks like it took real effort.
- Sketch in pencil first, always. Commit to pencil before marker. Erasing is free. Mistakes in the marker are permanent.
- Let the marker dry before erasing. Thirty seconds of patience here prevents smearing across the whole drawing.
- Leave some white space. Not every inch of the page needs color. White areas give the drawing room a sense of breathing room and keep it from looking muddy.
- Add a background, even a simple one. A horizon line, a sky, or just a few small clouds at the top ground the drawing in the real world rather than letting it float on a blank page.
- Shade with a darker version of the same color. Press harder at the edges of a shape and lighter toward the center. It adds basic depth without needing any real art training.
- Write a message directly on the drawing. “Happy Mother’s Day” along the bottom ties the image to its purpose and fills space that might otherwise feel empty.
- Do a practice run on scrap paper. Try the most complicated part of the drawing once on a spare sheet before doing it on the final version. Shapes that feel hard become easy after one practice attempt.
How to Display or Gift Your Mother’s Day Drawing?
Once the drawing is done, there are a few ways to give it that feel intentional rather than last-minute. Frame it in a simple dollar-store frame, and it looks like real wall art right away.
For moms who live far away, photograph the drawing and order it printed on a mug or canvas through any online print service. That takes about five minutes and costs very little.
If you are keeping it as a card, fold a piece of cardstock in half, glue the drawing to the front, and write a short message inside. The most classic option is still the fridge.
Do not underestimate it. Moms genuinely save drawings from the fridge for years, long after the magnets give up.
Conclusion
Mother’s Day drawings do not have to be perfect to matter. A slightly lopsided rose, a trophy with uneven letters, a portrait where the nose is a little off.
None of that changes what the drawing means to the person who receives it. Moms keep handmade art for years, long after store-bought cards get thrown away.
The ideas in this guide cover every skill level, from a five-minute tulip for a kindergartner to a detailed floral lettering piece for a teen.
Pick the one that fits, follow the steps, and make something real this Mother’s Day. Which drawing are you starting with? Drop it in the comments below.
Frequently Asked Questions
How to Write Mother’s Day in a Beautiful Way?
Use floral lettering. Sketch the words lightly in pencil, then trace each letter outline with small drawn flowers and leaves instead of filling it with solid color.
What Are Some Unique Mother’s Day Craft Ideas?
Handprint flower art, painted river rocks with short messages, and personalized portrait drawings are all creative options that feel personal without needing special materials.
What Painting Ideas Are Good for Mother’s Day?
A simple watercolor bouquet, a sunset silhouette of a mother and child, or a painted flower pot with mom’s name on it are all easy and meaningful choices.
What Is a Symbol for Mother’s Day?
The carnation is the official flower of Mother’s Day in the US. A white carnation honors a mother who has passed, while a colored one celebrates a living mom.