
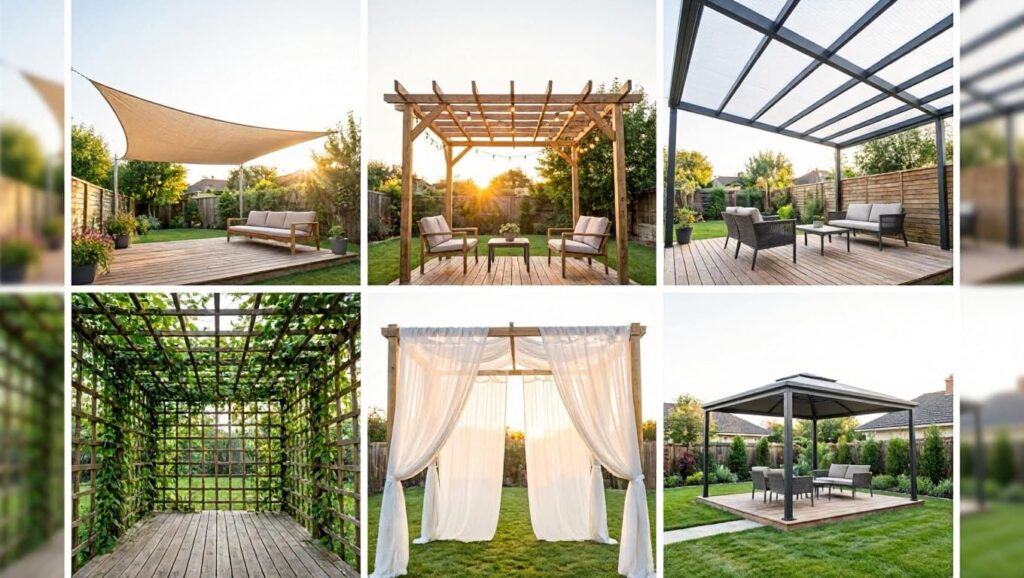
Last summer, a neighbor spent three weeks trying to find shade for her deck without blowing her savings. She ended up with a $180 shade sail that still looks great two years later.
That’s the thing about covered deck ideas on a budget. You do not have to overspend to get something that works and looks good.
Whether it’s a simple sail stretched between two posts or a weekend pergola built with lumber from the hardware store, the options are far better than most people expect.
This guide walks through real ideas, with actual costs, what each one needs, and tips worth knowing before you start.
What Is the Average Cost to Build a Covered Deck?
Covering an existing deck typically costs between $2,000 and $12,000, or roughly $10 to $60 per square foot. If you are starting from scratch with a brand new covered deck, expect to spend between $5,000 and $20,000.
Budget-friendly DIY options like shade sails or canopy kits can bring that number down to well under $500. The final cost depends on how much of the deck you want covered, the materials you choose, and whether you hire a contractor or do the work yourself.
Location also plays a role since labor rates vary significantly by city and region.
Covered Deck Ideas on a Budget
Covered decks come in more shapes and sizes than most people expect. Here are 18 options, from quick and affordable setups to more lasting structures worth the extra effort.
1. Triangle or Square Shade Sails
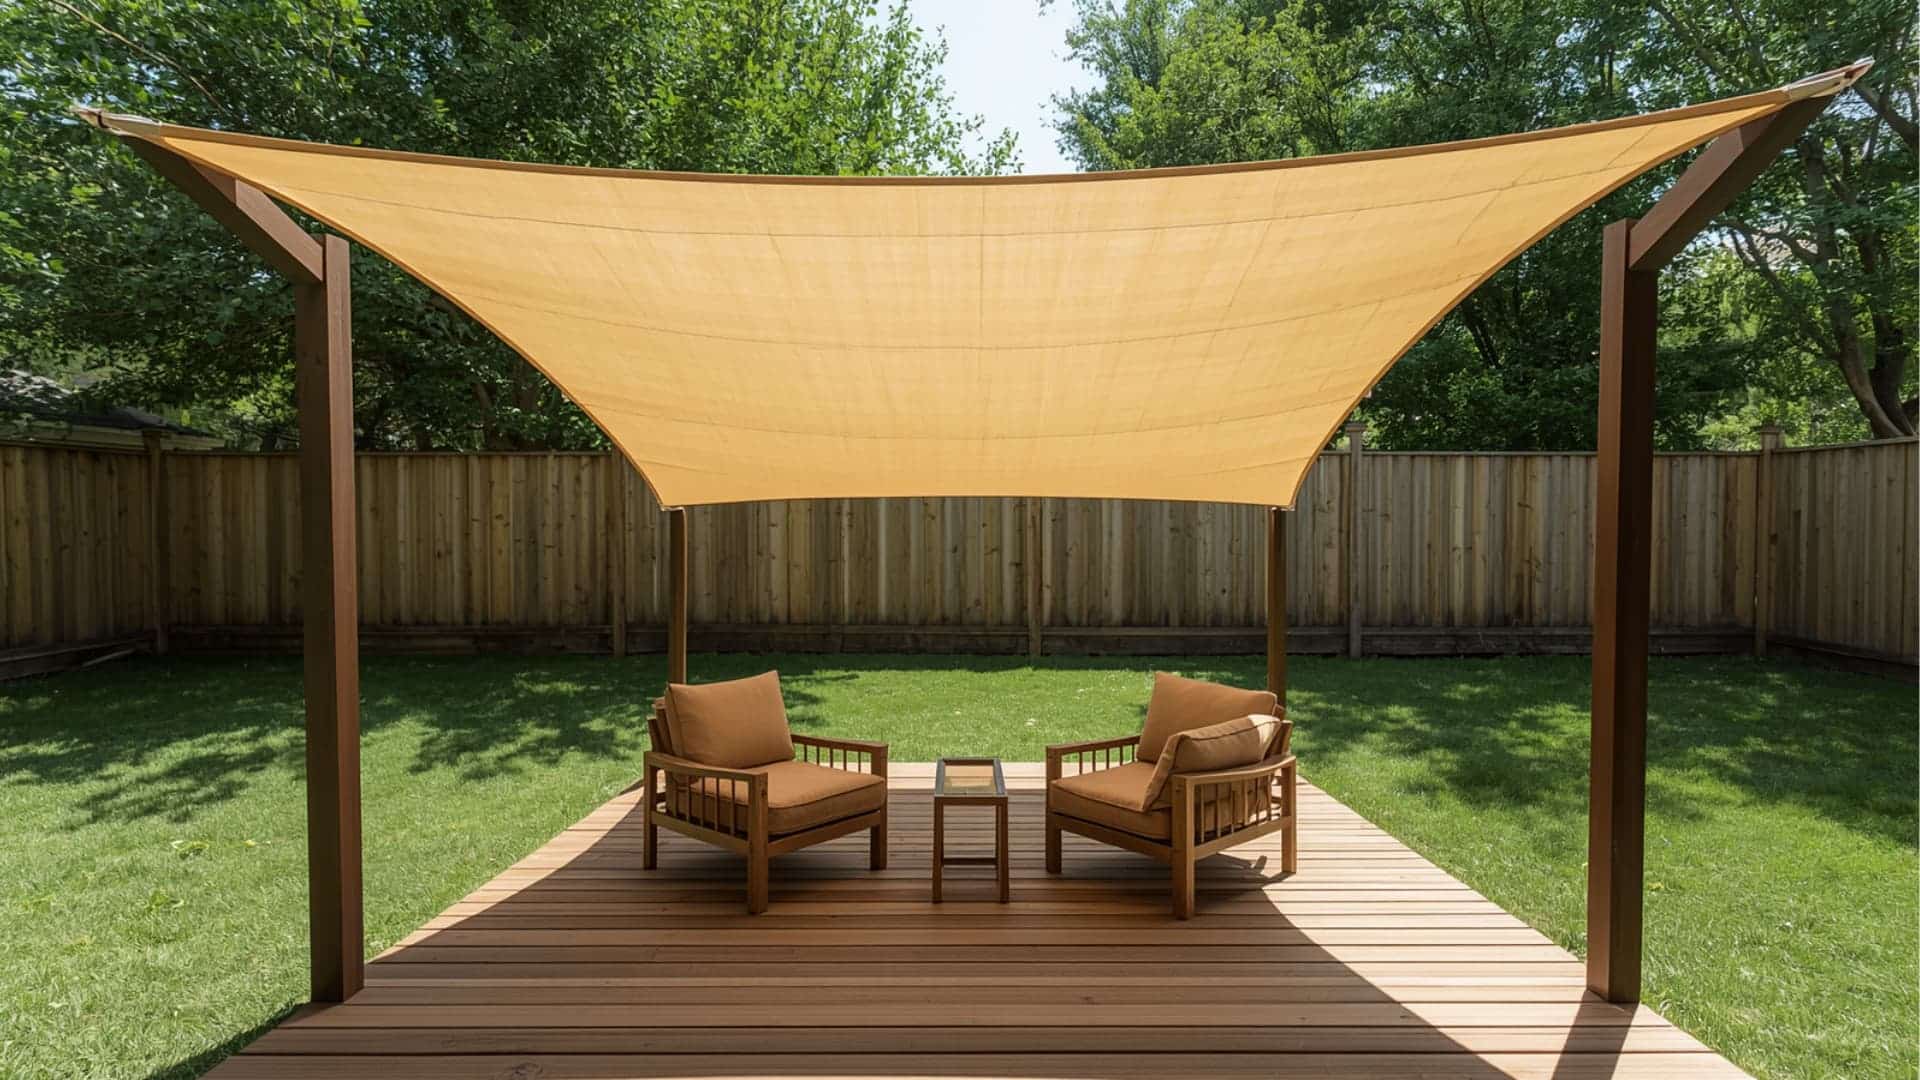
Alt Text: Backyard deck with wooden seating area shaded by a large Square sail canopy, creating a simple and affordable covered deck setup for outdoor relaxation.
Shade sails are flat fabric panels stretched overhead between two or more anchor points. They come in triangle and square shapes and attach to posts, walls, or trees using basic hardware.
If you have a solid spot to hook them and an afternoon free, this is one of the fastest covered deck ideas you can put together.
Estimated Cost: $50 to $300
Best For: Open decks with at least two strong anchor points, such as fence posts, walls, or freestanding poles
| Pros | Cons |
|---|---|
| Very affordable and widely available | Not waterproof; rain passes through standard fabric |
| Comes in many colors and sizes | Needs strong, secure anchor points to stay taut |
| Easy to take down before winter | Can sag if not set at the right angle |
| Blocks up to 90% of UV rays | Less suited for very windy spots |
Maintenance: Wash with mild soap and water once a season. Store indoors during winter to extend its life.
Pro Tip: Set your shade sail at a slight angle rather than flat. This lets rainwater run off instead of collecting in the center.
2. Retractable Awning
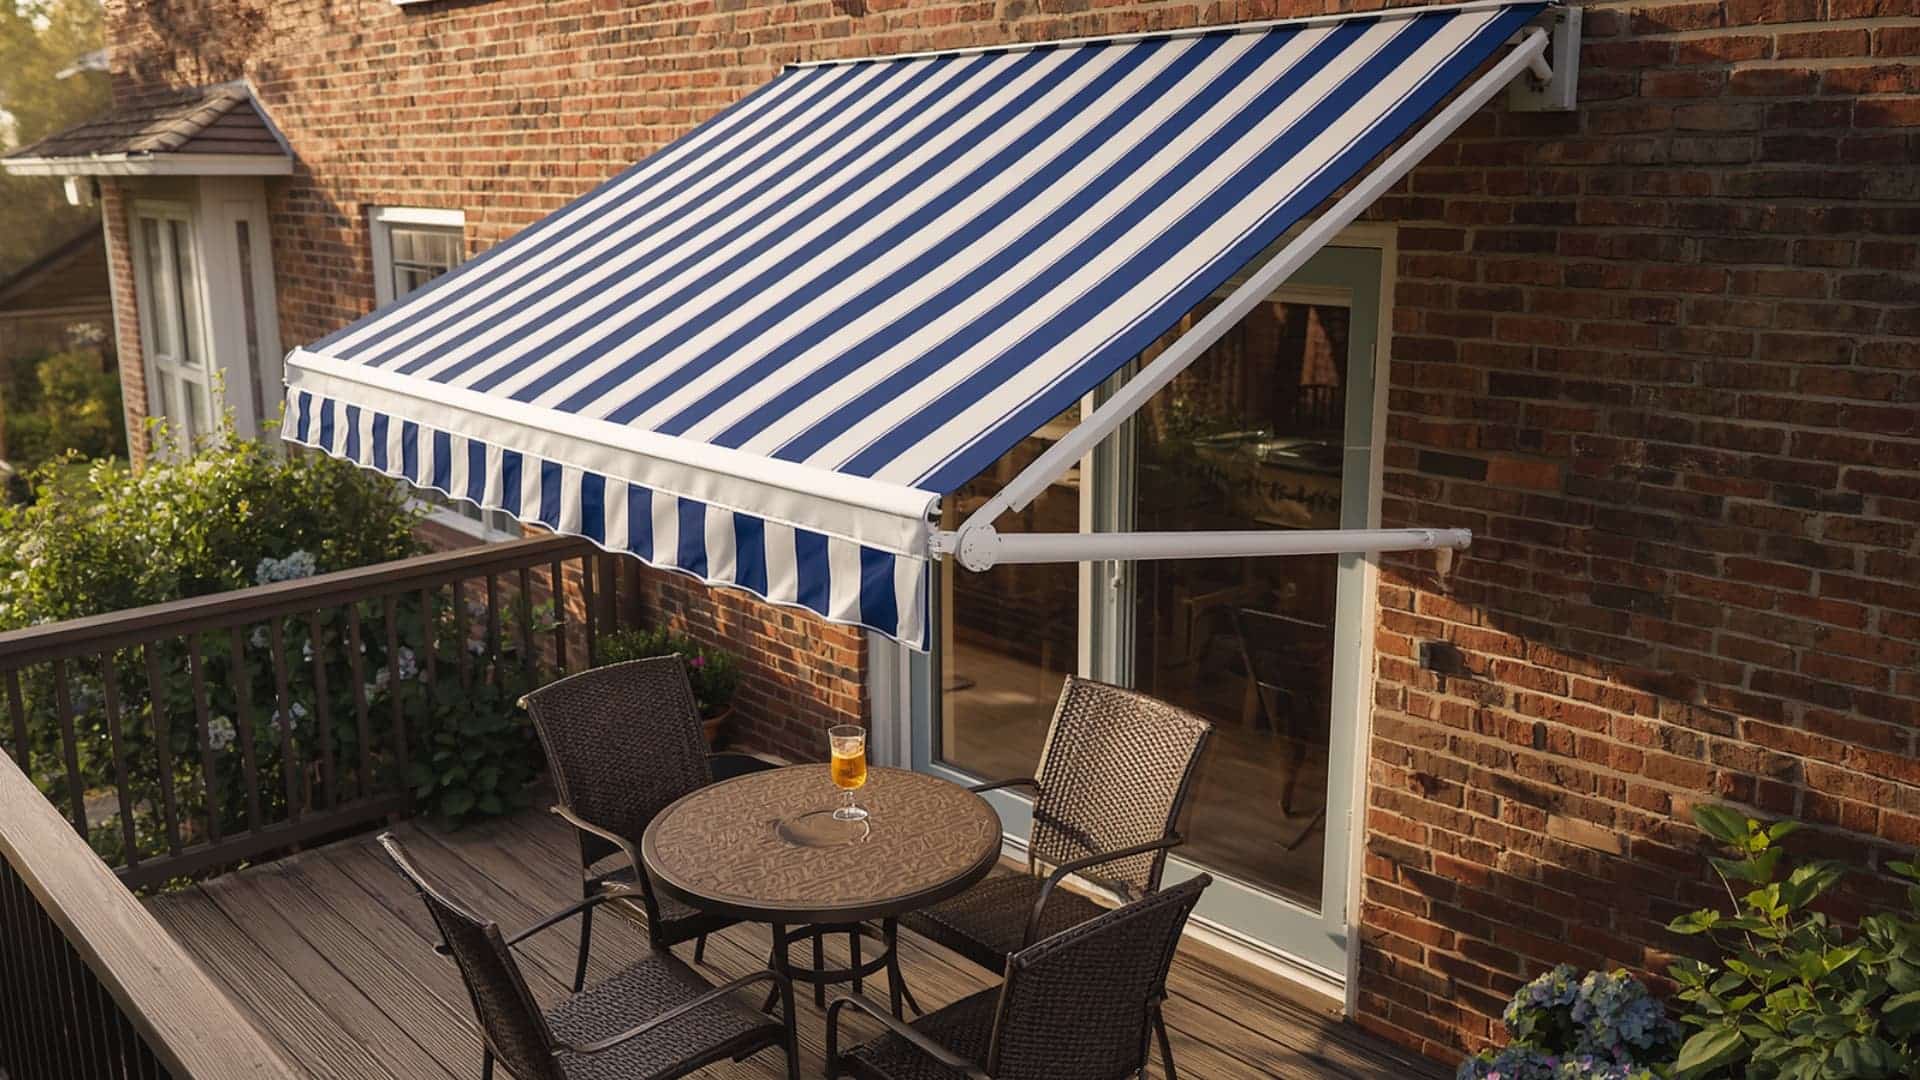
Alt Text: Small patio deck attached to a brick house featuring a blue and white striped retractable awning, shading a cozy outdoor seating area with table and chairs.
A retractable awning mounts to your home’s exterior wall and rolls out over the deck when you need shade. It pulls back when you want full sun or when the wind picks up. For decks that face south or west and bake through the afternoon, this option is hard to beat.
Estimated Cost: $300 to $1,500 for manual versions; $1,000 to $3,500 for motorized
Best For: Decks attached directly to the house that get heavy afternoon sun
| Pros | Cons |
|---|---|
| Full control over shade and sun | Higher cost compared to shade sails or umbrellas |
| Folds away completely when not needed | Must be retracted during strong winds to avoid damage |
| Protects furniture from fading | Needs sturdy wall space and exterior mounting |
| Available in many fabric colors | Motorized versions add high cost |
Maintenance: Keep fabric dry before rolling it back in. Lubricate the roll mechanism once a year. Inspect wall brackets each spring.
Pro Tip: A manual crank awning costs far less than a motorized one and works just as well for most households. Save the difference for outdoor furniture or lighting.
3. DIY Wood Pergola
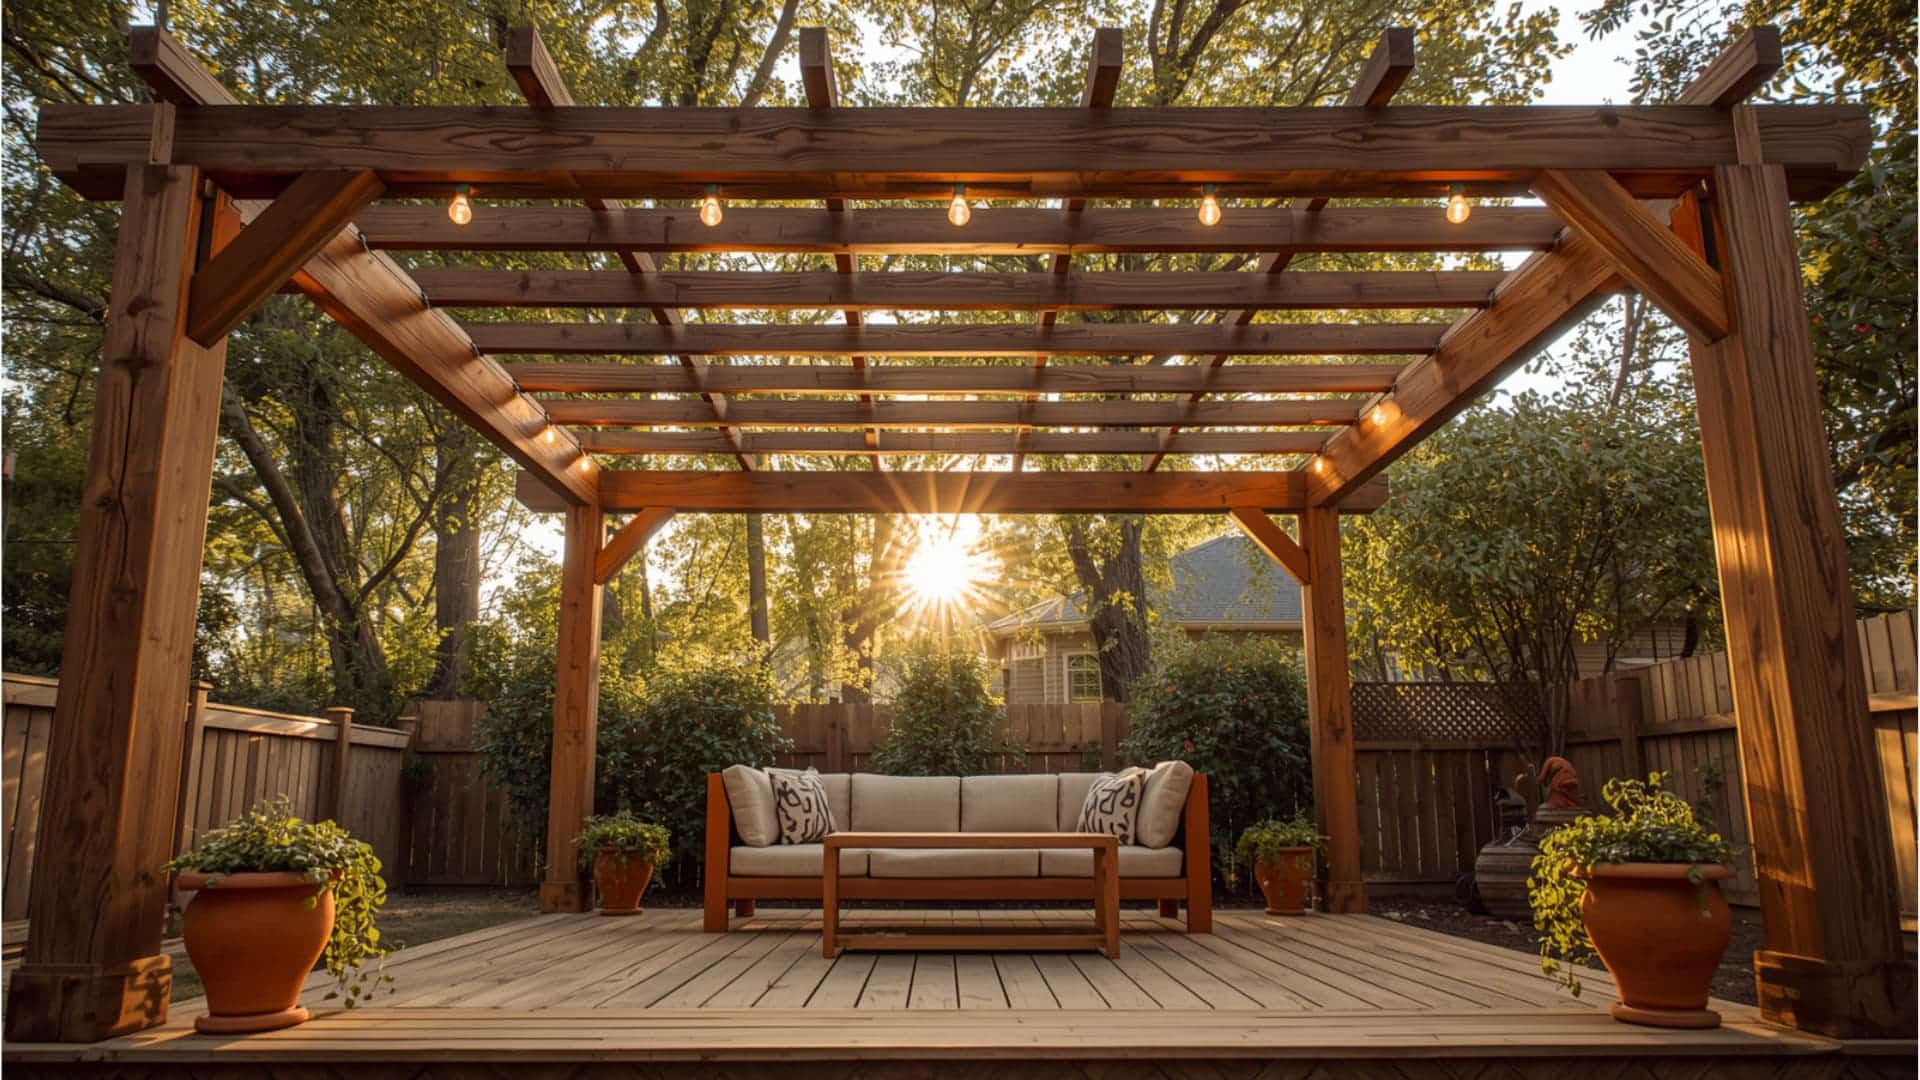
Alt Text: Wooden backyard pergola with open slatted roof and string lights, covering a cozy outdoor seating area on a deck, offering a stylish and budget-friendly covered deck idea.
A wood pergola is an open-roof frame built from posts and crossbeams. It gives your deck structure, character, and a place to hang lights, fabric panels, or climbing plants.
It takes a full weekend and some basic carpentry, but the result looks like you spent far more than you did.
Estimated Cost: $500 to $3,000 in materials, depending on size and wood type
Best For: Homeowners who want a permanent structure and are comfortable with basic tools
| Pros | Cons |
|---|---|
| Adds real structure and a finished look | Requires time and basic carpentry skills |
| Supports string lights, shade cloth, and plants | Wood needs ongoing maintenance |
| Increases home resale value | May need a building permit in some areas |
| Can be built to any size | Posts must be set in concrete for stability |
Maintenance: Sand and re-stain or seal every two to three years. Check posts at ground level for rot annually. Tighten all bolts each spring.
Pro Tip: Use pressure-treated lumber for the posts and base structure. It resists moisture and insects far better than standard wood and costs only slightly more.
4. Polycarbonate Roof Panels
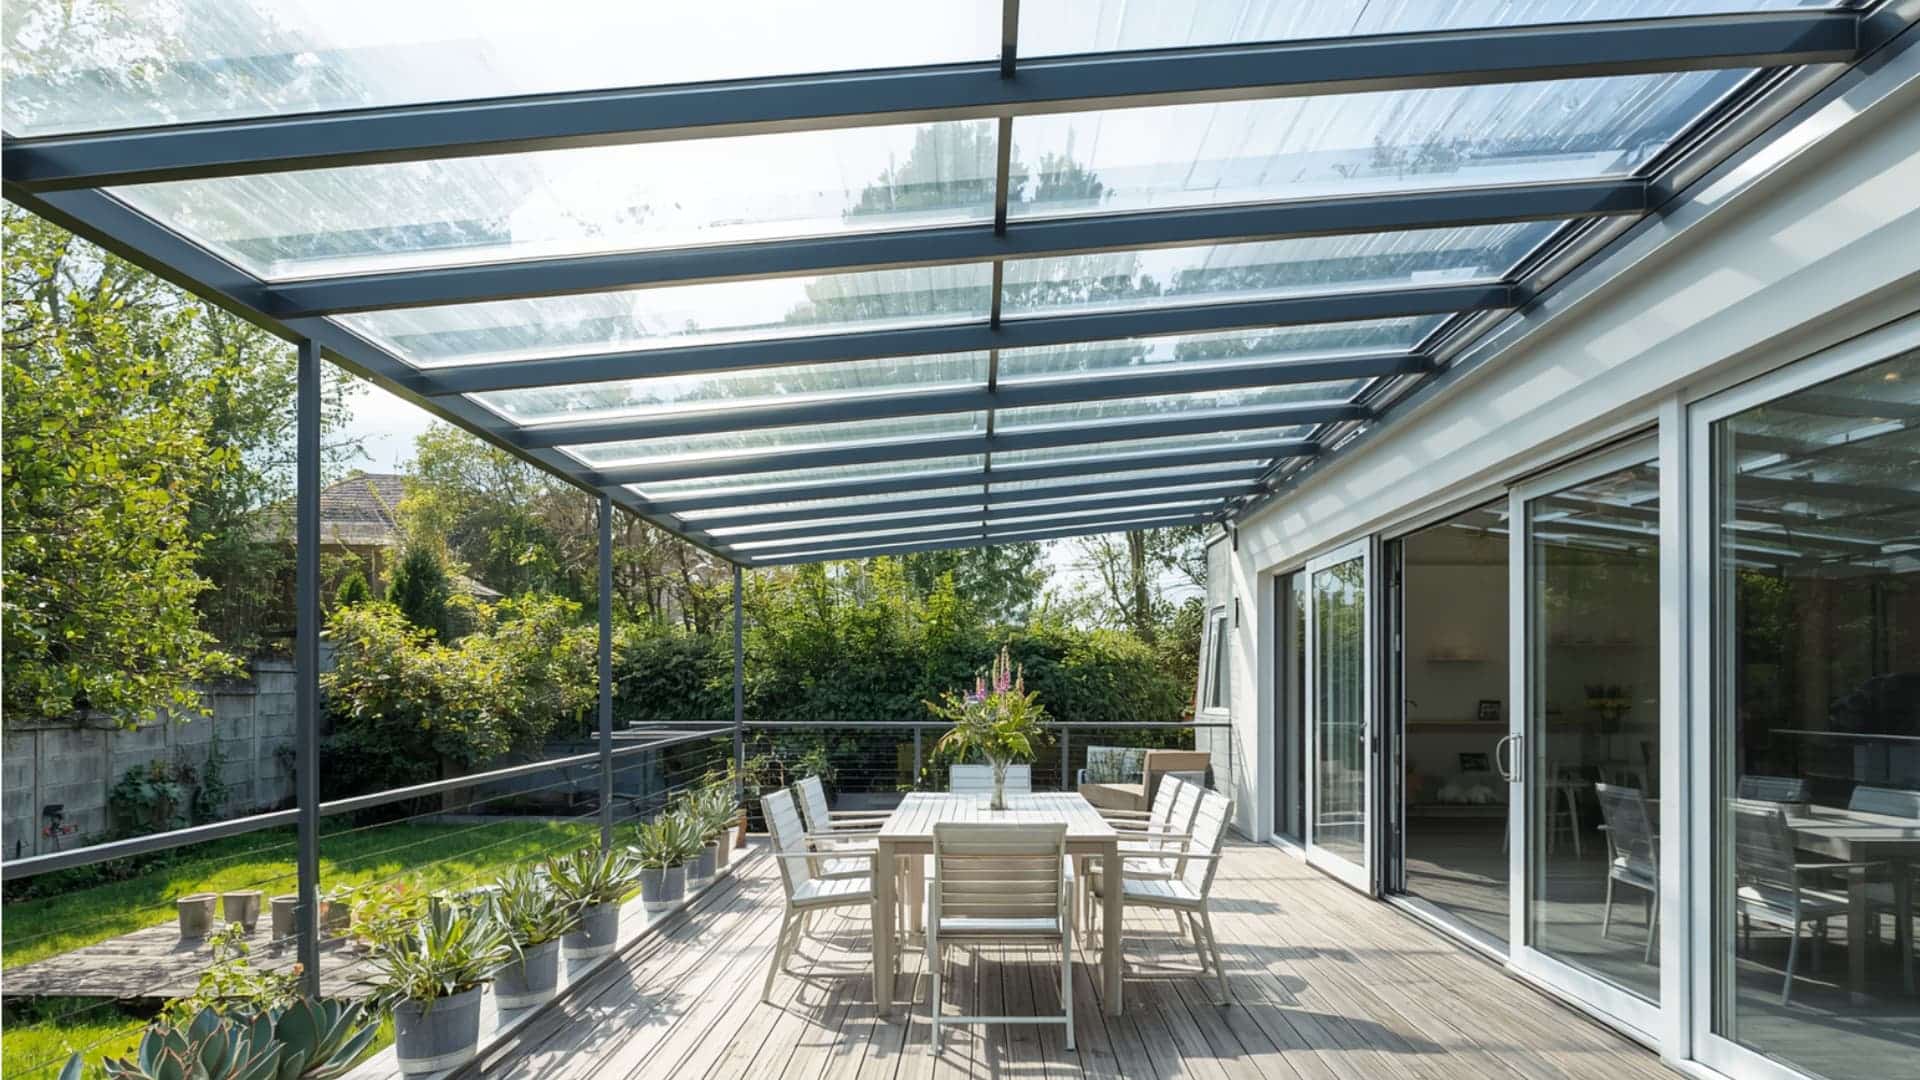
Alt Text: Modern deck with a sleek metal frame and clear polycarbonate roof panels, creating a durable covered outdoor dining space that allows natural light while protecting from rain.
Polycarbonate panels are rigid plastic sheets attached to a frame above the deck. They come in clear, tinted, or frosted finishes and provide full rain protection while still allowing natural light to enter.
For rainy climates where you want year-round use, this is one of the smartest budget-friendly moves.
Estimated Cost: $150 to $600 for materials; more if a new frame needs to be built first
Best For: Homeowners who want full waterproof coverage without a dark, closed-in feel
| Pros | Cons |
|---|---|
| Fully waterproof and durable | Can trap heat in summer without ventilation |
| Let’s be in natural light | Clear panels may yellow over time with sun exposure |
| Lightweight and easy to cut to size | Needs a solid frame to attach to |
| Lifespan of 10 to 20 years with care | Frame construction adds extra cost and time |
Maintenance: Rinse panels with water and mild soap to remove algae or dirt. Check screws and seals after heavy rain each season.
Pro Tip: Choose tinted or opal polycarbonate over clear if your deck gets strong afternoon sun. It significantly reduces heat buildup under the panels.
5. Pre-Built Gazebo Kit
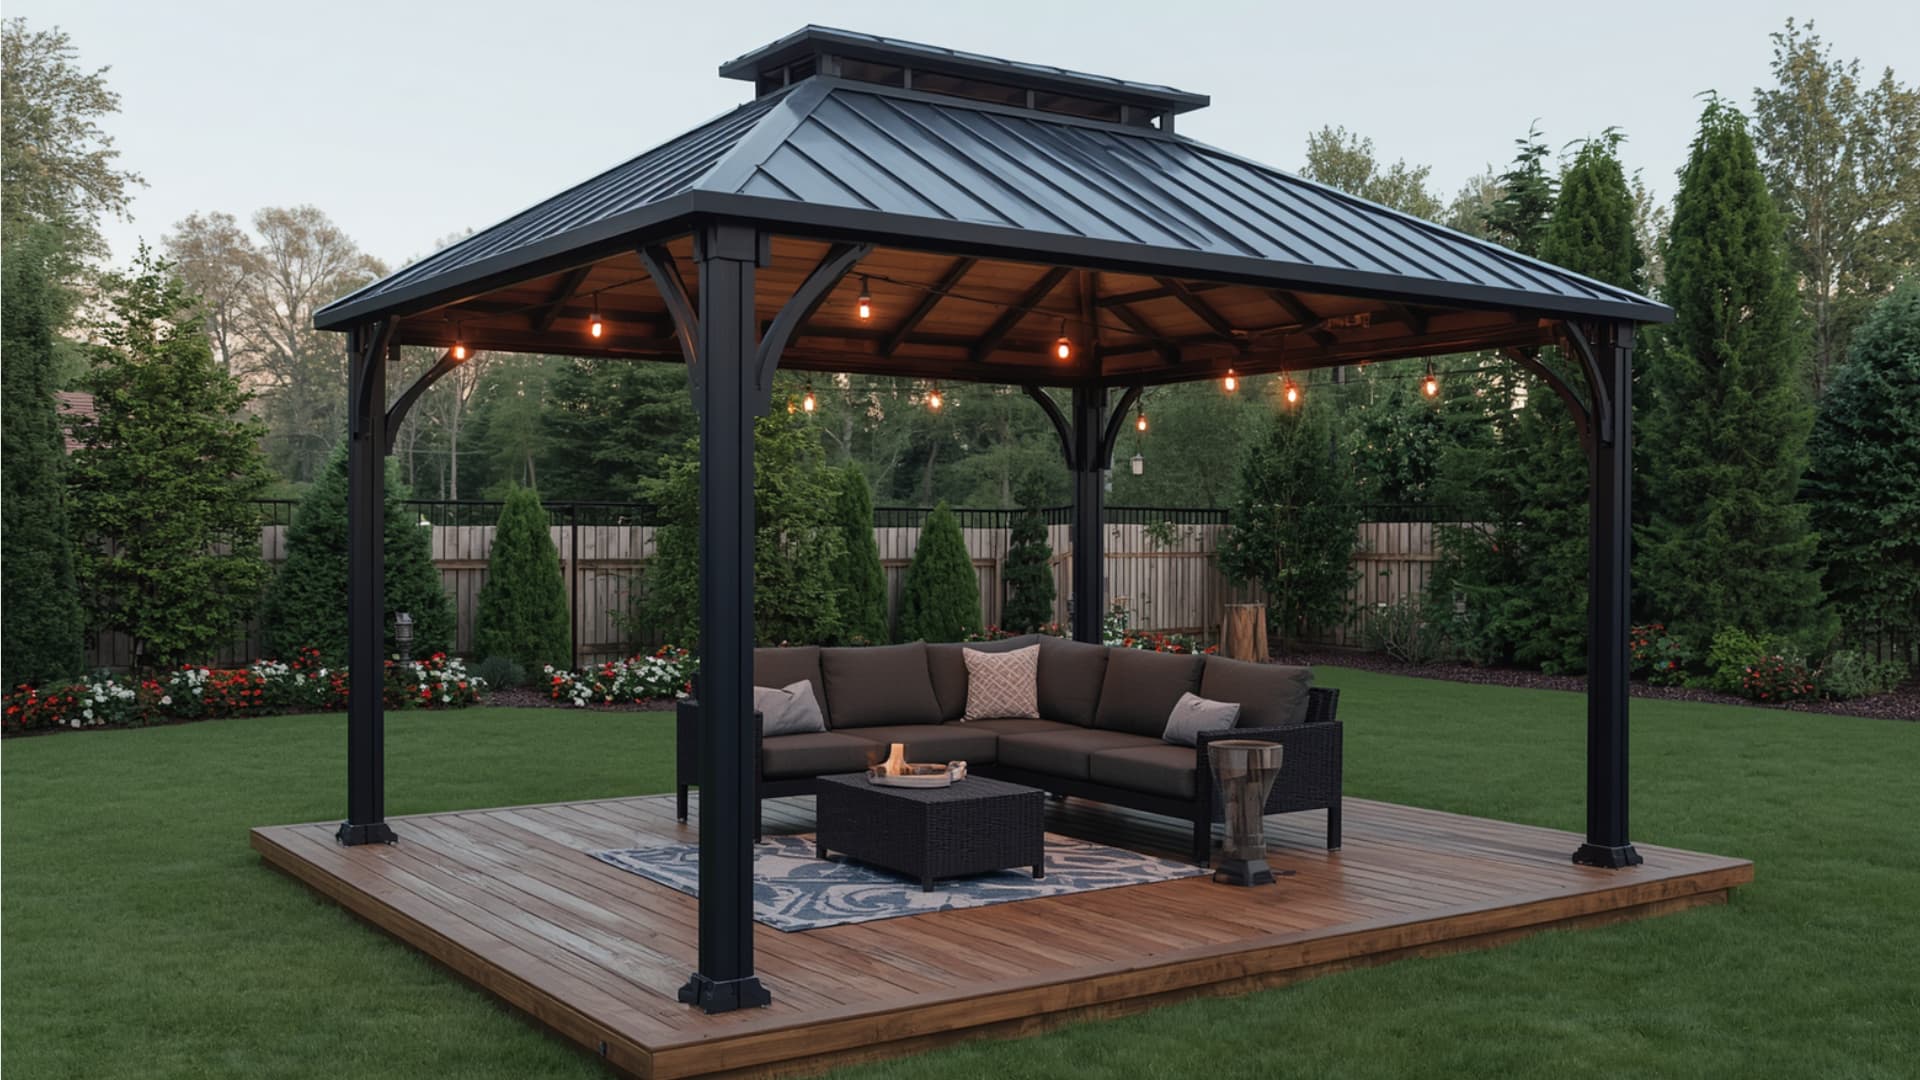
Alt Text: Pre-built gazebo with a solid metal roof and string lights, covering a stylish outdoor seating area on a wooden deck, offering a durable and elegant covered deck solution.
A gazebo kit comes with a frame and fabric or a hard roof that you put together yourself. Most kits include all the parts and take 2 to 4 hours with 2 people.
If you want a fully covered space without any construction, this is the straightforward option.
Estimated Cost: $100 to $800, depending on size and material
Best For: Homeowners who want a finished covered structure quickly, without tools or carpentry skills
| Pros | Cons |
|---|---|
| No building skills needed | Soft-top fabric roofs may fade or tear within a few seasons |
| Sets up quickly on any flat deck | Metal frames can rust if the coating wears off |
| Many sizes available from 8×8 to 12×12 feet | Less durable in heavy snow or strong wind |
| Hardtop versions offer solid rain protection | Less permanent and sturdy than built structures |
Maintenance: Rinse the frame and roof after storms. Apply a rust-resistant spray to metal joints each year. Replace fabric panels when they show wear.
Pro Tip: Look for gazebo kits with a powder-coated steel frame and a hardtop polycarbonate or steel roof panel. These last significantly longer than fabric-top versions at a similar price point.
6. Bamboo or Reed Panel Roofing
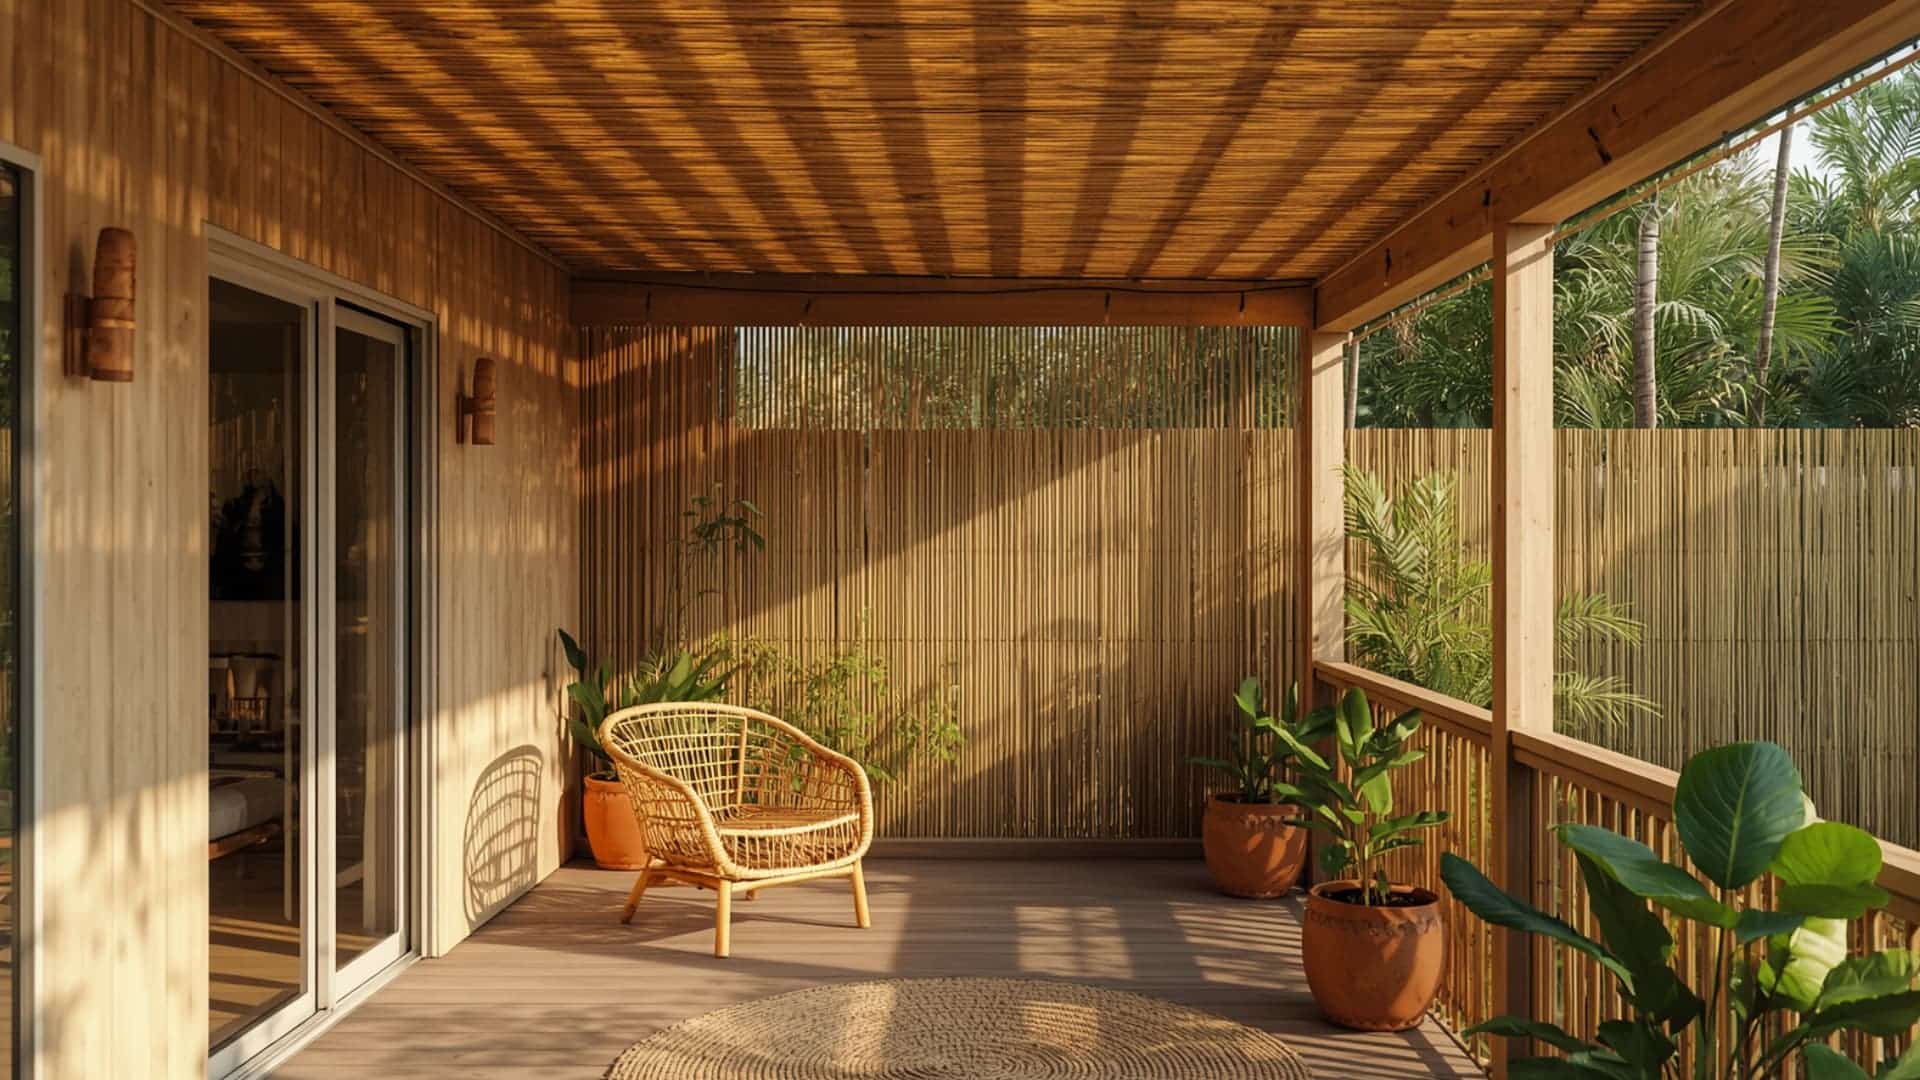
Alt Text: Covered deck with bamboo or reed panel roofing, creating a warm, natural shade with filtered sunlight, paired with plants and simple seating for a relaxed outdoor space.
Bamboo and reed panels are natural material sheets that lay or tie across a pergola frame or overhead structure.
They filter sunlight and give the deck a warm, relaxed feel that is hard to get with synthetic materials. This works especially well as a low-cost add-on to an existing structure.
Estimated Cost: $50 to $200 per panel or roll
Best For: Homeowners who have an existing frame and want the most affordable shade add-on with a natural look
| Pros | Cons |
|---|---|
| Very affordable | Not waterproof; rain passes through |
| Gives a warm, natural look | Breaks down faster in wet climates |
| Easy to install and replace | Can hold moisture and develop mold if left wet |
| Provides good shade in hot months | Needs replacing every two to three years in most climates |
Maintenance: Let panels dry out fully after rain. Remove and store before winter in colder climates. Replace sections that show splitting or darkening.
Pro Tip: Seal bamboo panels with a clear outdoor wood sealant before installation. This extends their life and helps them resist moisture and UV exposure from day one.
7. Offset or Cantilever Patio Umbrella
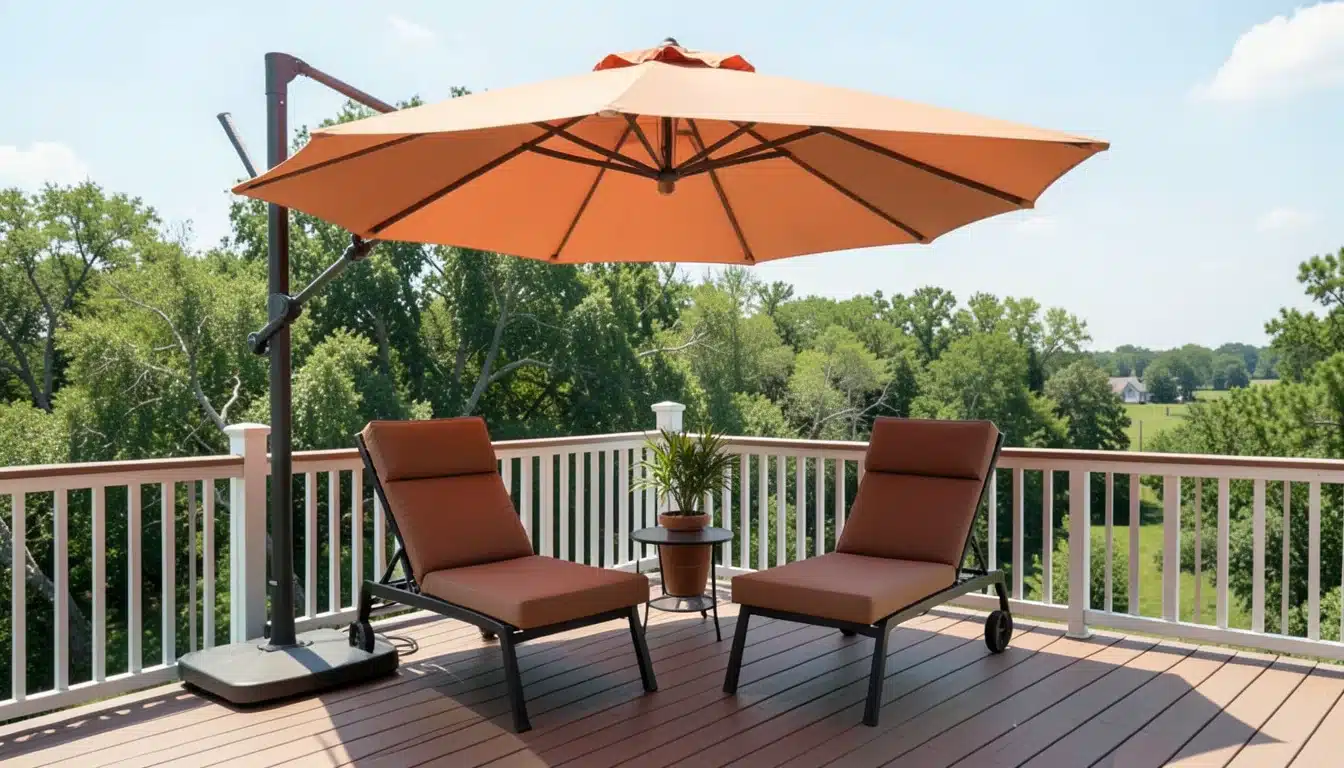
Alt Text: Deck seating area with lounge chairs, shaded by a large cantilever patio umbrella, offering a flexible, budget-friendly covered deck option for sun protection.
An offset umbrella has its pole on the side rather than through the center of a table. This gives full overhead coverage with no pole in the way.
It covers a lounge chair, a small seating group, or a corner of the deck with no installation required.
Estimated Cost: $80 to $400, depending on size and brand
Best For: Small to medium decks that need flexible shade without any permanent setup
| Pros | Cons |
|---|---|
| Completely portable and adjustable | Needs a heavy base to stay stable |
| Tilts to block the sun at different times of day | The base is often sold separately |
| No permits or tools required | Covers a limited area, typically 9 to 13 feet across |
| Easy to store in winter | Not reliable in windy spots without extra weight |
Maintenance: Close the umbrella when not in use or when the wind picks up. Wash fabric with soap and water at the start and end of each season. Store in a covered bag or indoors during winter.
Pro Tip: Pair a cantilever umbrella with a heavy concrete or sand-filled base. Do not rely on the lightweight plastic base that often comes in the box.
8. DIY Curtain Cabana
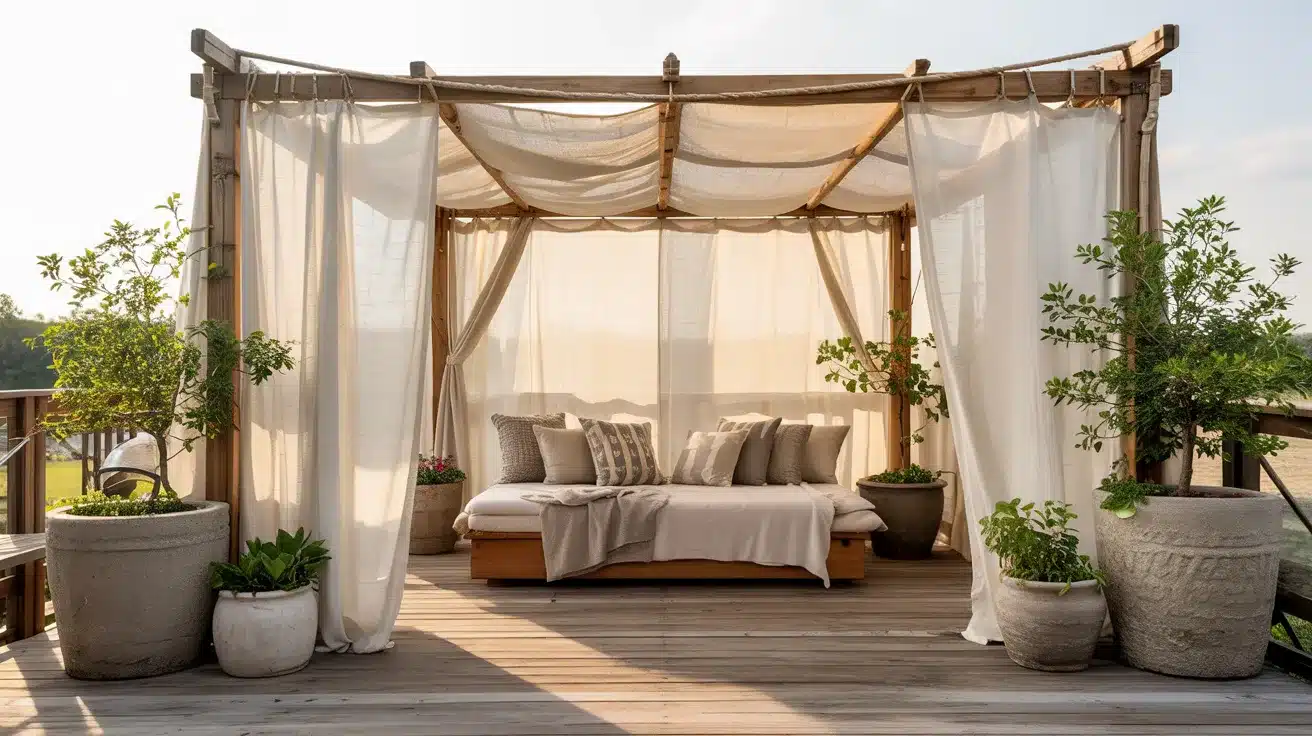
Alt Text: Wooden pergola cabana with sheer white curtains draped on all sides, featuring a cushioned outdoor daybed with pillows, surrounded by potted plants on a sunlit deck.
This option uses wooden or metal poles set into planter pots filled with concrete, with rope or wire strung across the top and outdoor curtain panels hung from the lines.
It creates a covered, semi-enclosed outdoor room with no drilling into walls or floors. It is one of the best covered deck ideas for renters who want the look without the commitment.
Estimated Cost: $100 to $350 for poles, pots, concrete, and curtains
Best For: Renters or homeowners who want a private, covered space that can be taken apart and moved
| Pros | Cons |
|---|---|
| No drilling into walls or permanent fixtures | Curtains blow in the strong wind |
| Creates shade and privacy at the same time | Poles must be secured well to prevent tipping |
| Looks polished when done well | Fabric may need washing frequently in dusty conditions |
| Completely removable | Requires some setup time and concrete drying overnight |
Maintenance: Wash curtains at least once a season. Check the concrete in pots for cracking after winter. Adjust ropes or wire if they start to sag.
Pro Tip: Use only outdoor-rated, UV-resistant curtain panels. Regular indoor curtains fade and break down within a single season when left outside.
9. Corrugated Metal Roof on a Wood Frame
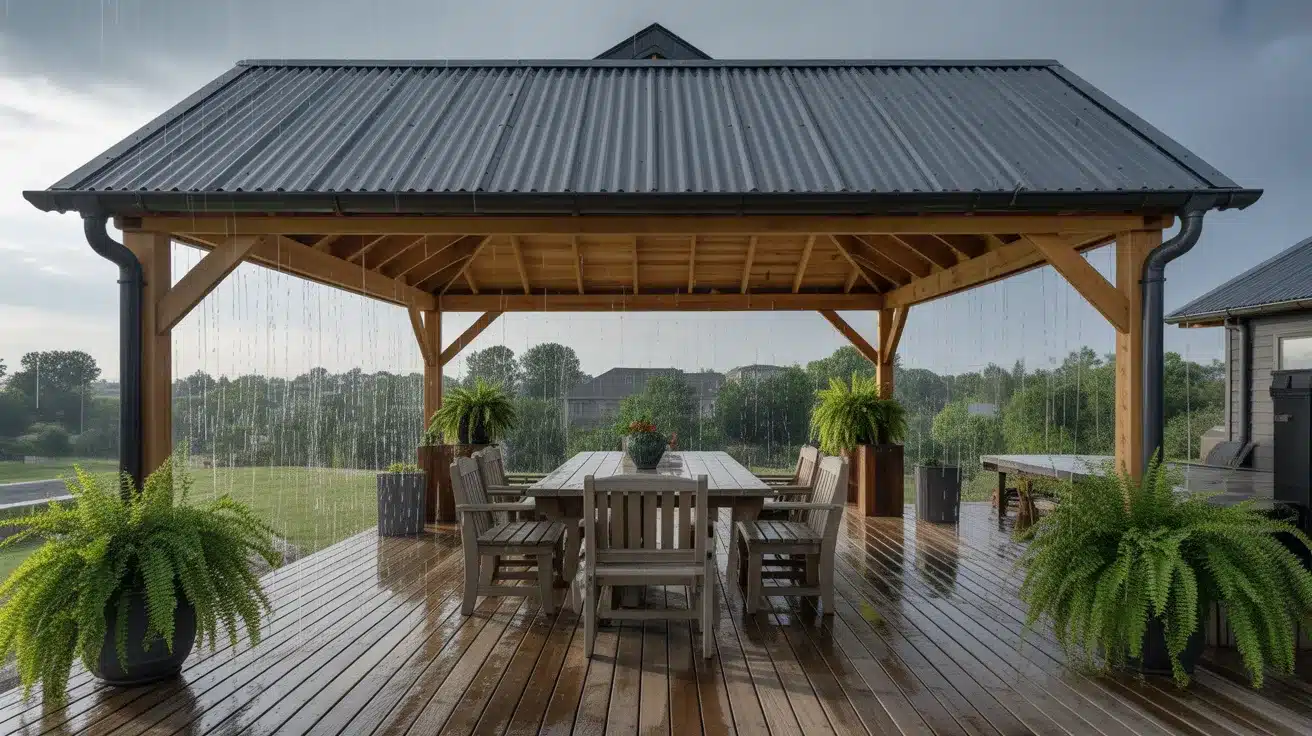
Alt Text: Wooden deck with a sturdy frame and corrugated metal roof providing full rain protection, covering an outdoor dining area with table, chairs, and potted plants.
This setup uses a simple wood frame built over the deck, covered with corrugated metal roofing sheets. It provides full waterproofing at a fraction of the cost of a professionally built roof.
The look works well with modern, industrial, and farmhouse-style homes.
Estimated Cost: $400 to $1,800 in materials, depending on deck size
Best For: Homeowners who want a permanent, fully waterproof cover that handles heavy rain and snow
| Pros | Cons |
|---|---|
| Fully waterproof and very durable | Rain on metal can be loud during heavy downpours |
| Handles heavy rain and moderate snow loads | Metal absorbs heat and can warm the space in summer |
| Metal panels are inexpensive and widely available | The frame may need a building permit |
| Suits modern, industrial, and farmhouse styles | Requires basic framing skills to build correctly |
Maintenance: Check cut edges for rust each year and seal with metal paint if needed. Clear debris from the roof after storms. Tighten screws annually as metal expands and contracts with temperature changes.
Pro Tip: Install a thin layer of foam insulation board between the metal panels and the frame. This reduces rain noise and lowers heat transfer to the space below.
10. Lattice Ceiling with Climbing Plants
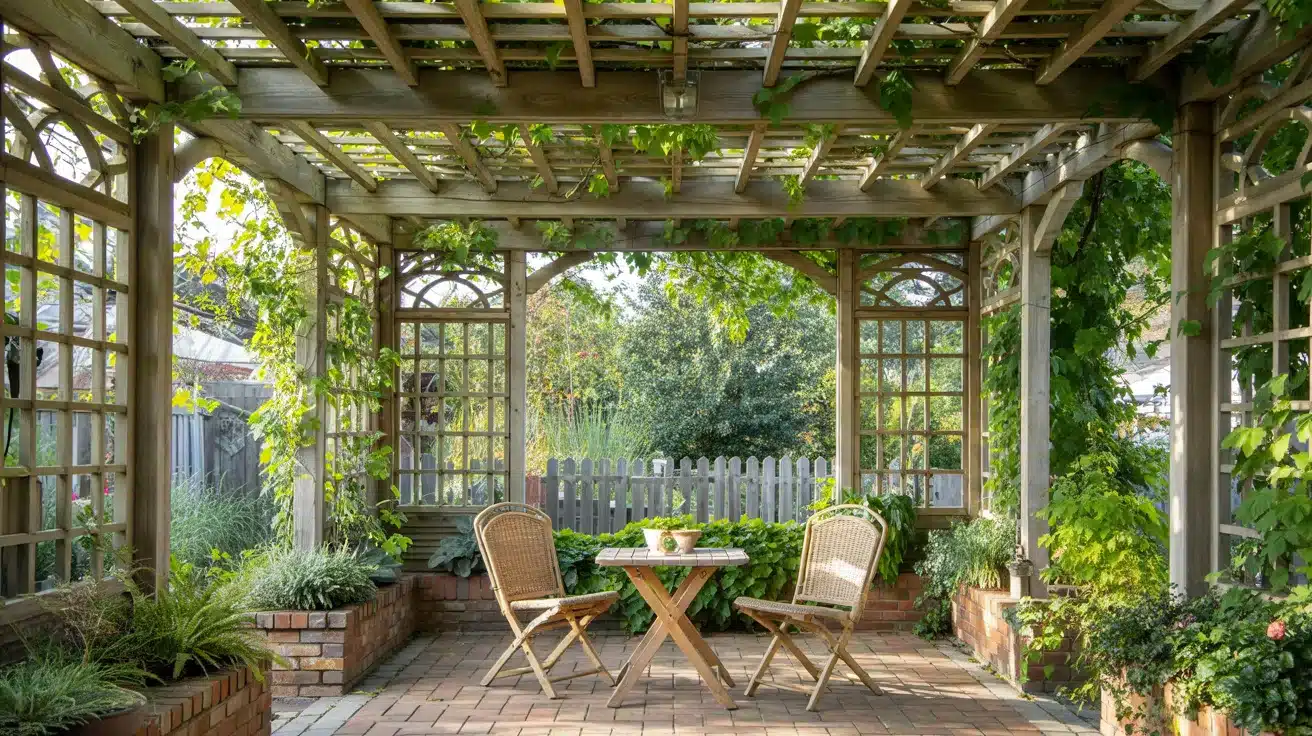
Alt Text: Wooden pergola with a lattice ceiling covered in climbing plants, creating a shaded garden seating area with two chairs and a small table surrounded by greenery and brick planters.
A wood or vinyl lattice panel is placed horizontally overhead as a ceiling structure. Climbing plants like jasmine, clematis, or grapevines are then trained to grow across it over time.
The result is a living canopy that gets better-looking each season and costs very little to build.
Estimated Cost: $100 to $500 for lattice and hardware; plants are often cheap or free from cuttings
Best For: Homeowners who enjoy gardening and want a natural canopy that improves each growing season
| Pros | Cons |
|---|---|
| Looks natural and very attractive once plants fill in | Full coverage takes one to three growing seasons |
| Provides increasing shade each year | Some climbing plants need regular pruning |
| Very low material cost | Lattice must be secured firmly for the weight of mature plants |
| Adds privacy as well as shade | Not waterproof even at full plant coverage |
Maintenance: Prune plants each spring to keep growth manageable. Check lattice connections for warping or loosening. Replace broken panels before plants regrow over them.
Pro Tip: Choose fast-growing climbers like clematis or trumpet vine if you want coverage within the first or second season. Slower plants like wisteria take longer but can last for decades.
11. Solar Screen Panels
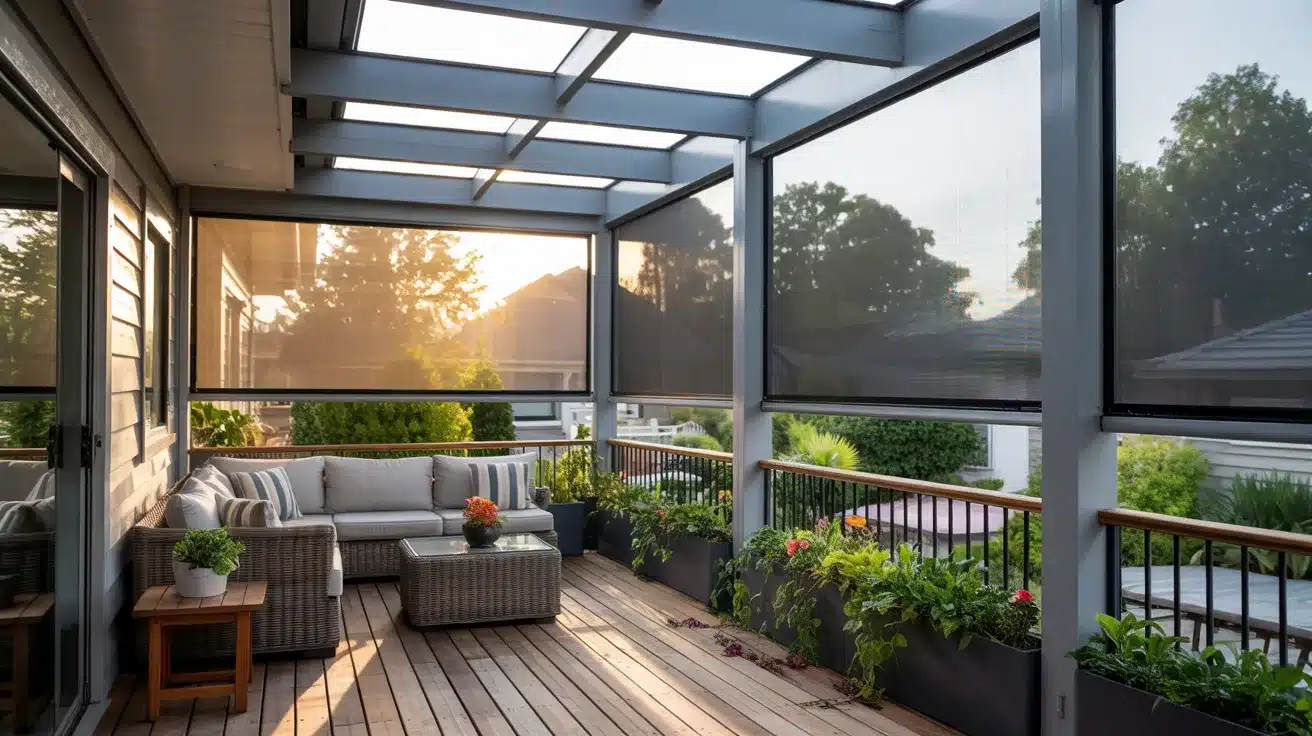
Alt Text: Covered deck with a modern frame and solar screen panels, creating a shaded outdoor seating area that reduces glare and heat while maintaining airflow and visibility.
Solar screen panels are made from tightly woven mesh fabric that blocks a large percentage of sunlight while still allowing airflow.
They are typically mounted in a fixed frame overhead or along the sides of a deck. This works especially well as a vertical side screen to block harsh western afternoon sun.
Estimated Cost: $100 to $500, depending on coverage area and frame cost
Best For: Decks that already have an overhead structure and need side screening, or decks with intense directional sun
| Pros | Cons |
|---|---|
| Blocks 80 to 90% of UV rays while keeping airflow | Not fully waterproof |
| Reduces glare without blocking the view entirely | Fabric can stretch or sag if not kept taut |
| Works as both an overhead and a side panel | Fixed panels do not retract for full-sun days |
| Fabric is affordable and easy to replace | Less flexible than shade sails or umbrellas |
Maintenance: Vacuum or brush off dust and pollen monthly. Rinse with a hose and mild soap once a season. Inspect the frame for rust or corrosion each spring.
Pro Tip: Solar screen fabric is sold by the roll at most home improvement stores. Buying it by the roll and cutting it yourself is far cheaper than buying pre-made screen panels.
12. Aluminum Pergola Kit
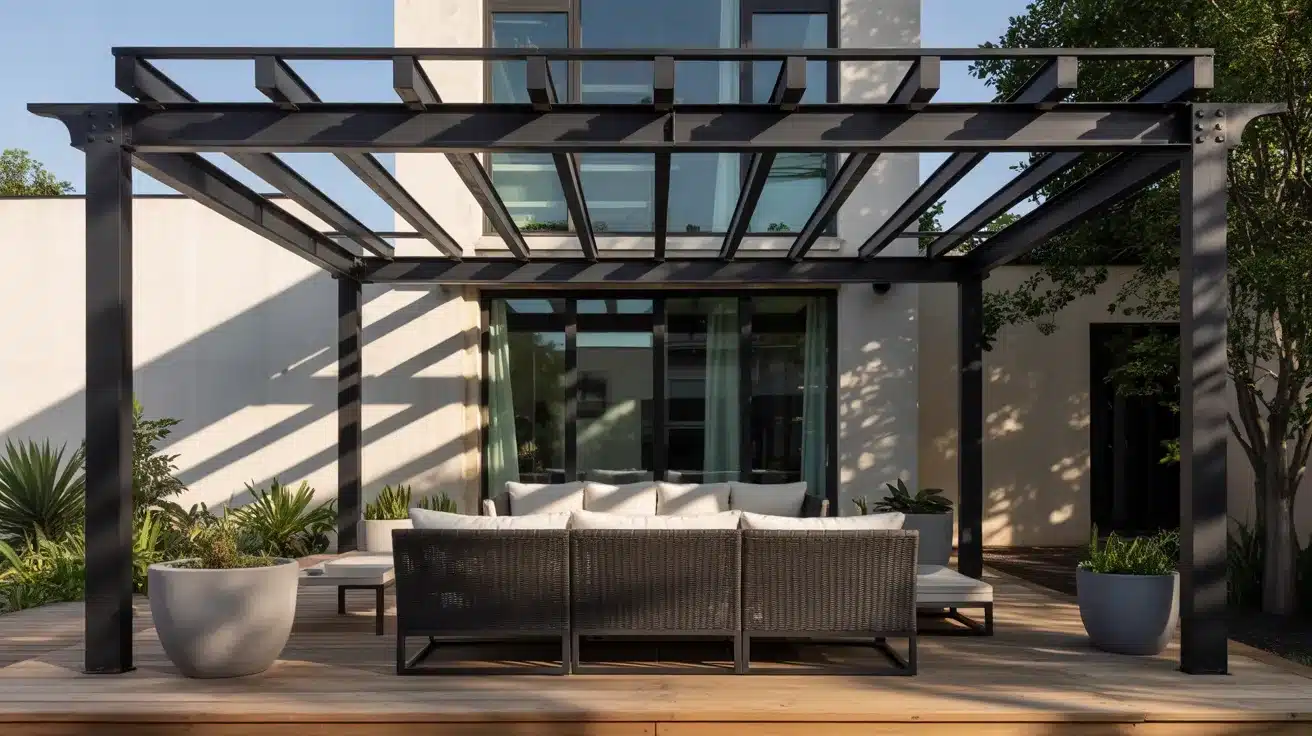
Alt Text: Modern aluminum pergola with a slatted roof attached to a house, shading an outdoor seating area with cushioned furniture on a wooden deck surrounded by planters.
An aluminum pergola kit comes with pre-cut metal posts, beams, and crossbars that bolt together without any carpentry.
It gives you the look and function of a built pergola without the need to cut, stain, or seal wood year after year. For homeowners who want a low-maintenance permanent structure, this is a solid pick.
Estimated Cost: $800 to $3,000, depending on size and brand
Best For: Homeowners who want a permanent pergola look with minimal upkeep compared to wood
| Pros | Cons |
|---|---|
| Does not rust, rot, warp, or need repainting | Higher upfront cost than a DIY wood pergola |
| Looks clean and modern | Fewer custom size options than building from scratch |
| Stands up well to wind and snow loads | Metal can feel hot to the touch in direct summer sun |
| Can hold shade cloth, lights, or a polycarbonate panel roof | Shipping costs can be high when ordered online |
Maintenance: Wipe down with a damp cloth once a season. Check bolt connections annually. Inspect any attached shade accessories for wear.
Pro Tip: Many big-box home improvement stores stock aluminum pergola kits in standard sizes. Buying in-store avoids shipping costs, which can be steep for heavy metal kits.
13. Waterproof Tarp and Post Canopy
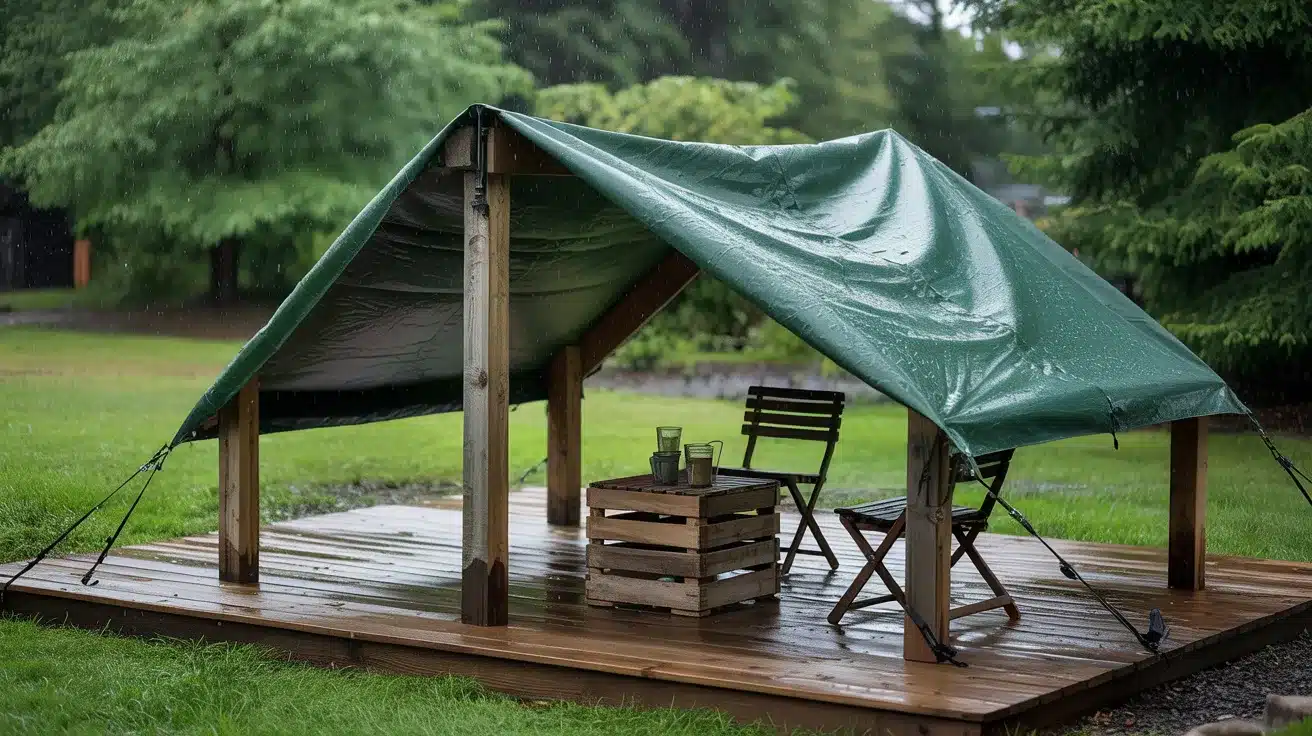
Alt Text: DIY wooden canopy shelter with a green waterproof tarp stretched over posts, covering a small seating area with chairs and a table on a rainy outdoor deck.
A heavy-duty waterproof tarp is stretched tightly between wooden or metal posts anchored in weighted containers or the ground.
It is one of the most affordable ways to provide rain cover for a deck, with almost no tools or experience required. Think of it as the no-frills version of a covered deck that actually works.
Estimated Cost: $30 to $150 for tarp, posts, rope, and hardware
Best For: Homeowners on a very tight budget who need quick, temporary, or seasonal rain protection
| Pros | Cons |
|---|---|
| Extremely low cost | Not the most attractive option visually |
| Can be set up in a few hours | Tarps flap in the wind and can tear at grommets over time |
| Fully waterproof with a quality-rated tarp | Requires careful setup to avoid water pooling in the center |
| Easy to take down and store | UV exposure breaks down tarp material over one to two years |
Maintenance: Drain any standing water after rain. Inspect grommets and tie points before each season. Replace the tarp every one to two years.
Pro Tip: Pull the tarp at an angle rather than flat so water drains off to one side. Use heavy-duty ratchet straps instead of rope to keep it tight and prevent sagging.
14. Louvered or Adjustable Slat Pergola
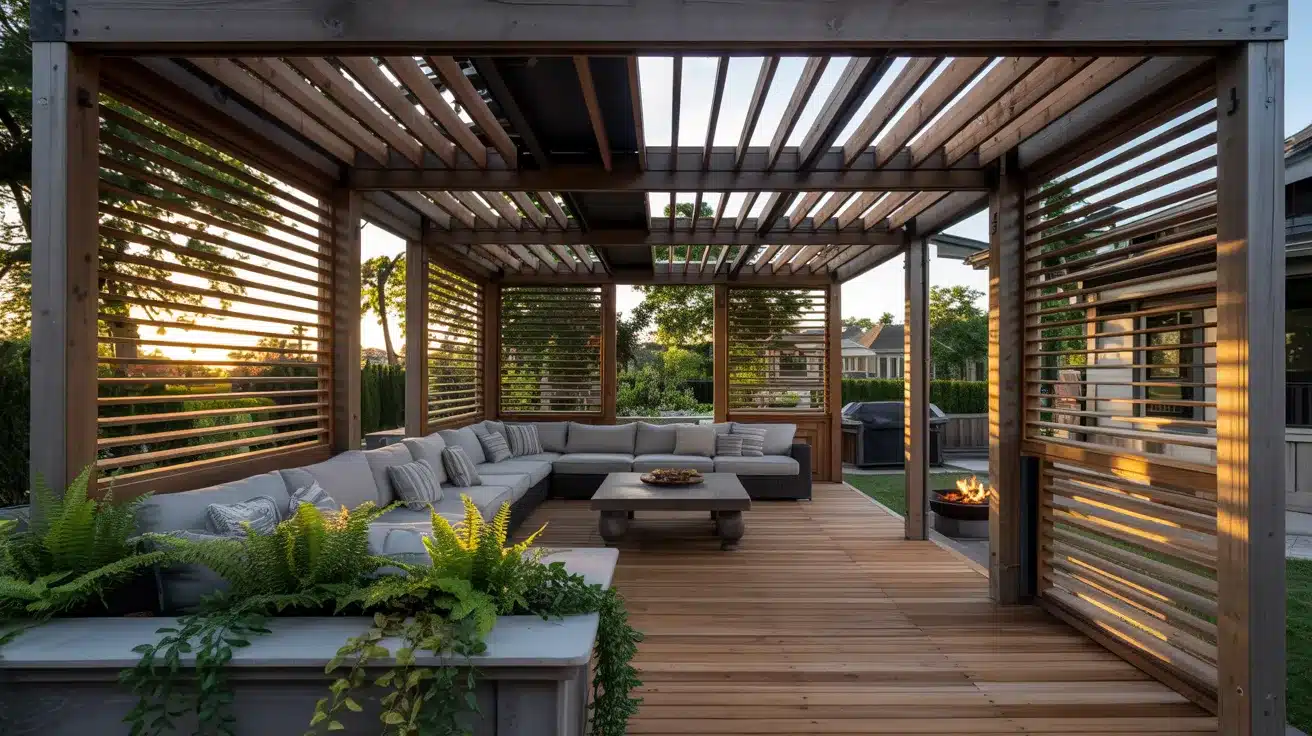
Alt Text: Modern pergola with adjustable wooden slats on the roof and sides, creating a shaded outdoor lounge area with sectional seating, a coffee table, and surrounding greenery.
A louvered pergola has roof slats that rotate between open and closed positions. Open slats bring in sun and airflow. Closed slats block rain and create a fully shaded space.
It is the most flexible covered deck option on this list, and manual versions bring the price down to a point where it fits a reasonable budget.
Estimated Cost: $1,500 to $6,000 for manual DIY kits; significantly more for motorized systems
Best For: Homeowners who want full year-round flexibility and are willing to invest a bit more for long-term value
| Pros | Cons |
|---|---|
| Most flexible cover option available | Higher cost than most budget options on this list |
| Adjusts for weather and time of day | More moving parts mean more potential for wear over time |
| Adds significant value to the home | Manual versions require walking to the structure to adjust |
| Works in all four seasons with the right additions | Precise assembly is needed for the slats to open and close correctly |
Maintenance: Lubricate louver pivot points once a year. Clear debris from slats after storms. Check the frame for movement or settling annually.
Pro Tip: Manual louvered kits from specialty outdoor suppliers offer the same function as motorized systems at roughly a third of the cost. For most homeowners, manual operation is not a daily inconvenience.
15. Recycled Wood Pallet Shade Structure
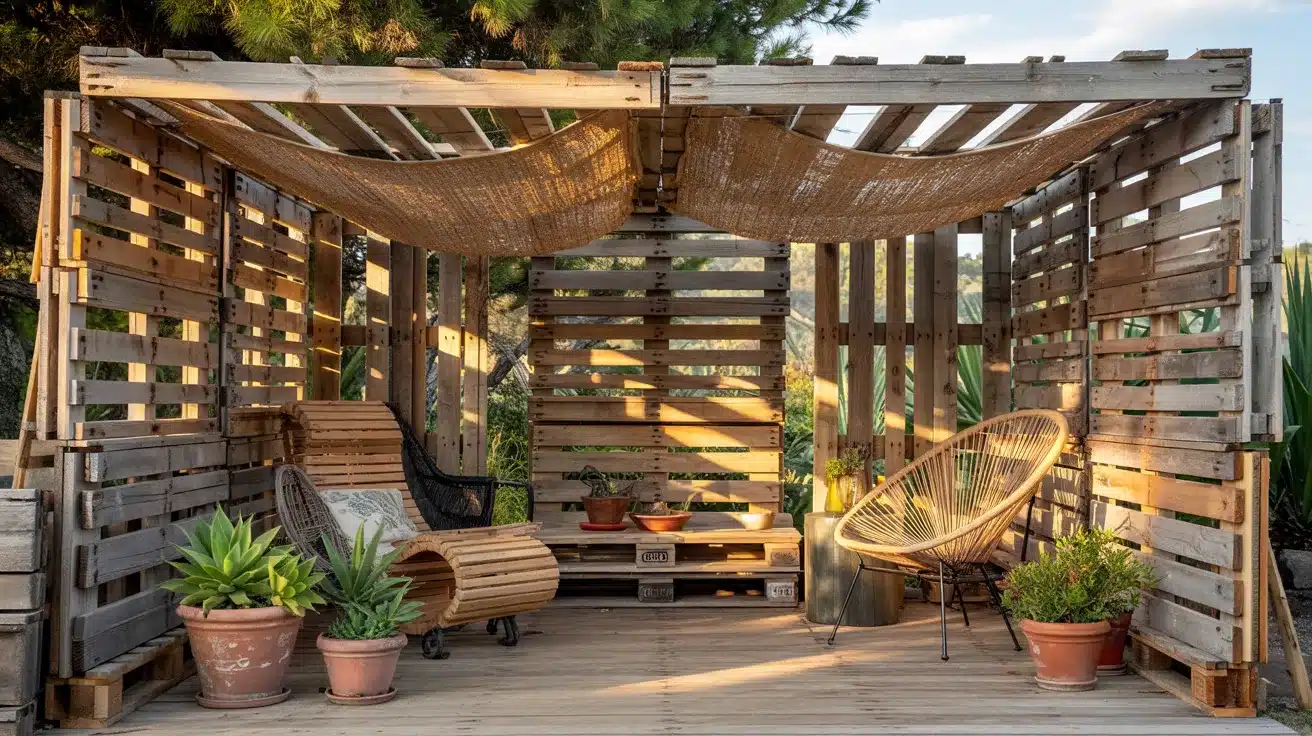
Alt Text: DIY outdoor shade structure made from recycled wood pallets, featuring slatted walls, a fabric canopy overhead, lounge seating, and potted plants on a rustic wooden deck.
Wooden shipping pallets can be bolted or stacked to form a simple shade frame above your deck. The pallets are often free or very cheap from local businesses, warehouses, or online marketplaces.
With some sanding, sealing, and basic hardware, the result is a one-of-a-kind shade structure that costs almost nothing.
Estimated Cost: $0 to $200 for pallets, hardware, and sealant
Best For: Budget-first homeowners who enjoy creative DIY builds and are comfortable with basic tools
| Pros | Cons |
|---|---|
| Extremely low cost, sometimes completely free | Quality varies widely between pallets |
| Fully customizable in height and layout | Requires sanding and sealing to prevent splinters |
| Can be combined with shade cloth or bamboo on top | Not as structurally strong as purpose-built lumber |
| Has a popular reclaimed, rustic look | Some pallets are treated with chemicals not safe for living spaces |
Maintenance: Re-seal with outdoor wood sealant every year. Check for loose boards or protruding nails each spring. Replace cracked or badly weathered sections promptly.
Pro Tip: Only use pallets stamped “HT” (heat treated). Avoid any marked “MB” as those have been treated with methyl bromide, which is not safe for use in outdoor living areas.
16. Home Roof Line Extension
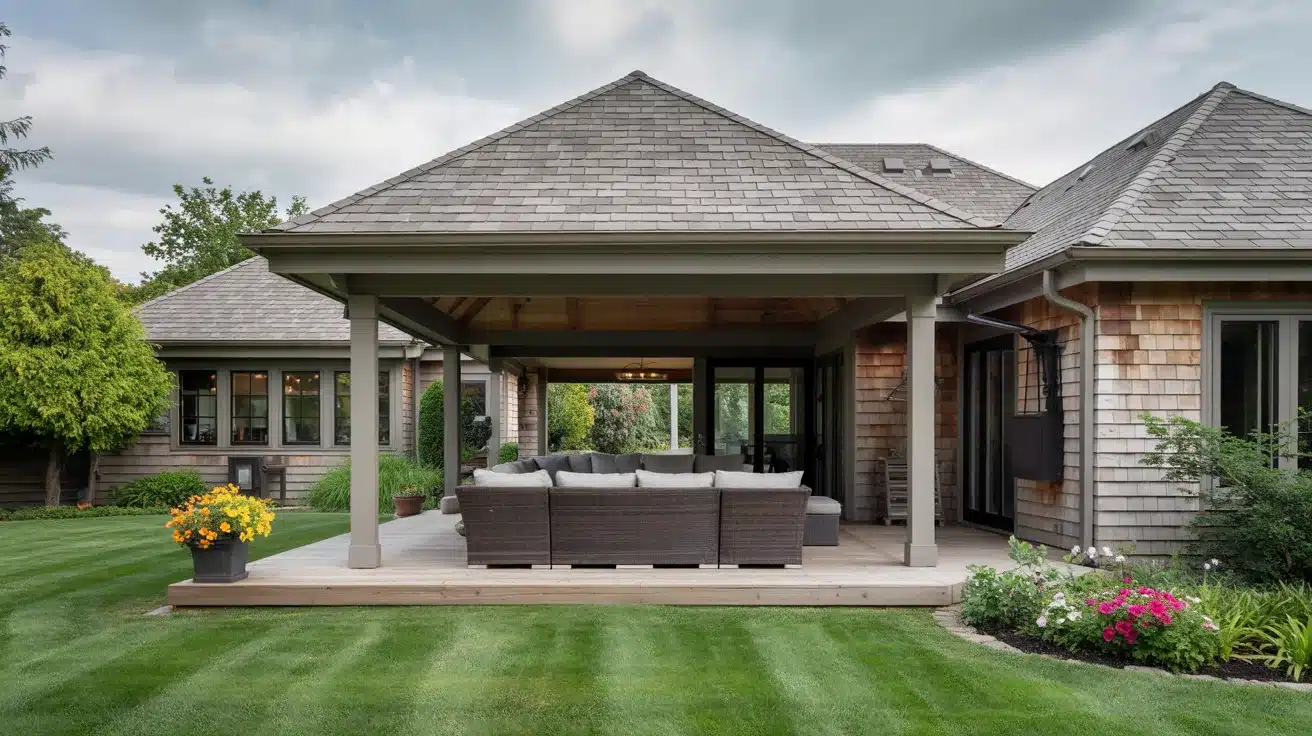
Alt Text: Covered patio extension built into the home’s roofline, featuring a shaded outdoor seating area with cushioned furniture on a wooden deck overlooking a landscaped yard.
This option extends your home’s existing roof outward to cover the deck below.
A contractor adds new rafters, matching roofing material, and a gutter system so the new covered section looks like it was always part of the house. It is the most permanent and most integrated covered deck option available.
Estimated Cost: $5,000 to $15,000 and up, depending on deck size, roof pitch, and materials
Best For: Homeowners who want a fully permanent covered deck that matches the home’s style and adds real resale value
| Pros | Cons |
|---|---|
| Most permanent and durable covered deck option | The highest cost option on this list |
| Matches the home’s existing style and materials | Requires permits in most areas |
| Fully weatherproof in rain, snow, and wind | Work can take several days to complete |
| Significantly increases home resale value | Changes the home’s structure permanently |
Maintenance: Maintain it just like the rest of your home’s roof. Clear gutters twice a year. Inspect flashing where the new roof meets the house wall after each winter.
Pro Tip: If you are already planning a roof repair or replacement, ask your roofer about extending the roofline at the same time. Doing both jobs together typically reduces the per-project cost of the extension.
17. Steel Carport-Style Cover
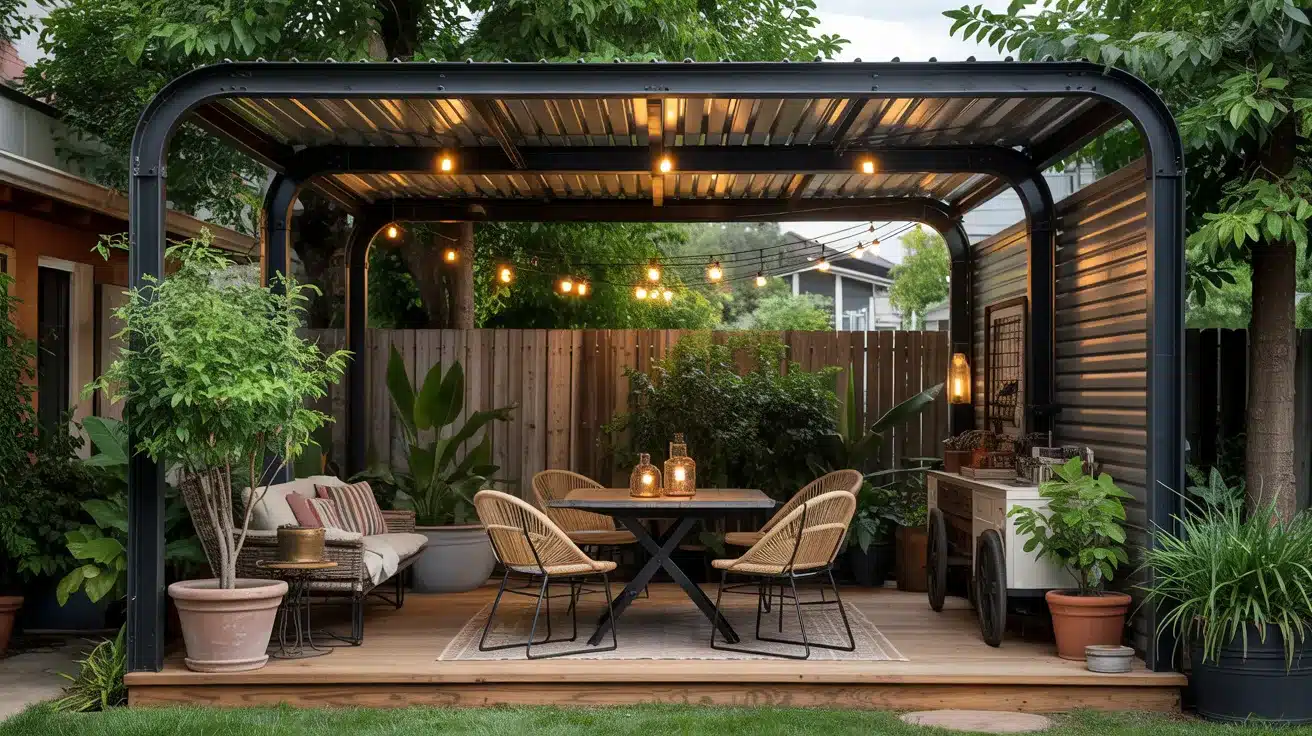
Alt Text: Steel carport-style pergola with a curved metal roof and string lights, covering a cozy outdoor dining and seating area with plants, furniture, and decorative accents on a wooden deck.
A steel carport kit is a freestanding metal frame with a solid or corrugated roof. These kits are widely sold for vehicles, but they work very well as covered deck structures when anchored correctly.
They offer full waterproofing at a fraction of the cost of a custom-built structure.
Estimated Cost: $300 to $1,500 for the kit, depending on size
Best For: Homeowners with a large freestanding deck who want full waterproof coverage without attaching anything to the house
| Pros | Cons |
|---|---|
| Fully waterproof and structurally strong | Looks more functional than decorative without added finishing touches |
| Does not require attachment to the house | A metal roof can be loud during heavy rain |
| Kits are widely available in many sizes | May need anchoring into the deck or ground for wind stability |
| Much cheaper than a professionally built roof structure | Some local codes classify these as permanent structures |
Maintenance: Check anchoring bolts annually. Clear the roof of debris after storms. Apply touch-up paint to areas where the coating chips to prevent rust from spreading.
Pro Tip: Add wooden side panels and string lights to turn a carport-style kit into a proper outdoor room rather than a utility structure. A coat of matte black spray paint on the frame also helps it blend in.
18. PVC Pipe Frame with Shade Fabric
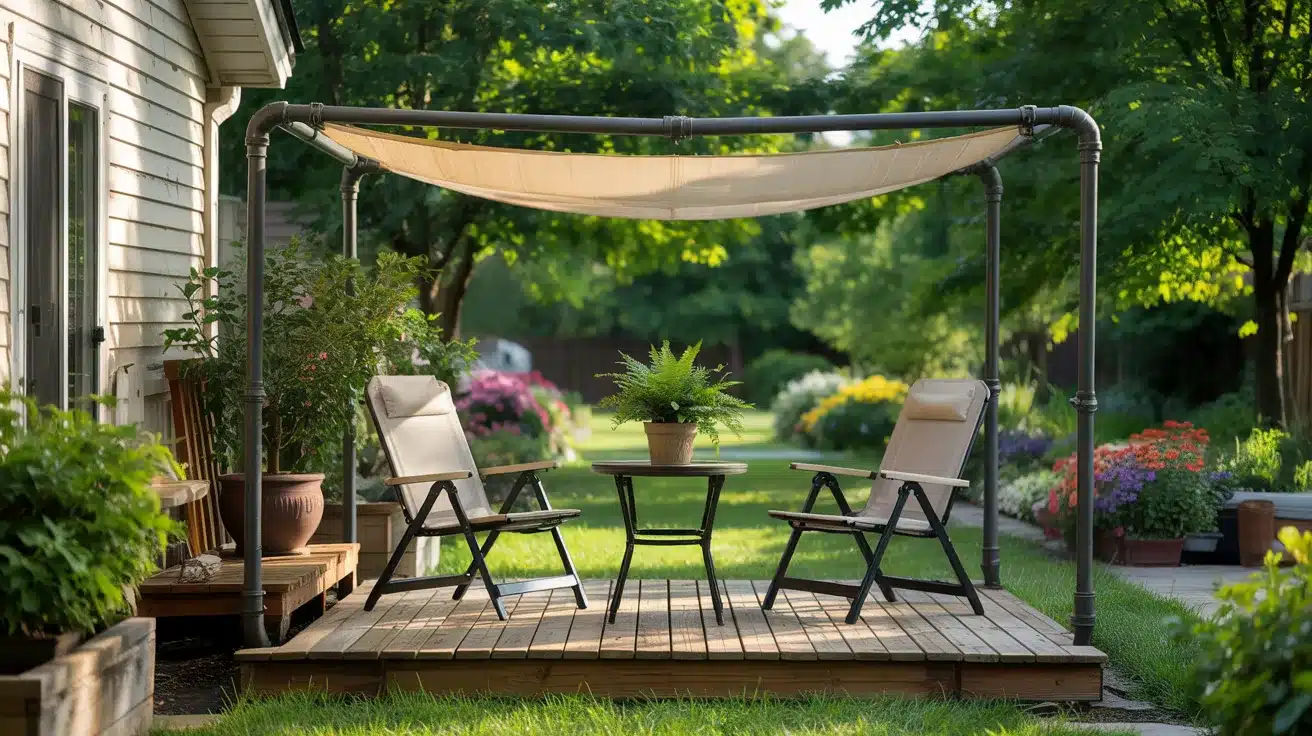
Alt Text: DIY PVC pipe frame canopy with a stretched fabric shade, covering a small deck seating area with two chairs and a table, surrounded by lush garden plants.
PVC pipe is used to build a lightweight overhead frame above the deck, with shade cloth or outdoor fabric stretched across the top and attached with zip ties or clips.
It is one of the most affordable and flexible DIY covered deck ideas, and it can be set up in a few hours without any special tools.
Estimated Cost: $40 to $150 for pipe, connectors, fabric, and fittings
Best For: Renters, first-time DIYers, or anyone who needs a very low-cost temporary or seasonal shade solution
| Pros | Cons |
|---|---|
| Extremely low cost | Not suitable as a permanent structure |
| Lightweight and easy to disassemble and move | Will not handle heavy snow or strong winds without extra bracing |
| PVC does not rust or rot | Does not look as finished as the other options without added fabric and trim |
| Can be shaped into many configurations | Standard white PVC weakens over time from UV exposure |
Maintenance: Check pipe connections for loosening each season. Inspect shade cloth for tears or fading and replace as needed. Paint PVC with spray paint rated for plastic to slow UV breakdown.
Pro Tip: Use gray electrical conduit PVC instead of white plumbing PVC. It is rated for outdoor UV exposure and holds up significantly longer without becoming brittle.
How to Choose the Right Deck Cover?
Start with two questions: how much do you want to spend, and do you need full rain protection or just shade? For shade only with flexibility, shade sails or a cantilever umbrella work well.
For full rain cover and something permanent, polycarbonate panels, metal roofing, or a roof extension are the better path.
For renters or anyone who wants everything removable, stick with gazebo kits, tarp canopies, or DIY builds that do not require drilling into the home’s structure.
Wrapping It Up
Covering your deck does not have to be a big project or a big expense. A well-placed shade sail or a weekend pergola build can change how much time you actually spend outside.
The right covered deck idea on a budget depends on your space, your setup, and how much effort you want to put in.
Pick the option that fits your situation and start there. You do not have to get it perfect on the first try. Small changes make a real difference outdoors.
Which of these covered deck ideas are you planning to try first? Drop a comment below and let us know what you are working with.