
Kids are not hard to entertain. They are hard to entertain.
Screens work, sure. But somewhere between the third cartoon and the fourth snack, you start looking for something better.
That is where crafting comes in. It is hands-on, low-cost, and keeps kids focused in a way that surprises most parents the first time they see it.
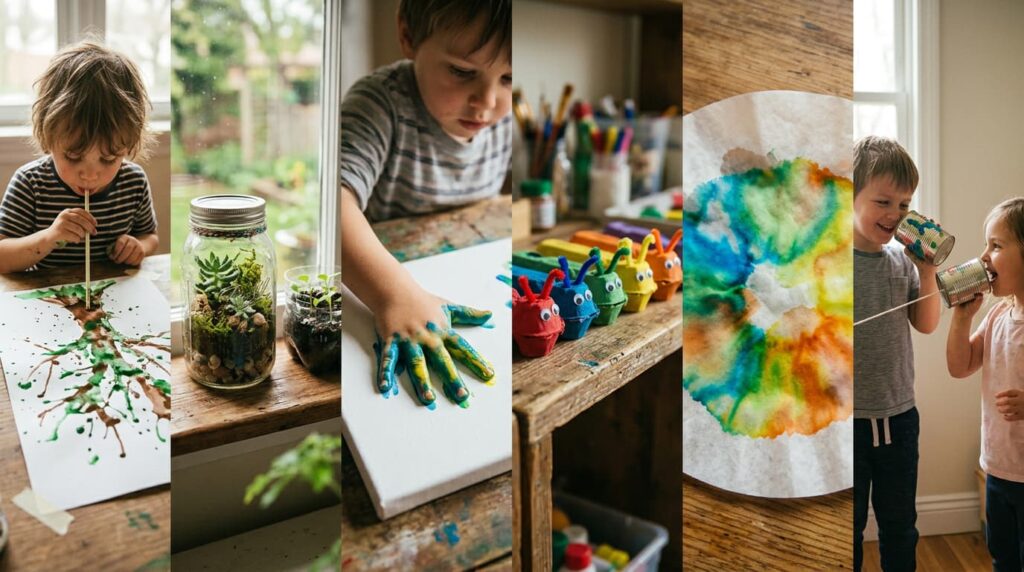
This blog brings you fun crafts for kids, split into clear categories. Paper, paint, nature, science, seasonal, wearables, recycled materials, and pretend play toys. Every idea uses simple supplies and comes with step-by-step instructions.
Pick one and get started today.
What You Need Before You Start
Setting up takes five minutes. Having the right supplies ready means less stopping mid-craft to hunt for scissors.
| Supply | What It Is Used For |
|---|---|
| Child-safe scissors | Cutting paper, cardboard, and yarn |
| Glue sticks and liquid craft glue | Sticking layers, attaching details |
| Construction paper and cardstock | Base sheets for most paper crafts |
| Markers, crayons, watercolor paints | Coloring, decorating, adding detail |
| Regular tape and washi tape | Joining parts, adding color borders |
| Popsicle sticks | Building structures and frames |
| Pipe cleaners | Bending, shaping, making figures |
| Paper plates, cups, and egg cartons | Animal crafts and upcycled builds |
| Googly eyes | Faces on any craft |
| Yarn and string | Weaving, tying, making pom-poms |
| Empty toilet paper rolls | Tubes, animals, pretend tools |
| Recycled materials (bottles, cans, boxes) | Eco builds bigger constructions |
You do not need all of these at once. Most crafts in this blog use three to five items from this list. Keep a small labeled box ready in a corner, and kids can reach in whenever they feel like making something.
Paper Crafts for Kids
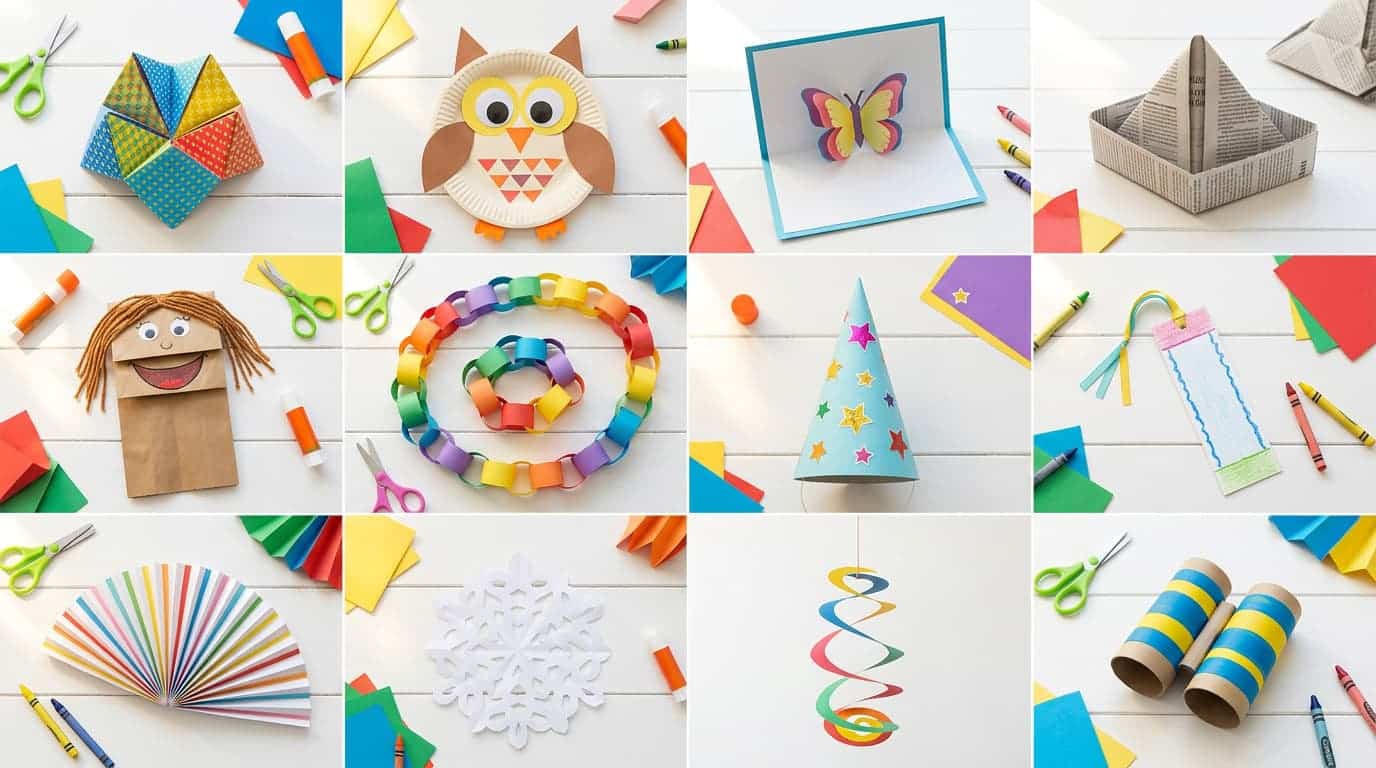
Alt Text: Grid of paper crafts for kids, including origami, paper plate owl, pop-up card, paper chains, puppet, party hat, bookmark, snowflake, spiral decoration, and binoculars.
Paper is the most available craft supply in any house. It costs almost nothing, takes paint and glue well, and folds into almost anything. These easy crafts for kids are a great place to start.
1. Origami Chatterbox
The origami chatterbox has been popular in classrooms for generations. Kids love it because it is a craft and a game in one sitting.
- Fold a square piece of paper diagonally in both directions, then open it flat
- Fold each corner into the center to form a smaller square
- Flip it over and fold all four corners into the center again
- Slide fingers under the four square flaps and write numbers and funny messages inside
2. Paper Plate Animals
Paper plates make a ready-made base for any animal face. This craft works especially well for toddlers since the round shape does half the work for them.
- Paint a paper plate in the base color of the chosen animal
- Cut ears, a beak, or horns from colored paper and glue them onto the edges
- Add googly eyes and draw a nose and mouth with a marker
- Leave to dry and use as a mask or hang on the wall
3. Pop-Up Greeting Cards
These cards feel like a small surprise when you open them. Kids enjoy giving them as gifts because the reactions are always positive.
- Fold a piece of cardstock in half to form the card base
- Cut two short parallel slits in the fold and push the tab inward
- Glue a small drawing or cutout onto the tab so it pops up when the card opens
- Decorate the front and write a message on the inside
4. Paper Bag Puppets
Paper bag puppets take about ten minutes to make and open up hours of storytelling. Kids can put on a full show within the same afternoon.
- Take a flat paper lunch bag and fold the bottom flap to act as the moving mouth
- Draw or glue eyes, a nose, and teeth on the folded bottom flap
- Add yarn for hair, paper ears, or a paper crown to the top of the bag
- Slip one hand inside and start performing
5. Newspaper Hat
Old newspapers become wearable hats in under five minutes. Kids enjoy wearing them as part of a costume or an outdoor game.
- Open a full newspaper sheet and fold it in half horizontally
- Fold the top two corners down to meet in the center
- Fold the bottom strip up on both sides to form the brim
- Decorate with paint, stickers, or marker drawings once folded
6. Paper Chain Garland
Paper chains look great as party decorations, window displays, and classroom bunting. Even very young kids can help make these with adult guidance.
- Cut strips of colored paper about two centimeters wide
- Loop the first strip and tape or glue the ends together to form a ring
- Thread the next strip through the first ring and seal its ends closed
- Keep adding strips until the chain reaches the length you want
7. Cone Party Hat
Each handmade cone hat comes out slightly different, which makes them feel personal. Kids love wearing something they built from scratch.
- Roll a large piece of cardstock into a cone shape and tape the edge closed
- Trim the bottom of the cone so it sits flat on a child’s head
- Punch two holes on either side and thread the elastic through for a chin strap
- Decorate with stickers, paint, or scrunched tissue paper on top
8. DIY Bookmarks
Bookmarks make thoughtful, handmade gifts and are easy enough for kids to finish in one short sitting.
- Cut a rectangle from thick paper or cardstock, roughly 5 by 15 centimeters
- Draw a favorite character, animal, or pattern on the front
- Punch a hole at the top and thread a small ribbon or tassel through it
- Cover with clear tape or laminate film to make it last longer
9. Paper Fan
This craft is useful and fun at the same time. It is perfect for a hot afternoon or as a prop in a dress-up game.
- Take a piece of A4 paper and fold it accordion-style from one short end
- Keep folding back and forth in equal strips until the whole sheet is folded
- Pinch and staple one end tightly to form the base handle of the fan
- Decorate the outer panels with markers or watercolor before or after folding
10. Paper Snowflakes
No two paper snowflakes ever come out exactly the same. That is part of what makes them so satisfying to cut.
- Fold a square piece of paper in half, then in half again to form a small square
- Fold it diagonally one more time to make a triangle
- Cut small shapes along both folded edges and the tip
- Open the paper carefully to reveal the full snowflake pattern
11. Spiral Hanging Mobile
These paper spirals spin slowly in a breeze and look striking when hung in a row from a ceiling or window frame.
- Draw a spiral on a paper plate starting from the outer edge toward the center
- Cut along the spiral line carefully with scissors
- Punch a hole at the center point and tie a length of string through it
- Decorate both sides with paint, markers, or stickers before hanging
12. Paper Roll Binoculars
These pretend binoculars take five minutes to make and spark outdoor activities that last much longer.
- Take two empty toilet paper rolls and tape them firmly side by side
- Punch a small hole on each outer side and thread a string through for a neck strap
- Wrap with colored paper or decorate directly with markers and stickers
- Take them outside and challenge kids to spot birds, clouds, or neighbors’ pets
Nature Crafts for Kids
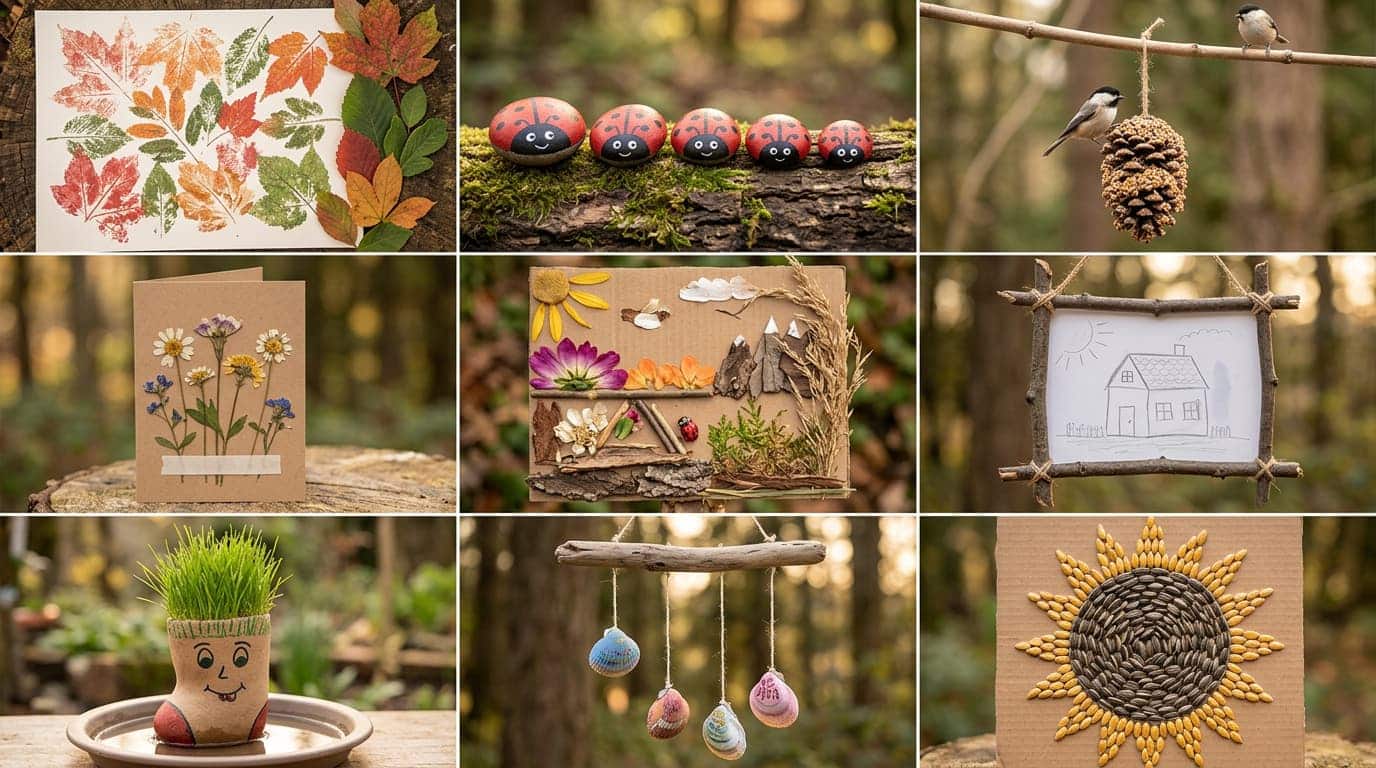
Alt Text: Grid of nature crafts for kids, including leaf prints, painted rocks, pinecone bird feeder, pressed flowers, twig frame art, grass head planter, hanging shells, and seed mosaic.
Step outside, collect a few leaves and rocks, and you already have half the supplies you need. These fun crafts for kids cost almost nothing and connect children to the world around them.
13. Leaf Print Art
Leaf prints capture the real shape and detail of leaves in a way kids find genuinely satisfying. Every print is slightly different.
- Gather leaves of different shapes and sizes from outside
- Brush paint evenly across the back side of a leaf where the veins stand out
- Press the painted side firmly onto paper and lift it off in one smooth movement
- Repeat with different colors and leaf types to build up a full scene
14. Rock Painting
Painted rocks make great gifts, garden markers, or simple decorations to collect and arrange on a windowsill.
- Wash and dry smooth, flat rocks collected from outside
- Apply a base coat of white acrylic paint and let it dry fully
- Draw a design, character, or pattern with a fine marker, then paint it in
- Seal with a coat of clear nail polish or craft varnish to protect the finished work
15. Pinecone Bird Feeder
This craft gives kids something useful and something to look forward to. Watching birds visit the finished feeder is often the highlight of the whole project.
- Tie a length of string around the top of a pinecone and loop it for hanging
- Roll the pinecone in peanut butter until it is fully coated
- Pour birdseed onto a plate and roll the coated pinecone through it until covered
- Hang it from a tree branch and watch from a window
16. Flower Pressing
Pressed flowers turn into bookmarks, greeting cards, and framed artwork that kids feel genuine satisfaction looking at weeks later.
- Pick small, flat flowers and place them face down on parchment paper
- Cover with another sheet and press them between the pages of a heavy book
- Leave undisturbed for one to two weeks until fully flat and dry
- Glue onto cards or inside a small photo frame using clear-drying craft glue
17. Nature Collage
A nature collage gives every twig, petal, and scrap of bark a second life. Kids who love collecting things on walks will take to this immediately.
- Go outside and collect leaves, petals, small sticks, bark pieces, and dried grass
- Lay a large piece of cardboard or thick paper flat on a table
- Arrange the collected items into a scene, pattern, or landscape
- Glue everything down firmly and let it dry flat before displaying or framing
18. Twig Frame
A frame made from found sticks turns any child’s drawing or photo into something that looks like it came from a craft market stall.
- Collect four straight sticks of similar length from the garden or park
- Lay them into a square shape and tie each corner tightly with twine
- Add extra decorations such as small stones, dried berries, or shorter sticks if desired
- Attach a drawing or photo to the back of the frame with tape or strong glue
19. Mud Painting
Mud painting is messy, and kids love it for exactly that reason. It also shows them that art materials do not have to come from a shop.
- Mix soil and water in a small container to create a thick, workable mud paint
- Use sticks, fingers, or old brushes to paint directly onto thick paper
- Add different shades by mixing darker soil or wet sand into portions of the mix
- Let the painting dry in the sun before bringing it inside
20. Grass Head Planter
The grass head planter is a craft that keeps going. Kids water it, watch it grow, and then give it a haircut. Then they grow it again.
- Fill an old stocking with potting soil and a handful of grass seeds
- Tie the top closed and place the filled end in a shallow bowl of water
- Draw a face on the front with a permanent marker
- Water it daily and watch the grass grow like hair within one to two weeks
21. Shell Wind Chime
Wind chimes made from shells have a soft, natural sound. Hanging one outdoors gives kids a reason to go outside and check on it every day.
- Collect several shells of different sizes and clean them well
- Ask an adult to help make a small hole in each shell using a sharp nail or drill
- Tie each shell to a length of fishing line at different lengths
- Attach all the strings to a short stick or piece of driftwood and hang outside
22. Bark Rubbing Art
Bark rubbing is one of those crafts that catches kids off guard. They do not expect the tree to give them a texture pattern to take home.
- Hold a piece of white paper firmly against the rough bark of a tree trunk
- Rub a crayon sideways across the paper in long, even strokes
- Lift the paper to reveal the texture pattern of the bark underneath
- Try different trees and crayon colors to collect and compare varied patterns
23. Sunflower Seed Mosaic
Seed mosaics teach patience and pattern-making at the same time. The result looks far more complex than the process actually is.
- Draw a simple shape or design onto a piece of thick cardboard with a pencil
- Apply a layer of craft glue within one section of the design at a time
- Press sunflower seeds, lentils, or dried beans into the glue closely together
- Fill in each section with different seeds until the whole design is covered
24. Seed Packet Craft
Kids can make these to share seeds from a home garden or give them as a thoughtful, handmade gift to friends and family.
- Fold a small piece of paper into an envelope shape and seal two edges with tape
- Decorate the front with a drawing of the plant the seeds will grow into
- Write the plant name, simple growing tips, and the child’s name on the outside
- Fill the packet with a small number of seeds and fold the top edge closed
Recycled Material Crafts for Kids
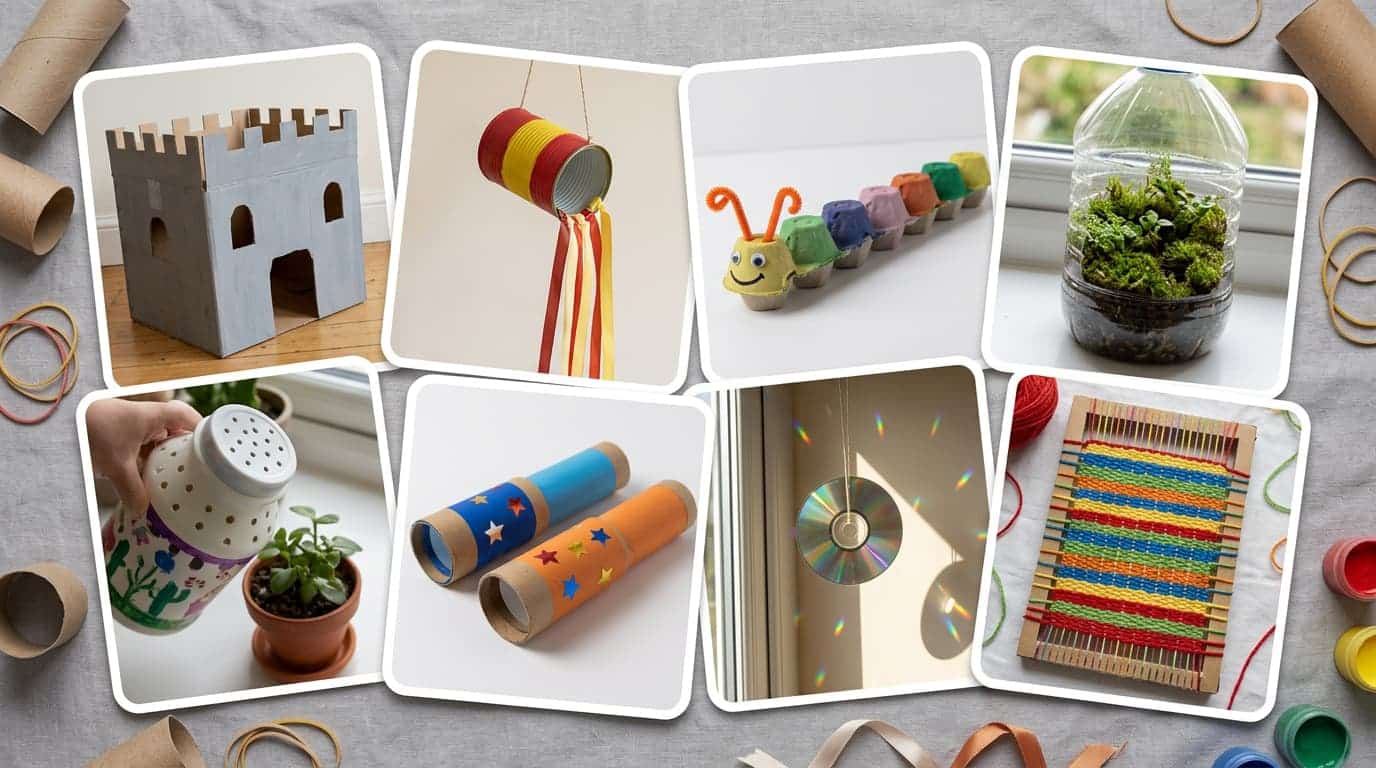
Alt Text: Collage of recycled material crafts for kids, including cardboard castle, tin can decoration, egg carton caterpillar, bottle terrarium, painted pot, cardboard tubes, CD suncatcher, and woven yarn art.
Before you toss the egg carton, look again. Cardboard tubes, tin cans, old boxes, and plastic bottles are waiting to become something. These easy crafts for kids cost close to nothing and make great use of what most families throw away every week.
25. Cardboard Box Castle
A large cardboard box becomes a full castle in one afternoon. Kids play with it long after it is finished.
- Cut a rectangular entrance and small window shapes from the sides of the box
- Cut battlements across the top edge by making square notches with scissors
- Paint the box grey or brown to look like stone walls
- Add a drawbridge by cutting a large flap at the entrance and attaching it with a string
26. Tin Can Windsock
Tin can windsocks make cheerful garden or porch decorations. The ribbon strips flutter in the breeze, and younger kids find it hard to look away.
- Clean an empty tin can and ask an adult to check the edges for any sharp points
- Paint the outside of the can in bright colors and let it dry fully
- Punch two holes at the top edge on opposite sides and thread the wire through for hanging
- Glue or tape long ribbon strips inside the open bottom end of the can
27. Egg Carton Caterpillar
This is one of the fastest crafts in this list. It takes about ten minutes, and the finished caterpillar is cheerful enough to display anywhere in the house.
- Cut a row of six connected cups from a cardboard egg carton
- Paint each cup a different bright color and let them dry
- Push pipe cleaners through the top of the first cup to form antennae
- Glue googly eyes to the front cup and draw a smile with a marker
28. Plastic Bottle Terrarium
A terrarium inside a plastic bottle gives kids a small indoor garden they can watch change week by week.
- Cut the top third off a large, clean plastic bottle with adult help
- Add a layer of small stones for drainage, then fill the base with potting soil
- Plant small cuttings, moss, or seedlings in the soil
- Mist lightly with water and place near a window with indirect light
29. Milk Jug Watering Can
This practical craft is useful in the garden and teaches kids a real lesson about reusing materials instead of buying new ones.
- Wash a plastic milk jug completely and let it dry
- Use a sharp skewer or nail with adult help to poke multiple holes in the lid
- Decorate the outside with waterproof paint or permanent markers
- Fill with water, screw on the lid, and use it gently on plants
30. Cardboard Tube Telescope
This pretend telescope sparks outdoor activities and imaginative play right away. Kids take it everywhere once they make it.
- Take two cardboard tubes of slightly different diameters so one slides inside the other
- Decorate the outside of both tubes with paint, paper wrapping, or stickers
- Slide the smaller tube into the larger one for a telescoping effect
- Cut a circle of colored cellophane and tape it to one open end as a pretend lens
31. CD Sun Catcher
Old CDs or DVDs scatter light in a way that is hard to replicate with any other material. Kids are drawn to the effect immediately.
- Loop a ribbon through the center hole of the CD and knot it for hanging
- Decorate the label side with permanent markers in patterns or shapes
- Add small clear beads or flat glass gems with strong craft glue for extra light scatter
- Hang in a sunny window and watch the reflections move across the room
32. Bottle Cap Stamps
Bottle caps from water or juice bottles are ideal for making repeat patterns in art projects. Kids love the clean circle shape they leave behind.
- Collect a handful of clean bottle caps of different sizes
- Press the flat face of a cap into a shallow tray of acrylic paint
- Press the painted cap firmly onto the paper to stamp a circle
- Repeat in different colors to build patterns, animals, or abstract designs
33. Cereal Box Weaving Loom
A cereal box becomes a small working loom with just a few cuts. Kids can weave their own colorful fabric strips using it.
- Cut the top flaps off a cereal box and cut even notches along the top edge, about one centimeter apart
- Thread a long piece of yarn through the notches back and forth to create the base threads
- Use a second piece of yarn to weave over and under the base threads across the full width
- Slide the finished weave off the notches gently when the loom is full
34. Newspaper Pencil Holder
A pencil holder made from tightly rolled newspaper is surprisingly strong. It holds its shape well once the glue dries and looks good on a desk.
- Roll a single sheet of newspaper tightly from corner to corner into a thin, firm tube
- Make several tubes of the same length and glue them tightly side by side in a cylinder shape
- Wrap the outside in a strip of colored paper or wide tape
- Let them dry fully before standing pencils and pens inside
35. Tissue Box Guitar
This guitar makes a real sound when the strings are plucked. Kids are always a little surprised when they hear it work for the first time.
- Take an empty tissue box with the standard oval opening already cut in the top
- Stretch four to six rubber bands of different thicknesses lengthwise over the opening
- Decorate the outside of the box with paint, stickers, or colored tape
- Pluck each band and note how the different thicknesses produce different sounds
36. Plastic Cup Stacker Tower
Stacker towers are simple to make and turn into a competitive game the moment they are done. Kids race to see whose tower goes highest without falling.
- Collect ten to twenty clean plastic cups of the same size
- Decorate each cup with markers in different colors and patterns
- Stack the cups in pyramid layers, each row one cup fewer than the row below
- Time how fast the full pyramid can be built, and challenge someone to beat the record
Sensory and Science Crafts for Kids
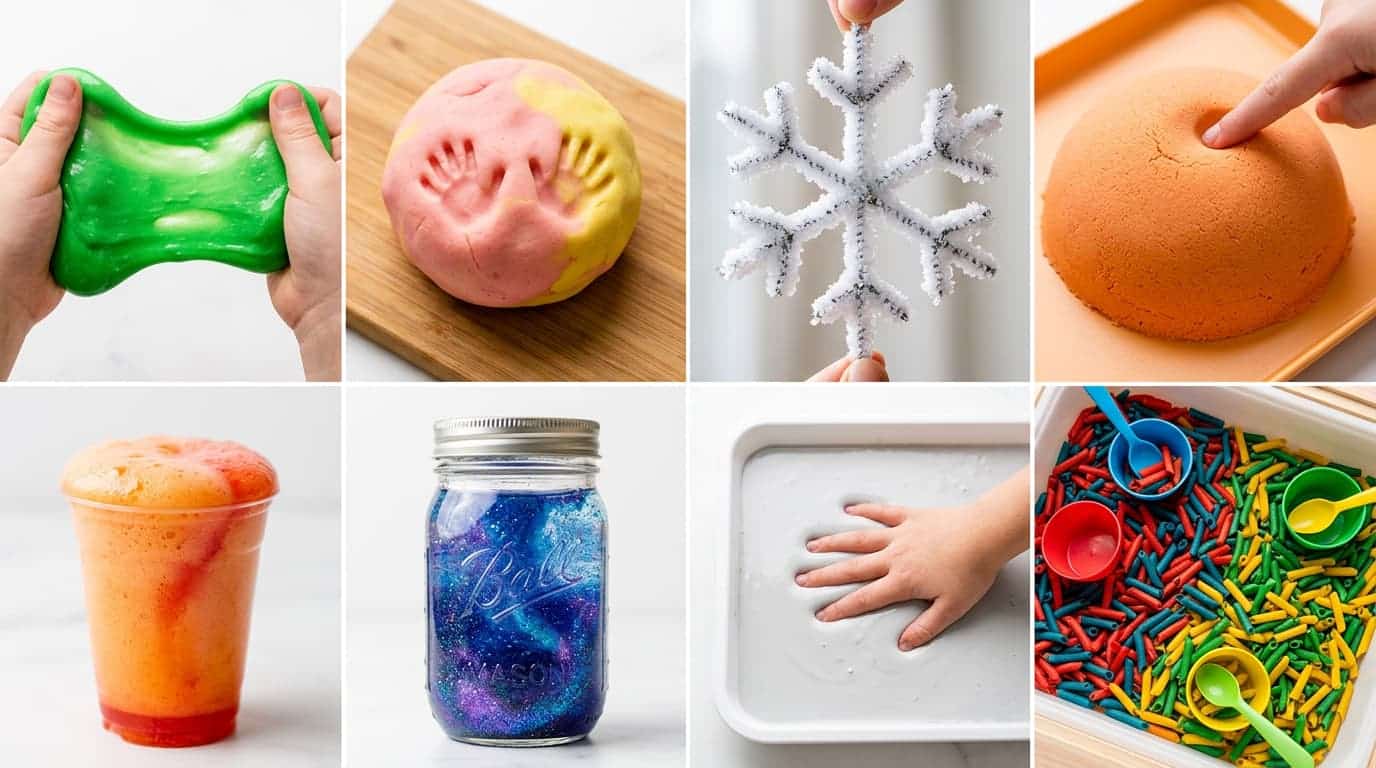
Alt Text: Collage of sensory and science crafts for kids, including slime, playdough, pipe cleaner snowflake, kinetic sand, fizzy reaction cup, galaxy jar, sensory tray, and colorful rice play.
These crafts go beyond just making something to look at. They get kids asking questions, running small tests, and figuring out how things actually work. Learning, dressed up as play.
37. Homemade Slime
Slime is one of those things kids never get tired of making or playing with. It stretches, squishes, and holds its shape, keeping hands busy for a long time.
- Mix half a cup of white PVA glue with half a teaspoon of baking soda in a bowl
- Stir in food coloring until the color is fully mixed through
- Add one tablespoon of contact lens solution and stir firmly until the mixture pulls away from the sides
- Knead the slime with your hands for two minutes until it reaches the right texture
38. DIY Playdough
Homemade playdough lasts for weeks stored in an airtight container. It is softer and more satisfying to work with than most shop-bought versions.
- Mix two cups of flour, half a cup of salt, and two tablespoons of cream of tartar in a pot
- Add two tablespoons of cooking oil and one cup of water with food coloring already mixed in
- Stir over low heat until the mixture pulls away from the sides and forms a ball
- Cool fully on a clean surface before kneading and handing to kids
39. Borax Crystal Ornaments
These crystals grow overnight and look remarkable in a window. The science behind them gives kids something real to talk about.
- Twist a pipe cleaner into a star, snowflake, or heart shape
- Dissolve three tablespoons of borax in one cup of boiling water with adult help
- Hang the pipe cleaner shape in the jar using a pencil laid across the top so the shape does not touch the sides
- Leave it undisturbed overnight and lift out a crystal-covered shape the next morning
40. Kinetic Sand
Kinetic sand holds its shape when squeezed and falls apart slowly when released. Kids find it genuinely hard to put down.
- Mix four cups of clean, fine sand with two teaspoons of cornstarch in a large bowl
- Add two tablespoons of water and mix well until the sand just barely holds its shape when pressed
- Mix through a small amount of washable paint for color if desired
- Store in an airtight container between uses to keep the right texture
41. Volcano in a Cup
The baking soda and vinegar reaction is short, satisfying, and kids want to repeat it immediately every single time.
- Place a plastic cup in the center of a tray with raised edges to catch the overflow
- Fill the cup halfway with baking soda and a few drops of red or orange food coloring
- Add a small squeeze of dish soap and mix gently into the baking soda
- Pour vinegar slowly into the cup and watch the fizzing overflow rush down the sides
42. Galaxy Glitter Jar
Glitter jars are calming to watch and satisfying to shake. Kids often reach for one when they need a quiet moment to settle down.
- Fill a clean mason jar with warm water, leaving a small gap at the top
- Add two tablespoons of clear glitter glue and a handful of fine glitter in two or three colors
- Drop in one or two drops of food coloring to give the water a deep background tone
- Seal the lid tightly with strong glue, then shake to watch the glitter spiral
43. Oobleck
Oobleck behaves like both a solid and a liquid, depending on how fast you press into it. That single property is enough to keep kids fascinated for a surprisingly long time.
- Mix two cups of cornstarch with one cup of water in a large flat tray
- Stir slowly until fully combined. The mix should feel liquid when stirred gently
- Press a hand quickly into the surface, and it feels solid; press slowly, and it sinks right in
- Add a few drops of food coloring to the water before mixing to make it more interesting
44. Homemade Chalk
Kids feel real ownership over the chalk they made themselves. It works just as well on pavements and blackboards as anything bought from a shop.
- Mix one cup of plaster of Paris with half a cup of warm water in a disposable cup
- Stir in washable paint or powdered pigment to add color to the mixture
- Pour into toilet paper roll tubes sealed at one end with tape or foil
- Leave to set for 24 hours, then peel the tube away before using
45. Magnetic Fishing Game
The fishing game is easy to set up and quickly turns into a fun competition between kids once the crafting part is done.
- Cut fish shapes from cardstock and color or decorate each one differently
- Attach a large paper clip to the nose of each fish
- Tie a small magnet to the end of a stick using a piece of string
- Scatter the fish on the floor and see who can catch the most in one minute
46. Rain Cloud in a Jar
This jar turns into a simple weather demonstration that kids actually want to watch. The moment the color starts to fall through is the best part.
- Fill a clear glass jar about three-quarters full with water
- Spray a thick layer of shaving cream on top to represent a cloud
- Drip drops of food coloring slowly on top of the shaving cream
- Watch the color seep through the cream and rain down into the water below
47. Color Mixing Tray
This craft teaches how primary colors combine to form new ones. Kids feel in control of the results, which keeps them engaged from start to finish.
- Set out an ice cube tray or muffin tin with small portions of red, blue, and yellow paint
- Give kids small spoons or pipettes to move paint between sections of the tray
- Mix red and blue, then try yellow and blue, then red and yellow
- Record the results on paper beside the tray so kids can see the full pattern
48. Sensory Bin with Dyed Pasta
A bin full of colorful pasta gives younger kids something satisfying to sort, scoop, and pour for a good stretch of time without needing much direction.
- Place uncooked pasta into zip-lock bags with a small amount of rubbing alcohol and food coloring
- Seal the bags and shake until every piece of pasta is fully coated with color
- Spread the pasta on a baking tray and leave it to dry for 30 to 60 minutes
- Pour the dried pasta into a large bin with cups, spoons, and small containers for scooping play
Painting and Art Crafts for Kids
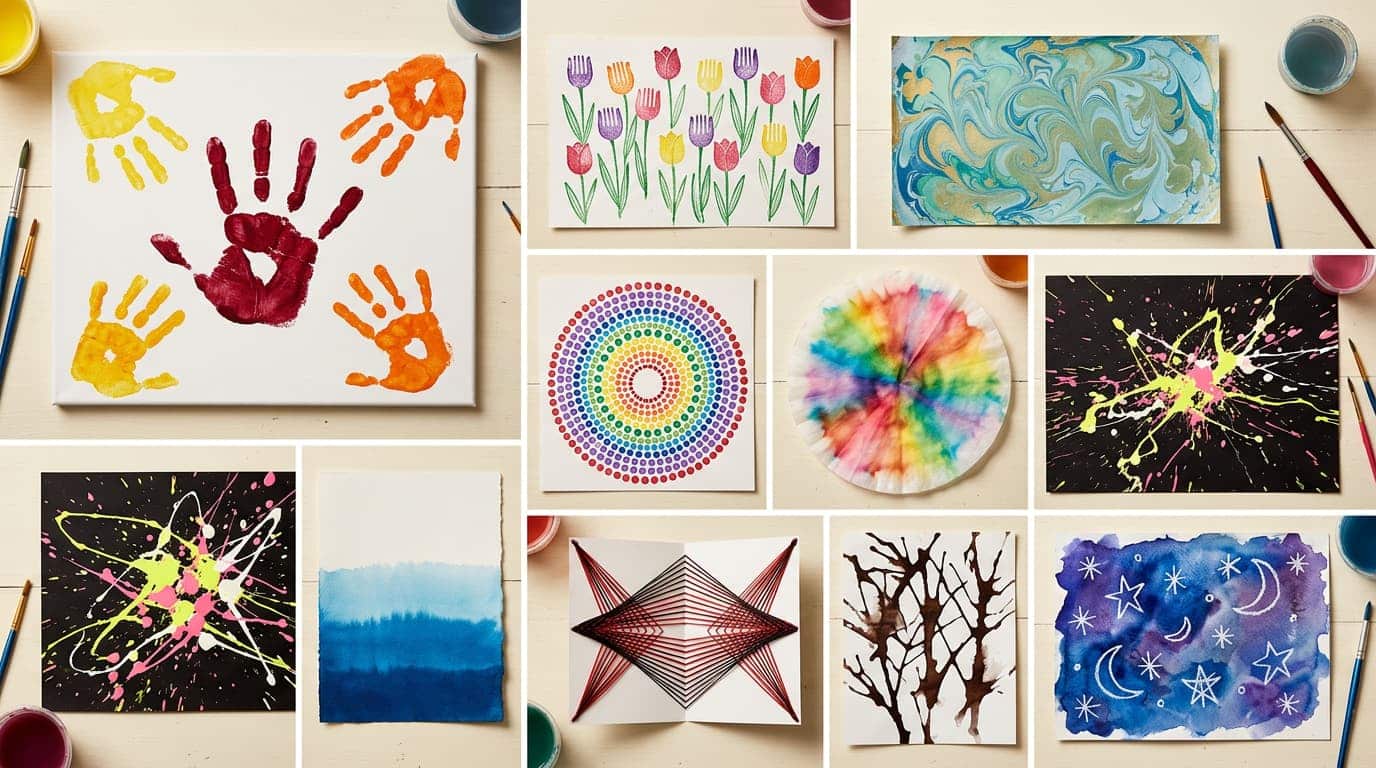
Alt Text: Collage of kids painting crafts, including handprints, tulip art, marble painting, dot mandala, tie-dye filter, splatter art, watercolor scenes, string art, and tree painting.
Paint and paper have always been the natural starting point for young artists. These ideas take things a step further and give kids new ways to put color on a page they may not have tried before.
49. Handprint Canvas Art
Handprint art captures something real and personal. Families keep these pieces for years, and kids love looking back at how small their hands were.
- Lay a small canvas or piece of thick paper flat on a covered table
- Paint the child’s full hand in one or two colors using a wide brush or sponge
- Press the painted hand firmly onto the canvas and lift it off in one clean motion
- Write the child’s name and the date in the corner once the paint dries fully
50. Fork-Stamped Flowers
A kitchen fork is the only tool needed here. Kids are always a little surprised by how much the print looks like a real tulip.
- Dip the flat tines of a plastic fork into a small amount of paint
- Press the fork flat onto paper to stamp a petal cluster
- Repeat in different colors to build up a full field of flowers across the page
- Use a thin brush or fingertip to add green stems and leaves below each flower
51. Bubble Wrap Printing
Bubble wrap prints produce a texture hard to achieve any other way. The light popping sounds as kids press it down are an added bonus.
- Cut a piece of bubble wrap to the size you want to print
- Brush paint evenly across the raised bubble side of the wrap
- Press the painted side firmly down onto paper and smooth it with one hand
- Lift the wrap to reveal the dotted print and repeat with different colors
52. Sponge Painting
Sponge painting is ideal for younger children because the results look impressive with very little effort required from small hands.
- Cut sponges into simple shapes such as circles, stars, or triangles
- Pour a small amount of paint into a shallow tray or plate
- Press the sponge shape into the paint, then press firmly onto the paper
- Swap shapes and colors to build up layered patterns or simple scenes
53. Marbled Paper with Shaving Cream
Marbled paper looks like something from a professional studio. Kids are genuinely shocked that they made it with shaving cream.
- Spread a thin, even layer of shaving cream across a flat baking tray
- Drop small amounts of different paint colors on top and swirl gently with a skewer
- Press a piece of white paper face down onto the shaving cream and press lightly
- Lift the paper and scrape the shaving cream off with a ruler to reveal the marble effect
54. Dot Art with Cotton Buds
Dot art is calm, precise, and produces striking results. It is a good option for kids who want to sit quietly and focus on something small.
- Draw a simple outline or pattern on paper lightly with a pencil
- Dip the tip of a cotton bud into a small pot of acrylic paint
- Fill in the drawn shape entirely with small, even dots of paint
- Use multiple colors in sections and let each dry before adding the next
55. Coffee Filter Rainbow
Coffee filter rainbows look bright and cheerful, and they also show kids what happens when water meets color in a soft material.
- Flatten a round coffee filter on a piece of paper towel
- Color thick bands across the filter with washable markers in rainbow order
- Spray or drip a small amount of water onto the filter and watch the colors spread
- Let the filter dry flat and display it in a window so the light shows through
56. Splatter Painting
Splatter painting is free, loud, and very exciting for kids. Set up outdoors or cover surrounding walls before starting.
- Lay a large sheet of paper on the ground and weigh down the corners
- Dip a wide brush into thinned paint, hold it over the paper, and flick the bristles sharply
- Try different distances and angles to see how the pattern changes
- Use multiple colors in layers and let each dry before adding the next
57. Dip-Dyed Wall Art
Dip-dyed paper creates soft color gradients that look great hung in a row. Each piece comes out slightly different.
- Fill a wide, shallow tray with a small amount of liquid watercolor or thinned food coloring
- Hold a piece of thick white paper by the top edge and dip just the bottom into the color
- Hold it there for five to ten seconds and lift slowly
- Hang vertically to dry so the color continues to bleed upward as the paper dries
58. String Pull Painting
String pull painting creates shapes that are completely unpredictable. No two prints are ever alike, which keeps kids coming back to try again.
- Cut a length of string about 30 centimeters long and drag it through a tray of paint
- Lay the paint-covered string in a loose curl on one half of a folded piece of paper, leaving one end sticking out
- Press the top half of the paper down firmly and hold it with one hand
- Pull the string out quickly with the other hand to reveal the pattern inside
59. Blow Painting
Blow painting produces wild, spreading shapes that look like trees, roots, or fireworks. Kids love not knowing what shape will appear next.
- Drop a small pool of thinned paint in the center of a piece of paper
- Use a straw to blow the paint outward in different directions
- Add drops of other colors and blow them into the existing paint to mix and spread
- Let the painting dry flat and add fine detail with a marker if desired
60. Watercolor Resist Art
The reveal moment in watercolor resist art never gets old. Kids draw and paint, then watch their hidden picture appear through the color wash.
- Use a white crayon or oil pastel to draw a picture or pattern on white paper
- Mix watercolor paint and brush it across the full surface of the paper in broad strokes
- Watch the wax of the crayon push back the paint, and the drawing reveal itself
- Add more layers of watercolor in different shades to build a richer background color
Seasonal and Holiday Crafts for Kids
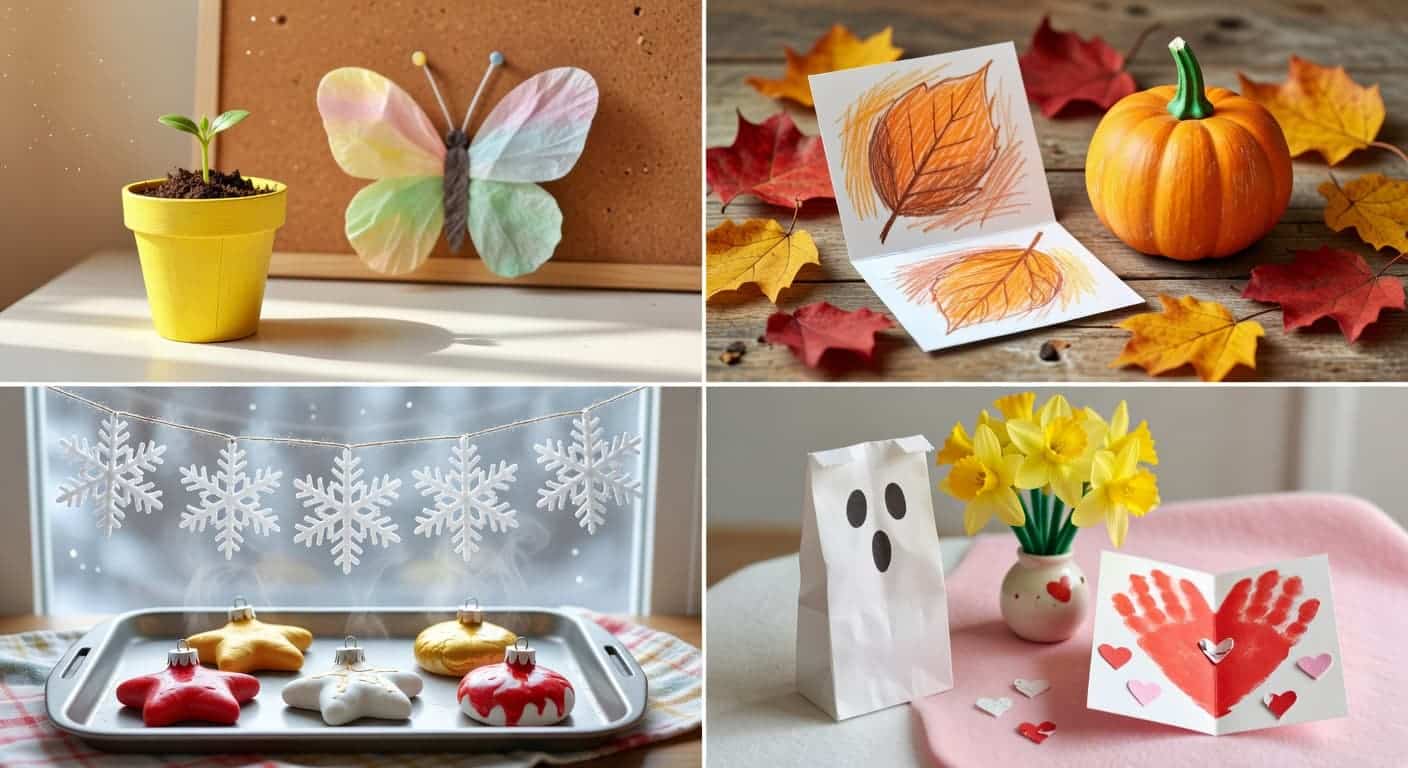
Alt Text: Collage of seasonal kids crafts, including spring plant and butterfly, fall leaf art with pumpkin, winter snowflake cookies, and Valentine handprint card.
Every season gives kids something new to make. These fun crafts for kids are sorted by time of year so you can pull the right idea out exactly when you need it.
61. Butterfly Coffee Filter Craft
This butterfly craft uses one of the most satisfying color effects in all of paper crafting. The results are bright, personal, and display beautifully.
- Use washable markers to color a flat coffee filter in patches of bright color
- Mist lightly with a water spray bottle and let the colors bleed and blend
- Once dry, pinch the filter at the center and twist a pipe cleaner around it tightly
- Curl the pipe cleaner ends upward for antennae and hang from a window or ceiling
62. Popsicle Stick Flower Pot
This miniature pot makes a heartfelt gift for a parent or grandparent and can be completed in one sitting.
- Glue popsicle sticks vertically around the outside of a small paper cup
- Wrap a rubber band around the sticks while the glue dries to hold them in place
- Paint or decorate the sticks once the glue has fully set
- Fill with soil and a small seed to give as a growing gift
63. Leaf Rubbing Fall Cards
These cards feel more personal than anything you buy in a shop. Real leaves pressed under the paper give them texture and authenticity that kids are proud of.
- Collect a few leaves with clear, strong vein patterns from outside
- Place a leaf vein-side up under a piece of paper and hold it flat with one hand
- Rub a crayon sideways across the paper above the leaf in firm, even strokes
- Fold the finished print in half to use as a greeting card and write a note inside
64. Paper Bag Pumpkin
These pumpkins can be made any size, depending on the bag used, and look great displayed in a row on a shelf or porch.
- Stuff a brown paper bag about three-quarters full with crumpled newspaper
- Twist and tie the top of the bag closed tightly with an orange string or twine
- Paint the whole bag orange and the twisted top section dark green or brown
- Draw a jack-o-lantern face with a black marker once the paint dries
65. Paper Snowflake Chain
A chain of paper snowflakes stretched across a window turns any room into a proper winter scene with no budget required.
- Fold a square piece of paper into a triangle shape twice to get a small triangle
- Cut small shapes from each folded edge and from the tip
- Open to reveal the snowflake, then fold a small tab along one edge
- Connect several snowflakes by gluing the tab of one to the back edge of the next
66. Salt Dough Ornaments
Salt-dough ornaments are among the most beloved annual craft traditions. Kids make them, paint them, hang them up, and ask to do it again the following year.
- Mix one cup of flour, half a cup of salt, and half a cup of water into a smooth dough
- Roll the dough flat and cut out shapes using cookie cutters
- Make a small hole at the top of each shape using a straw before baking
- Bake at 150 degrees Celsius for two hours, cool fully, then paint and hang
67. Paper Bag Ghost
This is one of the simplest Halloween crafts in this entire list. Even toddlers can finish one with very little help from an adult.
- Take a white paper lunch bag and open it up fully
- Stuff loosely with a small amount of crumpled white tissue paper to give it a round shape
- Twist and tie the top of the bag with white string to form the ghost head
- Draw two black oval eyes and a small, round, open mouth on the front with a marker
68. Egg Carton Spider
Egg carton spiders take under ten minutes and look surprisingly good lined up along a shelf or hanging from a front door.
- Cut a single cup from an egg carton and paint it black all over
- Punch four holes on each side of the cup and thread pipe cleaners through for legs
- Bend the end of each pipe cleaner slightly to form a foot so the spider can stand
- Glue two small googly eyes to the front of the cup
69. Egg Carton Daffodils
These bright flowers work well as a spring table centerpiece or as decoration on an Easter greeting card.
- Cut individual cups from a cardboard egg carton and trim the rim into petal points
- Paint the inside and outside of each cup yellow
- Glue each cup onto a piece of folded cardstock at the center of the flower
- Add green paper strips as stems and small oval cutouts as leaves
70. Paper Easter Basket
A woven paper basket takes a little patience but produces something actually usable on Easter morning for collecting eggs and treats.
- Cut strips of colored paper about two centimeters wide in two contrasting shades
- Lay one set of strips side by side, flat as the base
- Weave the second set through the base strips one at a time, alternating over and under
- Fold the strip ends upward to form the sides, and tape a strip handle across the top
71. Handprint Heart Card
Two handprints pressed together create a heart shape. It is one of the most personal cards a child can give to someone they care about.
- Paint one hand red or pink and press it diagonally onto the left side of the folded white paper
- Paint the other hand and press it, mirroring the first, so the thumbs meet at the top center
- Let the paint dry completely before writing a message on the inside of the card
- Add small stickers or drawn details around the heart print as decoration
72. Washi Tape Love Notes
These decorated notes feel handmade in the best possible way. Kids enjoy the sticking and layering process as much as the giving.
- Take a plain white envelope and decorate the front with strips of patterned washi tape in different widths
- Write the recipient’s name and a short note on a folded piece of paper inside
- Add sticker hearts or small drawings in the open gaps between tape strips
- Place the note inside, seal the envelope, and hand it over in person
Wearable and Jewelry Crafts for Kids
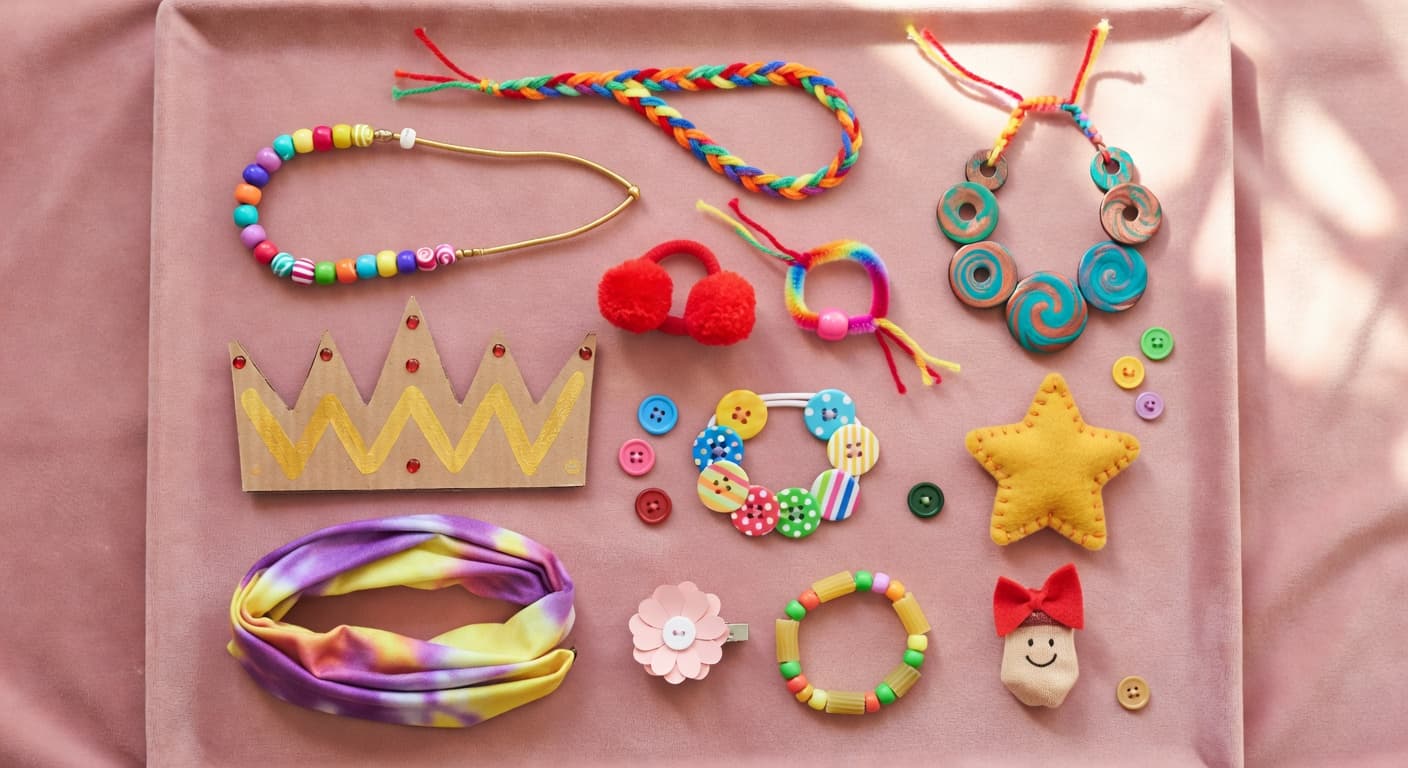
Alt Text: Collection of kids’ wearable crafts, including beaded necklaces, braided bracelets, button jewelry, fabric headband, felt star, crown, and colorful handmade accessories.
There is something extra satisfying about making something you can actually put on and wear out of the house. These crafts give kids a finished result they can show off all day.
73. Friendship Bracelets
Friendship bracelets have been popular for generations. They require focus and patience, and kids feel real satisfaction when the finished bracelet goes on a wrist.
- Cut three or four lengths of embroidery thread, each about 60 centimeters long
- Fold in half, tie a knot at the fold, and tape the knot to a table to hold it steady
- Braid or knot the threads together using a simple over-under pattern all the way down
- Tie a knot at the end, trim the threads, and tie around a friend’s wrist
74. Paper Bead Necklace
Paper beads look like real beads when rolled tightly and sealed well. A full necklace can be made in one afternoon.
- Cut long, thin triangles from a magazine or colored paper, each about 30 centimeters long
- Roll each triangle tightly around a toothpick, starting from the wide base end
- Seal the pointed tip with a small dot of glue and slide the bead off once dry
- Thread the finished beads onto a piece of elastic cord and tie the ends together
75. Nail Polish Washer Necklace
This craft makes a colorful, swirled pattern on a plain metal washer using nail polish floated on water. The result surprises kids every time.
- Fill a disposable cup with cool water
- Drop a few different nail polish colors onto the water surface quickly
- Swirl the colors gently with a toothpick to blend slightly
- Lower a metal washer flat through the nail polish layer and lift it out to reveal the pattern
76. Yarn Pom-Pom Hair Ties
These hair ties come out looking full and colorful. They are quick to make, and kids often make several in a row once they get the hang of it.
- Wrap the yarn about 40 times around two fingers held together
- Slide the wrapped yarn off the fingers and tie a shorter piece tightly around the center
- Cut through all the loops on both sides and fluff the yarn into a round ball
- Trim any uneven ends and attach the center tie string to a plain hair elastic
77. Crown from Cardboard
Every child wants to wear a crown at some point. Making their own means they get exactly what they had in mind.
- Cut a strip of cardboard long enough to fit around a child’s head, with a little extra for overlap
- Draw and cut a zigzag pattern along one long edge to form the crown points
- Decorate with paint, foil, stick-on gems, stickers, or marker patterns
- Overlap the ends at the back and tape or staple them together securely
78. Tie-Dye Headband from a T-Shirt
Old T-shirts become new accessories with this craft. No sewing is needed, and every headband comes out completely individual.
- Cut a strip about 5 centimeters wide from the bottom hem of an old T-shirt
- Twist the strip tightly, fold it in half, then secure sections with rubber bands
- Dip each rubber-banded section into fabric dye or diluted food coloring
- Leave to dry, remove the rubber bands, and stretch the strip around the head
79. Button Bracelet
Button bracelets are colorful and chunky. Kids love sorting through a button collection to pick out the ones they want.
- Cut a piece of elastic cord to about 20 centimeters and tie a firm knot at one end
- Thread buttons onto the elastic by pushing the cord through both holes of each button
- Keep adding buttons until the elastic is nearly full and fits the wrist comfortably
- Tie the two ends together and trim any extra length
80. Pipe Cleaner Rings
These rings take about two minutes each, and kids wear them all day long once they realize how simple they are to make.
- Cut a pipe cleaner to about 15 centimeters
- Thread two or three small plastic or wooden beads onto the center of the pipe cleaner
- Wrap the pipe cleaner around a finger to size it, crossing the ends once at the back
- Twist the ends tightly together and curl in the tips to avoid any sharp points
81. Paper Flower Hair Clip
A paper flower glued onto a plain clip makes a quick, pretty accessory. Kids enjoy choosing their color combinations for each one they make.
- Cut six to eight small petal shapes from colored paper or card
- Glue the petals in a circle onto a small backing square, ends meeting in the center
- Add a button or contrasting paper circle in the center of the flower
- Glue the finished flower firmly onto the flat top surface of a plain hair clip
82. Felt Pin Badge
Felt cuts cleanly, comes in many colors, and does not fray at the edges. These badges work well as name tags, character pins, or class reward projects.
- Draw and cut a shape from felt, such as a star, heart, animal face, or letter initial
- Decorate the front with fabric markers, small buttons, sequins, or layered felt pieces
- Apply a small amount of strong craft glue to the back and press a safety pin flat into it
- Hold the pin in place for 30 seconds and leave it to dry completely before wearing
83. Bead and Pasta Bracelet
Pasta pieces are easy to handle and thread, which makes this a good option for younger kids who are still building their fine motor skills.
- Dye uncooked pasta tubes by shaking them in a bag with food coloring and a small amount of rubbing alcohol
- Spread on paper to dry for about 30 minutes
- Cut a piece of elastic cord to wrist size plus a few centimeters for knotting
- Thread the colored pasta pieces and any extra plastic beads onto the cord, then tie the ends together
84. Sock Puppet Finger Ring
This funny craft turns into a finger puppet within minutes. Kids make several of these and put on a whole show with their fingers.
- Cut the tip off the toe of a small old sock to create a short fabric tube
- Slide the tube over a finger to check the size and trim if needed
- Draw a face on the front using a marker with tiny googly eyes stuck on
- Add a small paper bow or folded felt detail to give the character more personality
Pretend Play and Toy Crafts for Kids
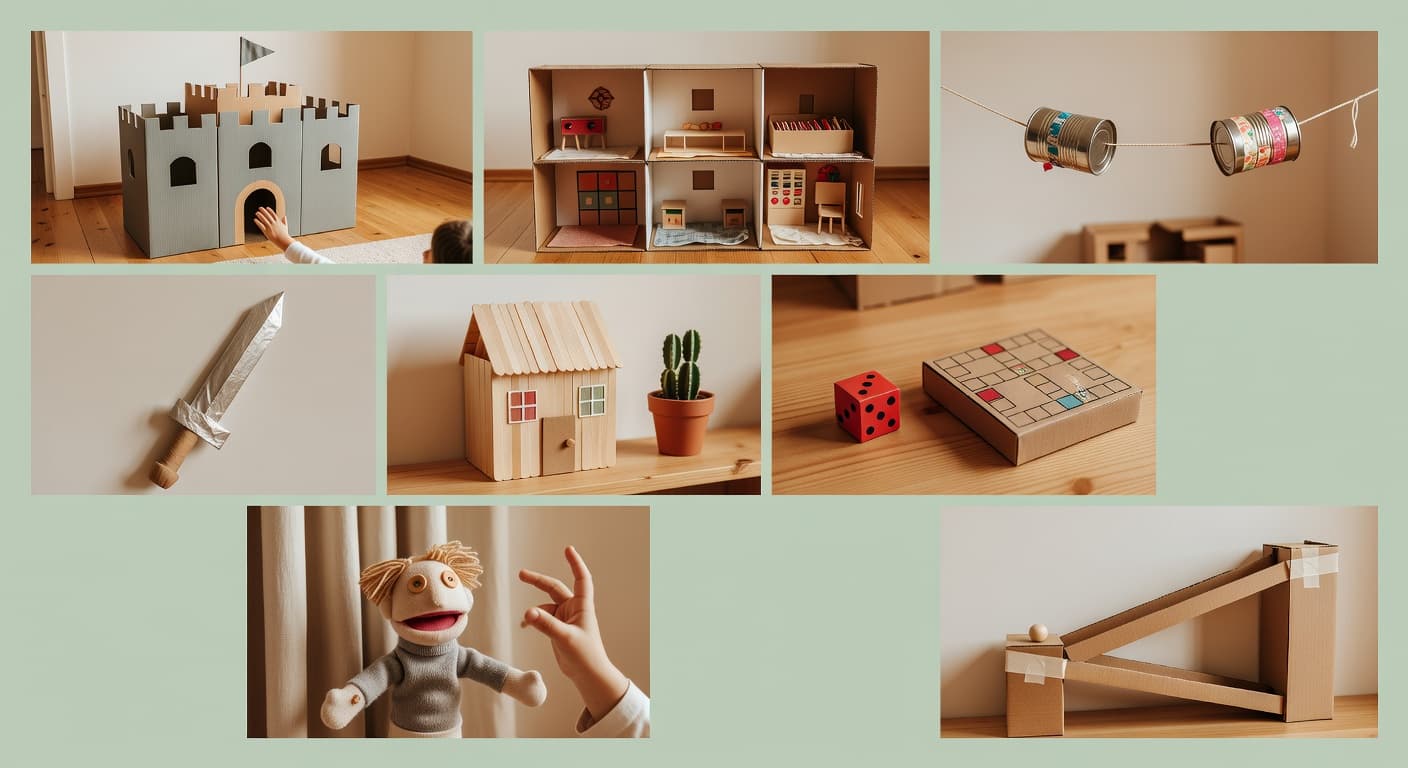
Alt Text: Collage of pretend play crafts for kids, including a cardboard castle, a dollhouse, a tin can phone, a toy sword, a mini house, a board game, a puppet, and a cardboard catapult.
The best crafts for kids are ones the let you make and play in one go. These ideas result in a toy that children use long after they finish building it.
85. Paper Bag Puppet Theater
A puppet theater gives kids a stage, and kids with a stage find no shortage of stories to tell.
- Take a large cardboard box and cut a rectangular opening in one side for the stage window
- Decorate the front with paint, paper curtains made from tissue or fabric, and a hand-lettered title
- Cut an opening in the bottom large enough for a child to kneel behind the box unseen
- Use any puppets made in this list to put on a full performance
86. Shoebox Dollhouse
A shoebox dollhouse is one of those projects kids return to over the course of days, adding new furniture and small details each time they come back.
- Line the inside of a shoebox with colored paper for wallpaper and a patterned floor
- Make small furniture from matchboxes, folded cardstock, and small fabric scraps
- Add bottle cap plates, folded paper books, and cotton ball rugs as finishing details
- Stack multiple boxes on their sides to create a multi-room layout
87. Tin Can Telephone
The tin can telephone actually works when the string is pulled taut and straight. Kids are genuinely shocked and pleased the first time a voice travels through the line.
- Take two clean tin cans and ask an adult to check for any sharp edges on both ends
- Use a nail to punch one small hole in the center of the closed base of each can
- Thread a long piece of string, at least five meters, through both holes and tie a firm knot inside each can
- Hold one can each, pull the string tight, and take turns speaking and listening
88. Cardboard Tube Sword
This sword is lightweight, safe for indoor play, and keeps kids busy in pretend battles for a long time.
- Roll several sheets of newspaper tightly inside a long cardboard tube to make it firm
- Wrap the full length of the sword in silver or grey foil to give it a metallic look
- Cut a cross-guard shape from thick cardboard and make a slit through the center
- Slide the cross-guard over the tube at the handle end and tape it firmly in place
89. Popsicle Stick House
Building with popsicle sticks teaches kids basic construction principles while producing something they feel a strong sense of ownership over.
- Lay pairs of popsicle sticks side by side and glue horizontal sticks across each pair to form wall panels
- Stack the panels upward by layering sticks in a log-cabin crossing pattern, gluing each layer as you go
- Make a roof from sticks glued to two triangular cardboard pieces, angled together at the top
- Add paper windows, a popsicle stick door, and paint details once all the glue is fully dry
90. Paper Dice
Homemade dice turn any board game fresh. Kids can also design completely new dice for games they make up themselves.
- Draw a cube net on cardstock, which looks like a plus sign shape with two extra squares attached
- Write a number, draw dots, or add custom symbols on each of the six square faces
- Cut out the full net shape along the outer edges and fold firmly along every inner line
- Glue all the tabs on the inside to form a solid cube and allow to dry before rolling
91. Sock Puppet
A sock puppet is one of the quickest toys a child can make, and it rarely stays still once it is in a child’s hand.
- Pull an old, clean sock over one hand to check the thumb position for the mouth opening
- Sew or glue two large buttons onto the toe area for eyes
- Tie small bunches of yarn through the knit of the sock for hair
- Cut felt shapes for ears, a bow, or other character details, and glue them in place
92. DIY Sticker Book
A handmade sticker book gives kids full creative control from the first page to the last. They make the stickers and fill the book entirely on their own terms.
- Fold and staple several sheets of blank paper together to form a small booklet
- On separate sheets, draw simple shapes, animals, or characters in thick, clear lines and color them in
- Cut each drawing out and apply a strip of re-stickable glue tape to the back of each one
- Press the stickers into the book pages and move them around whenever desired
93. Cardboard Marble Run
A marble run takes planning, testing, and adjusting. Kids learn about angles and speed through the process of getting it to actually work.
- Cut several cardboard tubes in half lengthwise to make open half-pipe channels
- Tape the first channel to a wall at a downward angle so a marble can roll through
- Connect more channels below and to the side, each one slightly lower than the last
- Drop a marble at the top and adjust angles until it flows all the way to the bottom
94. Spinning Top from Cardboard
This simple top works better than most kids expect. Getting the center balance right is a small but satisfying engineering challenge.
- Cut a circle about 8 centimeters across from thick cardboard
- Decorate it with bold patterns and colors using markers, as the spinning blurs the design in an interesting way
- Push a sharpened pencil or a rounded toothpick through the exact center of the circle
- Spin it by holding the stick between two fingers and flicking it sharply
95. Mini Lid Banjo
A mini banjo made from a tin lid produces a real twanging sound. Kids are always surprised that something this simple actually makes music.
- Stretch three to four rubber bands of different thicknesses across the open face of a tin lid
- Tape a popsicle stick to the back of the lid as a handle
- Hold the handle and pluck each band to hear how the different thicknesses change the tone
- Decorate the stick and lid with stickers or marker drawings
96. Paper Origami Box
An origami box is fully functional. Kids use them to hold small craft supplies, tiny toys, or items from their collections.
- Start with a square piece of paper and fold it in half both ways, then open it flat
- Fold each corner into the center point and press each fold firmly
- Fold the top and bottom edges into the center, then open just those two folds back out
- Fold the left and right sides upward to form the box walls and press the short ends inward to complete the box shape
Age Guide: Which Crafts Work Best for Your Child?
Ages 2 to 4 do best with sensory play, finger painting, paper plate animals, and playdough, since these crafts involve large movements and benefit from adult support nearby.
Ages 5 to 7 have grown enough motor control for scissors, glue, and more detailed work, so paper crafts, rock painting, and simple jewelry projects all land well at this stage.
Ages 8 to 12 are ready for multi-step builds like marble runs, crystal growing, cardboard structures, and weaving, where they can work mostly independently and feel a stronger sense of achievement when they are finished.
The Bottom Line
Crafting with kids does not need a big budget or a cleared-out afternoon. It needs a willing child, a cleared table, and one idea to start with.
These fun crafts for kids cover every mood, every season, and every corner of the supply cabinet. Some will take ten minutes.
Some will turn into a full afternoon. Either way, your child finishes with something they made from scratch. That matters far more than the mess.
Start with one craft this week. Keep it simple. See what your child comes up with when given the space to make something.
Which idea from this list are you trying first? Drop it in the comments below. We would love to hear what your kids create!